Sit quite well in the gap. Have the exact same fin density as the originals.
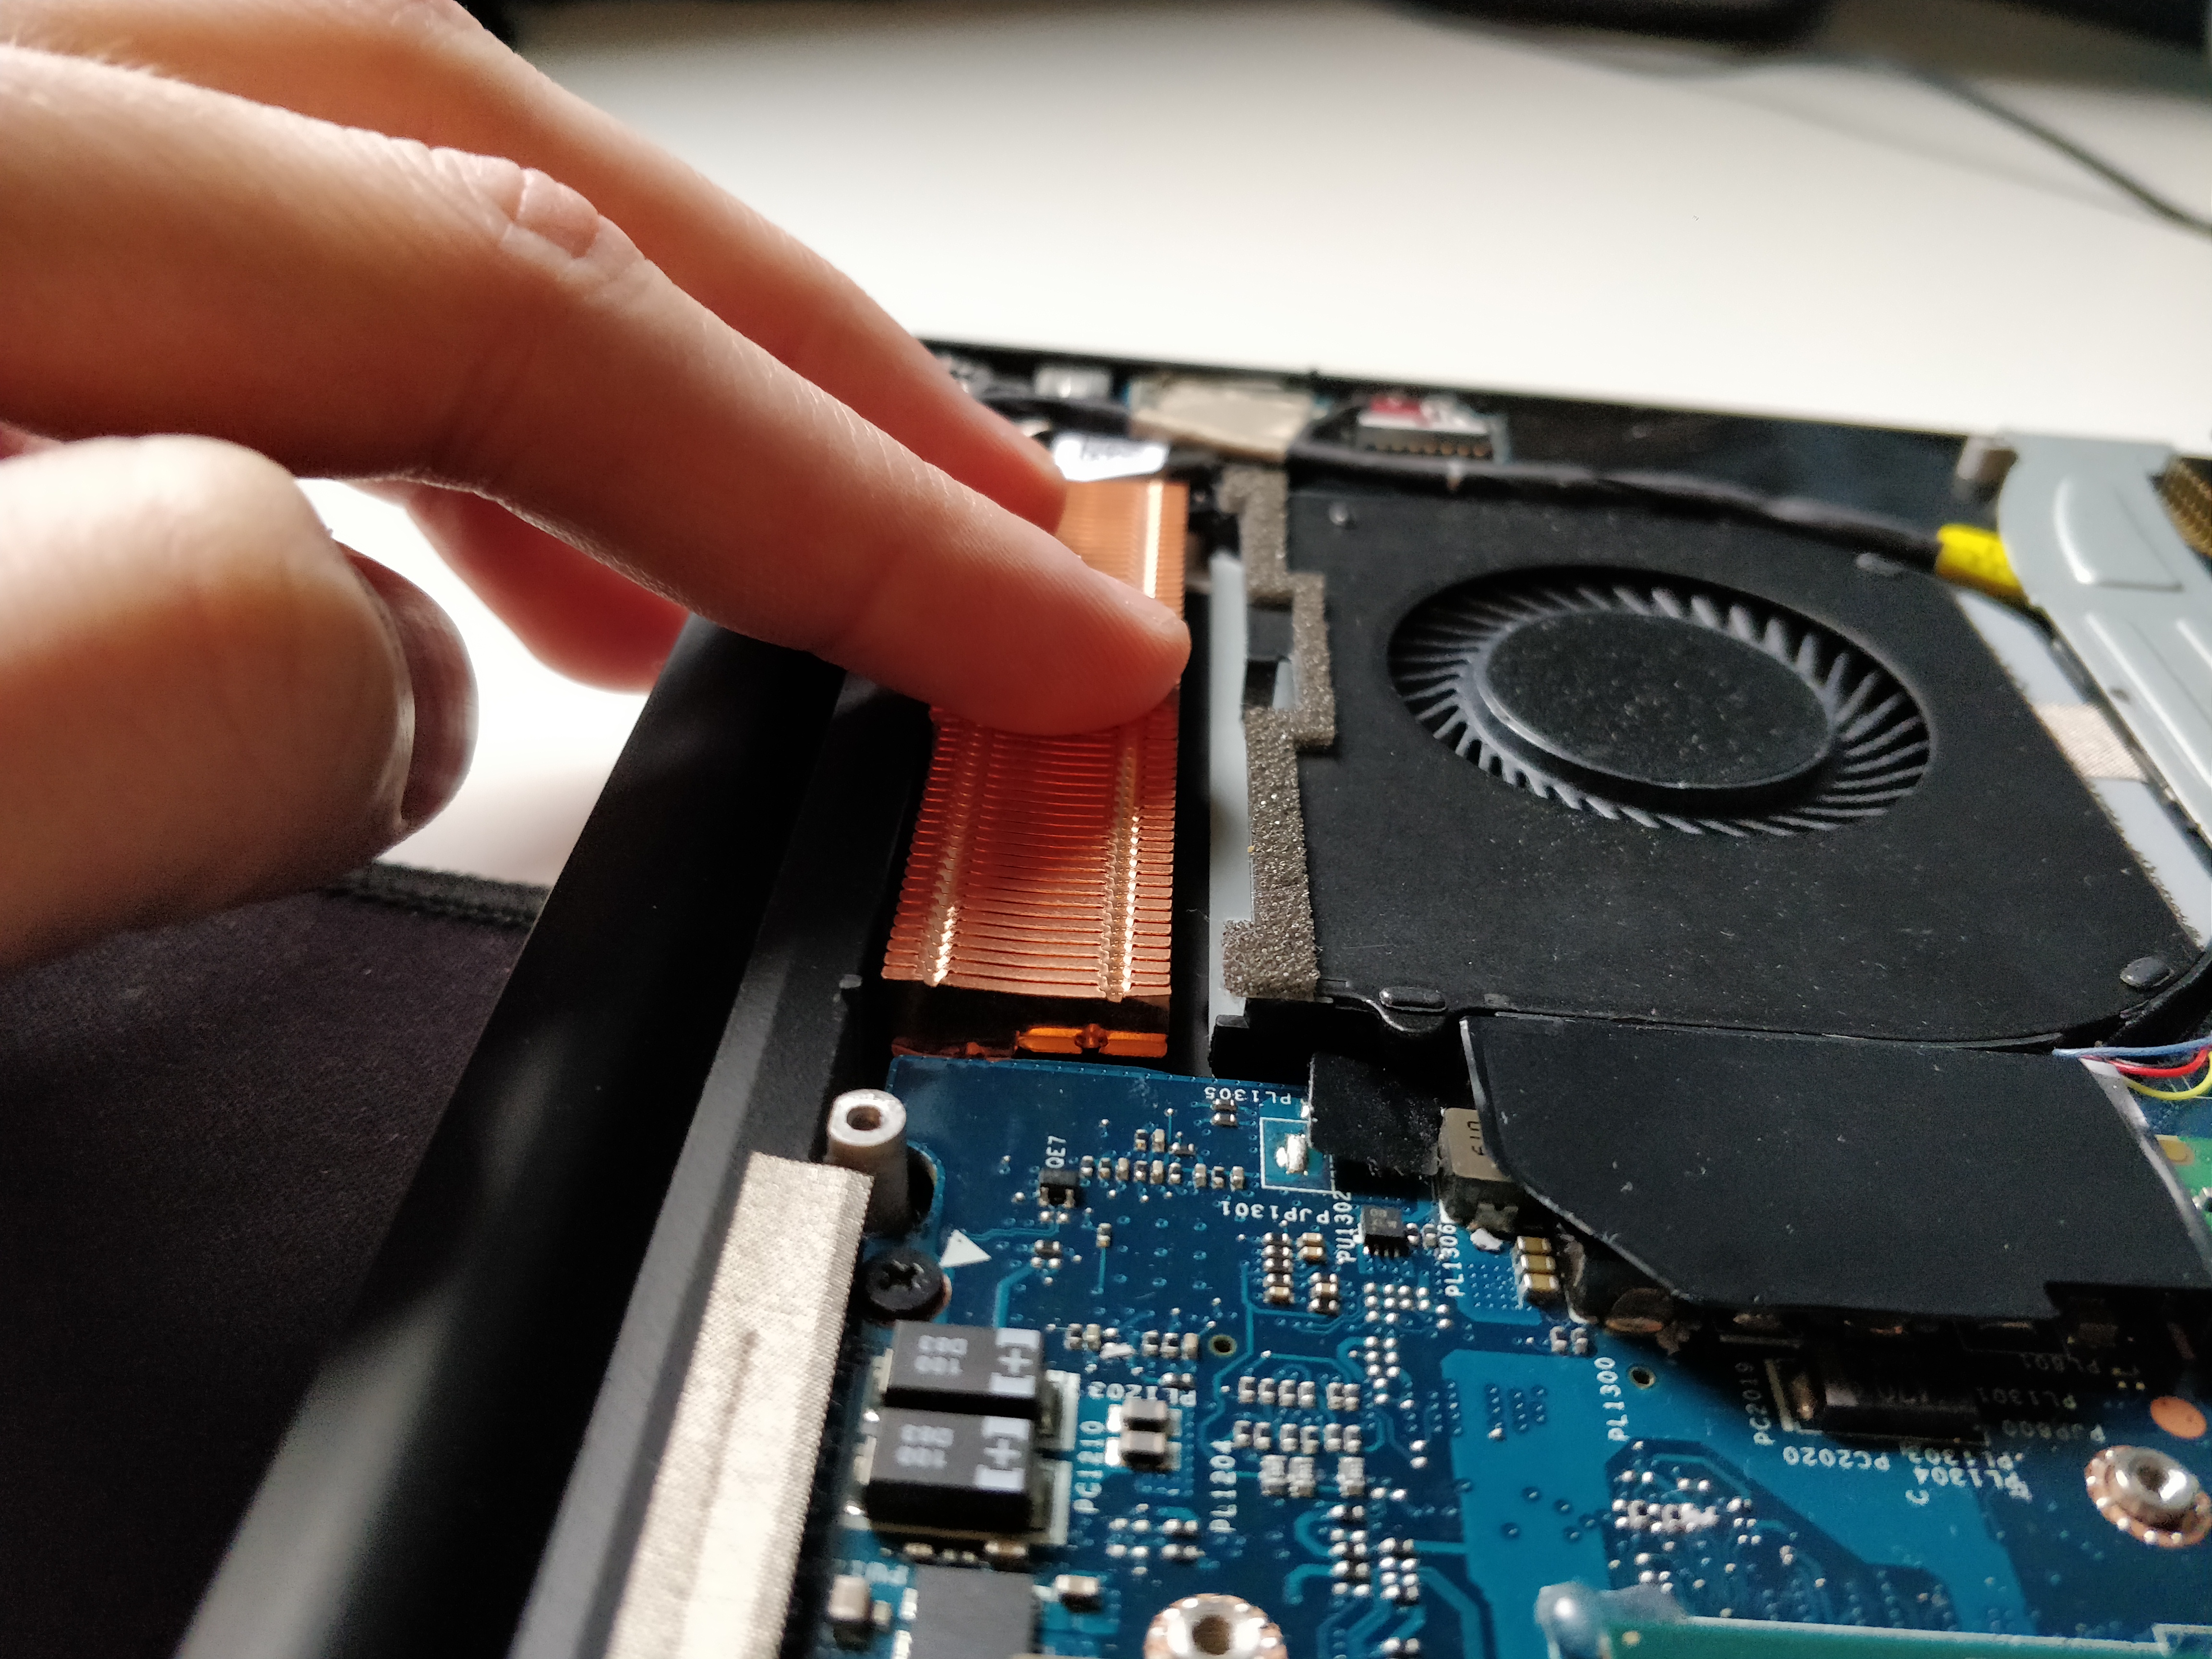
They’ve got a curve to them on the ‘flat’ surface, which is level when they’re pushed right up against the back. I’ll decide when I get to it, but if it can fit, I’ll cut a couple of bits of 0.5mm sheet copper that I have and solder that to the flat side of the stack first, so the heatpipes can sit closer to the fan, as they do on the original. Will also act to channel air into the fins, rather than getting all turbulent in the gap.
I vaguelly remember a heatsink manufactuer (maybe Noctua?) adding some dimple protrusions into their heatsink fins to increase the surface area (and turbulence), and therefore, increase heat dissipation.
Turbulence becomes an issue when you have an inadequately powerful fan (low powered fans with low RPM/pressure), in which case, heat will get trapped inside, and therefore, an increase in temperature. However, with this laptop, I doubt that will be a problem.
Chased the laser cutting company yesterday, because they’re taking ages. Said I should have it Monday or Tuesday (only two weeks to cut and post a single part - 5 star!).
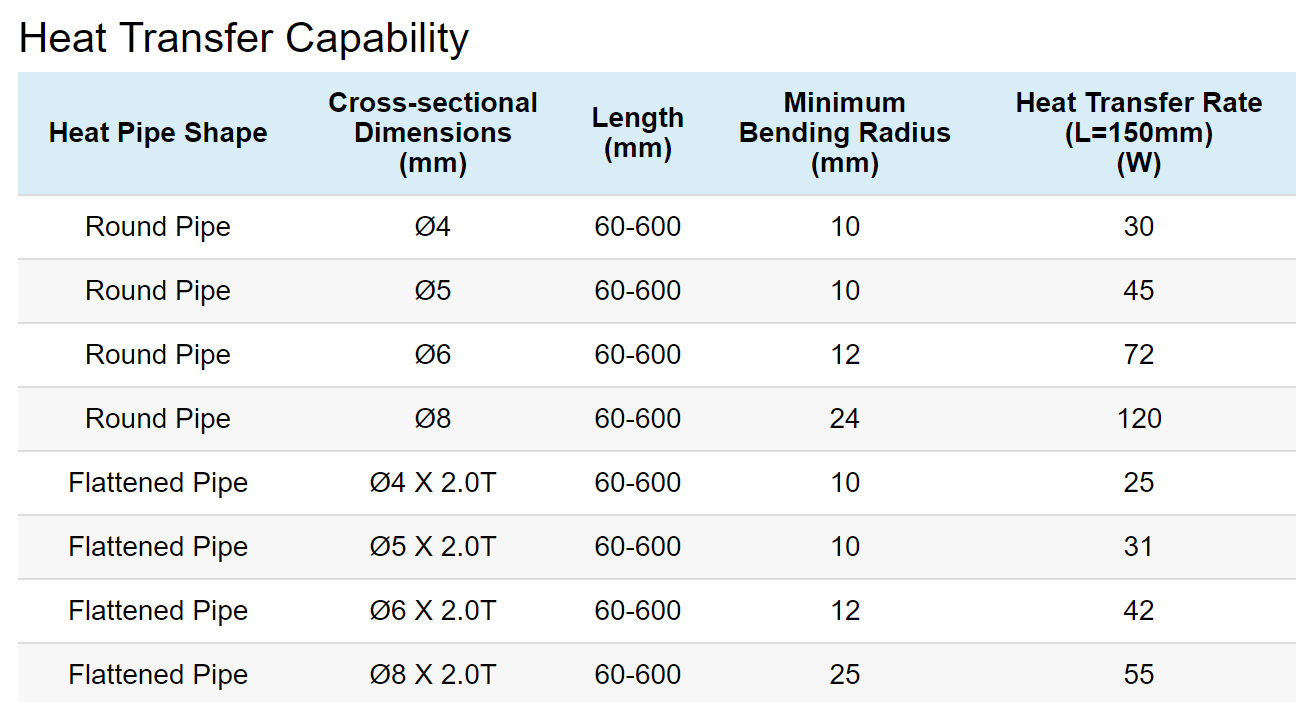
Found this lovely table showing specs of aluminium heat pipes, which shows that the stock heat pipes shouldn’t be an issue.
Pipes on the XPS 15 are about 9x2mm, by my measurements (assuming that’s the same as 8mm diameter flattened?), so they should have no problem moving the heat away. CPU, GPU and VRMs together shouldn’t™ put out 110W of heat, so shouldn’t need another heatpipe, as long as the solid copper can conduct to the pipes fast enough. Just means the main limiting factor is how much heat the fans can dissipate.
Been trawling through a load of threads discussing how/why the XPS 15 throttles. There’s a temp sensor near the RAM, which sits quite close to where the heatsink will be. If it reaches 63°C, it triggers power limit throttling. If this becomes a thing, I’ll cut a hole in the centre of the insulation covering the vents, near that point. Hopefully it’ll let enough hot air out/cooler air in. Could also just uncover the entire vent. Make it burn my lap nicely.
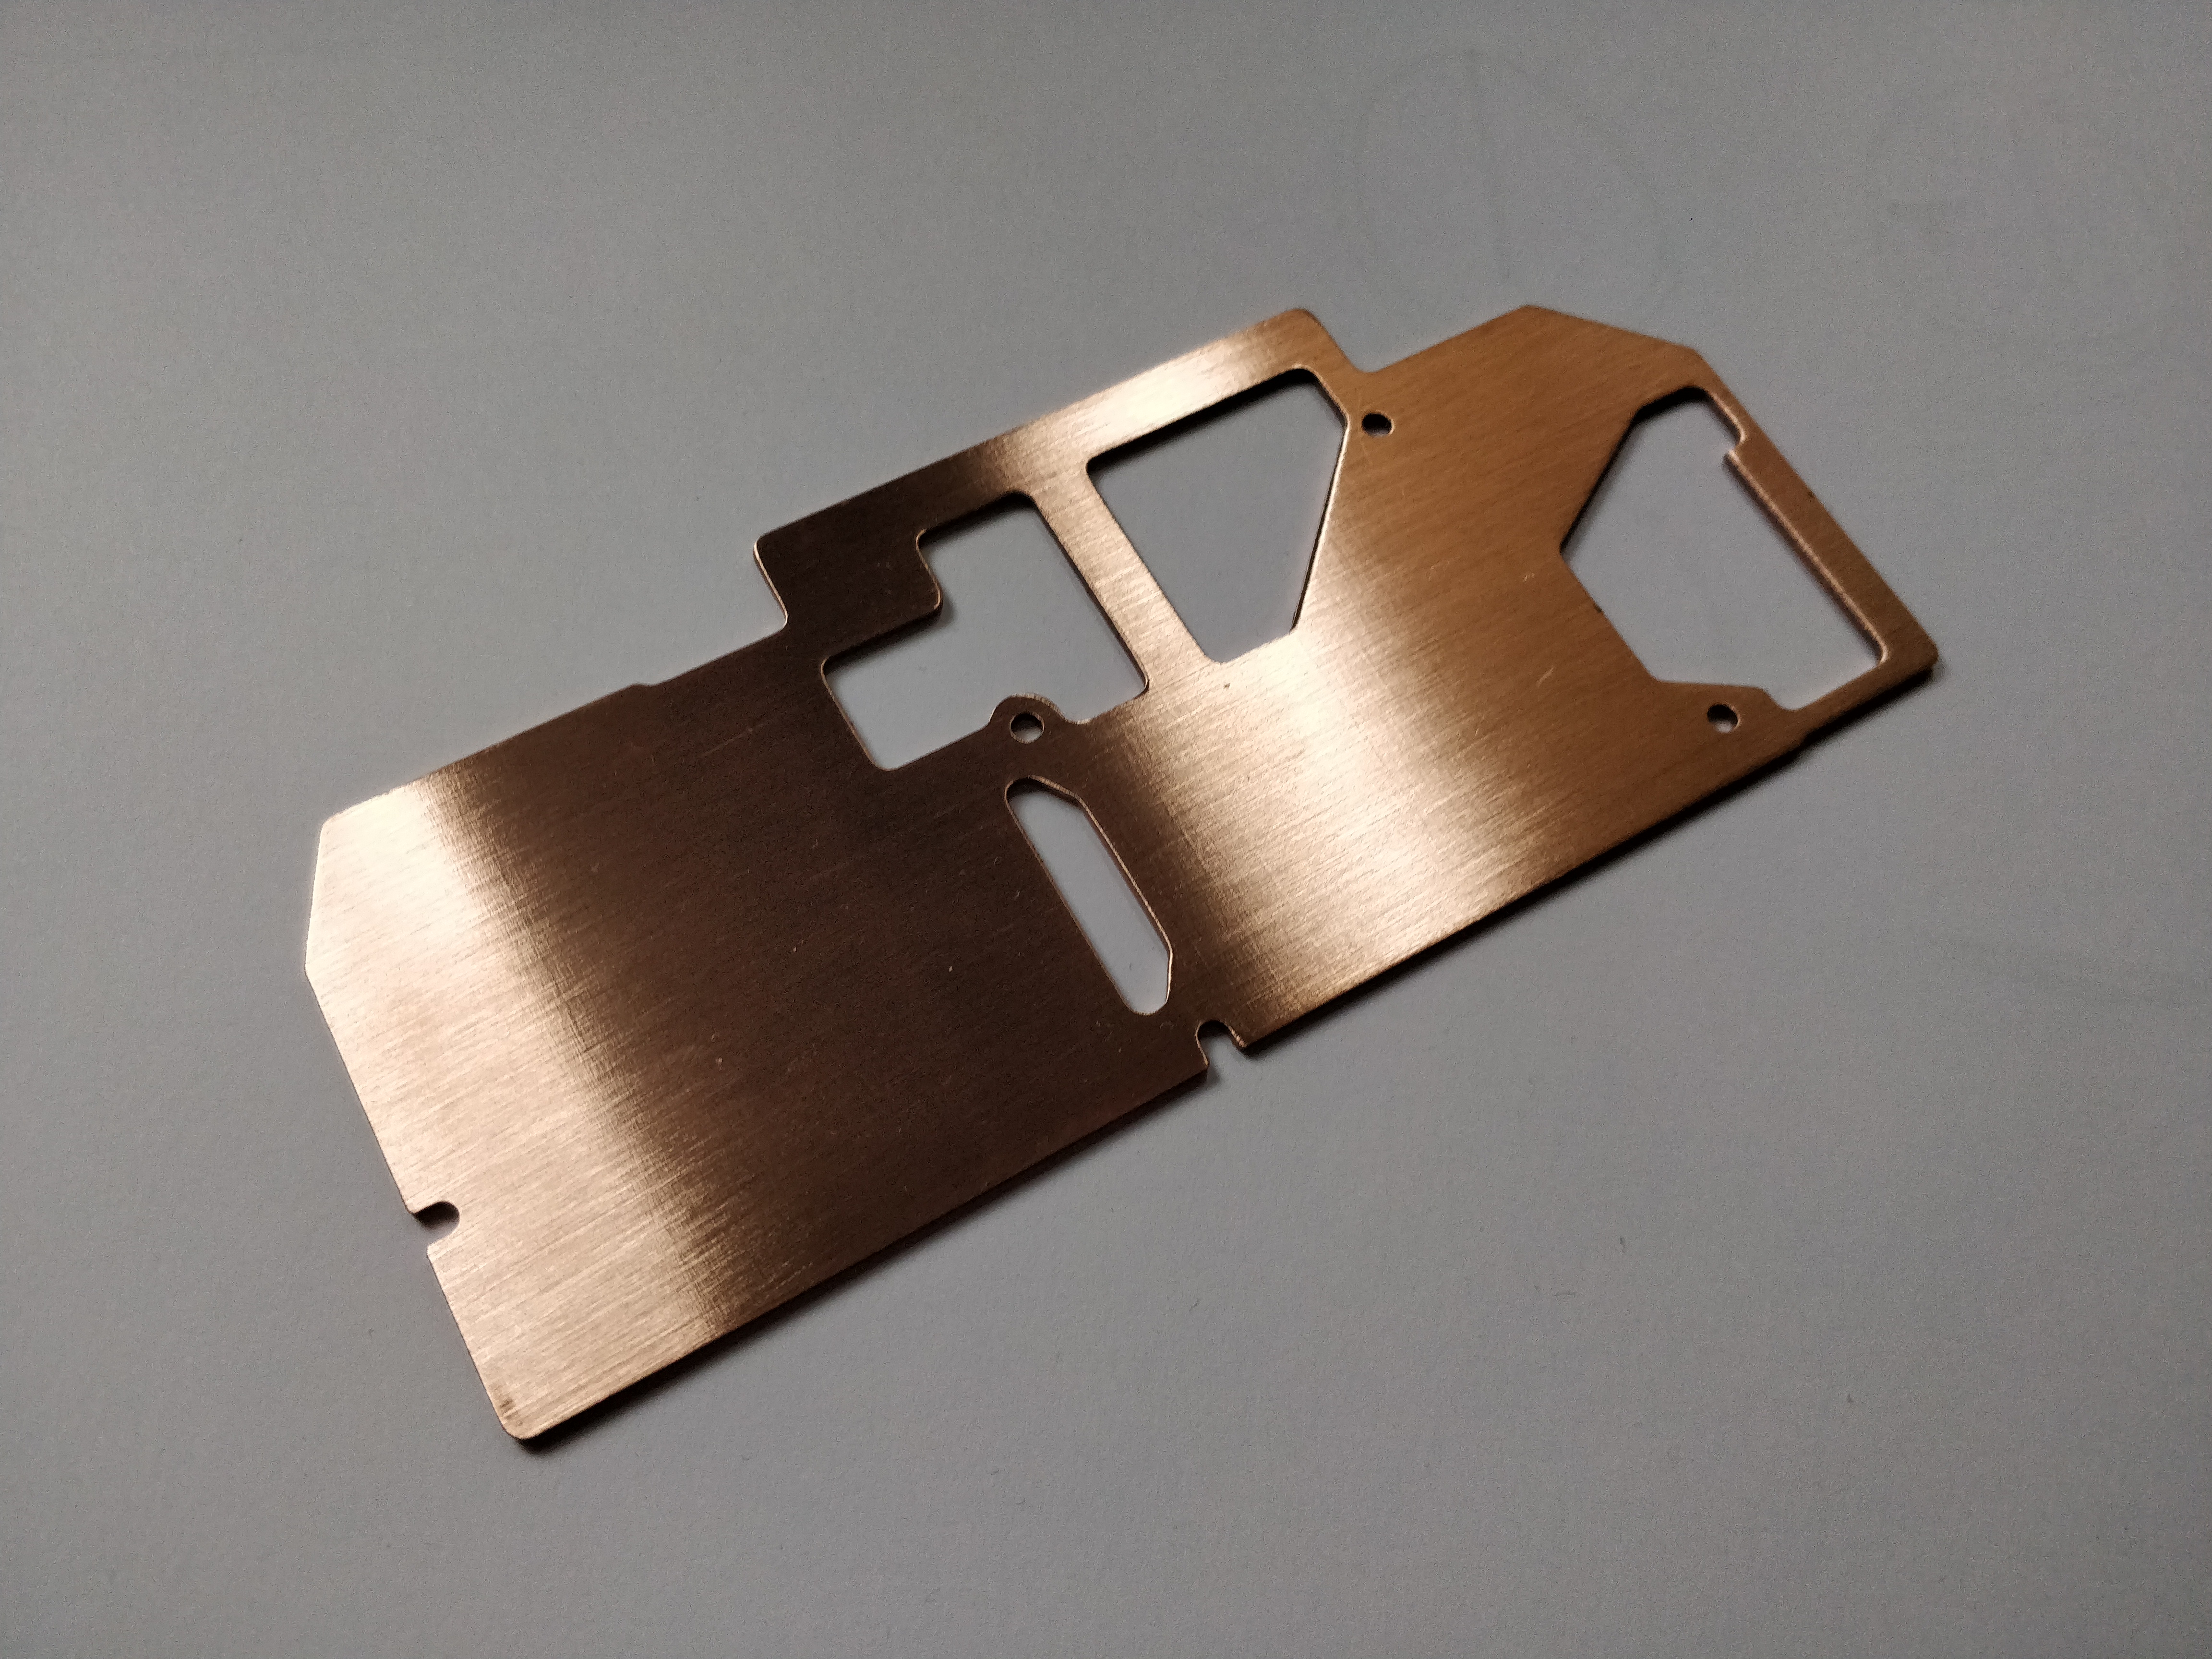
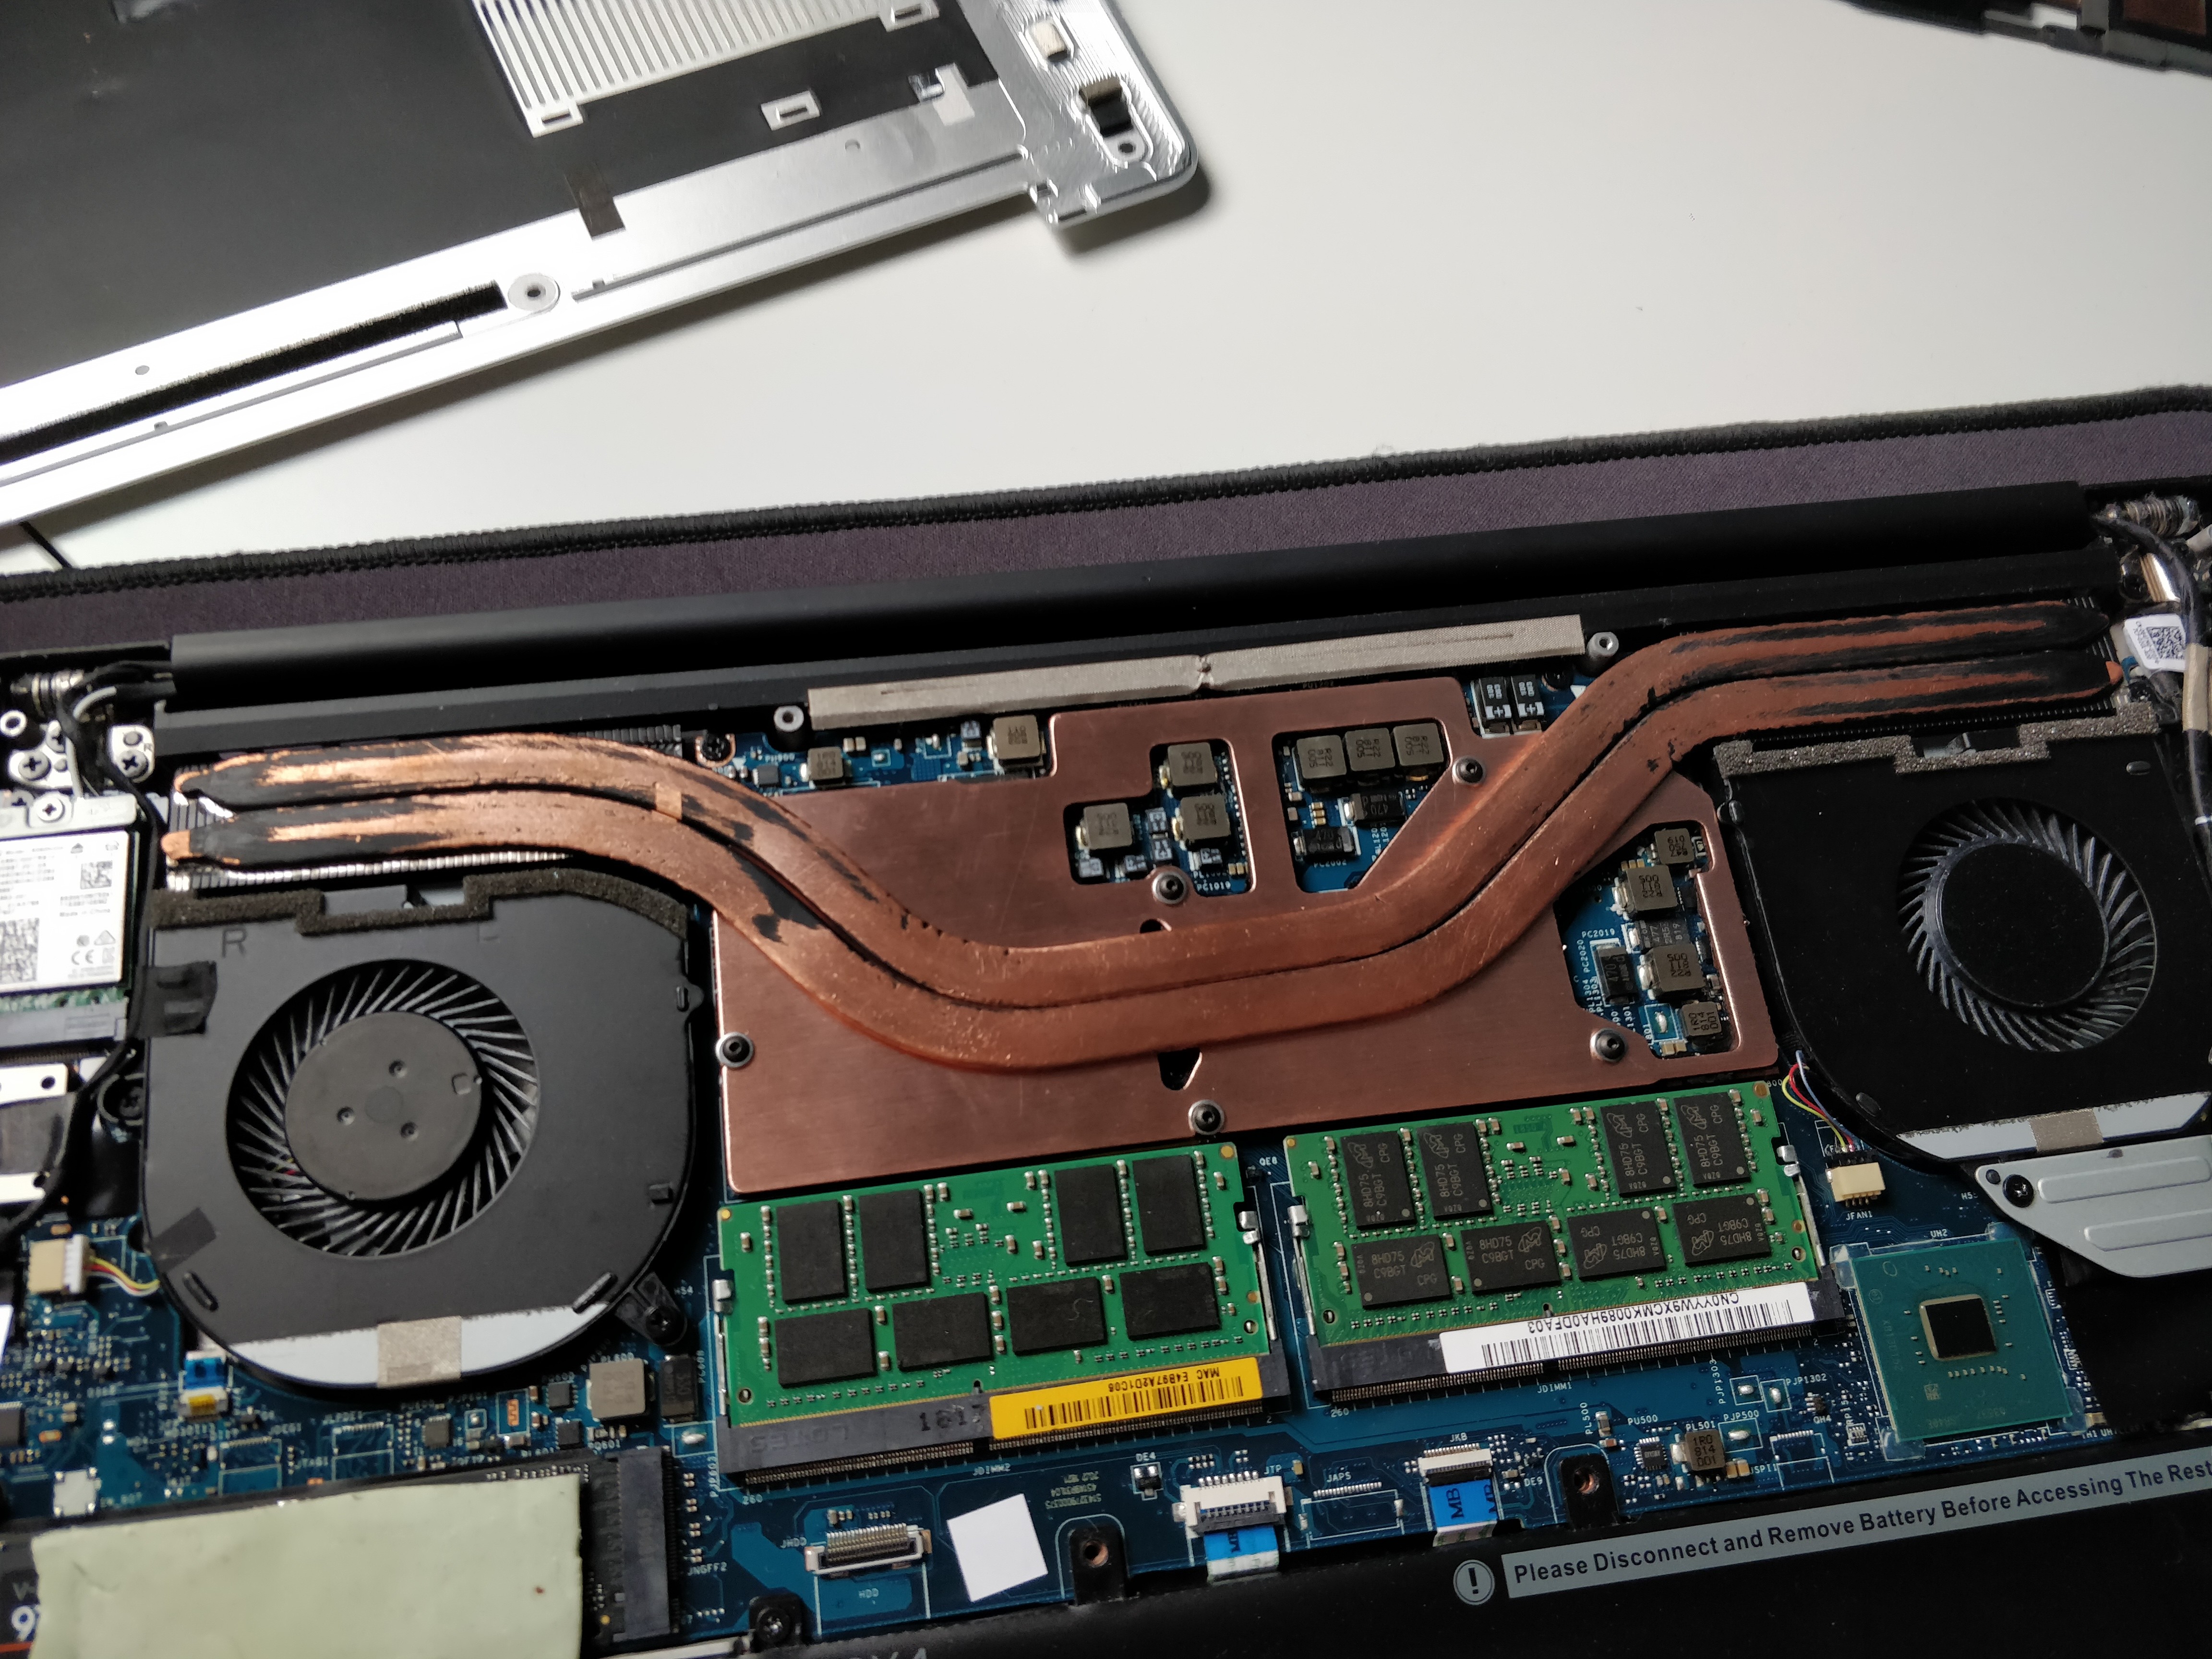
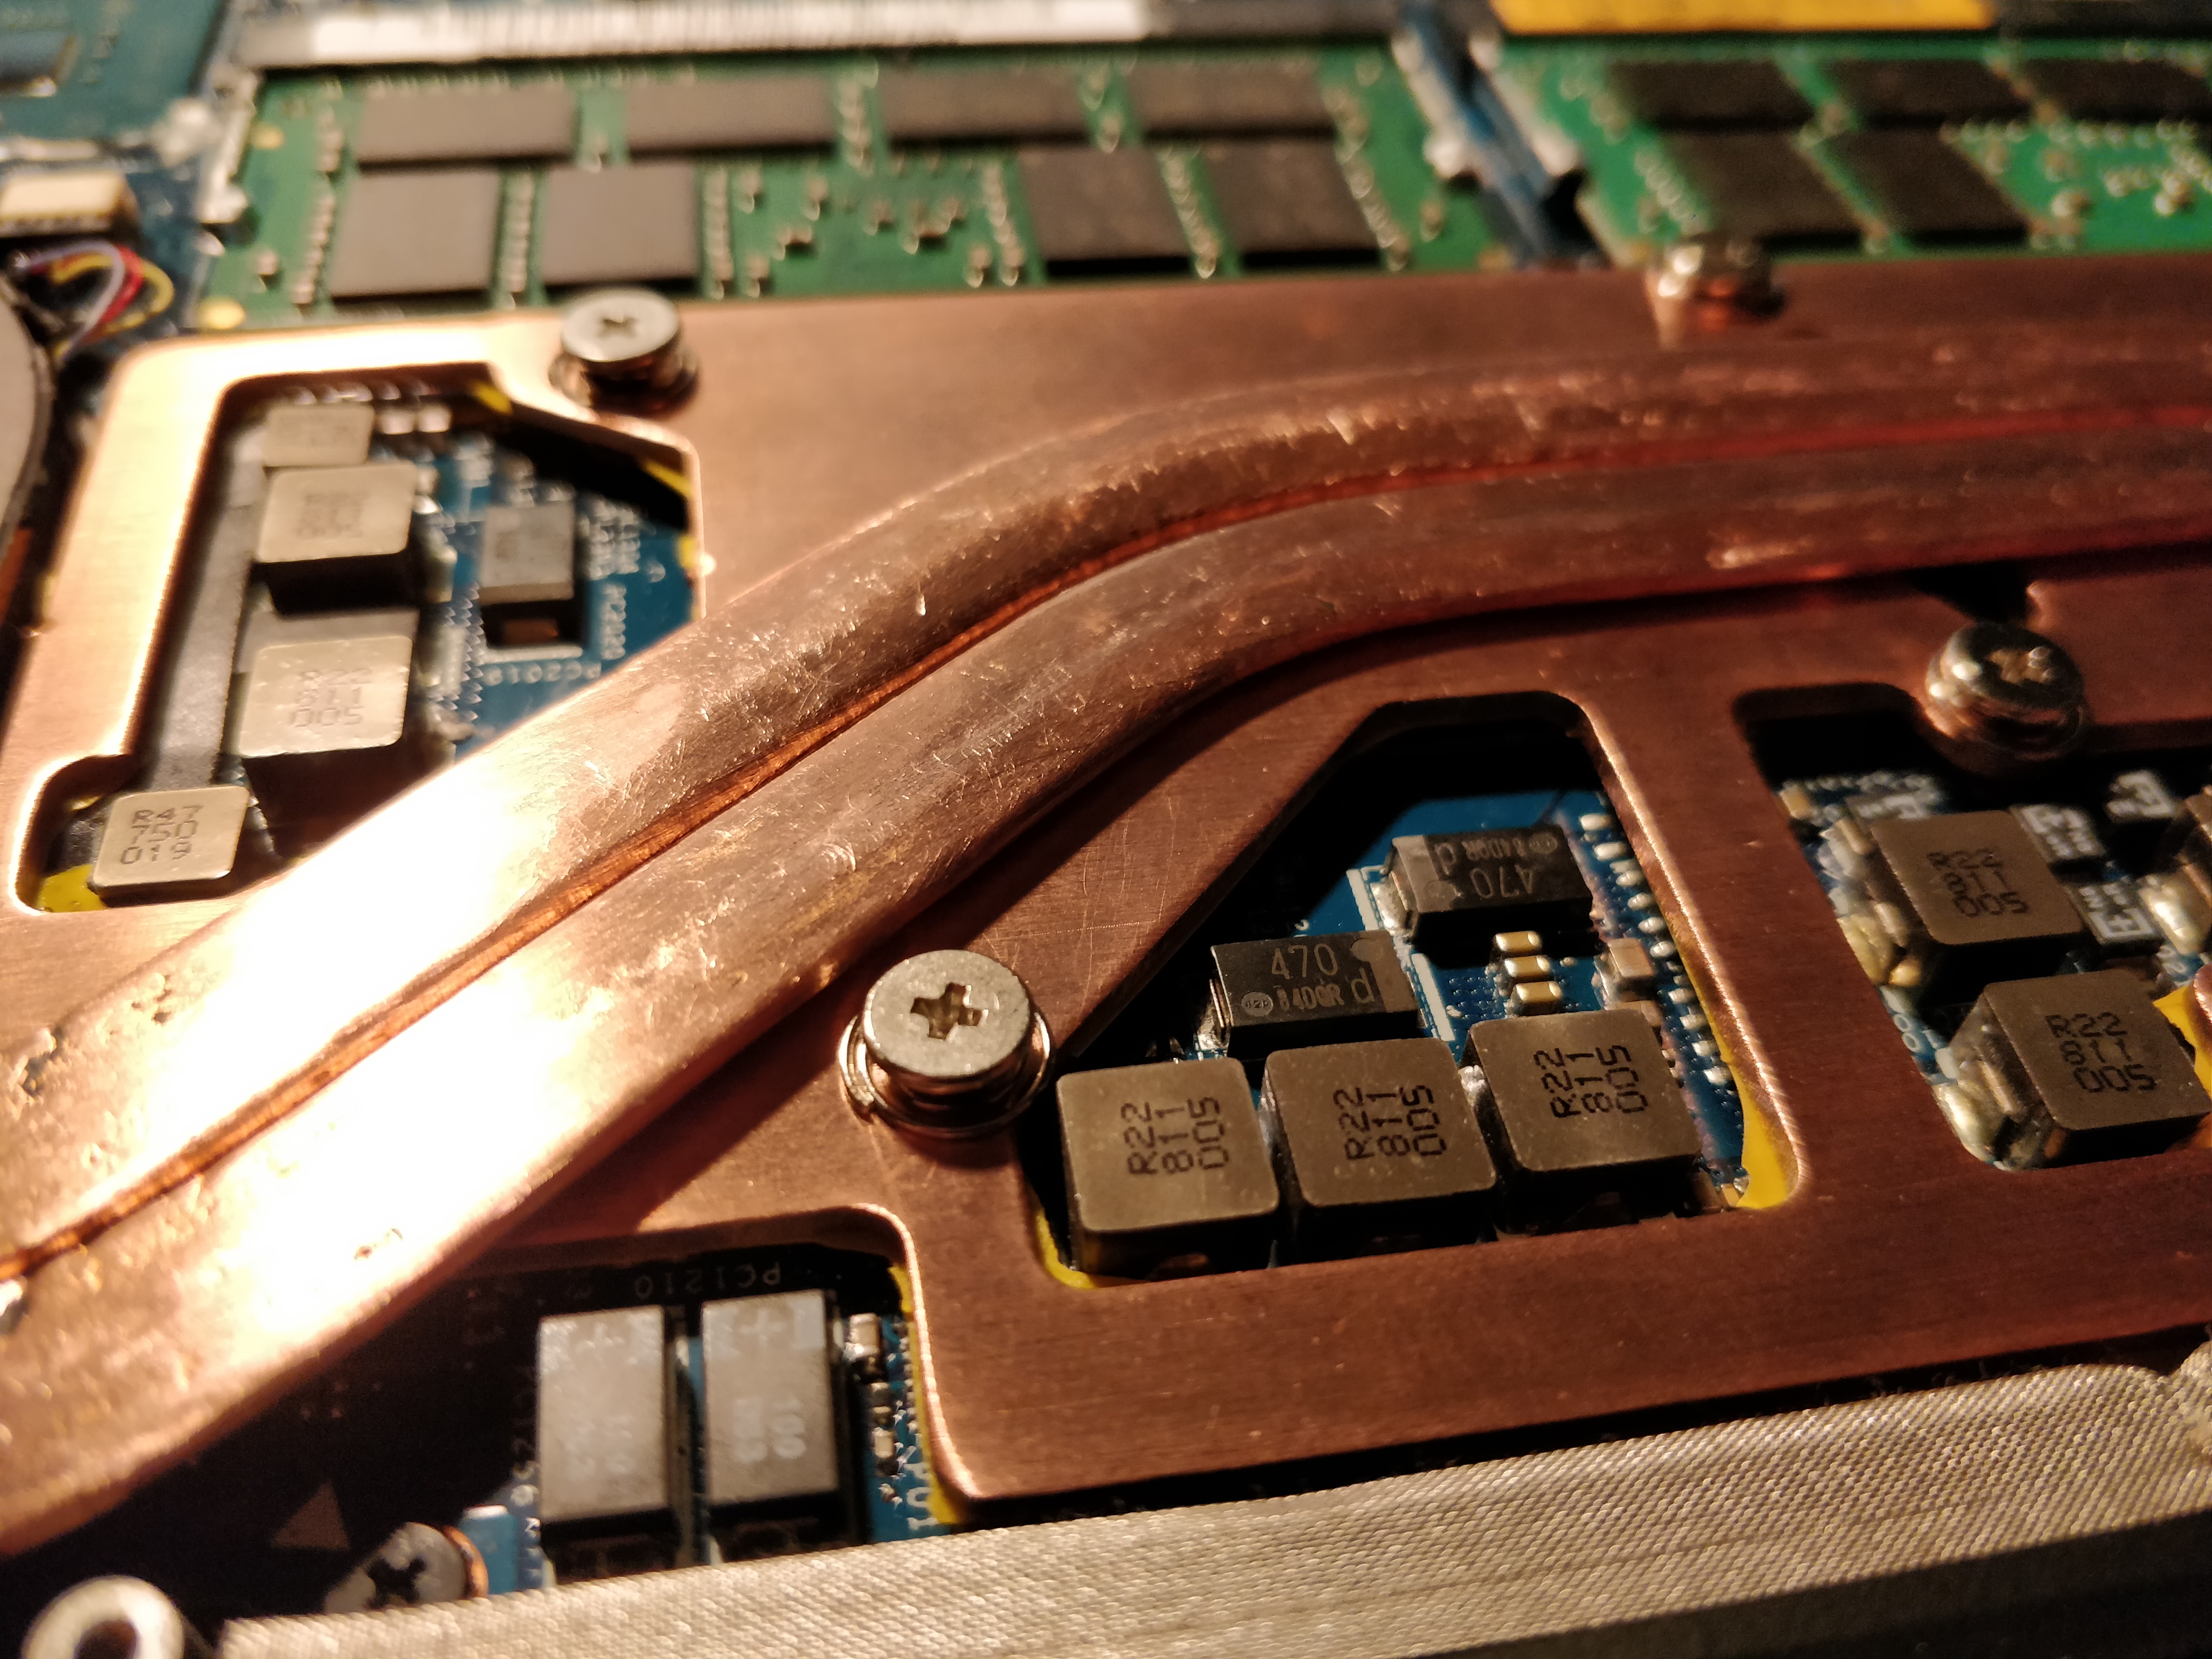
Copper finally turned up today, and I’ve done a test fit. So happy with how it’s turned out. Spring screws haven’t turned up today, so I just did it with the ones I have. Looks like 1mm pads should be fine the entire way around, and the 0.5mm shim is good. I’ll try the different height shims out properly with thermal paste before soldering, once I have the thermal pads.
Weighing everything, the plate and new fins add about 90g of mass. Solder will probably be about 20g.
Laser cut copper was £47, second hand heatsink to scavenge pipes was £19 (seen them for less than £15 since), shim was £2 (rip off), spring screws were £8 (couldn’t find a UK seller, so had to order 30 from Aliexpress), solder was £12, and fins were £16.
Just bought some cheap kapton tape and terrible thermal pads, so that’s another £6.
All in all, too much for what it’s probably worth haha. Mass produced would be a lot lower (cough Dell cough).
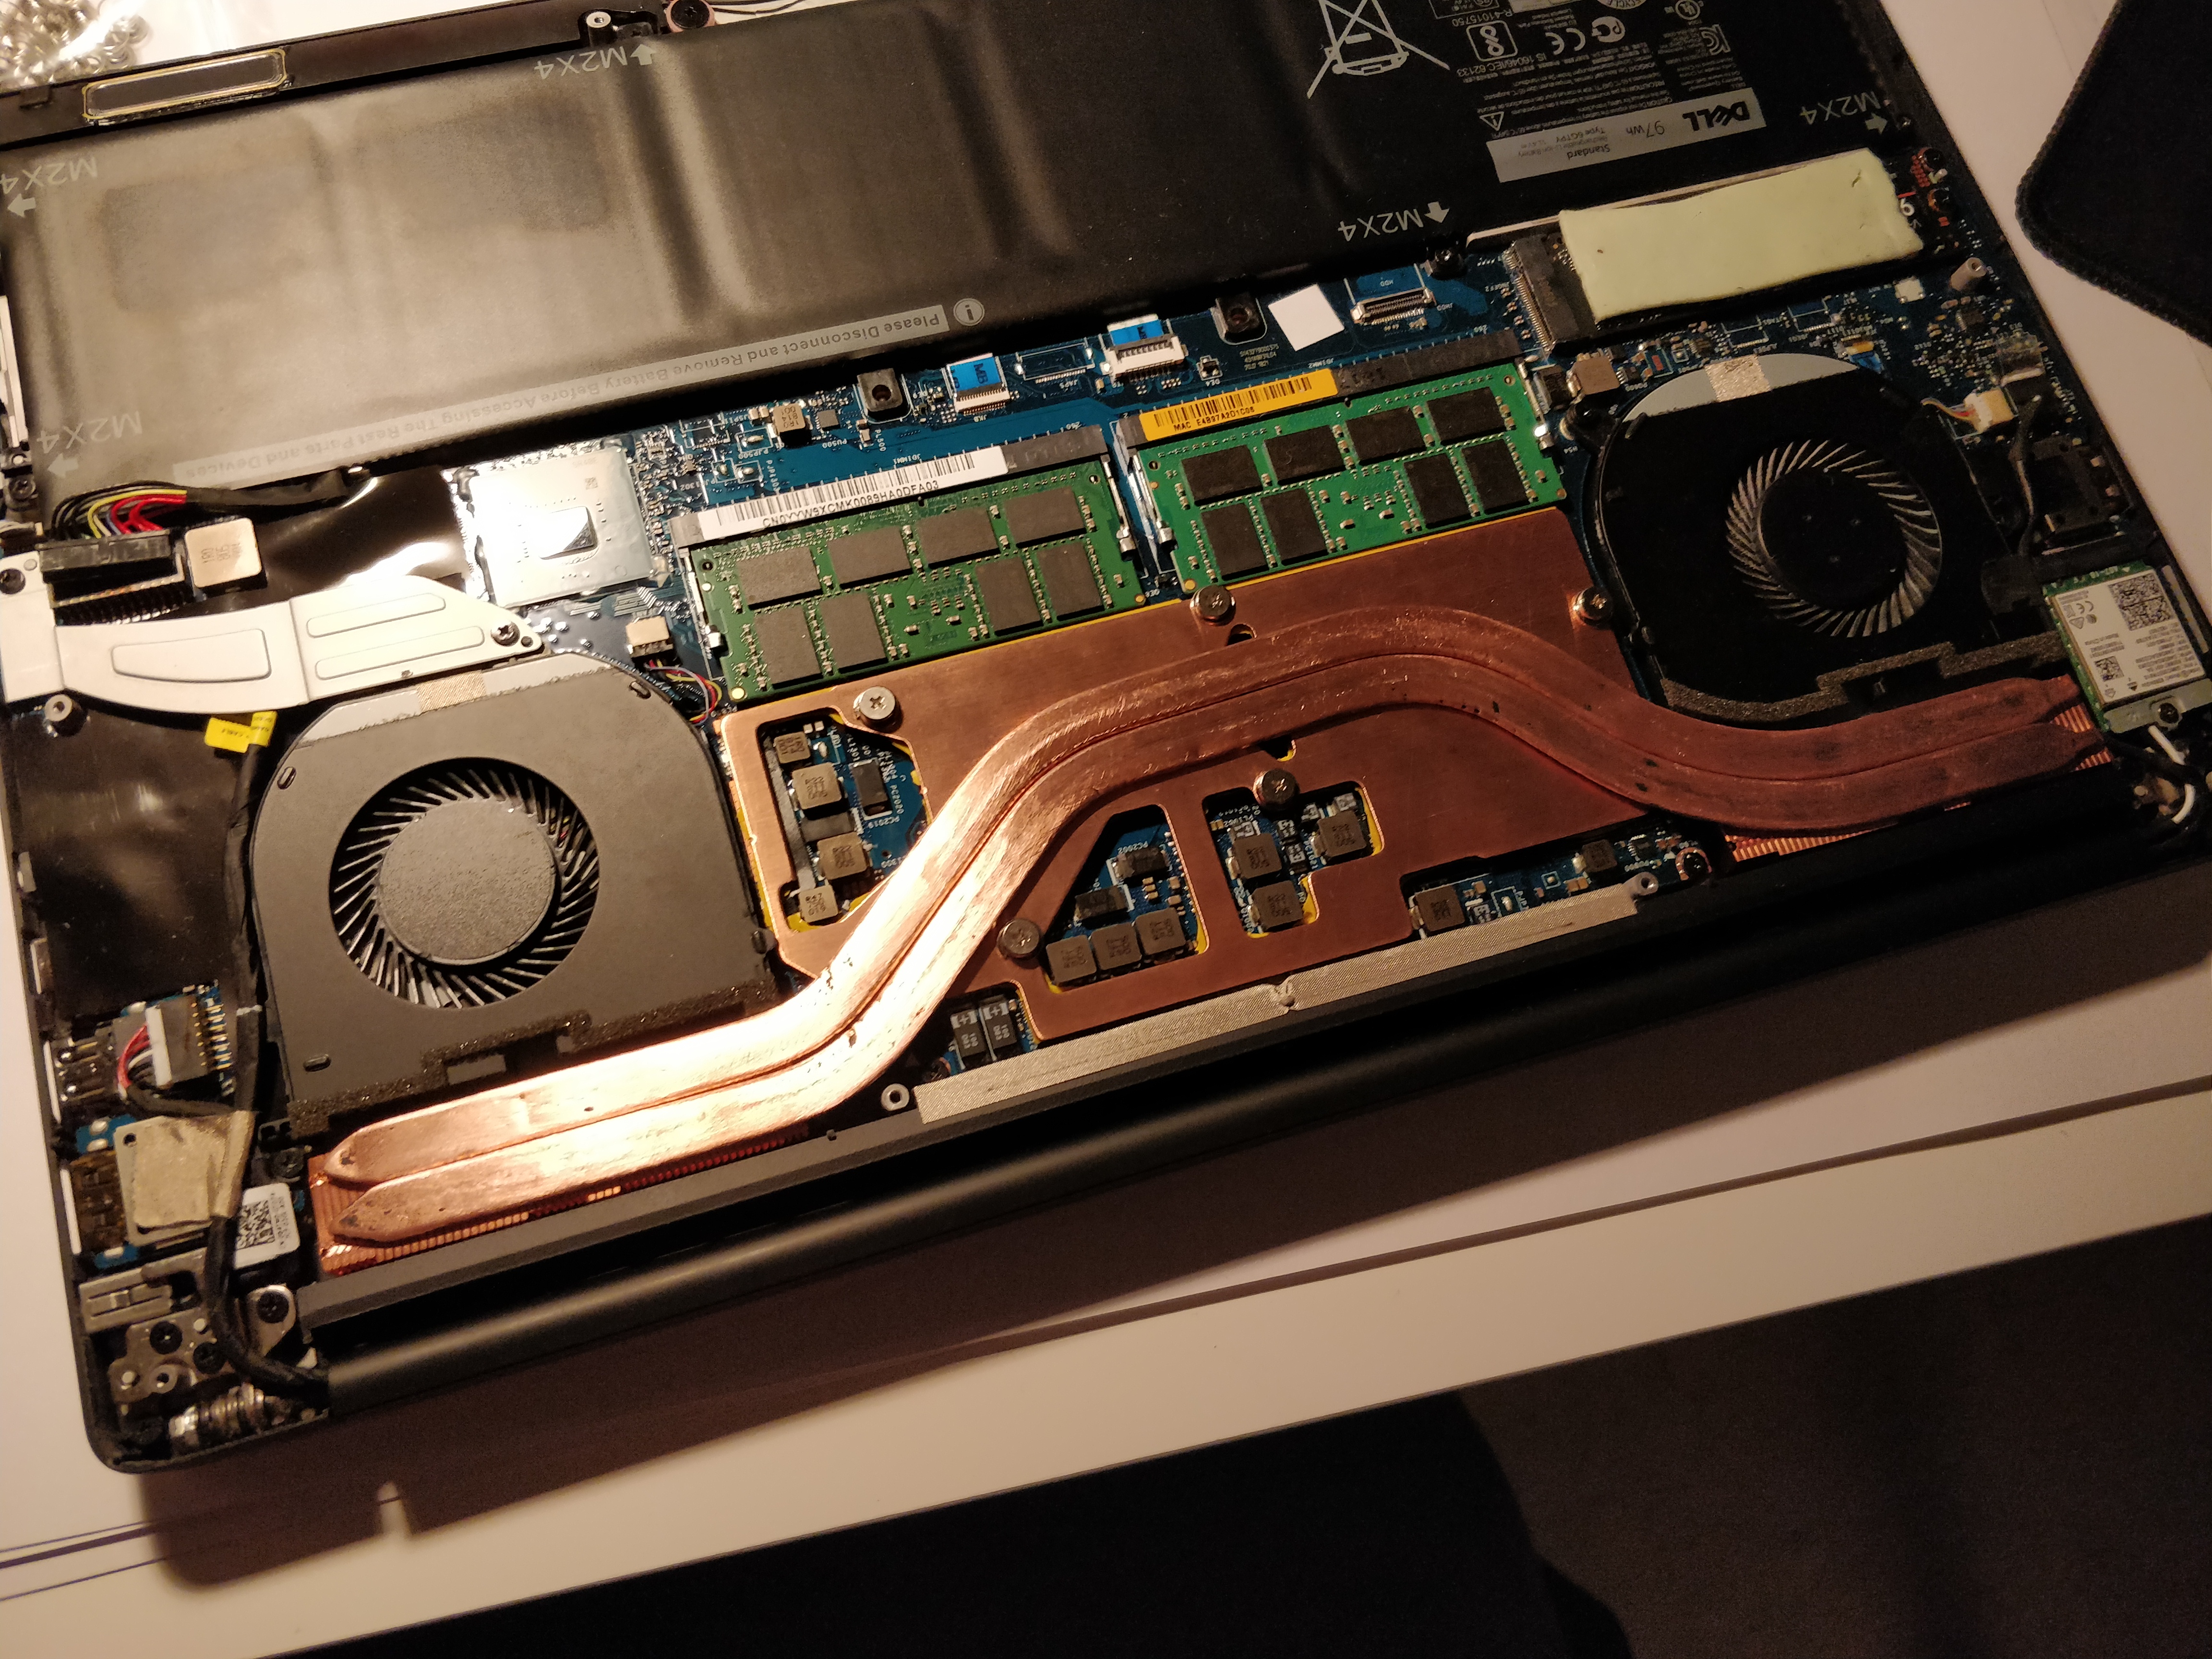
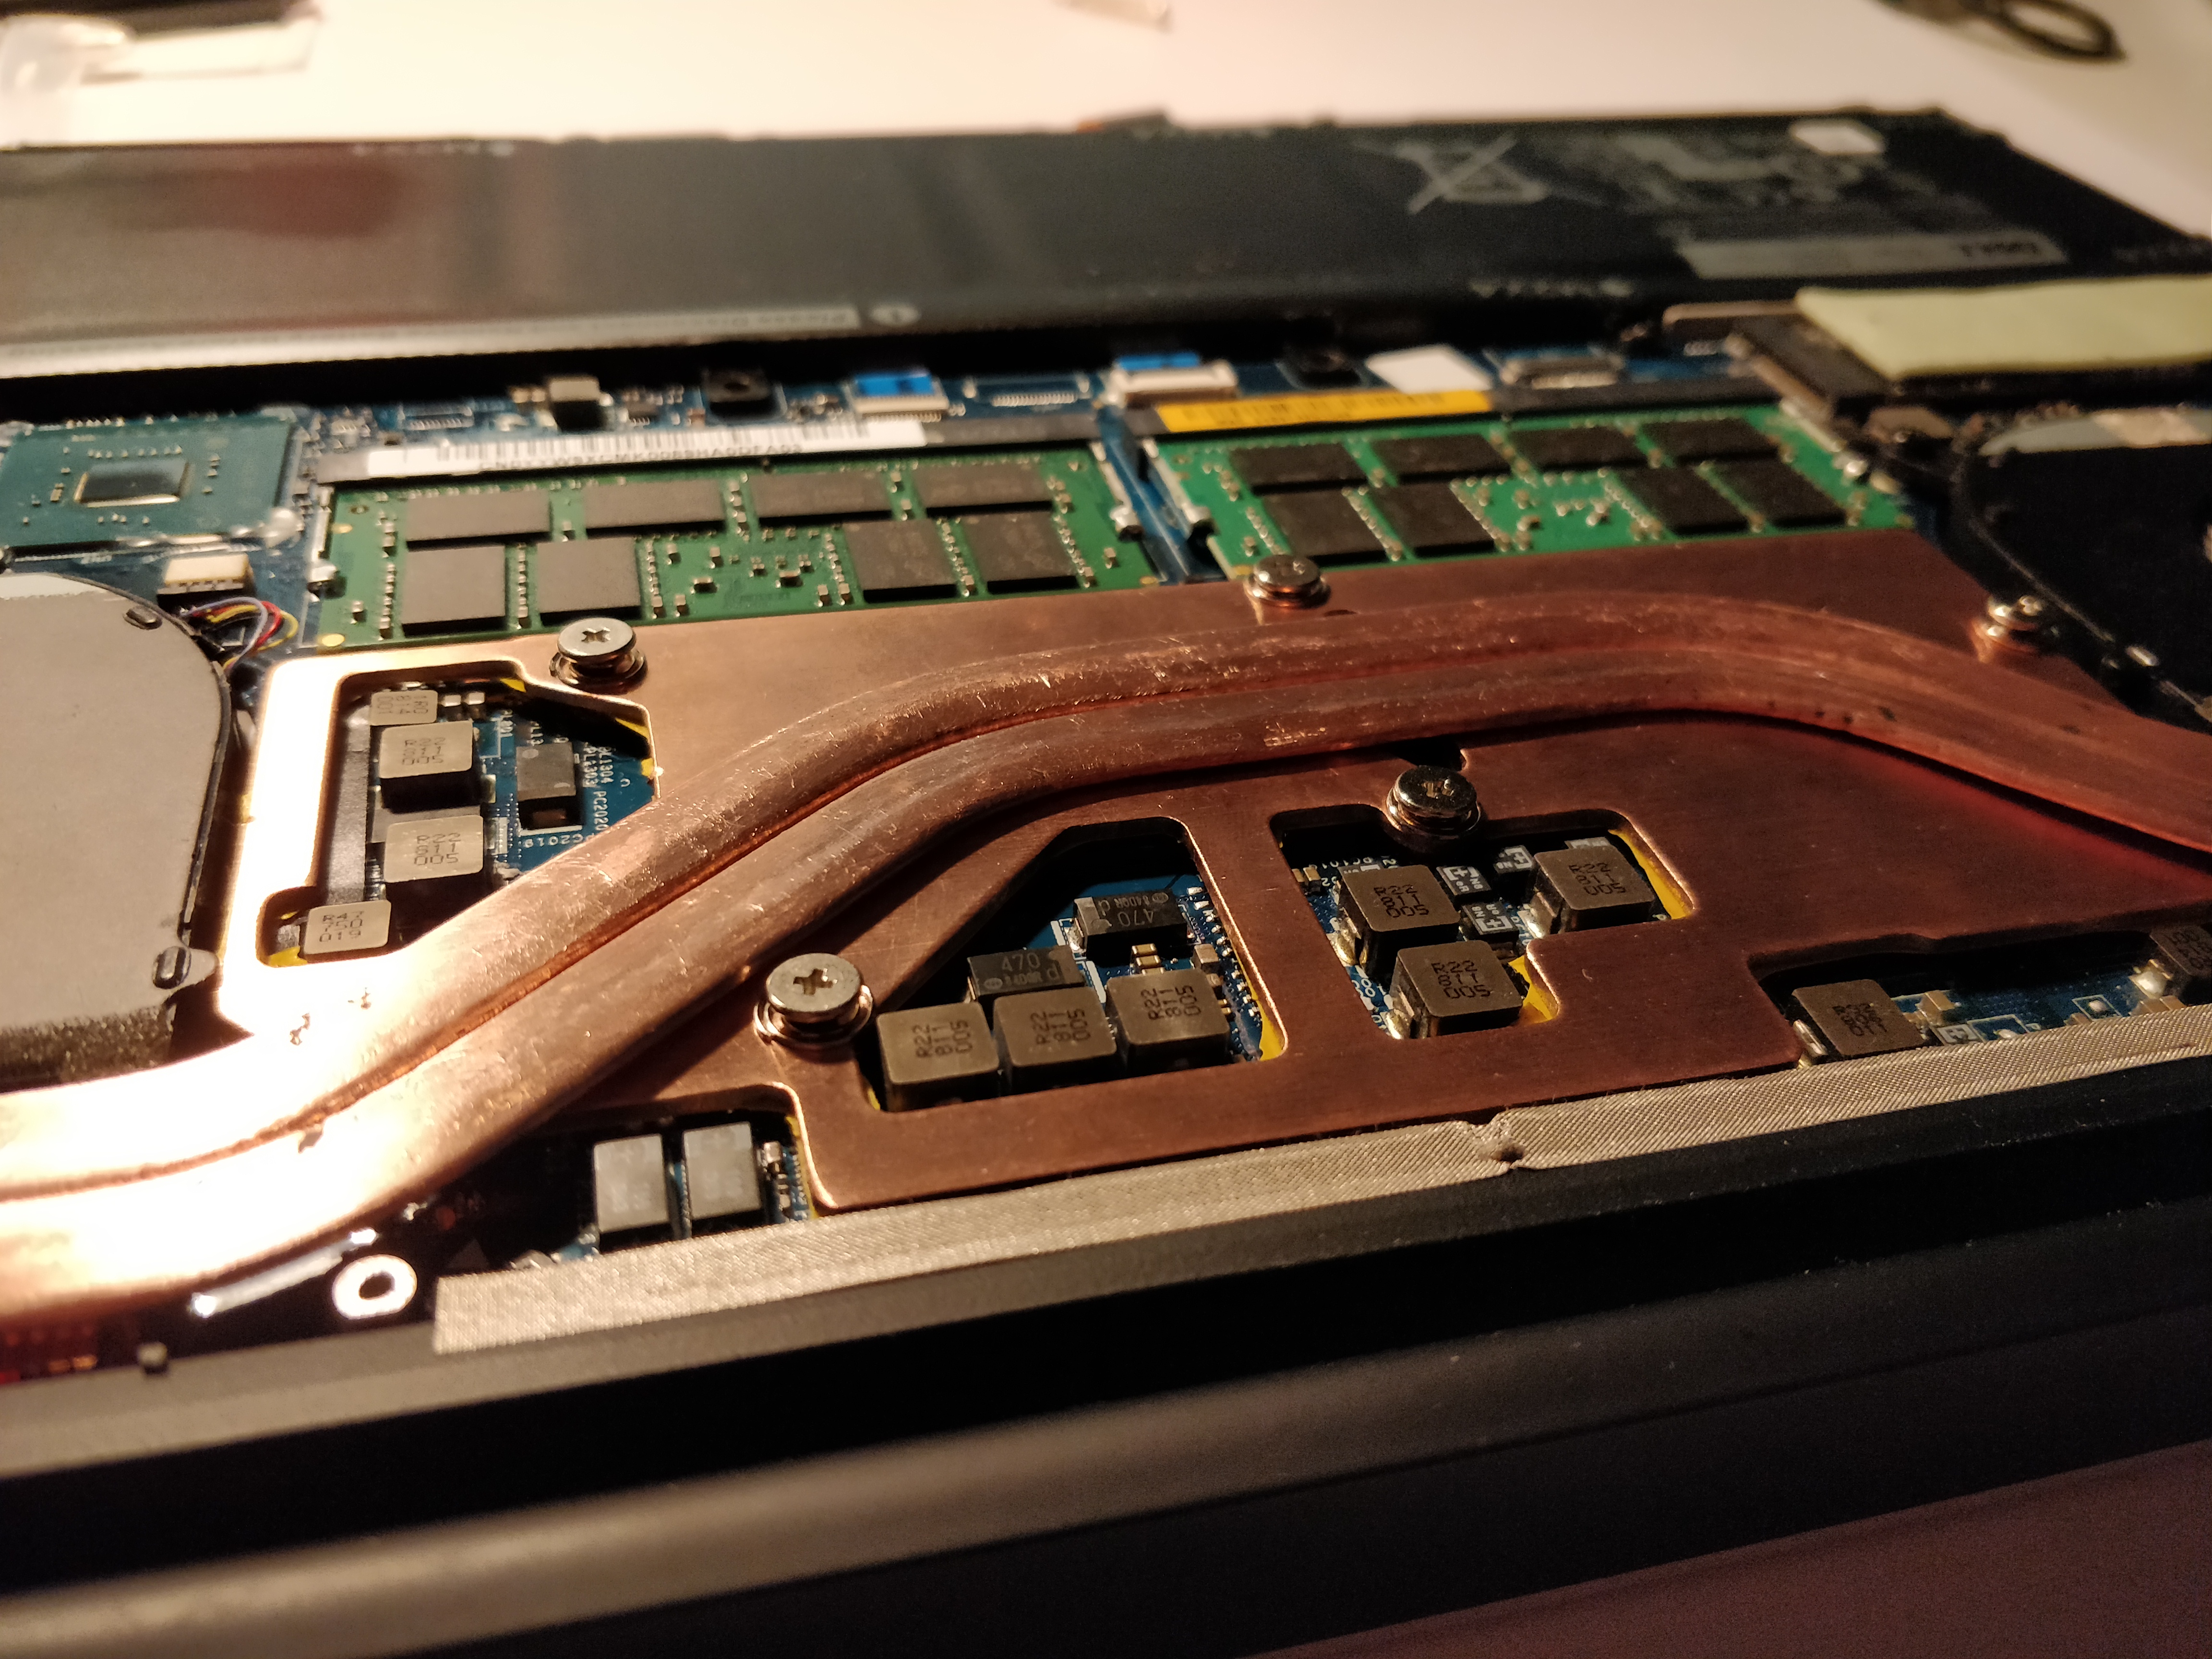
Spring screws turned up today, and I desoldered the old fins from the heatpipes. Made them swell a bit, and go cylindrical, but I’ve reflattened them, and taken most of the paint and old solder off.
These screws are a godsend for mounting pressure, but they might just be too tall… Stopping the back going on properly. You can see the one on the right side touching the bottom panel through the vent. Apart from that, everything’s fitting quite well.
The springs do slightly overhang the edges of the plate a bit, so they’re touching a DIMM, and nearly touching a choke. Shouldn’t be a problem. Have 30, so I can always try modifying a few to fit properly. May end up using two spring screw in the centre, and the other screws I used yesterday where height’s an issue.
That seems quite expensive for just a slab of copper being cut by a robit. Did you look into the pricing of having a company CNC mill it? Would that have been cheaper or more expensive?
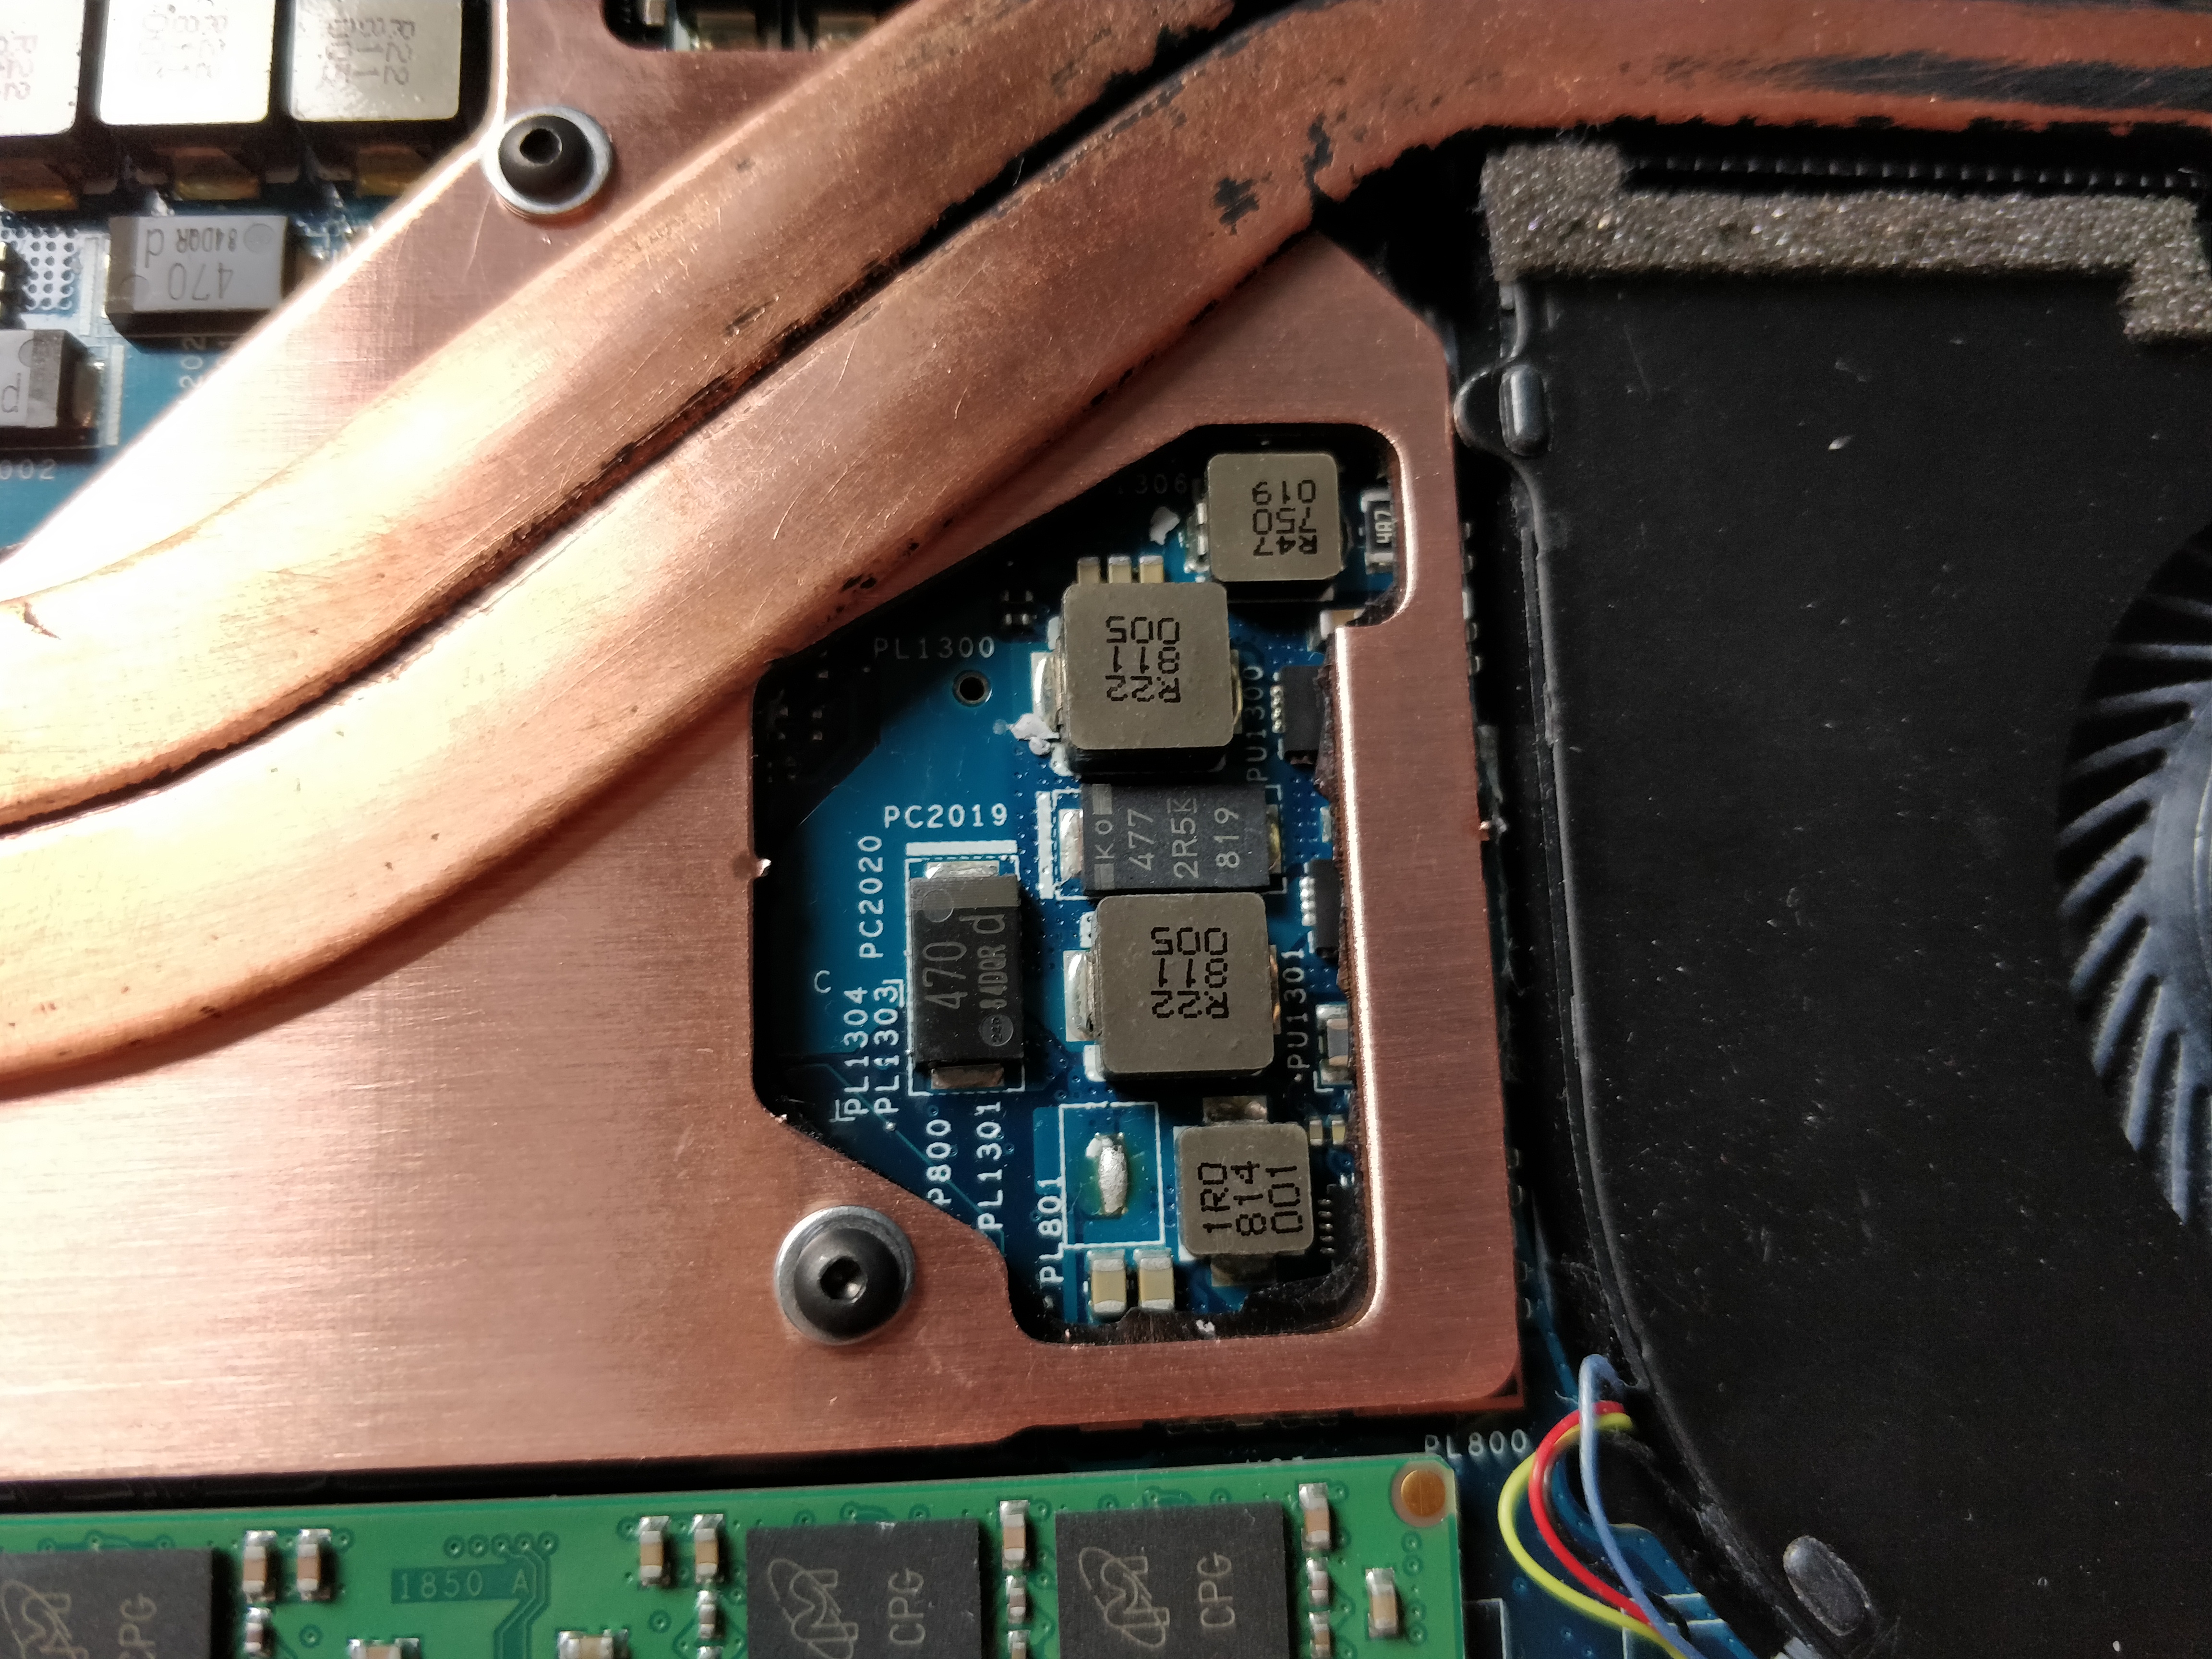
Also, I guess you didn’t decide to cover the chokes and those large caps (or diodes, can’t tell from the image) because it would have added complexity and expense to the design?
CNCing is more expensive. Looking at at least double.
From thermal tests other people have done, you can see that the MOSFETs are the only parts that get out of control hot. The other larger components get heated more by the MOSFETs via the PCB than they put out on their own.
Somewhat makes sense, since it is more labour intensive, but it’s still surprising that the laser cut was as expensive as it was.
Woops missed this comment that you posted earlier.
Have you also taken a look at NoteBookFanControl (an open source alternative to SpeedFan), to change the fan curve, to help alleviate therrmal throttling?
Edit: When you are doing your thermal tests, if you have a thermal imaging camera, maybe place kapton tape over the heatsink (because of emissivity), and see if the mosfets/chockes are still getting super hot, or if it’s just the CPU + GPU dies.
Edit 2: Maybe also post all of the components and 3D image files that you created, so that people who stumble upon this post in the future can complete the same thing as you?
The stock fan curve (if you can call 3 settings a curve) isn’t amazingly bad. Fans only come on when the CPU is in the 50-60°C range, or if the GPU is activated, and they only ramp up when you’re properly stressing the thing. 98% of the time browsing the web on battery, the fans stay off. If the heatsink works as intended, it should mean the fan won’t be as jumpy as it currently is, as the heatsink will take longer to change temperature.
The ThrottleStop logo in my notification area annoys me enough haha. Don’t want more junk crowding it.
I’ll post the final drawing/model once I’m done. Will change it a bit to iron out the kinks that I’m not going to bother fixing on mine. Also told @SgtAwesomesauce that I’ll do a model for the XPS 15 without the GPU.
Not to mention that throttlestop isn’t what I’d call safe since the CPU is throttling because the VRMs are getting too hot. If you cook your VRM, you’re out a $1200+ laptop, or you’re sending the thing to Rossman in shame.
Speaking of Rossman, I’ve been meaning to ask him if it’s possible for him to upgrade my CPU to the 8750H without putting a GPU on it.
Profiles don’t stick if it doesn’t close properly, mainly.
Got Throttlestop set to launch at login, and the settings stay applied even if the program crashes. Also has a lot more options, and can monitor GPU temps, too.
I’ve been toying with expanding linux-intel-undervolt to support all the XTU features lately. I’m also being extremely careful to not cook my laptop, so it’s slow going.