In this thread I am going to outline some of the changes I've made to my network setup since last December, One of the original goals of this blog series was to motivate me to improve and update my network through 2016-17. While that has happened and I've made many changes I have been less motivated to update this blog post which I attempt to change now. I have somewhat documented these changes and to the best of my ability will go through them in the order in which I made the changes.
Part one can be found here: https://forum.level1techs.com/t/pfsense-network-and-linux-server-upgrade-blog-2016-17/109405
WiFi Network changes
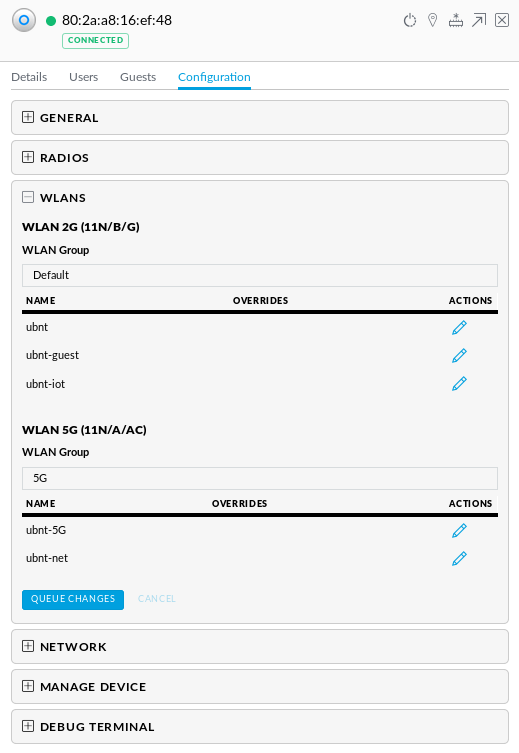
Since my last post I have had some issues with my wireless access point whereby the 5GHz SSIDs would refuse to accept clients some of the time, mostly just after the AP has been restarted. I this narrowed down to a configuration issue with the way WLAN Groups were setup. Originally I only had the default group which had four SSIDs, In the picture below both ubnt and ubnt-guest were 2.4GHz and ubnt-5G and ubnt-net were 5GHz:

This seemed to cause issues with the SSIDs when the same group was set for both 2.4GHz and 5GHz on the AP and an override set to disable the SSIDs on the band I didn't want them on, my suspicion was that disabling the bands per SSID was causing these issues.
To solve this problem I had two possible approaches, I could not override the SSIDs and have them all as dual-band and have the AP switch between the two bands or I could setup separate WLAN groups for each band. I opted for the later as I wanted SSIDs to use specific bands.
I first assigned all the SSIDs I wanted on 2.4GHz to the Default WLAN group, you can also see that I added another SSID to IoT specific devices on the network e.g. Smart TV, Chromecast, etc:

And another WLAN group for my 5GHz SSIDs:

I then set each group up on my AP for the specific bands:
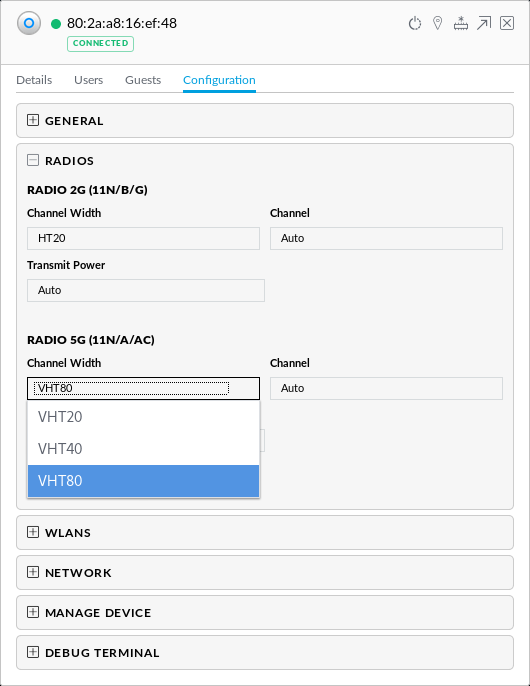
This configuration seems to have solved the issues I was with my 5GHz SSIDs, however there was one more thing I could do to improve my wireless network and that was to increase the throughput on 5GHz.
At this time my only option to transfer files to my server was through the wireless network as my server was downstairs connected to the switch with my desktop being upstairs using wireless. Luckily the areas in which I live has low wireless congestion and nothing but my own AP on the 5GHz band which I could take advantage of by increasing the channel from VHT40 to VHT80, This setting alone increased wireless throughput on 5GHz from around 220mbps up to 370mbps:
This was a nice bump in throughput for file transfers between my server but It wasn't enough and I can do better.
Running Ethernet
In mid February I decided that I wanted to run Ethernet from my networking equipment downstairs to my computers upstairs, this would be no easy task so I formulated a plan to run the cable. Given that layout of the house there was one obvious choice for the cable run, the room upstairs is adjacent to a cupboard in the hallway which is above another cupboard downstairs that is also adjacent to the living room where my networking equipment is, the plan is to drill holes in the walls for both rooms into the cupboards and another hole through the floor of the top cupboard to the bottom and run the cable down the walls.
After the plan for the run was finalised I bought 100 meters of LSZH CAT6 cable, a pinch down tool, wall plates with keystone jacks and some RJ45 plugs:

First task for the run was to drill a hole in the upstairs room through the wall into the cupboard:

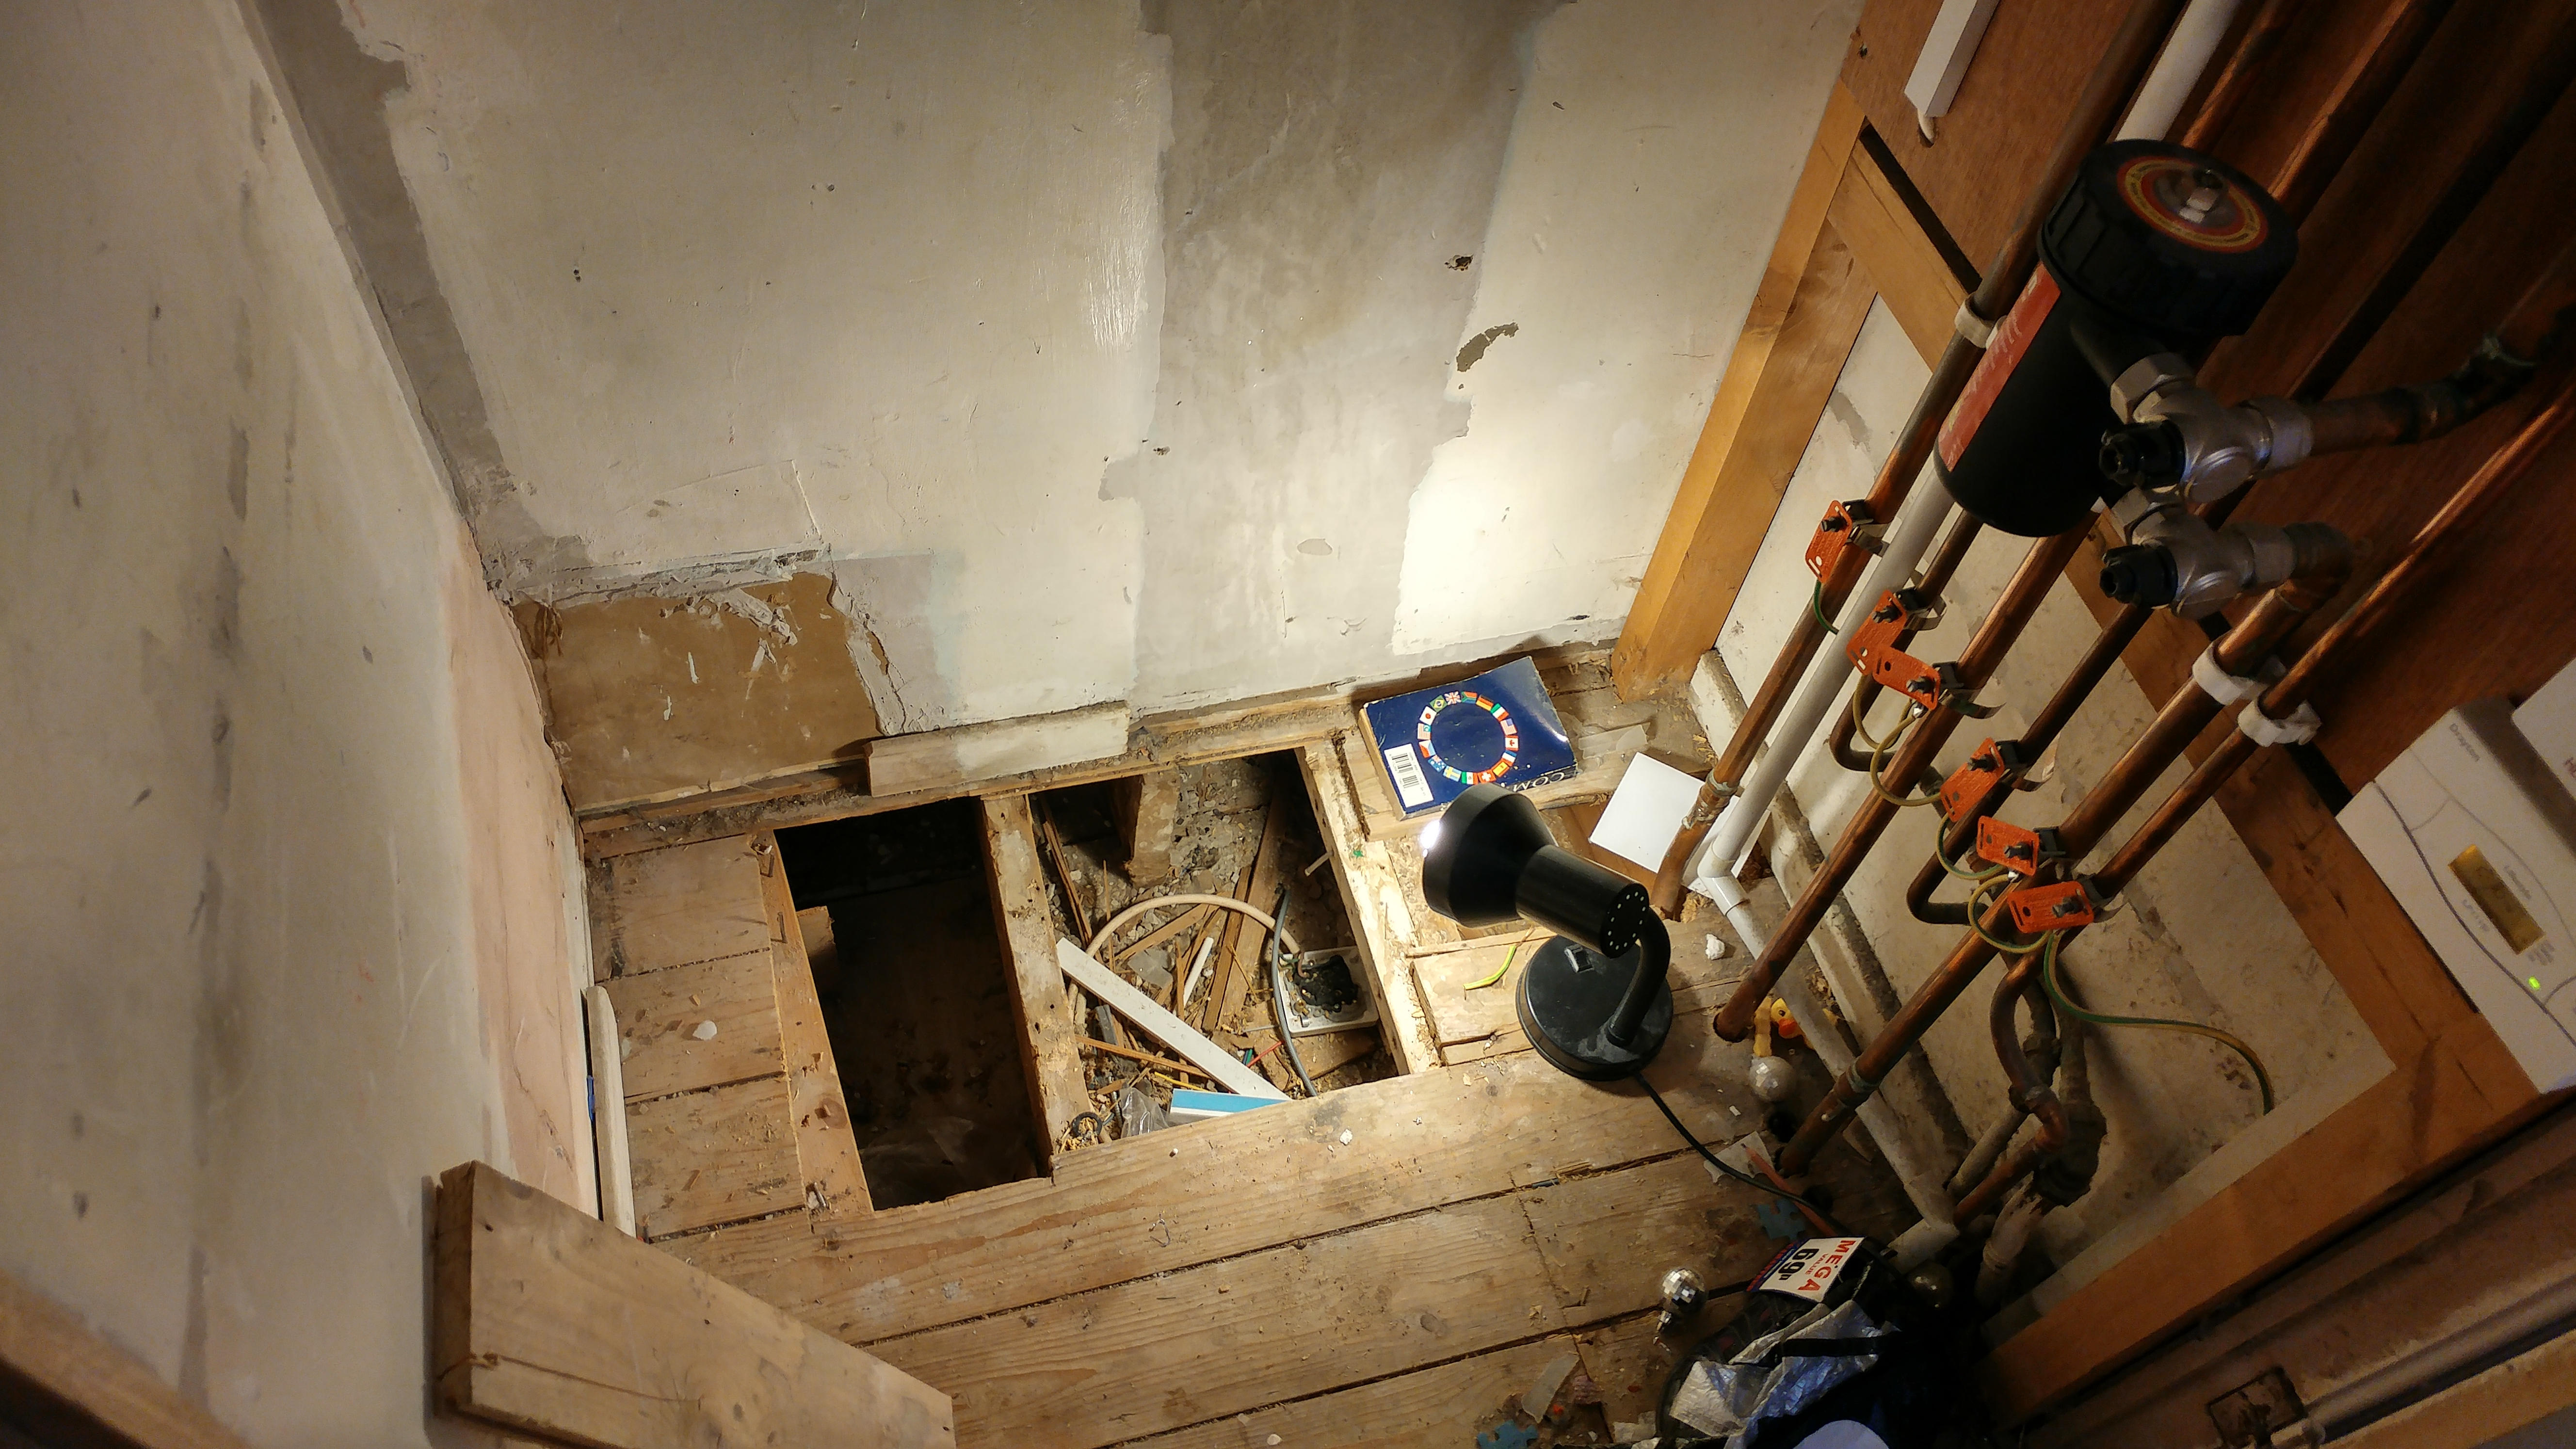
In the upstairs cupboard I removed some of floorboard only to find that the people who installed the central heating in the house left all their rubbish underneath:
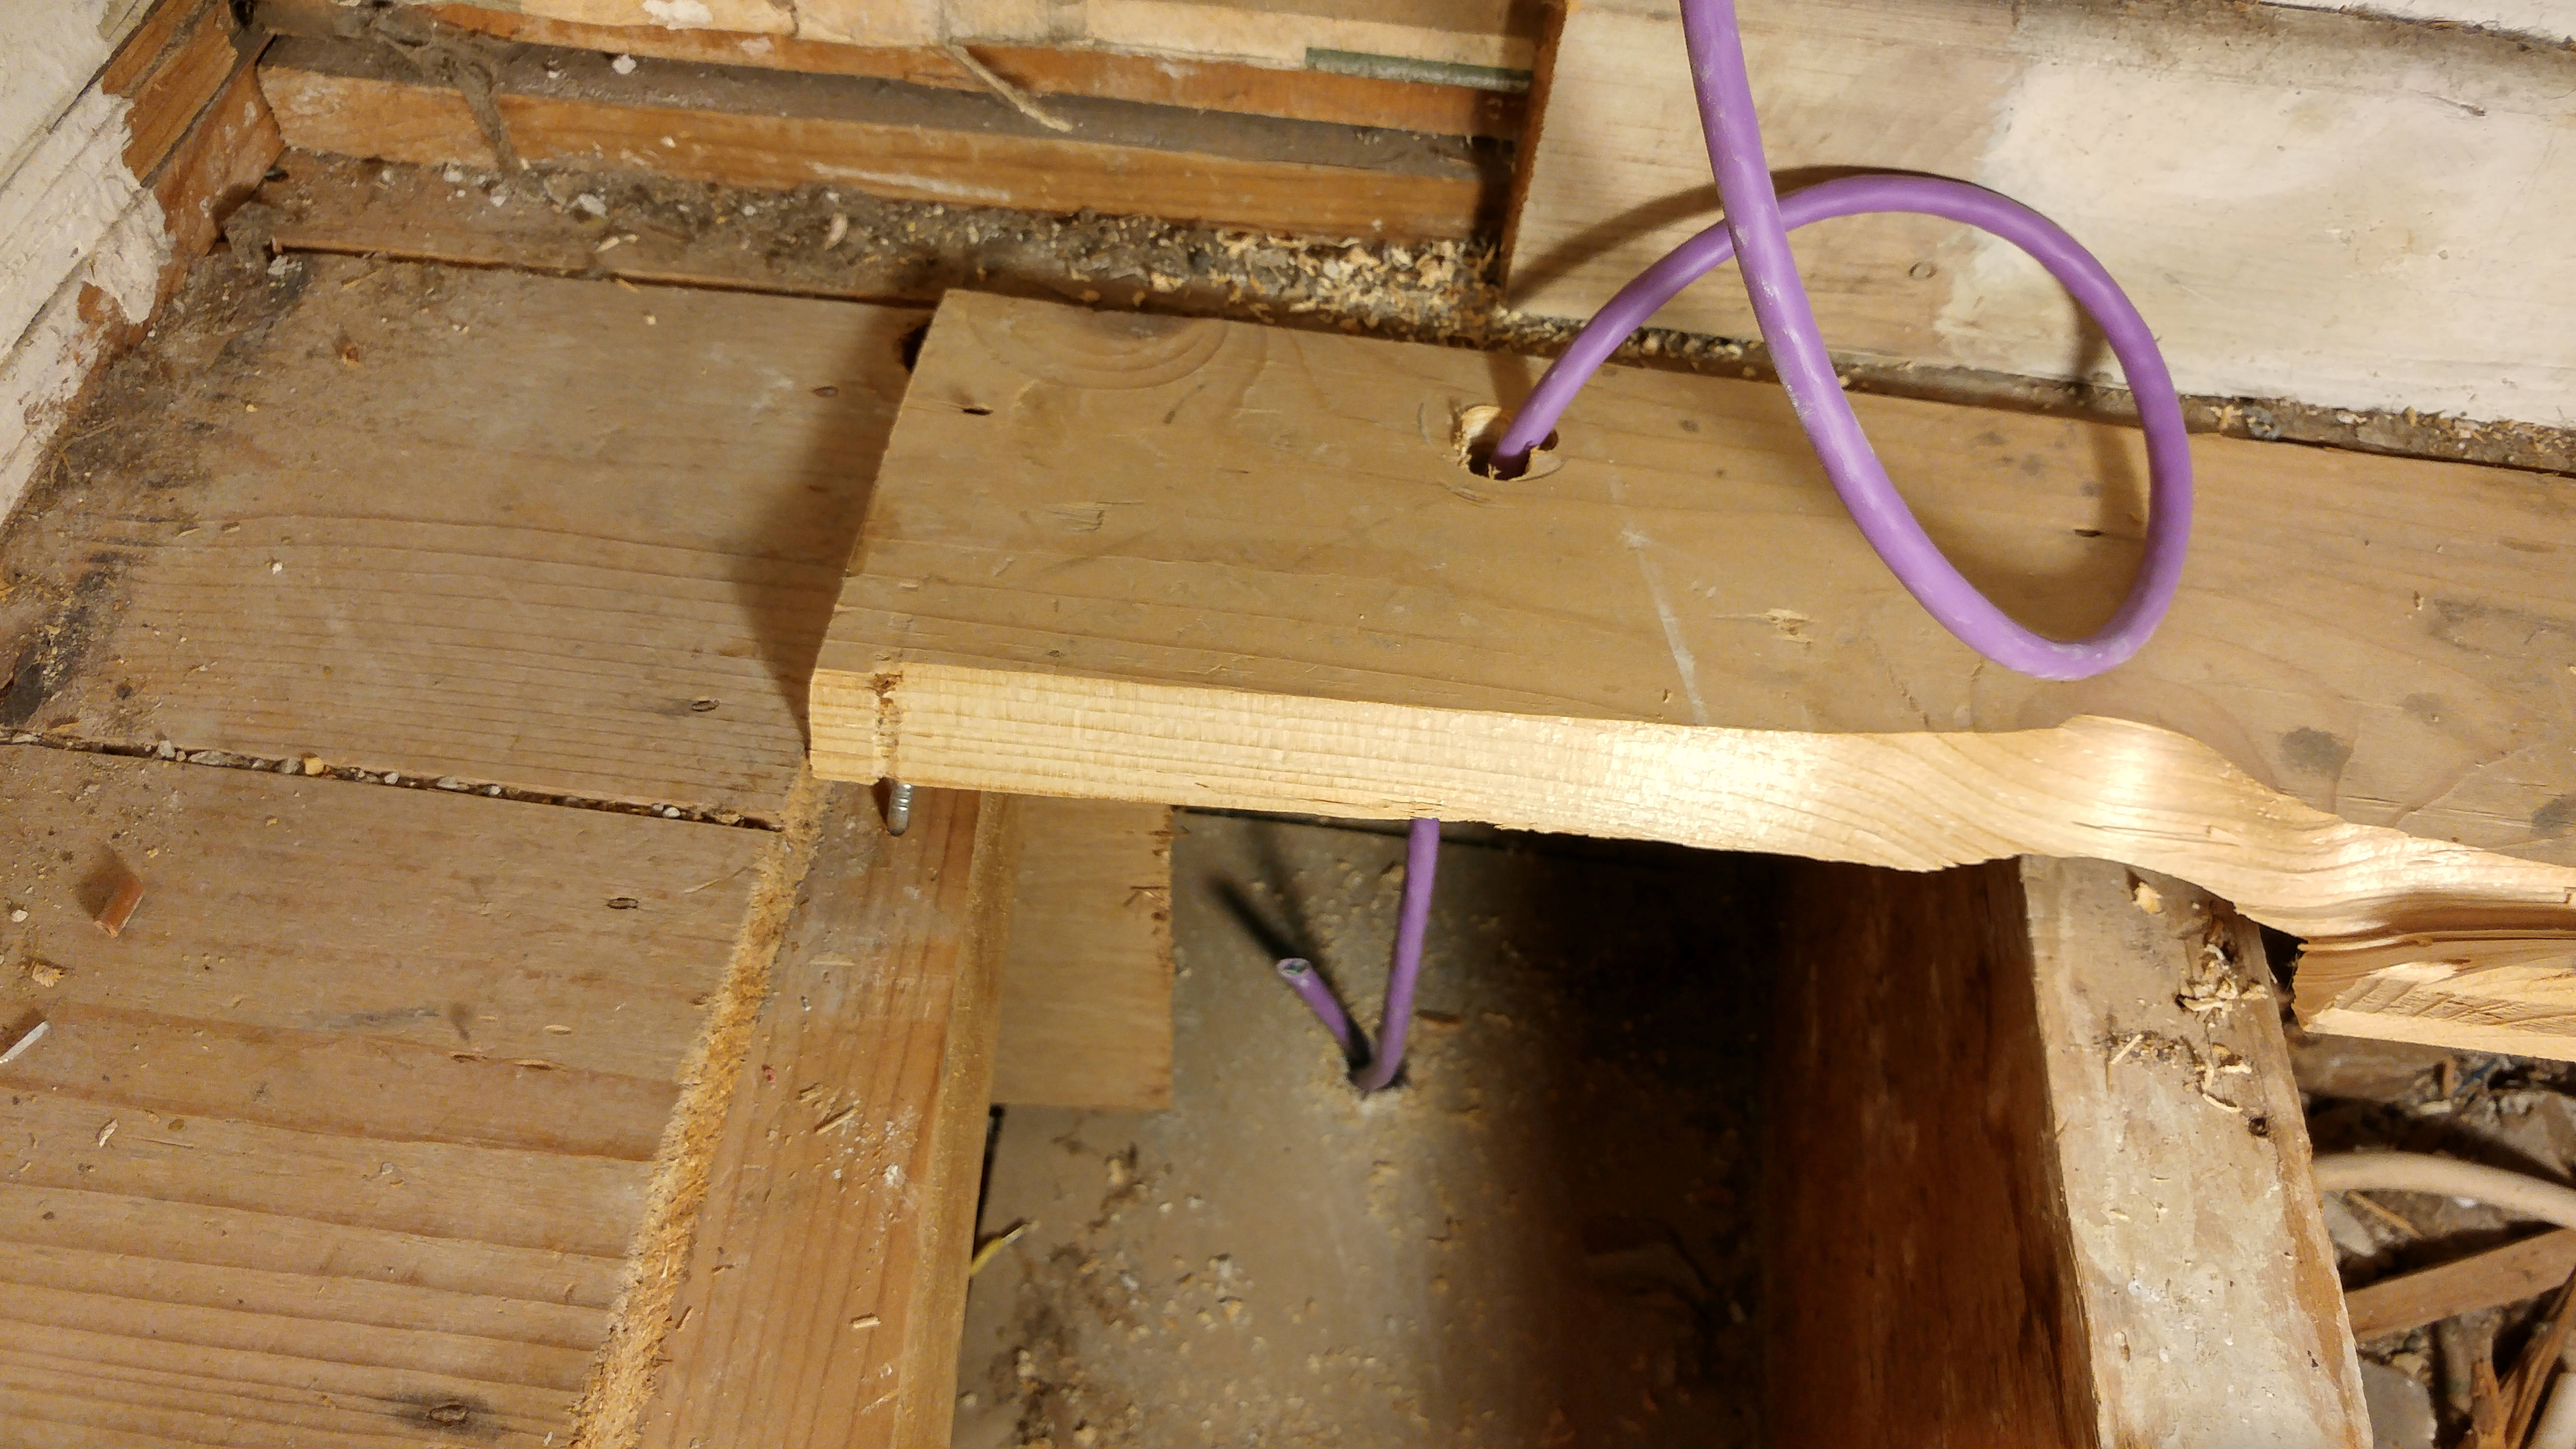
Not to be deterred I continued by drilling a hole through the floor and ran the cable to the bottom cupboard:
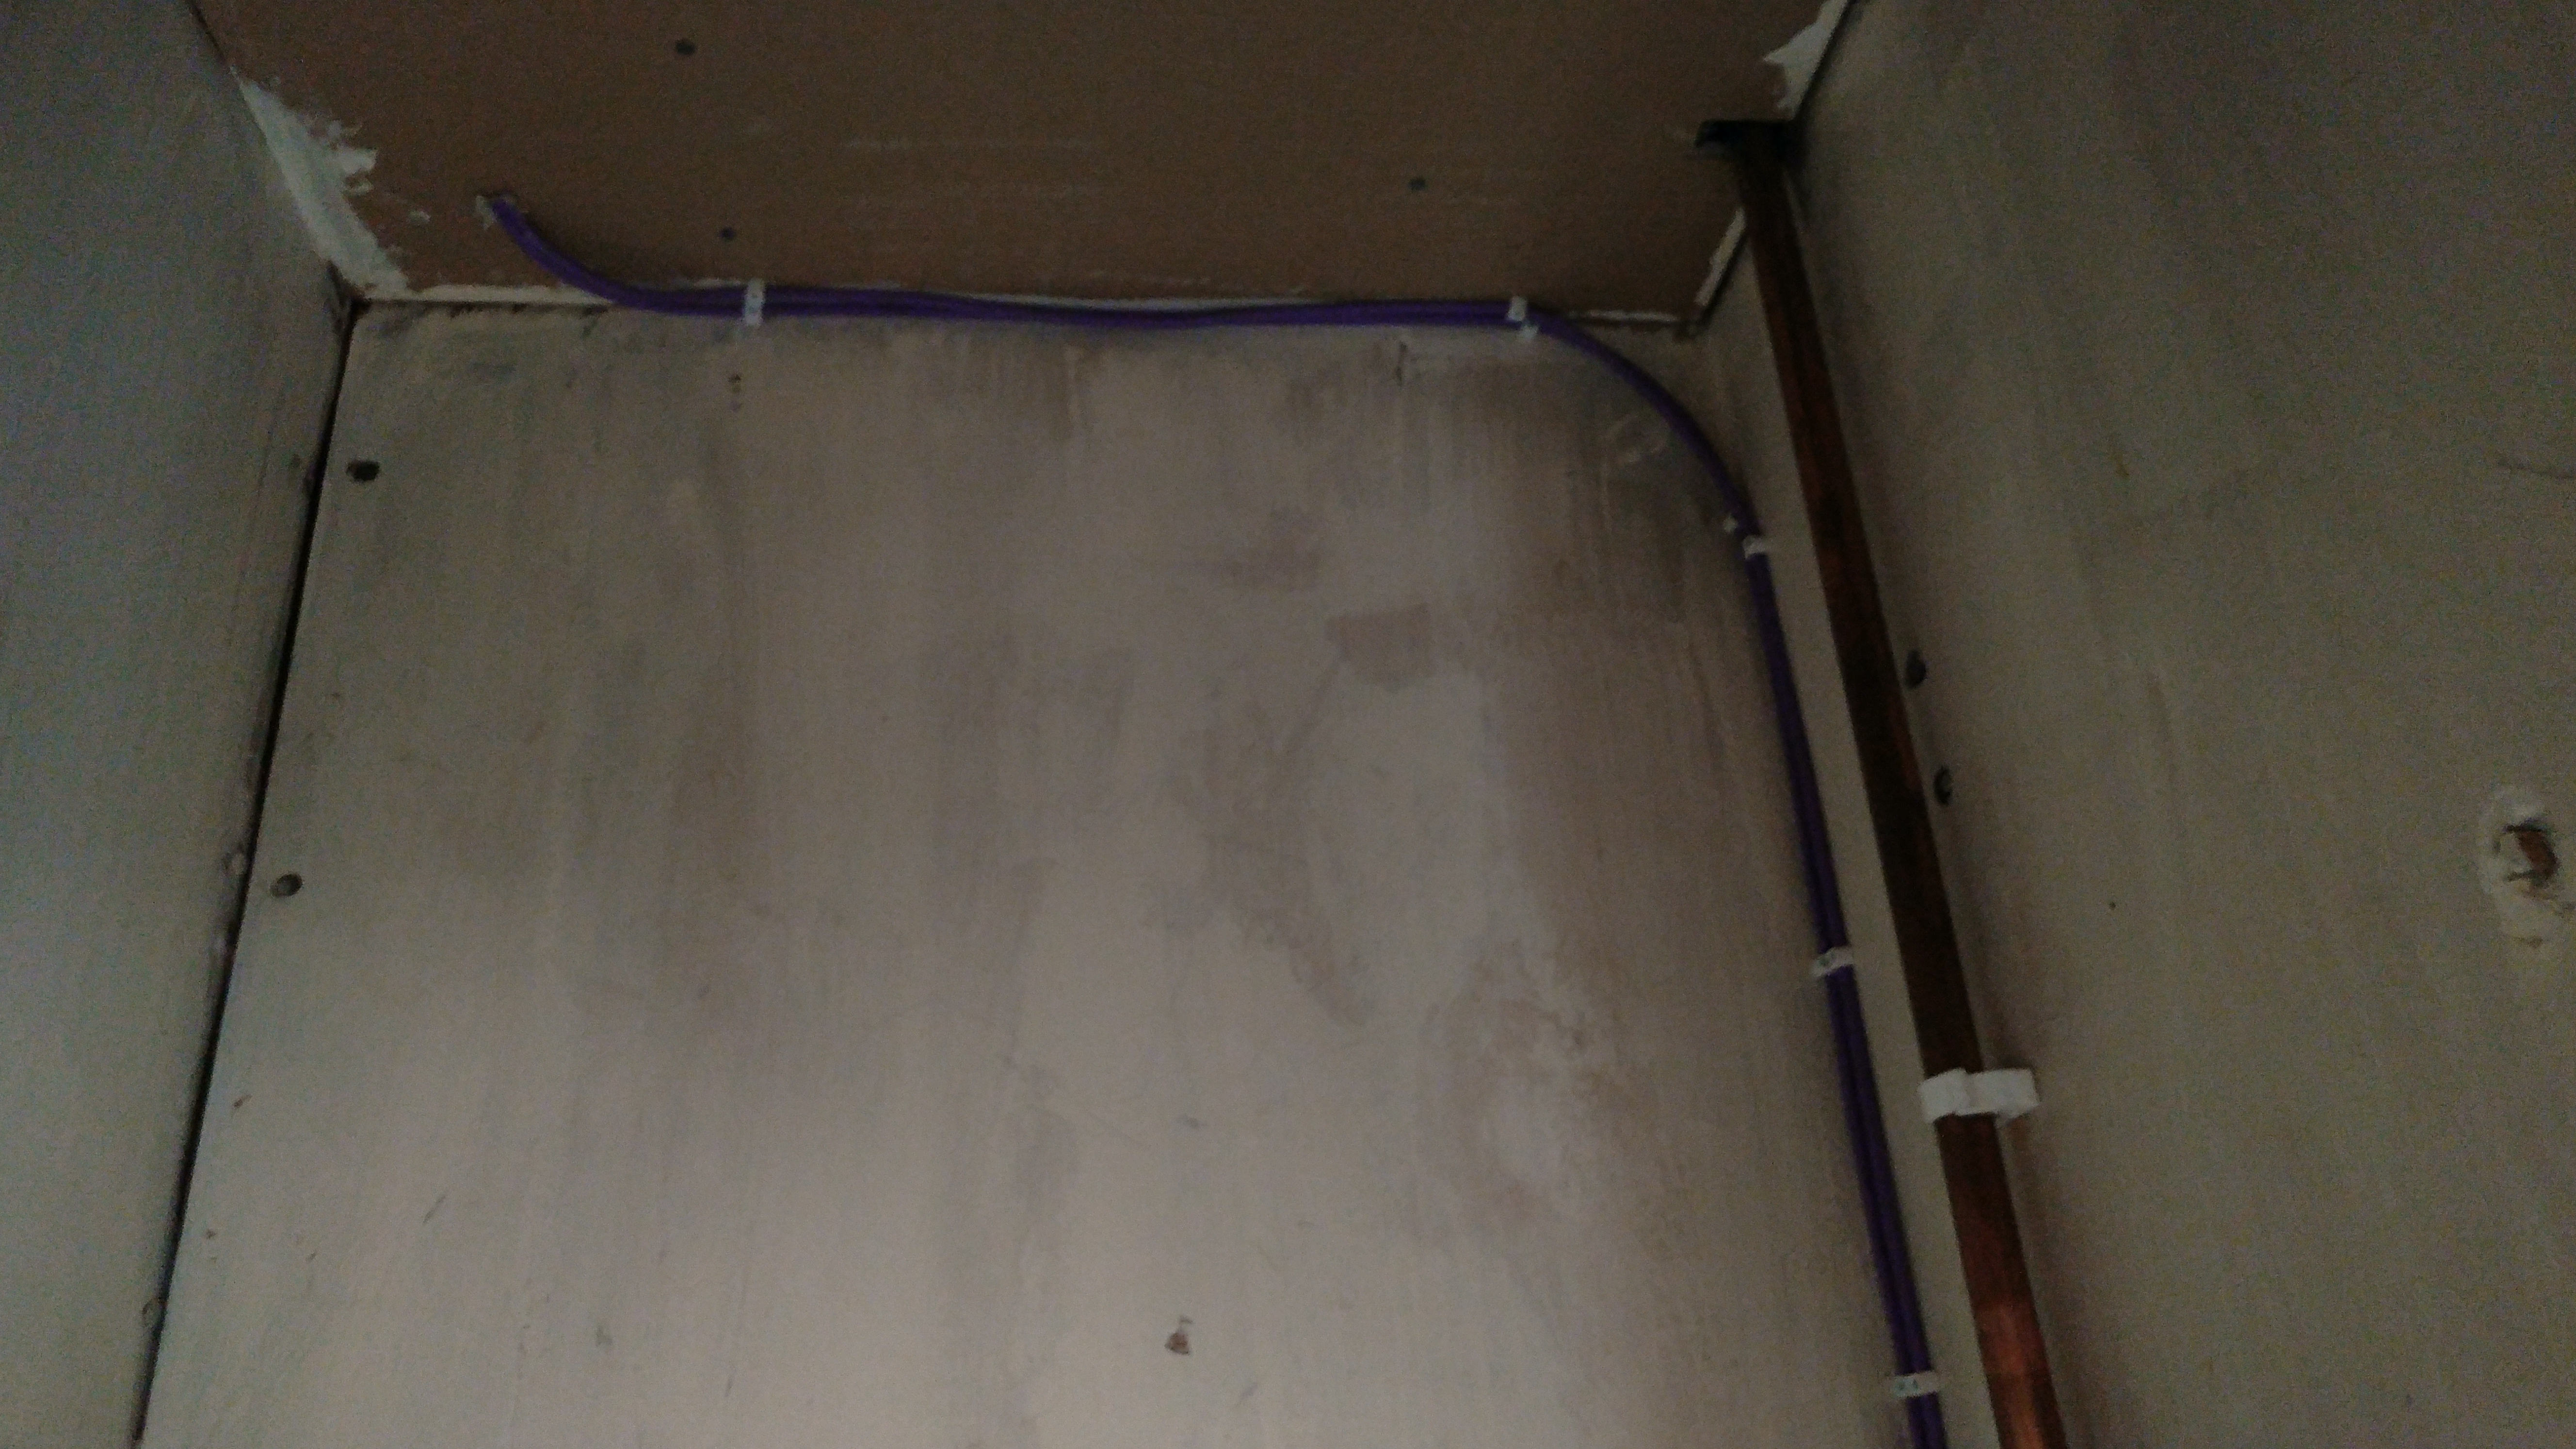
I then drilled the last hole into the living room and ran the cable through it:

Next I ran the wires down the wall and tied them down:
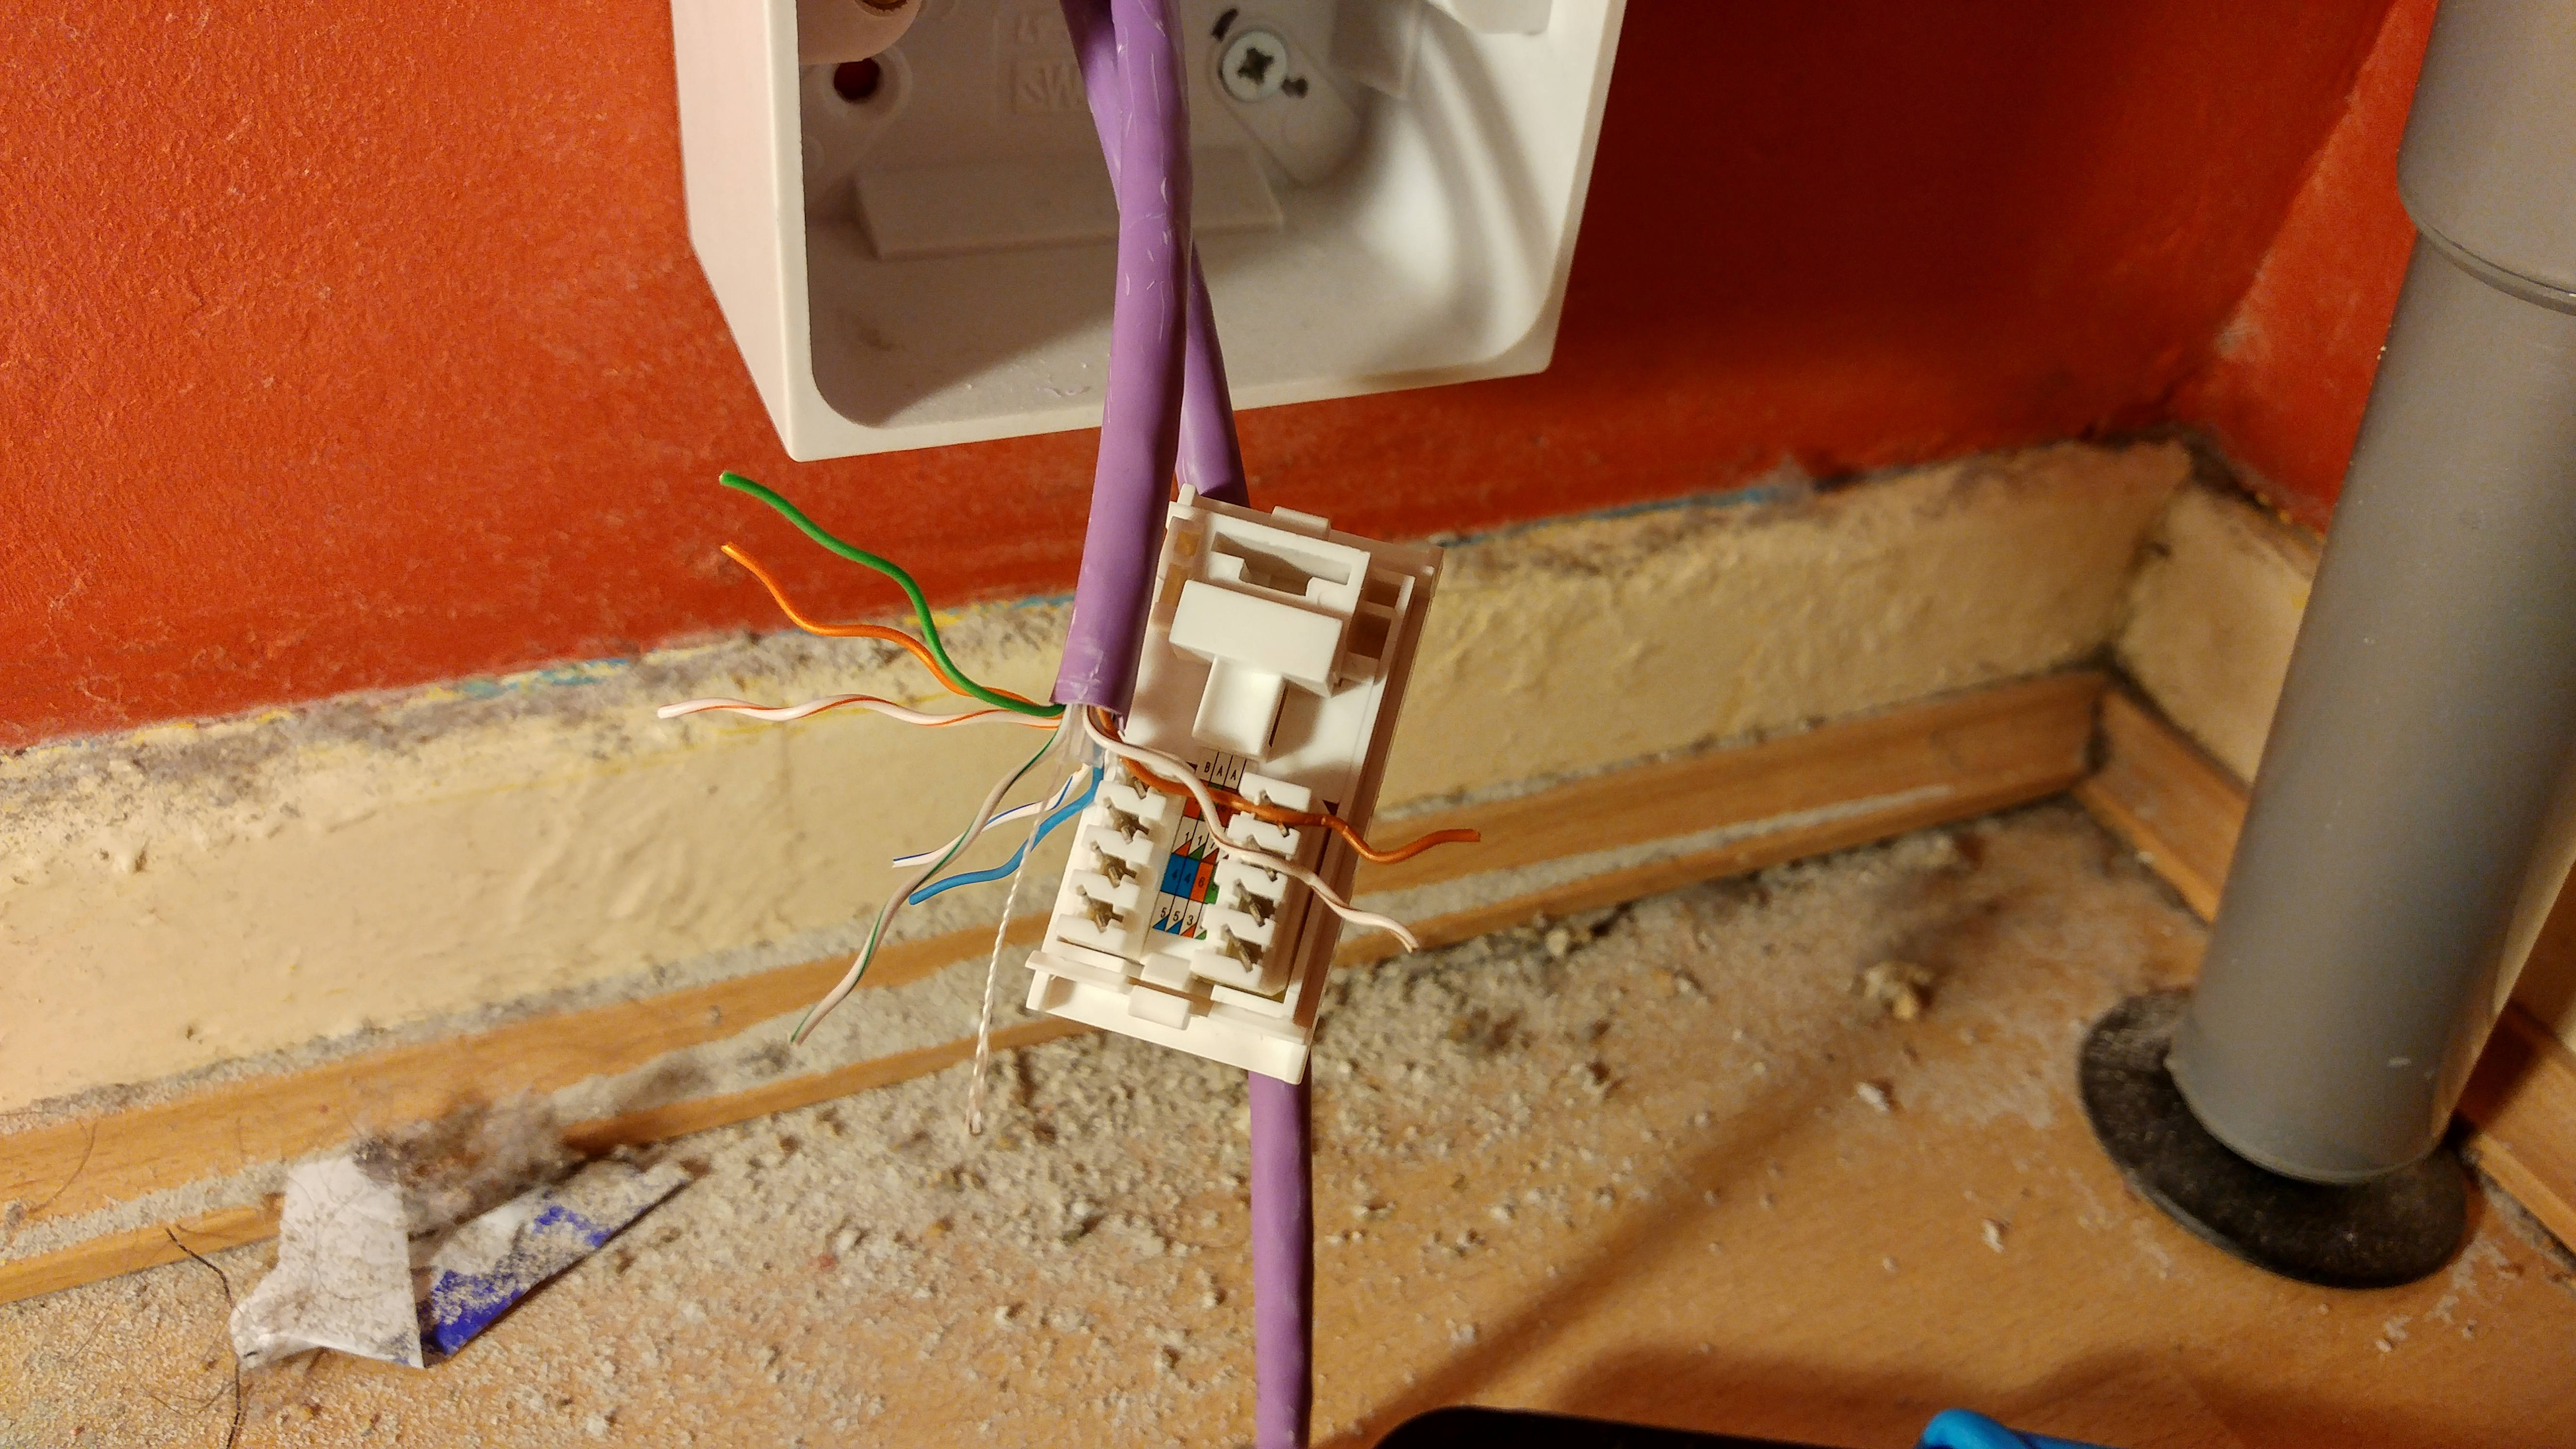
From here all that is left to do is wire all four keystone jacks (two upstairs and two down) and fit the wall plates:
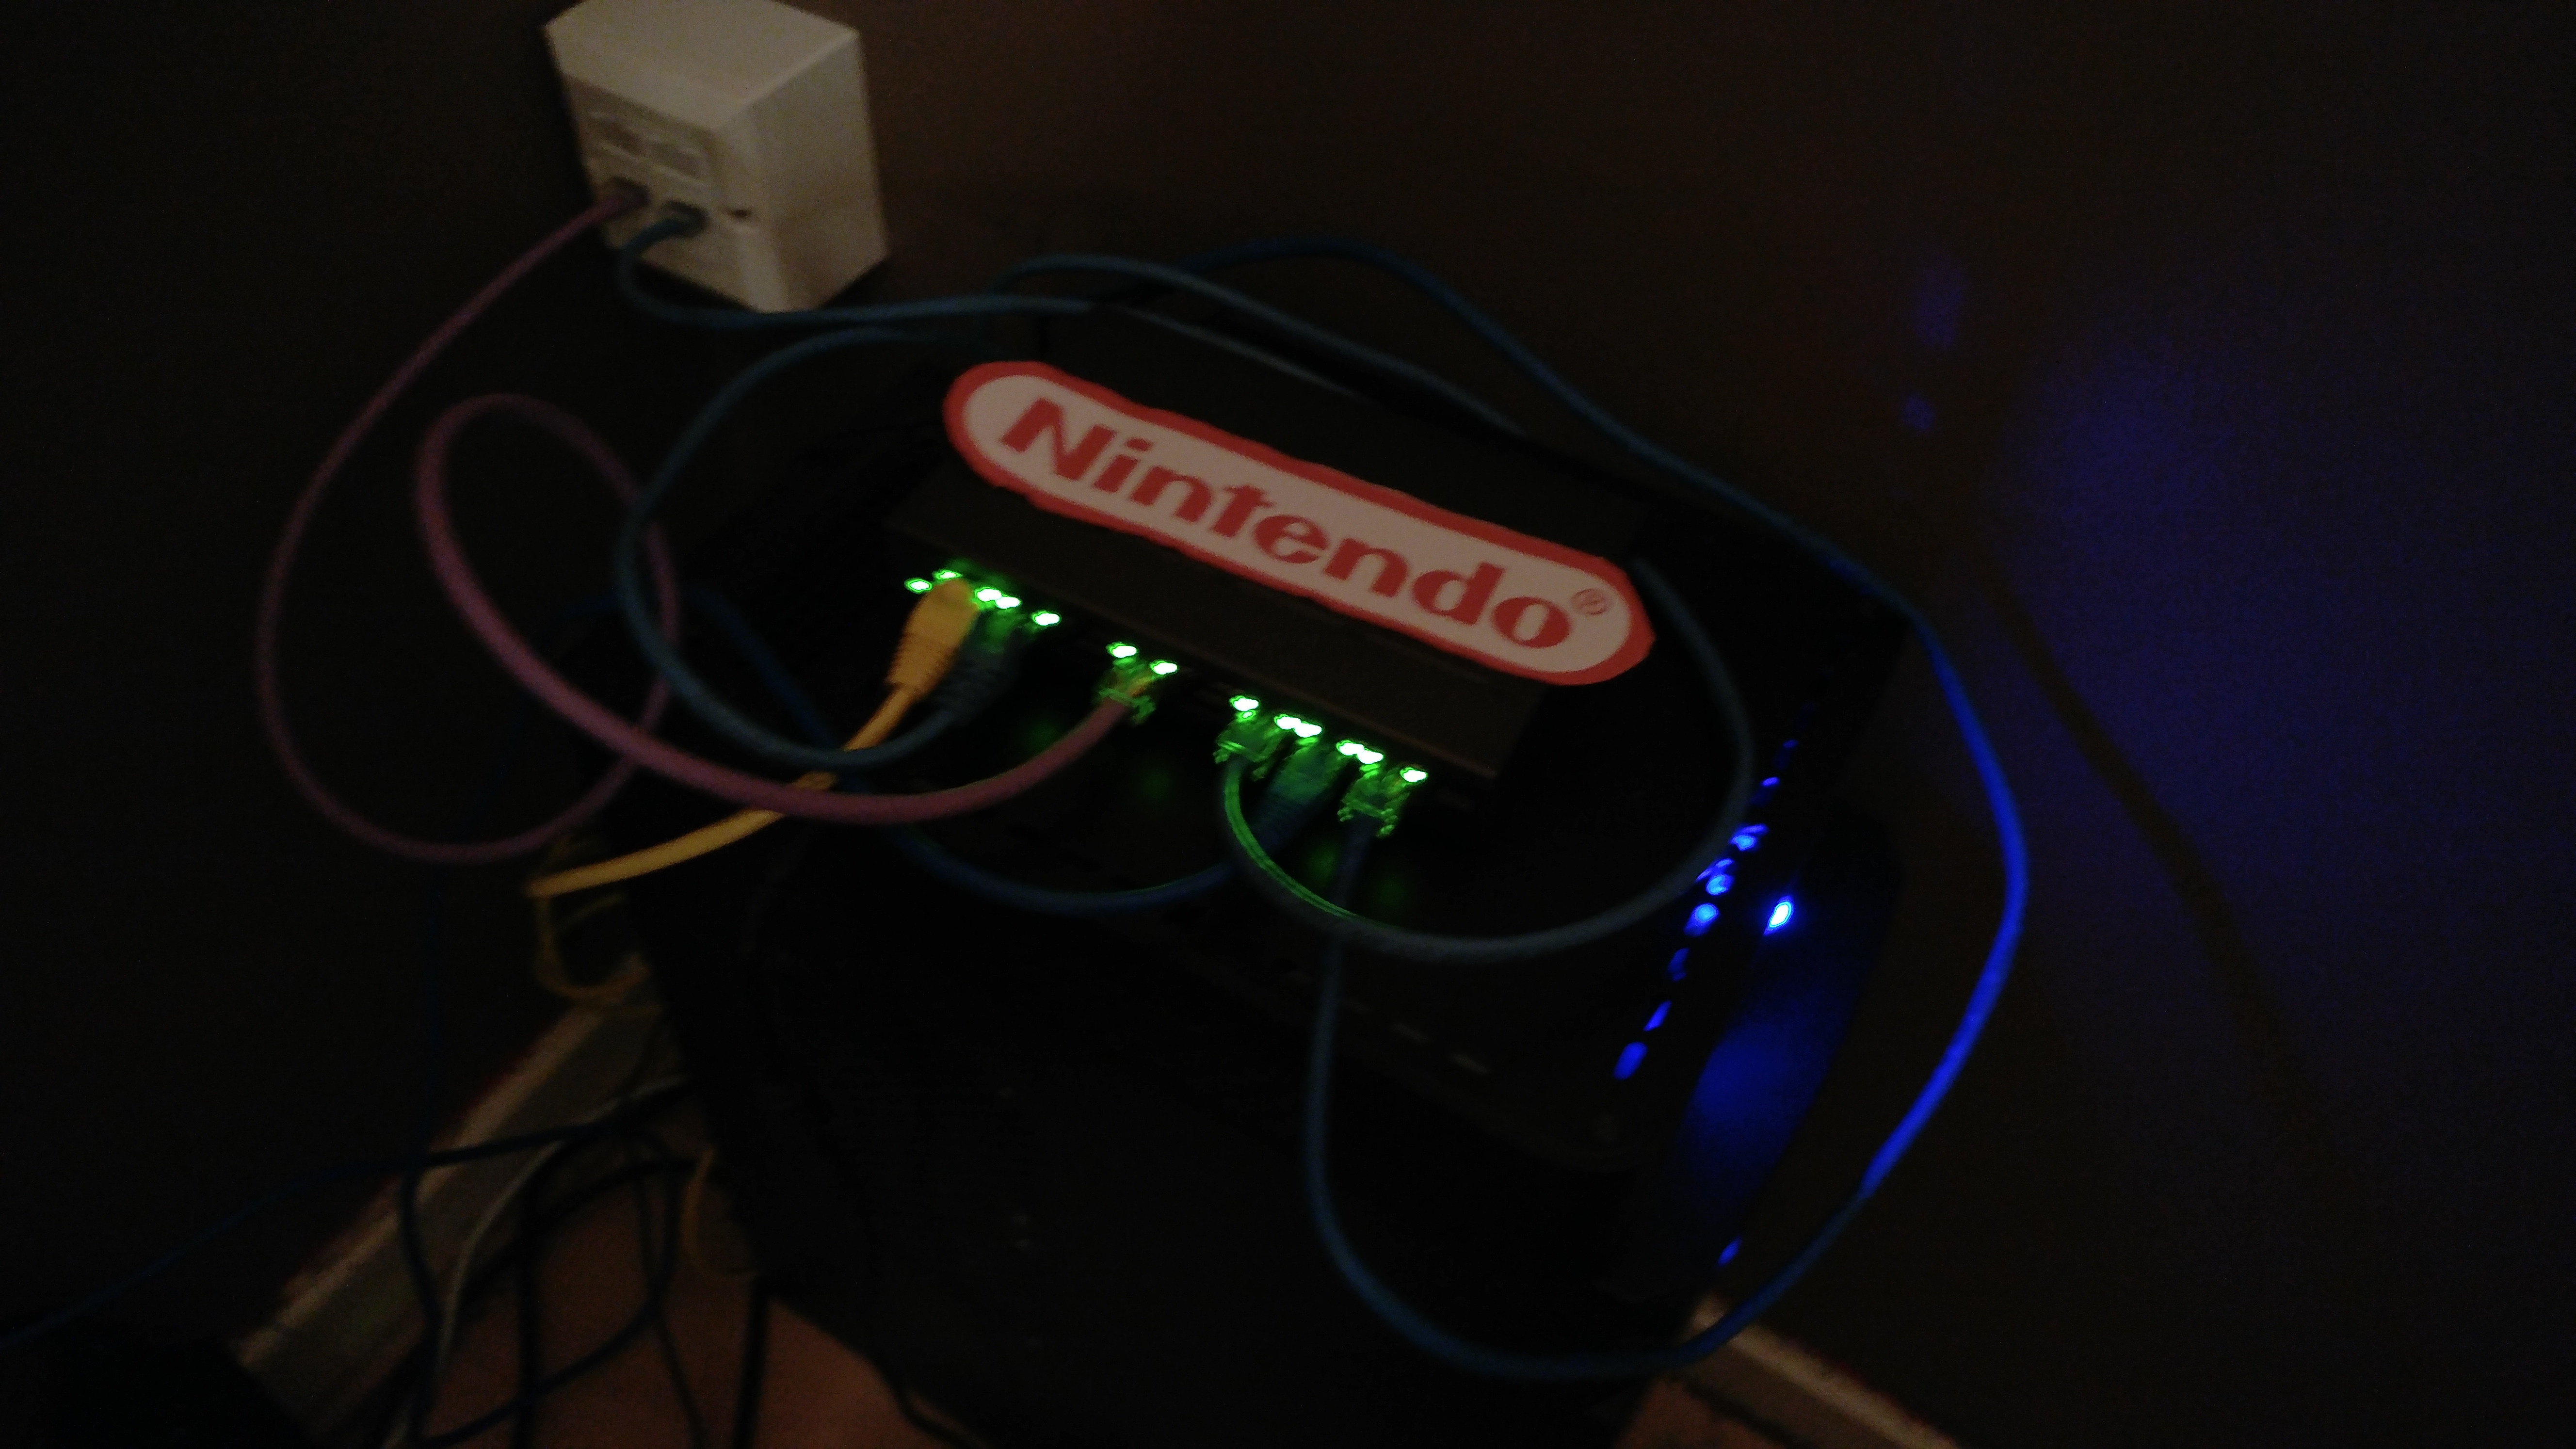
With the cable ran and tested I decided to move all of my networking gear so that it was next to the new outlet in the living room which also gave me the chance to take a photo of my router which has has been running almost none stop since it was initially setup.
Router Specifications
- AMD Athlon 5350
- ASUS AM1M-A
- 4GB HyperX DDR3 1600MHz
- Fractal Design 750W Integra
- Two TP-Link Gigabit NICs
- 10 yearish old 80GB SATA Seagate HDD mounted to the top vent
- An old Zalman Case

With my networking equipment moved this has been its current configuration up until a couple of days ago when I rewired the switch (please ignore my shameless Nintendo Switch joke)
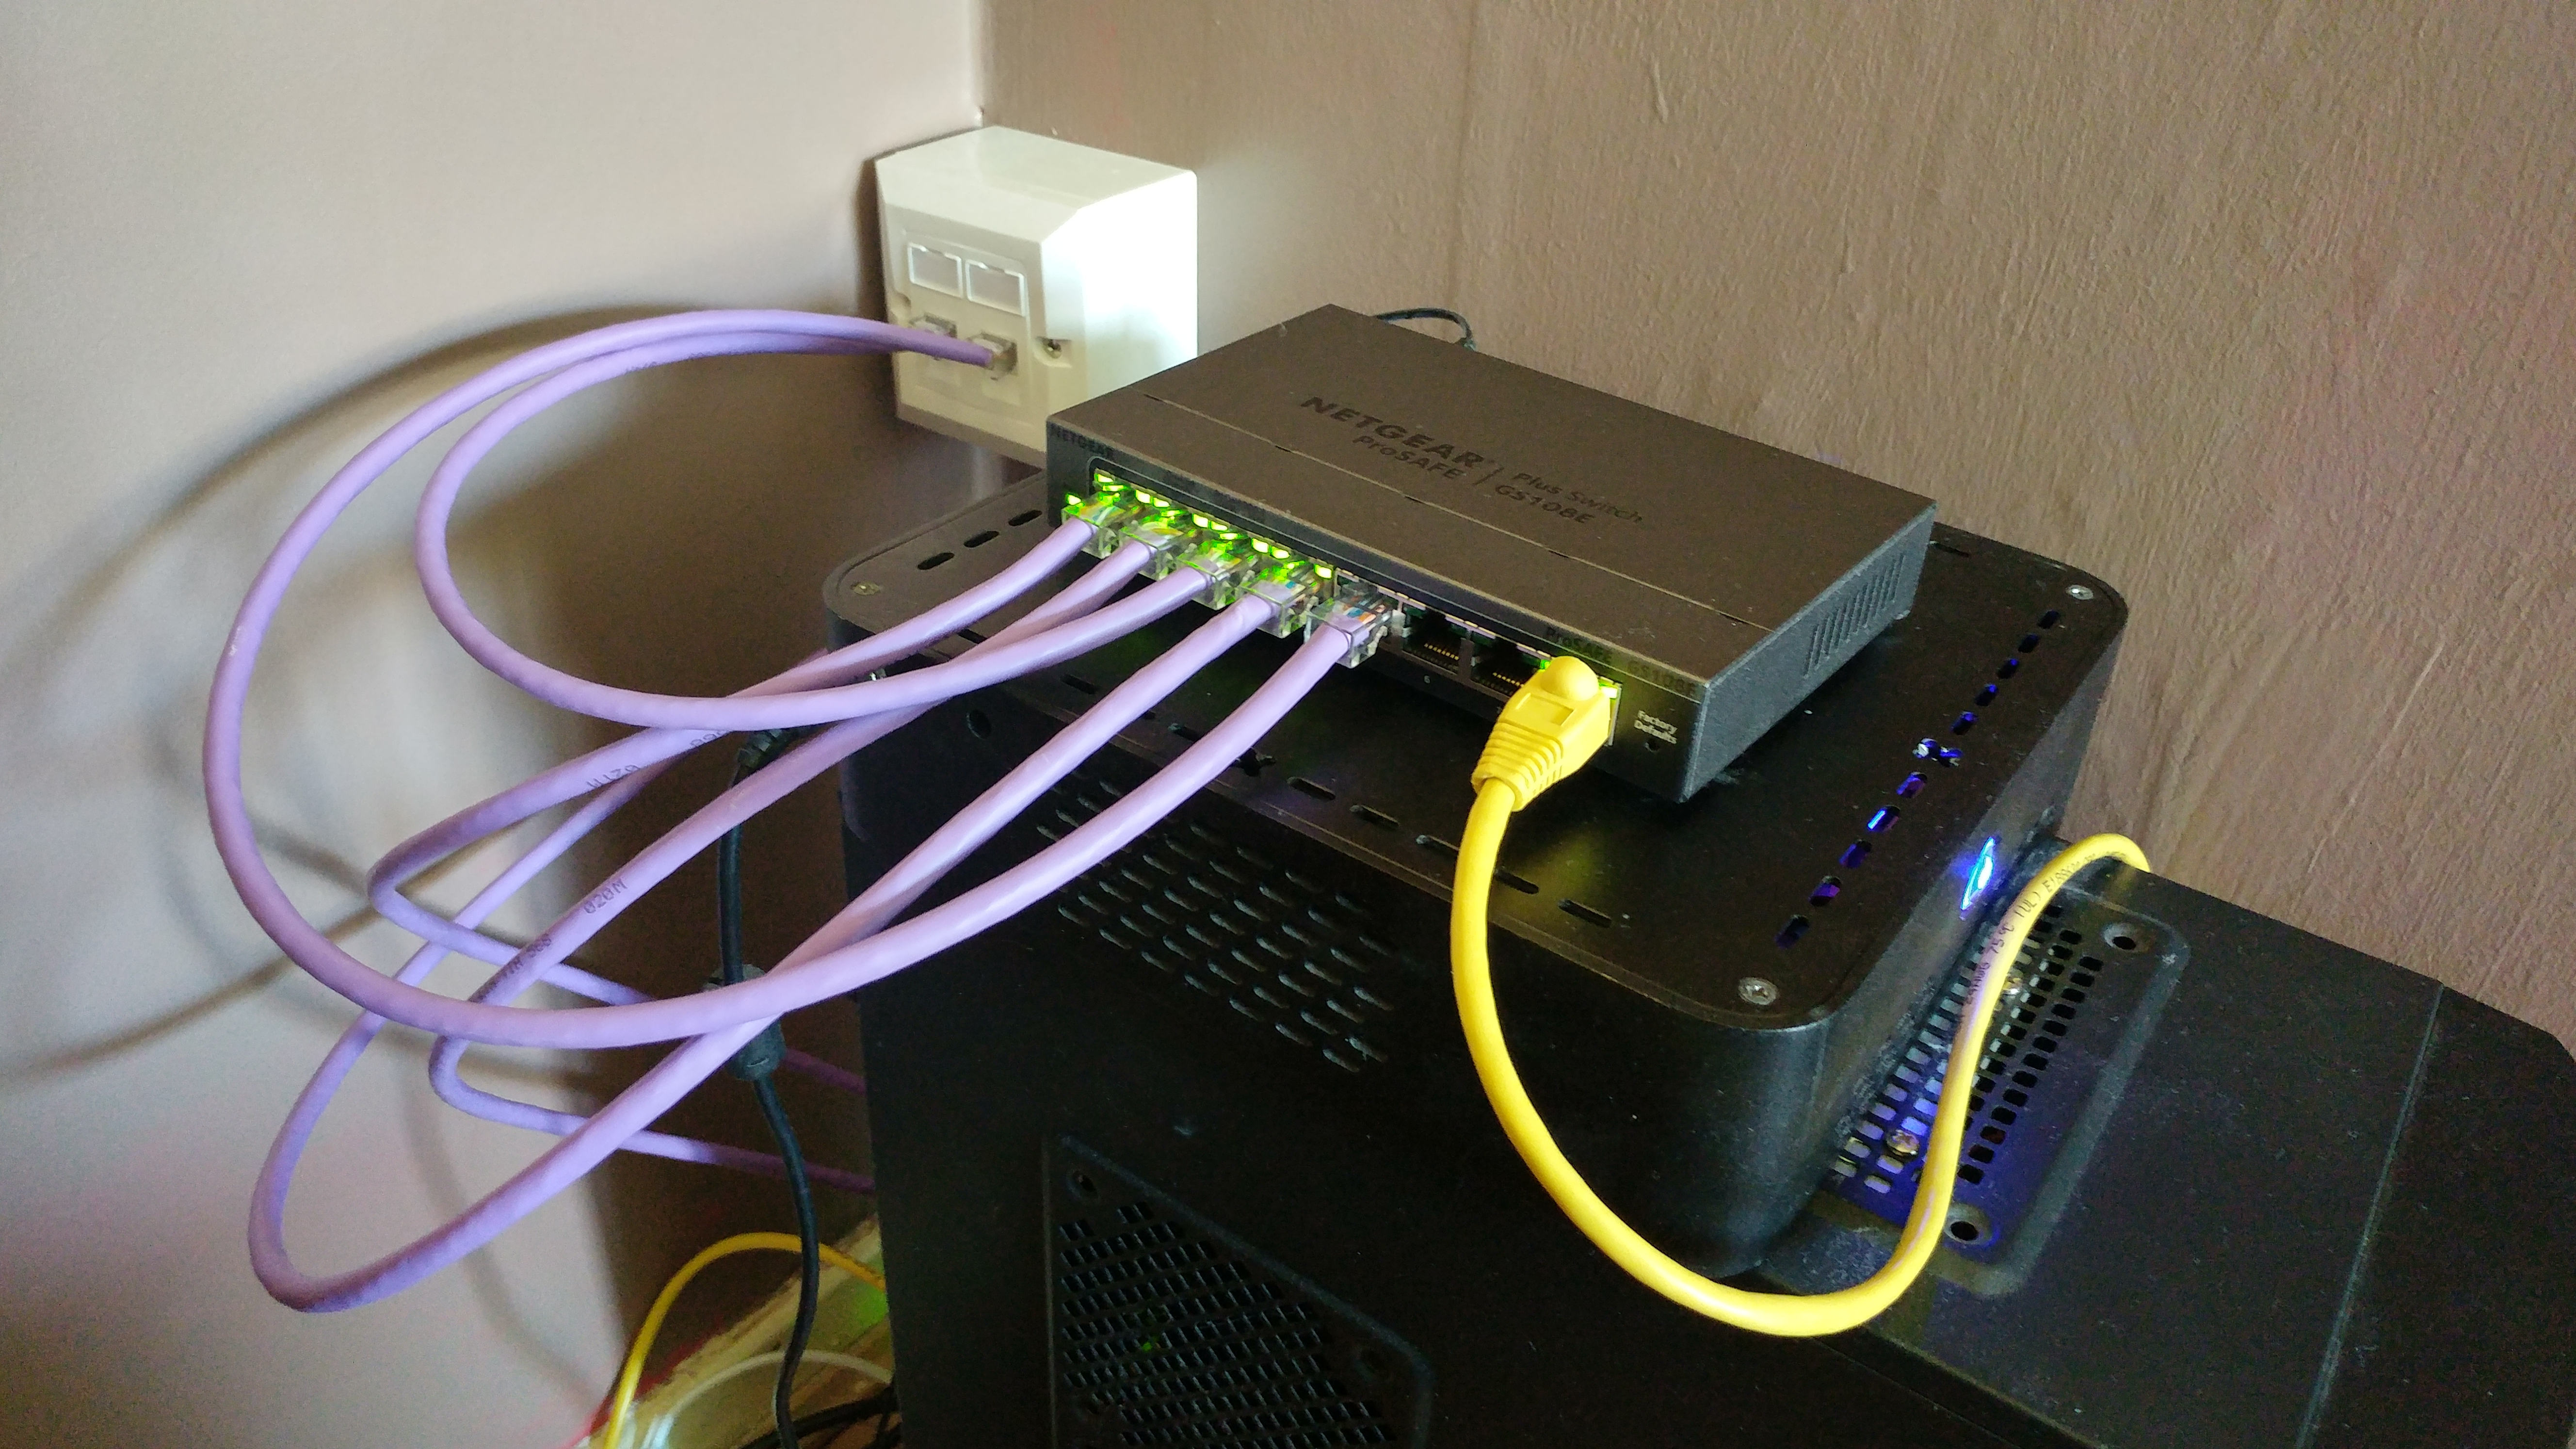
This is now the current setup with the cables all redone in shorter CAT6 runs with the yellow CAT5e cable running to my Unifi AP.
VLAN Setup
With rewiring the switch I made some changes in how VLANs were setup on the switch:
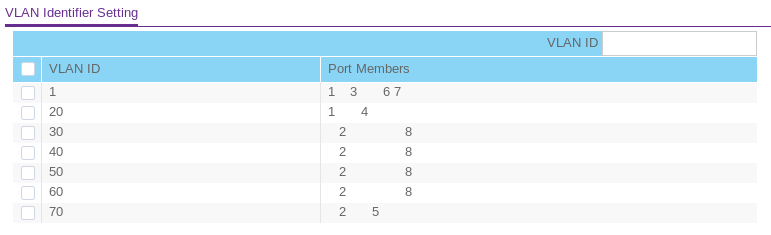
Here is a diagram of the port tagging I've used, Ports 1 and 2 go to my pfSense router, port 3 goes upstairs to a dumb switch which has my two desktops connected, port 4 is my server, port 5 also goes upstairs to another dumb switch for my brothers devices, ports 6 and 7 are unused and port 8 is for my Unifi AP:
| VLAN ID            | 1    | 2    | 3    | 4    | 5    | 6    | 7    | 8    |
| :----------------: | :--: | :--: | :--: | :--: | :--: | :--: | :--: | :--: |
| 1  (LAN)           | U    |      | U    |      |      | U    | U    |      |
| 20 (DMZ)           | T    |      |      | U    |      |      |      |      |
| 30 (WiFi)          |      | U    |      |      |      |      |      | U    |
| 40 (Isolated WiFi) |      | T    |      |      |      |      |      | T    |
| 50 (Guest)         |      | T    |      |      |      |      |      | T    |
| 60 (IoT)           |      | T    |      |      |      |      |      | T    |
| 70 (Isolated LAN)  |      | T    |      |      | U    |      |      |      |
Captive Portal
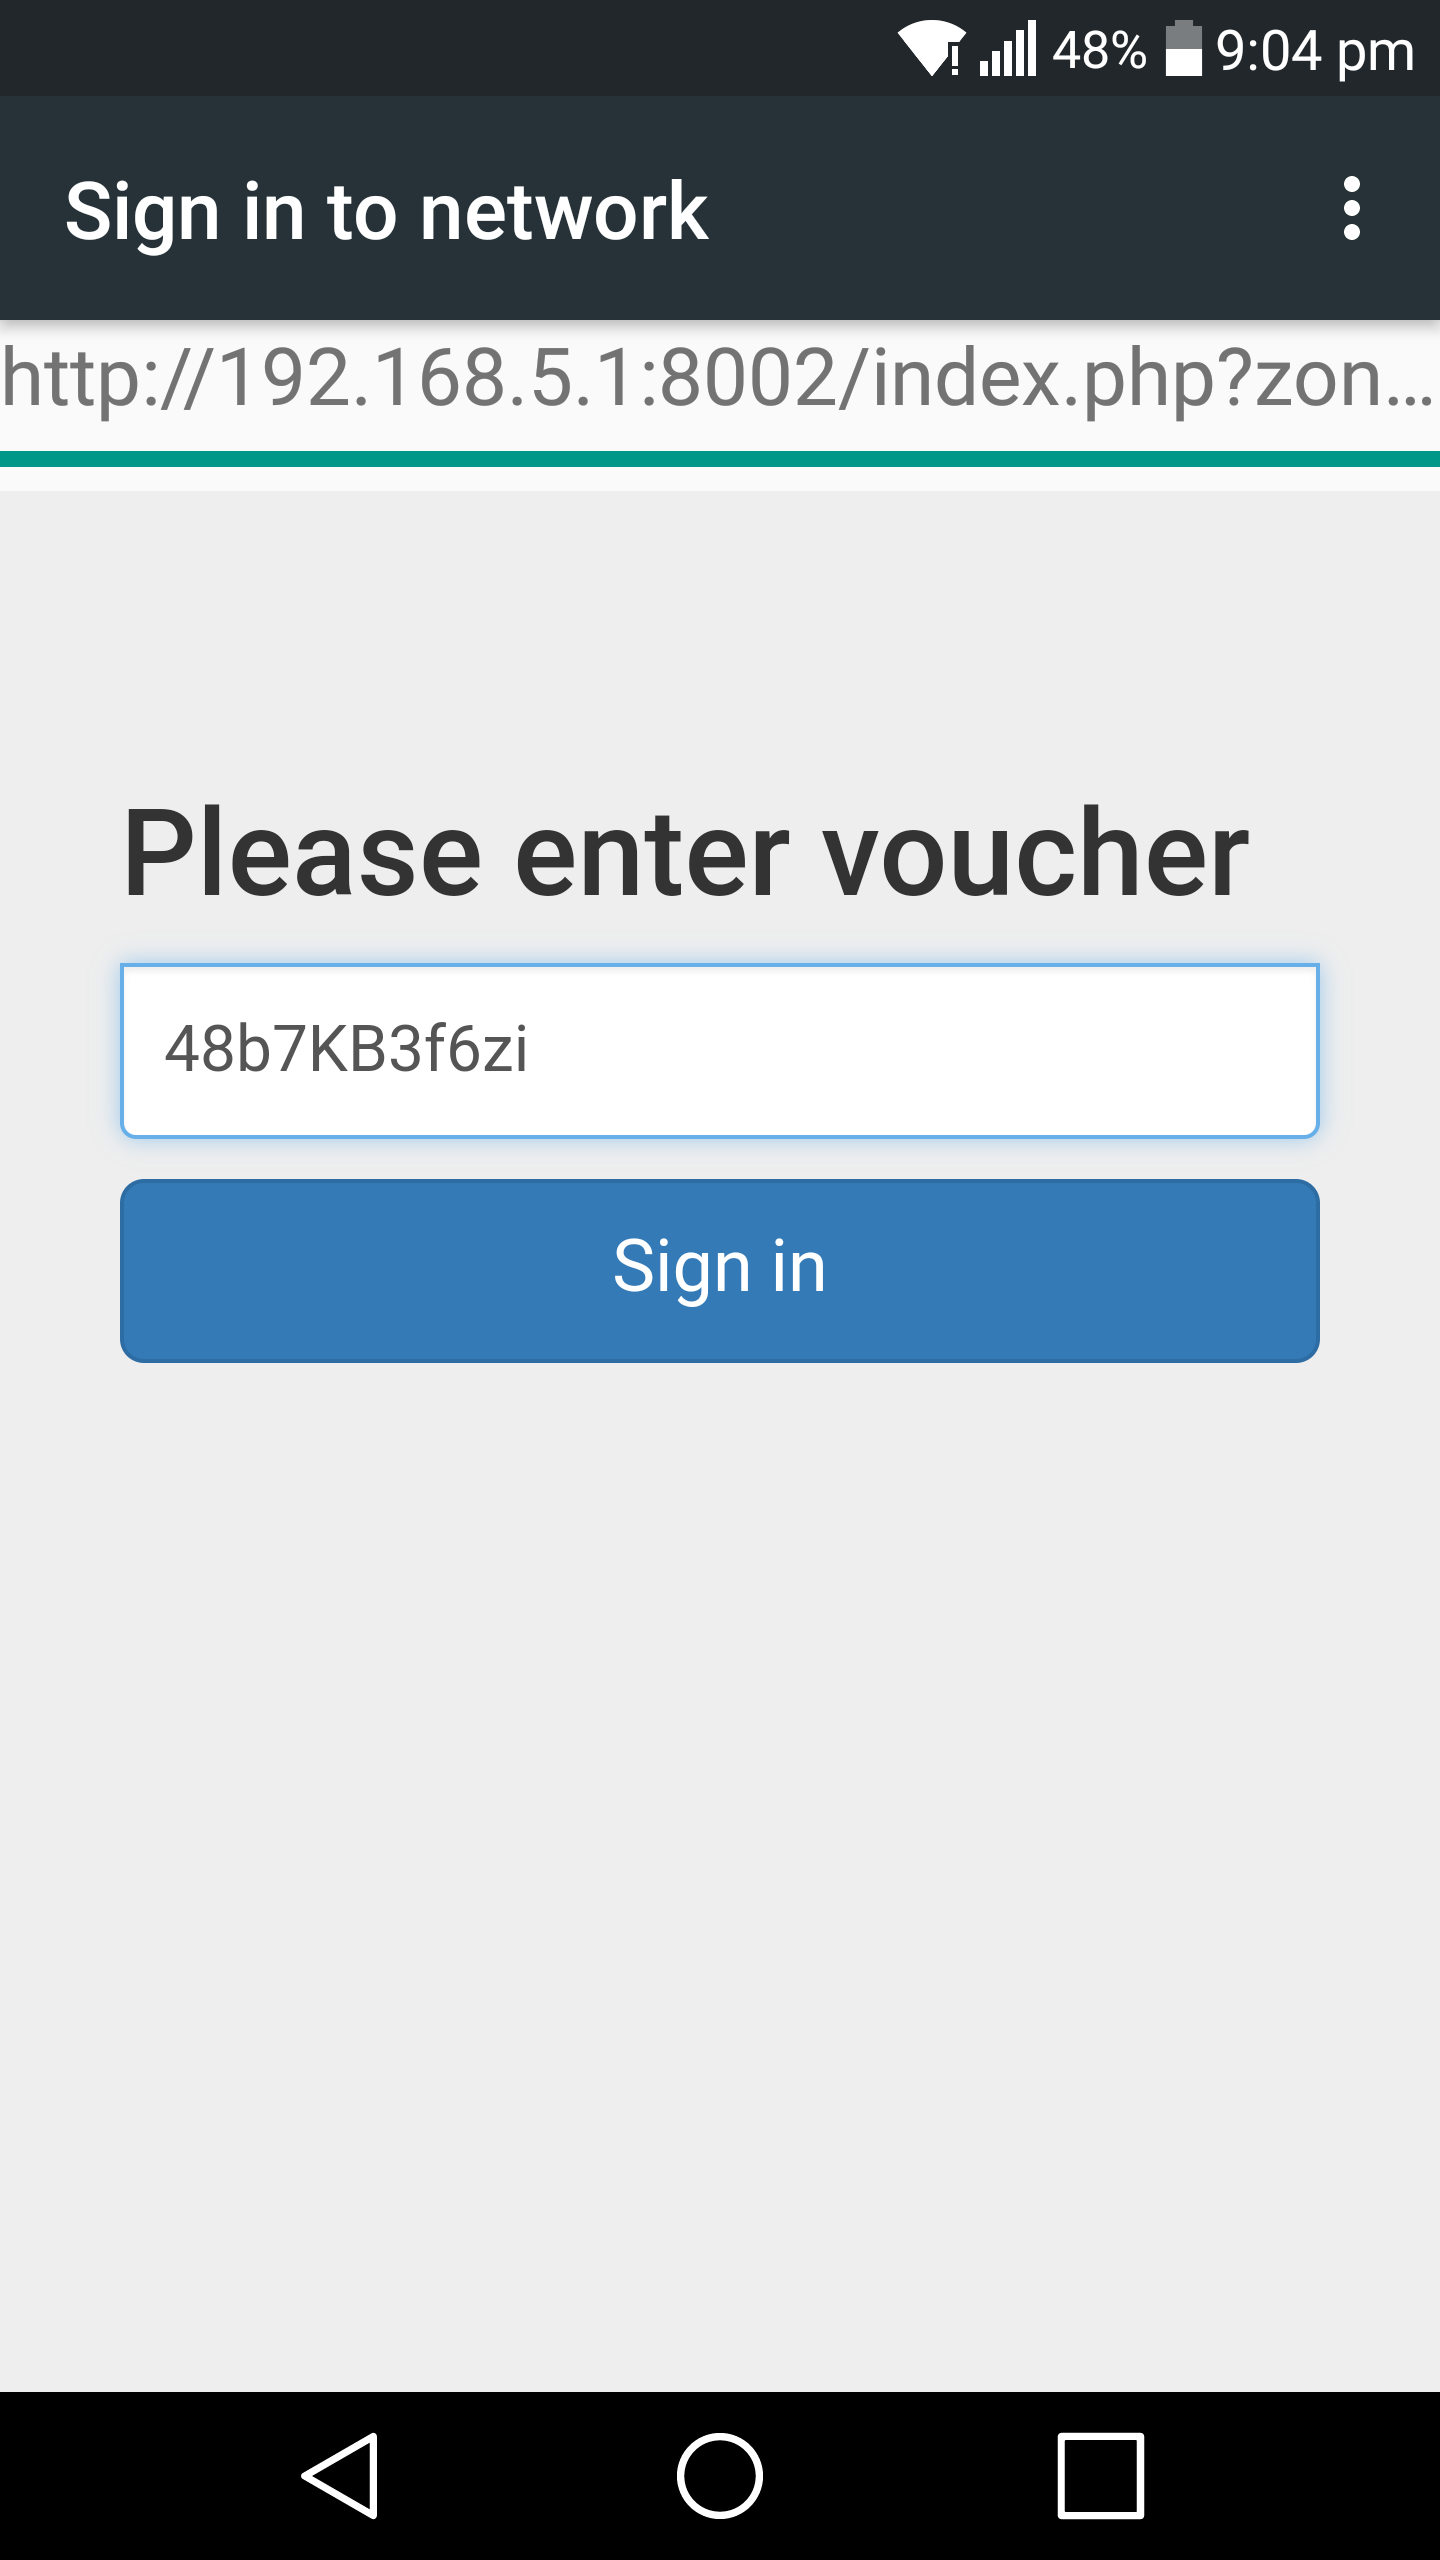
I have also setup a captive portal on my guest WiFi network to give me greater control over who uses it and when, the SSID still uses WPAPSK2 with the captive portal acting as an additional level of authentication. This is because my sisters friends like using the guest WiFi network and I'd rather not change the passphrase on a regular basis. With the captive portal they have to enter a voucher code to access the network which is also rate limited to 5mbps down and 2mbps up to stop them saturating the network for legitimate clients.
So whats next?
I have several improvements planned for upgrades and changes I want to make in the future which includes, migrating my server from Ubuntu 16.04 to either Fedora Server or CentOS 7, this is because I have recently switch to Fedora on most of my other machines and want to change the server to reflect this. At the moment I am leaning towards CentOS as it has a longer support cycle but I am currently testing both as VMs on my main system. I am also going to setup up HA Proxy and Acme to manage my LetsEncrypt certificates on pfSense to offload some of the tasks from my server and hopefully make it easier to manage.
I also want to write tutorials on the forums about some of the basics of using pfSense and how to setup some of the more useful packages.
Lastly I would like to commend anyone who has read this far and thank you for taking the time to read it.