Introduction
This will be a wiki/how-to that will come out of the CentOS 8 Week 1 thread. It includes general system configuration as well as selections from OpenSCAP’s implementation of the DISA STIG for RHEL 7 (the update for RHEL/CentOS 8 has not been published yet). A few additional items are taken from various sources and are cited.
Look out for Fedora caveats which begin with ###.
Installation
I am installing CentOS to a host via PXE network booting, but the steps should translate to booting from the DVD ISO as well. Currently the minimal boot ISO sets the Source Software incorrectly, but this should be fixed soon. If you do want to use the minimal boot ISO, you can manually configure the source.
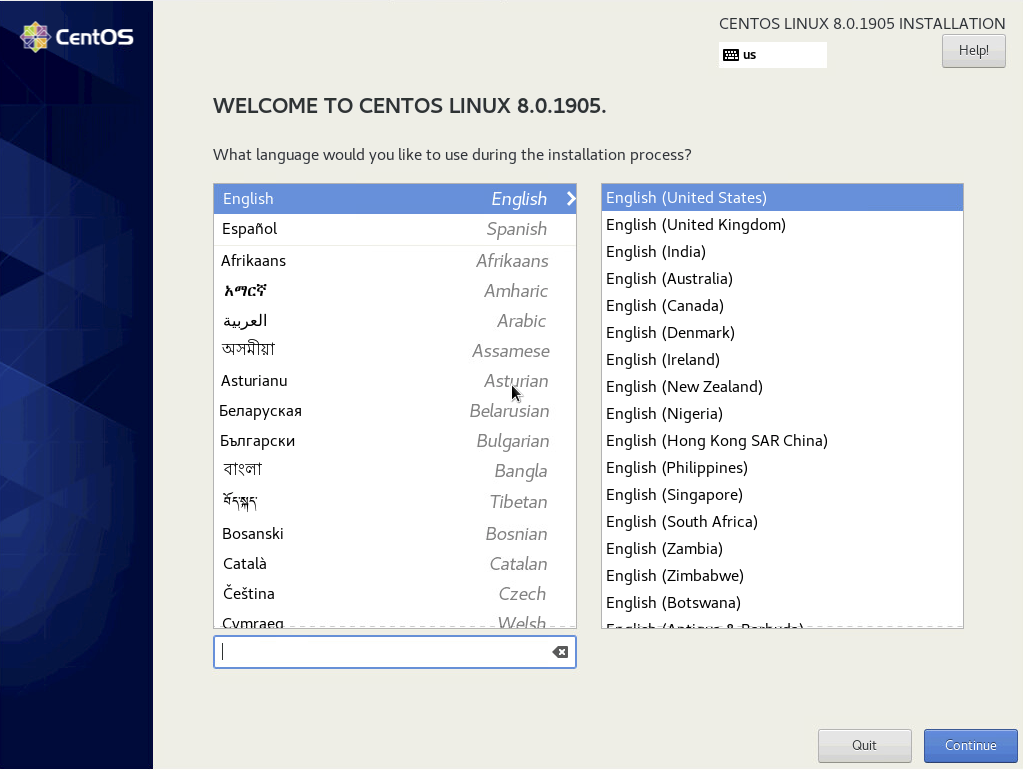
Localization
Self-explanatory. Choose your Language and dialect. Then click Continue.
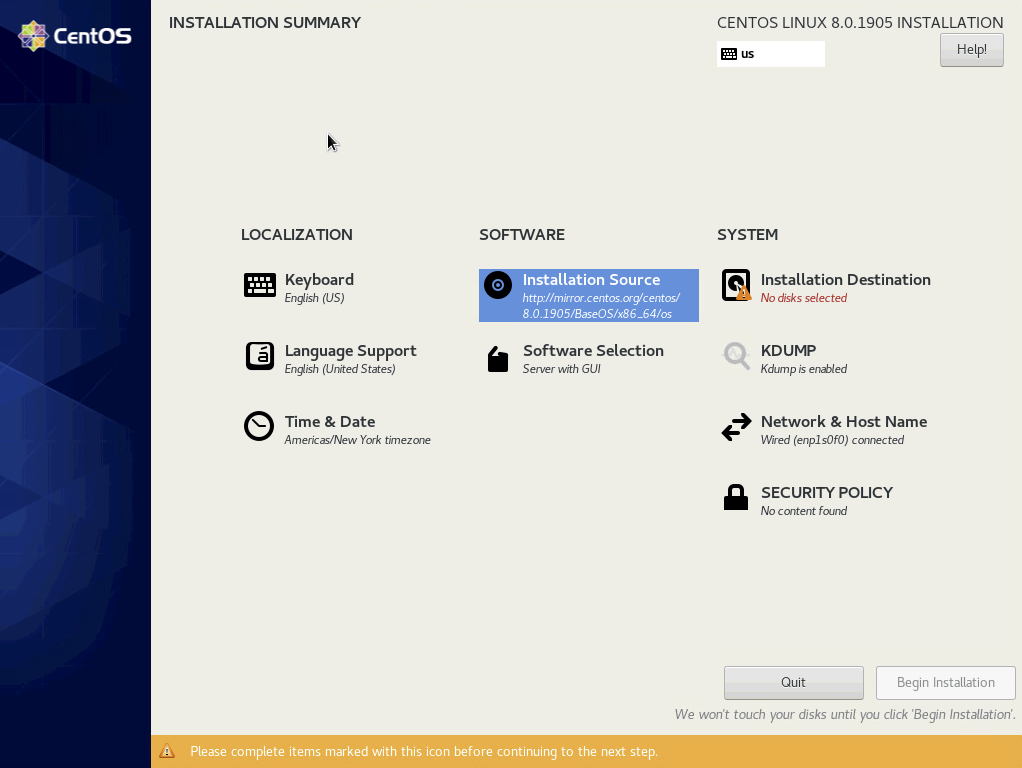
You will arrive on the Installation Summary where most of the configuration will take place.
Network
Addressing and Host Name
Click on Network & Host name
Enable an interface and configure it according to your environment. Set the host name and click Apply.
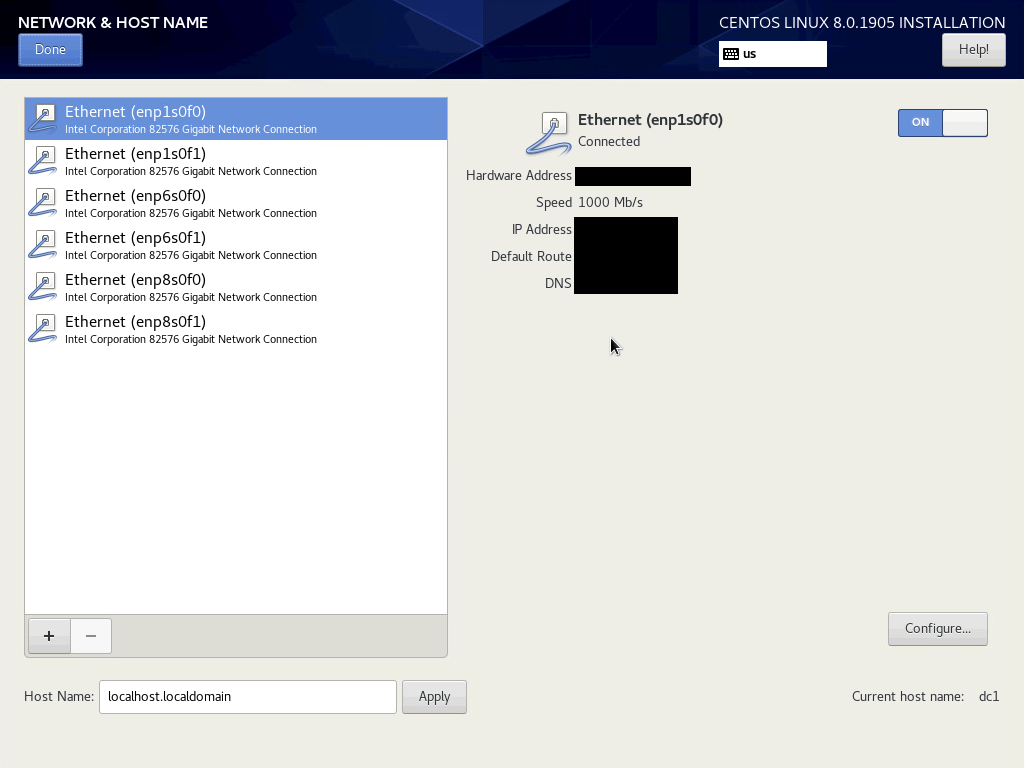
If you already have a DHCP reservation and a domain name in place like I do, you should see your short hostname on the right (dc1 in my case). If you are happy with that host name, you do not need to manually set it.
When you’re finished, click Done.
NTP
Next, click on Time & Date. Enable Network Time and configure your region and city if they aren’t already. Then click on the gear icon.
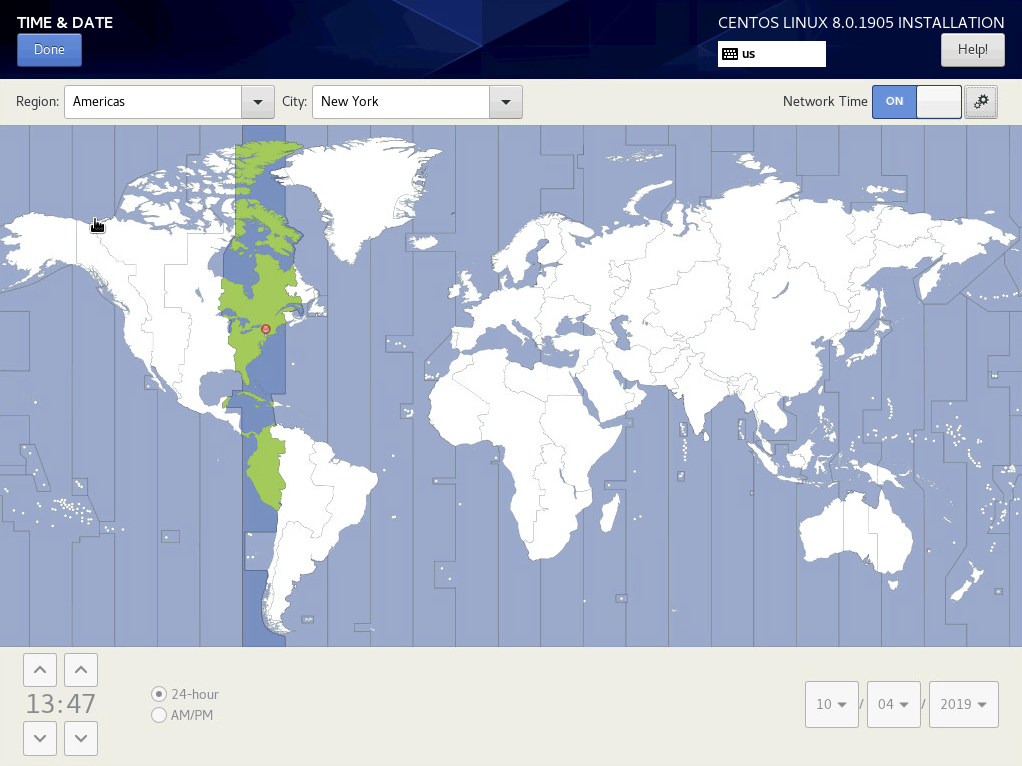
Ensure NTP servers are configured and there is a green check mark under Working. If your DHCP server is supplying NTP servers, they should show up here.
Interestingly, my DHCP server supplies an IP address for NTP, but the installer has automatically performed a reverse lookup and has filled in the FQDN.
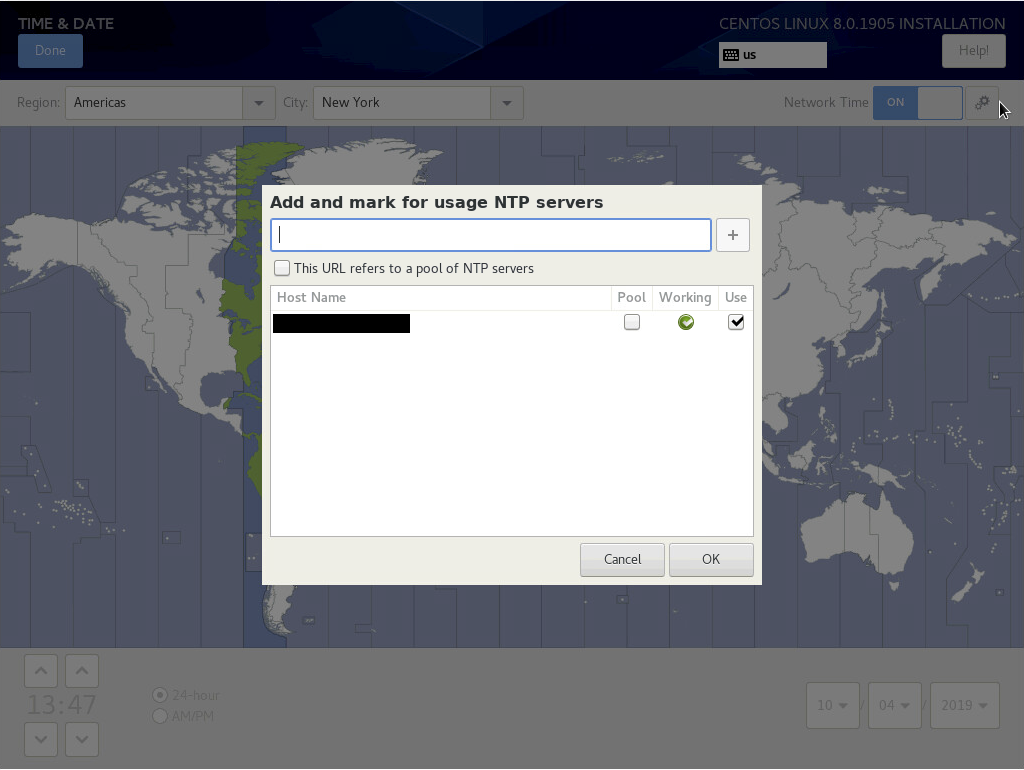
Click OK and then Done.
Software
Click on Software Selection and choose Minimal Install. Do not select any additional software. We want to start off as minimally as possible. We will install packages later as we need them.
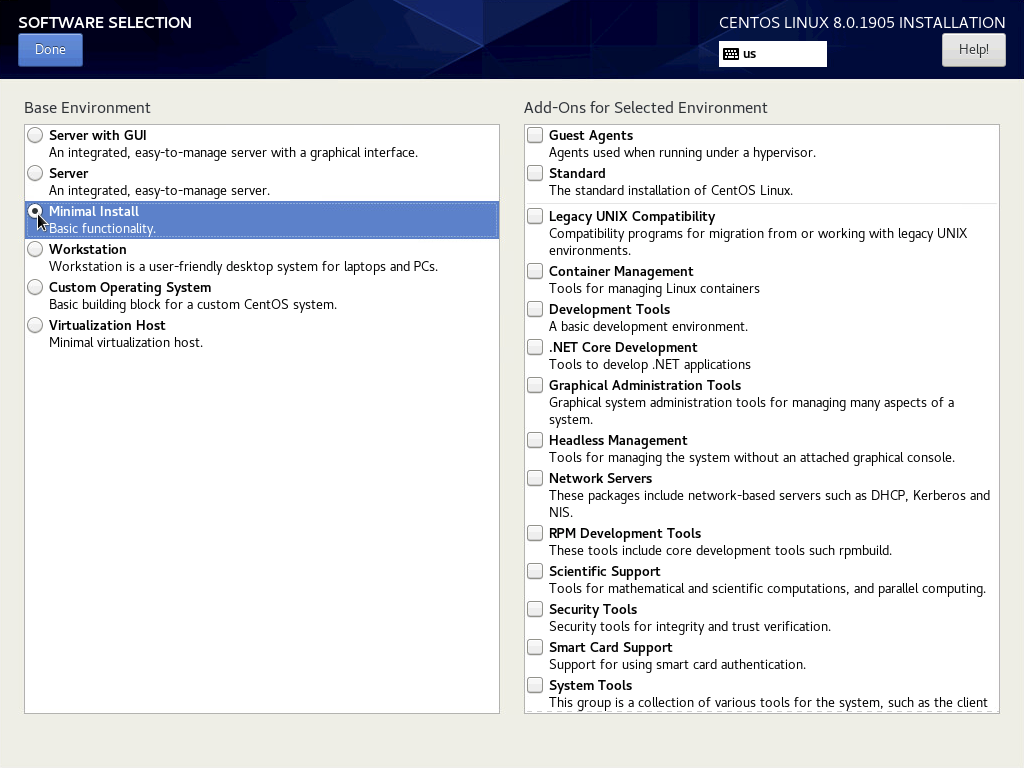
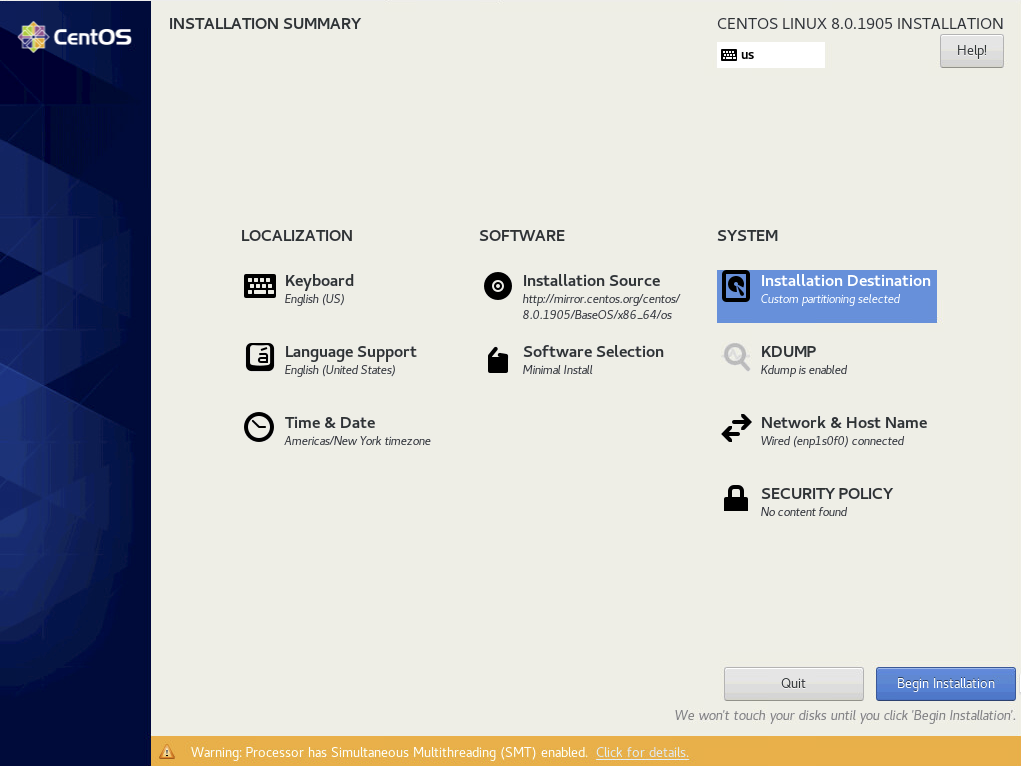
Click Done. Then click on Installation Destination.
Storage
Drives
Click on the drives you want to install CentOS onto (a checkmark will appear). Select Custom. Then click Done.
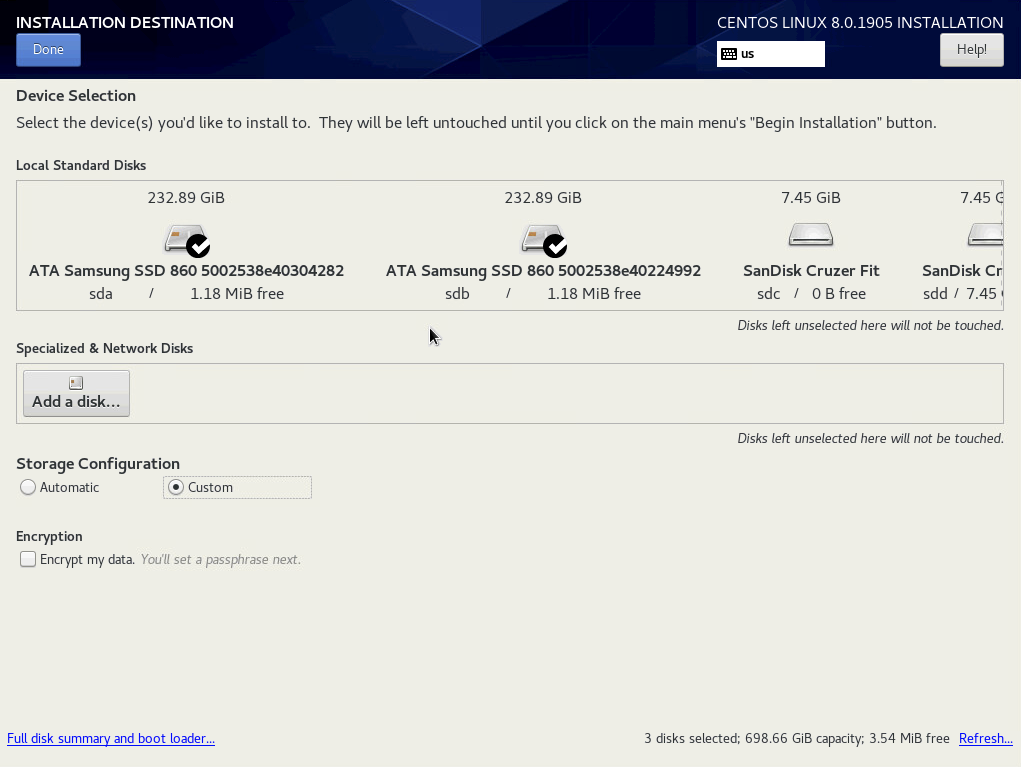
In my case, I selected 3 identical SSDs which I will configure in a 3-way mirror. The third drive is off screen to the right so it is not shown in the screenshot. For whatever reason, 2 USB drives were loaded before the 3rd drive.
Please note that we are not using encryption. I am prioritizing unattended rebooting over encryption because this server is in a physically secure location. I believe it is possible to use encryption in conjunction with a yubikey or similar to achieve unattended booting, but that is somewhat self-defeating and is beyond the scope of this tutorial. However, if your server is not physically secure, you should consider sacrificing unattended reboot for encryption.
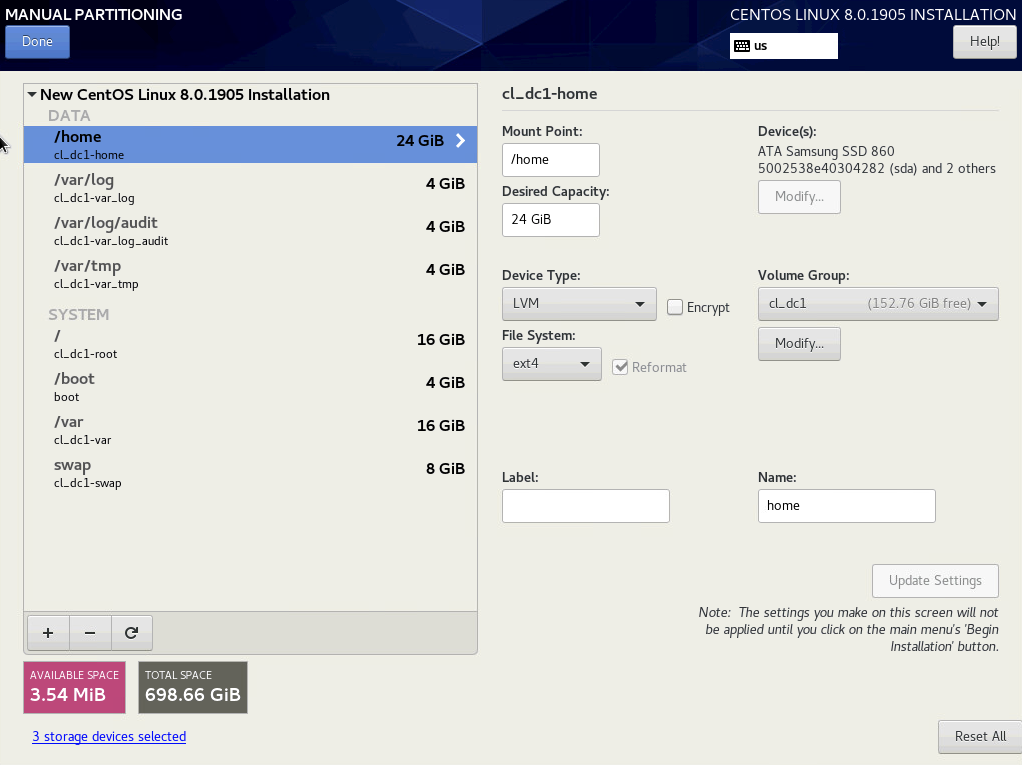
RAID, Volumes and Partitioning
As mentioned, I am configuring a 3-way mirror. I am using thick-provisioned LVM volumes and all partitions are EXT4. I am opting for EXT4 because it is more common across Linux as a whole and because the '/boot` partition is now EXT4 by default. While other partitions are still XFS by default, I want to limit the number of filesystems on the system as much as possible.
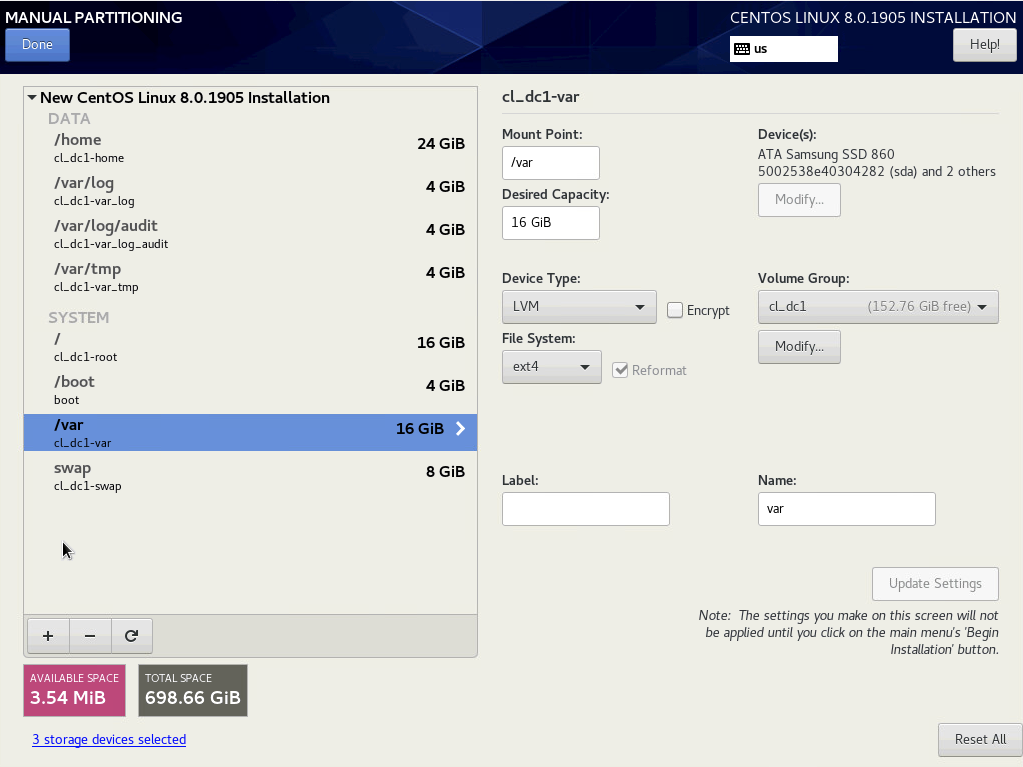
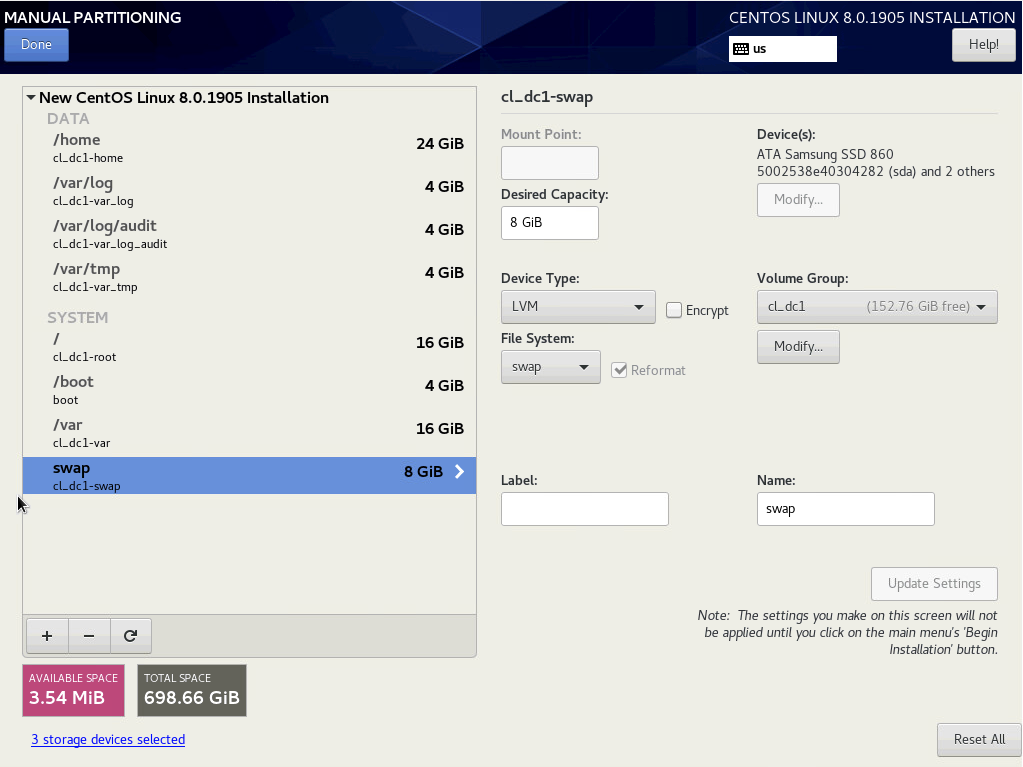
I am configuring separate partitions for /, /boot, /home, /var, /var/log, /var/log/audit, /var/tmp and swap. See the references below for the reasoning behind each. I’m using relatively small capacities for each to leave room for snapshots, and because it is trivial to expand them later with LVM (with the exception of /boot).
I recommend using blank, unformated drives with no pre-existing partitions. The installer does offer to delete partitions for you if you click on the -, but it currently causes a crash during installation.
Click on the + to add each partition.
/home
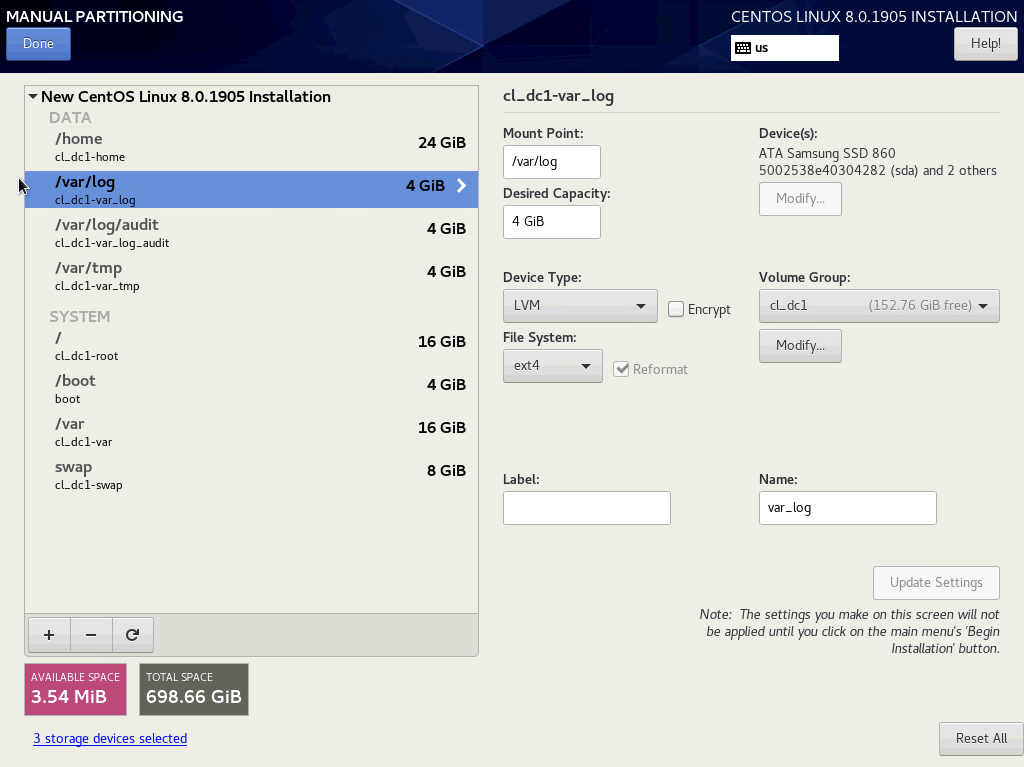
/var/log
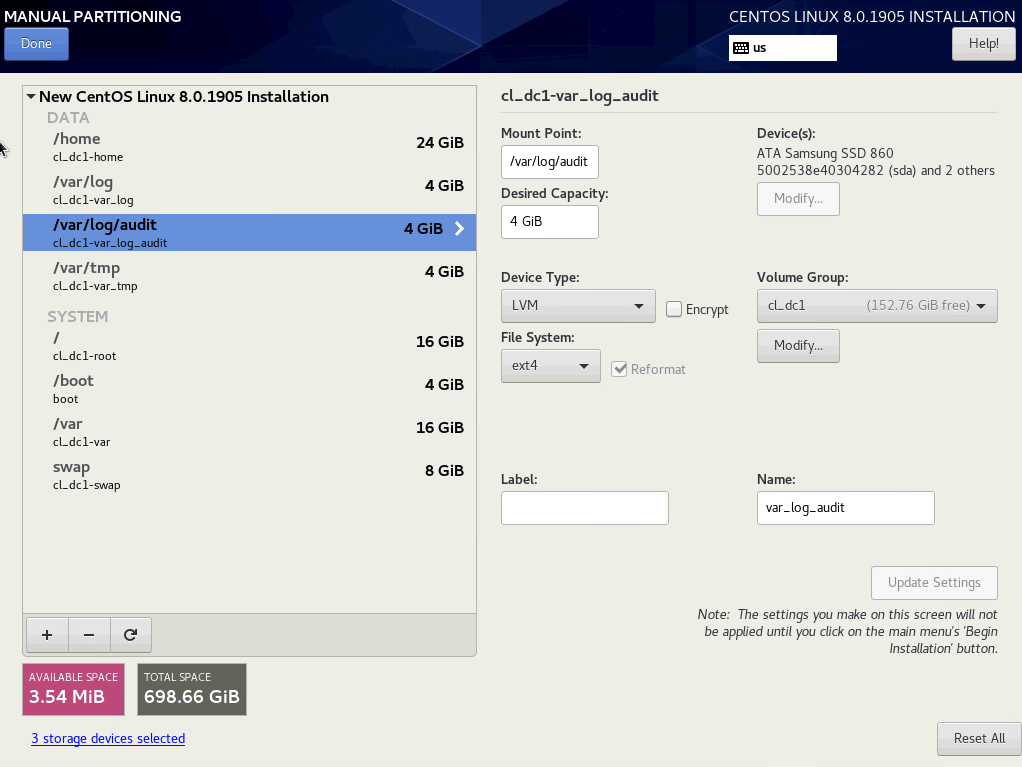
/var/log/audit
/var/tmp

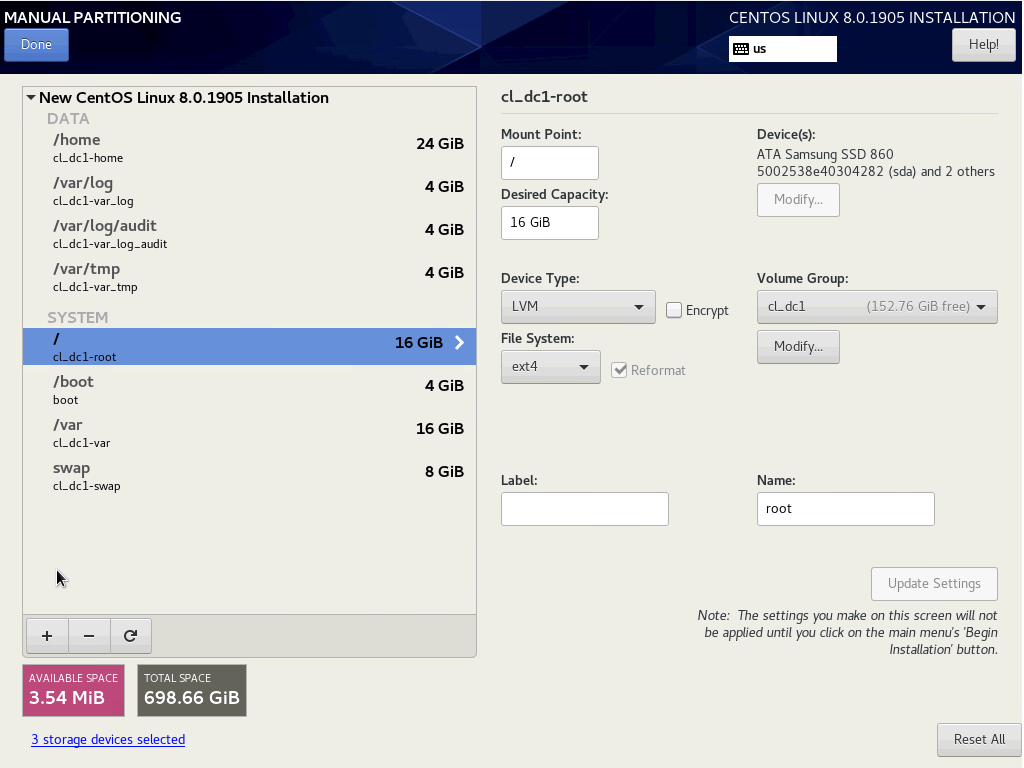
/ (root)
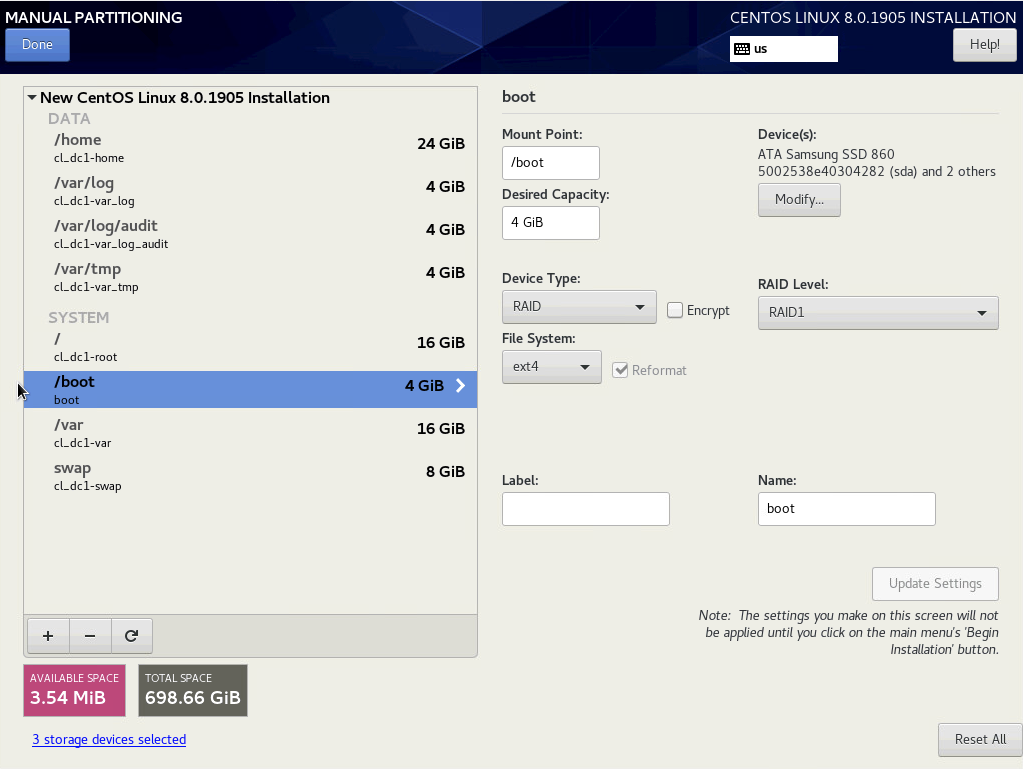
/boot
/var
swap
Click on Modify and select RAID 1 and Large as possible (forgot to take the screenshot).
Click Done and agree to the changes.
Once you return to the Installation Summary, click Begin Installation
Reference: OpenSCAP > Disk Partitioning
Reference: SecScan > Filesystem Configuration
User
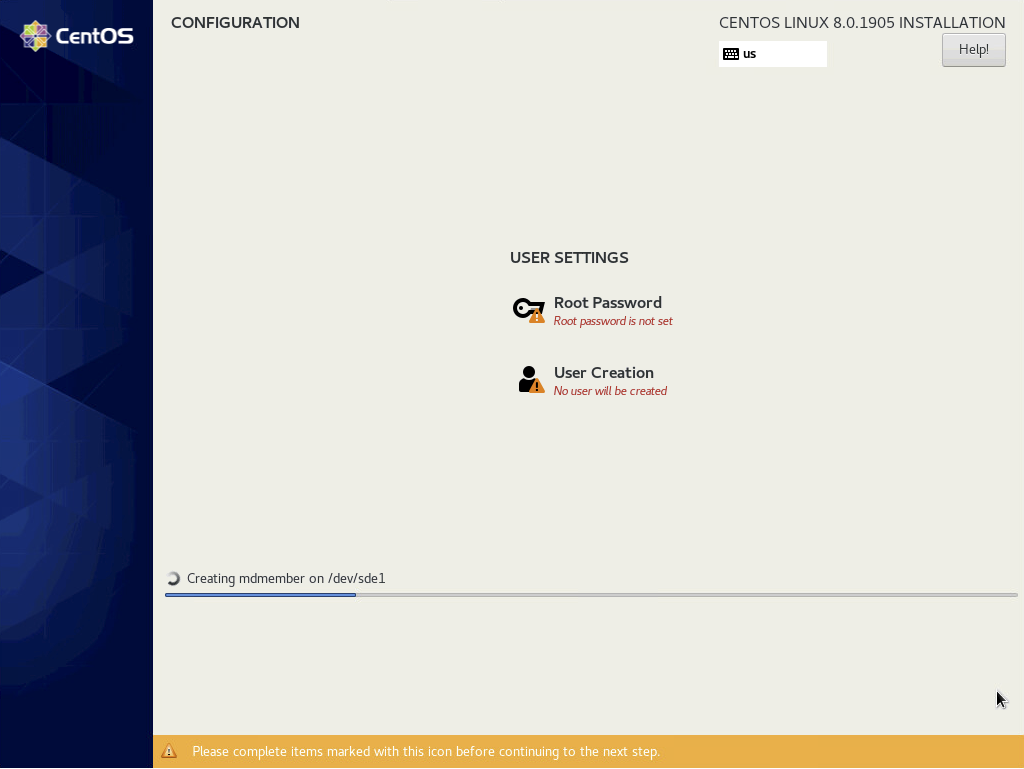
Click on User Creation
Use a reputable random word generator to give your user a random name and strong password. Select Make this user administrator, and then click Advanced.
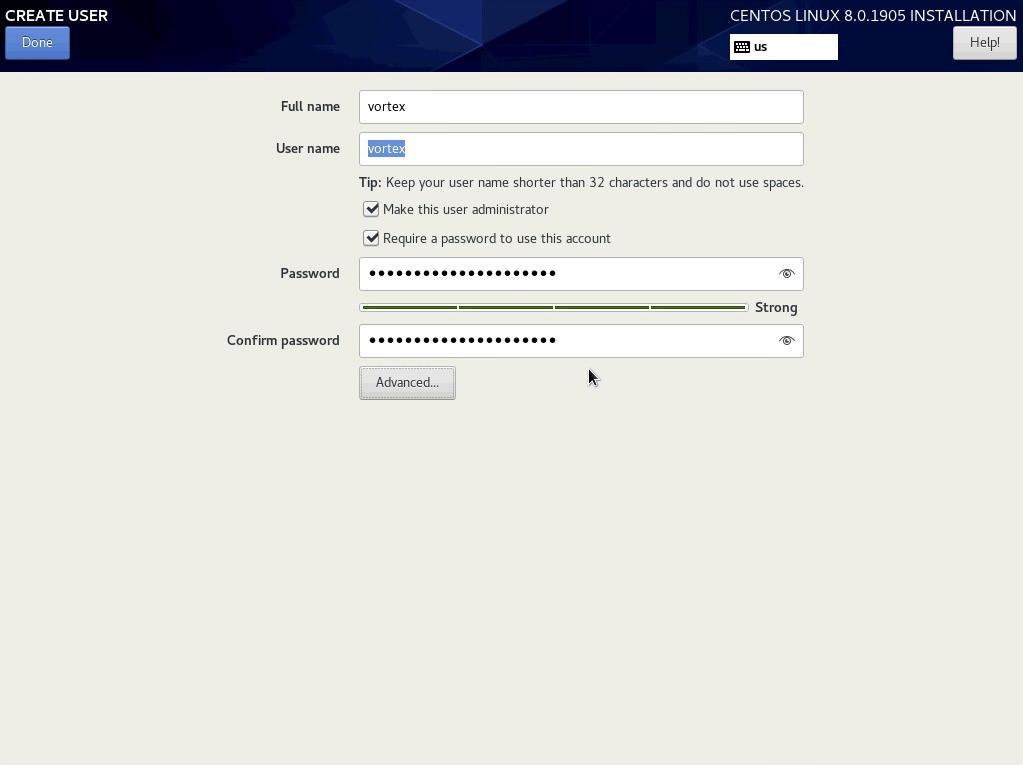
Change the user ID and group ID to 5000, and click Save Changes. See: Redhat Product Documentation > Chapter 4

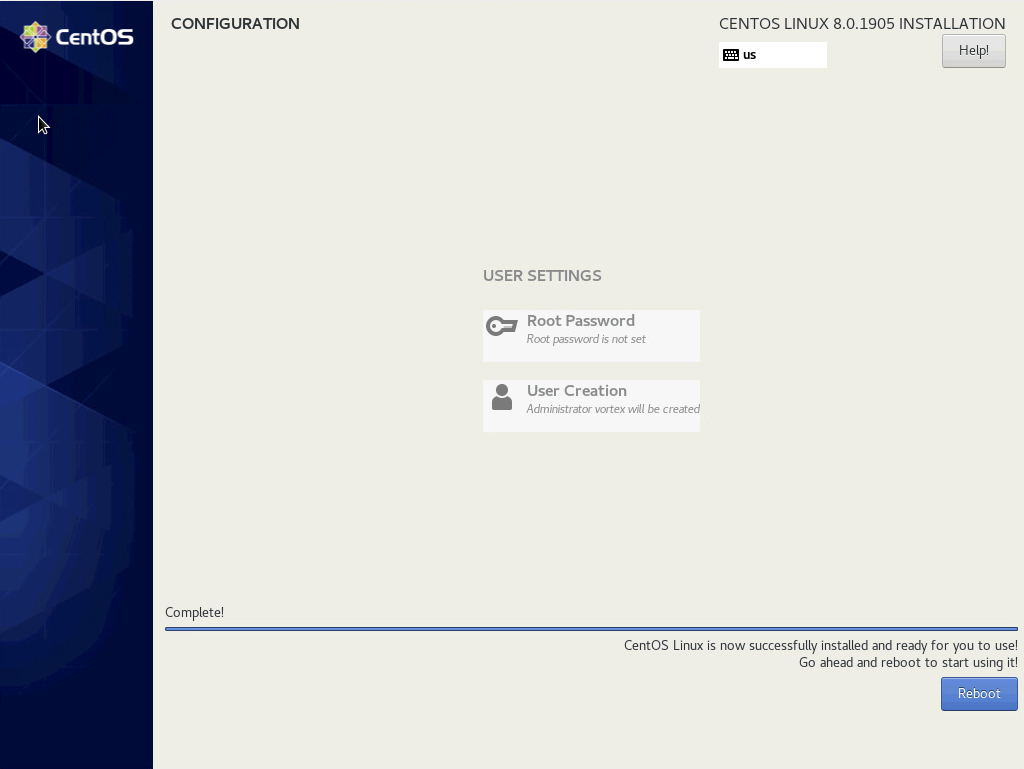
Click Done and wait for installation to finish. When the Reboot button appears, click on it.
If your server is not already configured to boot from the CentOS drives, configure that during the reboot. Keep in mind, the boot loader and EFI partitions are only installed to one drive, even if you configured a mirror.
First Boot
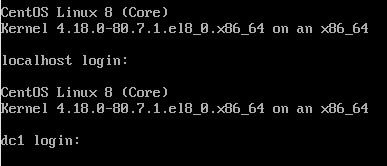
You should get a login prompt after reboot. ssh is enabled by default, so you should be able to work remotely from here if you prefer.
_The login prompt may initially say localhost instead of the correct host name. If you hit enter, you should see the correct host name.
Configuration
Our initial configuration will focus on optimization, automation and hardening. Once completed, we will have a secure, self-healing/updating server which may be further configured in any common server role (hypervisor, domain controller, web server, etc…). This config is not biased toward any specific task. It is essentially boilerplate.
Initial Snapshot
Before we start configuring the server, we want to perform the minimal steps necessary to create a system snapshot so that we can roll back to this point in the future if anything goes wrong.
Because our system is divided into multiple volumes, we’re going to use tags to group our logical volumes. We use os to indicate essential operating system volumes that we will snapshot in case we need to rollback the system. This includes root as well as any volumes that are mounted as or contained in /etc, /usr and /var with the exception of /var/log and /var/log/audit which we want to persist between rollbacks to retain forensic data. Partitions like /home, we want to persist through system rollbacks as well to retain user data.
Tagging Volumes
The local tag simply indicates that the storage is local to the machine and is not provided from a SAN. This assumes only one volume group exists on the system.
# os partitions
sudo lvchange --addtag "local" --addtag "os" $(sudo vgs -o vg_name --no-headings)/root
sudo lvchange --addtag "local" --addtag "os" $(sudo vgs -o vg_name --no-headings)/var
sudo lvchange --addtag "local" --addtag "os" $(sudo vgs -o vg_name --no-headings)/var_tmp

# log partitions
sudo lvchange --addtag "local" --addtag "log" $(sudo vgs -o vg_name --no-headings)/var_log
sudo lvchange --addtag "local" --addtag "log" $(sudo vgs -o vg_name --no-headings)/var_log_audit

# user storage
sudo lvchange --addtag "local" --addtag "user" $(sudo vgs -o vg_name --no-headings)/home

# swap
sudo lvchange --addtag "local" $(sudo vgs -o vg_name --no-headings)/swap
Taking the First Snapshot
Now, we take the initial snapshot of the OS volumes. We will tag them with a timestamp, the current kernel and a description. We set the timestamp to be the same across volumes when we snapshot so that we can easily roll back multiple volumes using lvconvert --merge "@${TIMESTAMP}". Tagging the volumes with the current kernel will allow us to know which kernel to roll back to if we also want to revert the kernel.
### SKIP ON FEDORA ###
# tags
TIMESTAMP="$(date +"%Y-%m-%d-%H-%M-%S")"
KERNEL="$(uname -r)"
DESCRIPTION="initial_snapshot"

# take the snapshots
while read -r LV; do sudo lvcreate -s -l 50%ORIGIN --addtag "${TIMESTAMP}" -n "${LV##*/}_${TIMESTAMP}" "${LV}"; done <<< "$(sudo lvs --noheadings -o lv_path @os)"
sudo lvchange --addtag "local" --addtag "os" --addtag "${KERNEL}" --addtag "${DESCRIPTION}" "@${TIMESTAMP}"

# clean up
unset TIMESTAMP KERNEL DESCRIPTION
### SKIP ON FEDORA ###
Host Name
This should be grouped with the network configuration, but it’s best to do it as soon as possible, so it is the first thing we configure after the snapshot.
Assuming DNS and a static IP (either manually or via DCHP reservation) are in place and the server picked up a FQDN during installation, we can add both the short hostname and FQDN to the hosts file. This is usually recommended for domain controllers, but is a good idea for any server.
# register short hostname and FQDN in /etc/hosts
sudo cp -a /etc/hosts /etc/.hosts.default~
printf "$(hostname -i | grep -o "[0-9]\{1,3\}\(\.[0-9]\{0,3\}\)\{3\}")\t$(hostname -f) $(hostname -s)\n" | sudo tee -a /etc/hosts >/dev/null

# this is necessary for some reason as systemd is defiantly attached to `localhost`
sudo hostnamectl set-hostname "$(hostname -f)"
Package Manager
We need to configure and harden the package manager. We will increase the number of old kernels that we retain, enable additional gpg checking, configure automatic security updates and install the epel repository.
Reference: OpenSCAP > Updating
# dnf config
sudo cp -a /etc/dnf/dnf.conf /etc/dnf/.dnf.conf.default~
sudo sed -i -E 's/(installonly_limit=)3/\110/' /etc/dnf/dnf.conf
echo "deltarpm=1" | sudo tee -a /etc/dnf/dnf.conf >/dev/null
echo "repo_gpgcheck=1" | sudo tee -a /etc/dnf/dnf.conf >/dev/null
echo "localpkg_gpgcheck=1" | sudo tee -a /etc/dnf/dnf.conf >/dev/null

# epel
sudo dnf -yq install epel-release
# epel doesn't support gpg signed metadata, also, it is problematic to make a backup of the default config here, so we don't
sudo sed -i -E "s/(^enabled=[0,1]$)/\1\nrepo_gpgcheck=0/g" /etc/yum.repos.d/epel*
sudo dnf -yq check-update

# update
sudo dnf -yq update

# automatic security updates
sudo dnf -yq install dnf-automatic
sudo cp -a /etc/dnf/automatic.conf /etc/dnf/.automatic.conf.default~
sudo sed -i -E 's/(apply_updates = )no/\1yes/' /etc/dnf/automatic.conf
sudo sed -i -E 's/(upgrade_type = )default/\1security/' /etc/dnf/automatic.conf
sudo systemctl enable dnf-automatic.timer
sudo systemctl start dnf-automatic.timer
Email Alerts
Configure postfix to use a public smtp Server via sendmail
We use sendmail instead of mailx or other alternatives to limit the number of additional packages installed on the system.
# using gmail as an example
SMTP_SERVER= #smtp.gmail.com
SMTP_PORT= #587
SMTP_ACCOUNT= #[email protected]
SMTP_PASSWD= #thepassword
RECIPIENT="${SMTP_ACCOUNT}" #or use separate accounts for sending and receiving alerts

# install postfix
sudo dnf -yq install postfix cyrus-sasl-plain
sudo systemctl enable postfix

# configure smtp credentials
sudo touch /etc/postfix/sasl_passwd
sudo chmod 600 /etc/postfix/sasl_passwd
echo "[${SMTP_SERVER}]:${SMTP_PORT} ${SMTP_ACCOUNT}:${SMTP_PASSWD}" | sudo tee /etc/postfix/sasl_passwd >/dev/null
sudo postmap /etc/postfix/sasl_passwd

# configure `postfix`
sudo cp -a /etc/postfix/main.cf /etc/postfix/.main.cf.default~
sudo sed -i -E "s/(^inet_interfaces = ).*/\1$(hostname)/" /etc/postfix/main.cf
sudo sed -i -E "s/(^inet_protocols = ).*/\1ipv4/" /etc/postfix/main.cf
echo "relayhost = [${SMTP_SERVER}]:${SMTP_PORT}
smtp_use_tls = yes
smtp_sasl_auth_enable = yes
smtp_sasl_security_options = noanonymous
smtp_sasl_password_maps = hash:/etc/postfix/sasl_passwd" | sudo tee -a /etc/postfix/main.cf >/dev/null

# by default, postfix will come up before we have an IP and will fail if `inet_interfaces` is set to anything but `all
# this is the fix per https://bugs.centos.org/view.php?id=13323
sudo mkdir /usr/lib/systemd/system/postfix.service.d
echo "[Unit]
After=network-online.target" | sudo tee /usr/lib/systemd/system/postfix.service.d/online.conf >/dev/null
sudo systemctl daemon-reload

# configure aliases
sudo cp -a /etc/aliases /etc/.aliases.default~
echo "root: $(whoami)
$(whoami): ${RECIPIENT}" | sudo tee -a /etc/aliases >/dev/null
sudo newaliases

# start postfix
sudo systemctl start postfix

# send test alert
echo "Subject: $(hostname -f) - Email Alerts Configured
$(hostname -f) has been configured to send email alerts to this address." | sendmail -F "Alert" root

# clean up
unset SMTP_SERVER SMTP_PORT SMTP_ACCOUNT SMTP_PASSWD RECIPIENT
Storage
Install Bootloader to All RAID Members
Assuming you configured your /boot partition to use an md RAID device (most likely a mirror), we’ll want to ensure that GRUB is installed to each member drive. Otherwise, a drive failure might prevent you from being able to boot into the system.*
# loop through boot drives and install grub
while read -r BOOT_DRIVE; do
  sudo grub2-install "${BOOT_DRIVE}"
done <<< "$(sudo mdadm -QD "$(mount | grep "/boot" | awk '{ print $1 }')" | tail -n +2 | grep -o "/dev/[[:alpha:]]*")"

# clean up
unset BOOT_DRIVE
* This will only work in bios boot and not efi boot since the /boot/efi partition cannot be mirrored.
Harden GRUB
We need to set a username and password to secure the GRUB configuration during boot. We’ll use the admin user’s name reversed and enter a new password.
Reference: OpenSCAP > Set Boot Loader Password
# set username and password for grub config
sudo sed -i s/root/"$(whoami | rev)"/g /etc/grub.d/01_users #or whatever username
sudo grub2-setpassword #set a unique password
sudo grub2-mkconfig -o "/etc/$(readlink /etc/grub2.cfg)" #for bios booting
sudo grub2-mkconfig -o "/etc/$(readlink /etc/grub2-efi.cfg)" #for efi booting
Use tmpfs for /tmp
The CentOS installer does not allow us to configure /tmp to use tmpfs, so we’ll configure that now. We will use systemd's tmp.mount to handle this. Additionally, we will add the noexec option.
# configure systemd unit file
sudo cp /usr/lib/systemd/system/tmp.mount /etc/systemd/system/
echo "
[Install]
WantedBy=multi-user.target
" | sudo tee -a /etc/systemd/system/tmp.mount #I don't know why this isn't there by default

# add noexec option
sudo sed -i -E "s/(Options=.*$)/\1,noexec/" /etc/systemd/system/tmp.mount

# enable and start tmp.mount
sudo systemctl enable tmp.mount
sudo systemctl start tmp.mount
Schedule RAID Scrubbing
RAIDs need to be scrubbed periodically to check for mismatching data. Since have no not configured any massive storage yet, we will schedule a scrub to run weekly on our system’s MD RAIDS.
# write cron script
echo '#!/usr/bin/env bash

for MD in /sys/block/md*; do
  echo "check" > "${MD}/md/sync_action"
  [ cat "${MD}/md/mismatch_cnt -gt 0 ] &&
    echo "Subject: $(hostname -f) - MD RAID Corruption
$(cat ${MD}/md/mismatch_cnt) mismatches found on ${MD}." | sendmail -F "mdraid" root
done


' | sudo tee /etc/cron.weekly/md_scrub >/dev/null

# make it executable
sudo chmod +x /etc/cron.weekly/md_scrub
Install and Configure SMART Monitoring
We need to periodically check the health of our drives using smartmontools. We will schedule short scans to run daily and long scans to run weekly.
# install smartmontools
sudo dnf -yq install smartmontools

# configure short test between 1-2AM daily
# and long test between 3-4AM Saturdays on all SMART-enabled drives
sudo cp -a /etc/smartmontools/smartd.conf /etc/smartmontools/.smartd.conf.default~
echo "DEVICESCAN -a -o on -S on -n standby,q -s (S/../.././01|L/../../6/03) -W 4,35,40 -m root" | sudo tee -a /etc/smartmontools/smartd.conf >/dev/null

# enable and start smartd
sudo systemctl start smartd
sudo systemctl enable smartd
Permissions
Scheduled Permissions Repair
We want to ensure that system files keep their correct permissions, so we will run a script every hour that checks for permissions discrepancies and corrects any that it finds. In the future if you want to permanently change the permissions of one of these files, you will want to edit this cron script.
Reference: OpenSCAP > Verify Integrity with RPM
This appears to be fundamentally broken in rpm, or I am missing something. See below.
$ sudo rpm -Va | grep -m 1 lastlog
.M....G..  g /var/log/lastlog
]$ ls -lZ /var/log/lastlog
-rw-rw-r--. 1 root utmp system_u:object_r:lastlog_t:s0 1460292 Oct 31 12:16 /var/log/lastlog
$ sudo rpm --setperms /var/log/lastlog
$ sudo rpm --setugids /var/log/lastlog
$ ls -lZ /var/log/lastlog
-rw-rw-r--. 1 root utmp system_u:object_r:lastlog_t:s0 1460292 Oct 31 12:16 /var/log/lastlog
$ sudo rpm -Va | grep -m 1 lastlog
.M....G..  g /var/log/lastlog
I tested this on several of the results from sudo rpm -Va and they were all like this. However, some things did appear to break after running repairs on all the files, specifically hostnamectl ceased to function for some reason. So instead of wasting more time, I am simply going to exclude it. aide and auditd should be sufficient for monitoring file changes.
## write cron script to repair permissions on system files based on rpm
#echo '#!/usr/bin/env bash
#
#while read -r WRONG_PERM; do
# echo "Possible permissions mismatch on ${WRONG_PERM}" >&2
#done <<< "$(/usr/bin/rpm -Va | /usr/bin/awk '\''{ if (substr($0,2,1)=="M") print $NF }'\'')"
#
#while read -r WRONG_PERM; do
#  echo "Possible ownership mismatch on ${WRONG_PERM}" >&2
#done <<< "$(/usr/bin/rpm -Va | /usr/bin/awk '\''{ if (substr($0,6,1)=="U" || substr($0,7,1)=="G") print $NF }'\'')"
#
#' | sudo tee /etc/cron.hourly/fix_permissions >/dev/null
#
## make it executable
#sudo chmod +x /etc/cron.hourly/fix_permissions
#
## run the script manually
## expect some `chmod: cannot access` warnings about `dbus-org.freedesktop.resolve1.service` on first run
## not sure what causes that...
#sudo /etc/cron.hourly/fix_permissions
Harden Mount Options
# add nosuid and nodev options to /home
sudo sed -i -E "s/(\/home.*)defaults/\1nosuid,nodev/" /etc/fstab

# systemd should be made aware of this change
sudo systemctl daemon-reload

# remount to apply new options
sudo mount -o remount /home
Disable USB Storage
We don’t want anyone to be able to plug a USB device into the server and expose it to whatever nefarious things might be on it. However, we do want administrators to be able to load the module if they need to, so we do not blacklist it.
Reference: OpenSCAP > Disable Modprobe Loading of USB Storage Driver
# disable usb-storage in running config
sudo modprobe -r usb-storage

# prevent it from being loaded at boot
echo "install usb-storage /bin/true" | sudo tee /etc/modprobe.d/usb-storage.conf >/dev/null
Network
System
sudo dnf -yq install bind-utils

echo "net.ipv6.conf.all.disable_ipv6=1
net.ipv6.conf.default.disable_ipv6=1
net.ipv4.conf.default.accept_source_route=0
net.ipv4.conf.default.accept_redirects=0
net.ipv4.conf.all.accept_redirects=0
net.ipv4.conf.all.send_redirects=0
net.ipv4.conf.default.send_redirects=0" | sudo tee -a /etc/sysctl.d/99-sysctl.conf >/dev/null

sudo sysctl --system >/dev/null
NTP
sudo cp -a /etc/chrony.conf /etc/.chrony.conf.default~
sudo sed -i "s/ maxpoll [0-9]*//g" /etc/chrony.conf
sudo sed -i "s/^server .*/& maxpoll 10/g" /etc/chrony.conf
sudo systemctl restart chronyd
Firewall
Configure firewalld
We only want to accept ssh traffic from a designated administrative subnet.
# Use the subnet that needs admin access to this machine
ADMIN_NET= #x.x.x.x/x
ZONE="$(hostname -d | cut -d '.' -f 1)"

# we'll create our own zone that corresponds to our vlan/subnet config
sudo firewall-cmd --permanent --new-zone="${ZONE}"
sudo firewall-cmd --permanent --zone="${ZONE}" --set-short="Server Default Gateway"
sudo firewall-cmd --permanent --zone="${ZONE}" --set-description="The server's default gateway provides services and management access."
sudo firewall-cmd --permanent --zone="${ZONE}" --set-target=DROP

# allow ssh and ping from admin subnet
sudo firewall-cmd --permanent --zone="${ZONE}" --add-rich-rule="rule family=ipv4 source address=${ADMIN_NET} service name=ssh accept"
sudo firewall-cmd --permanent --zone="${ZONE}" --add-rich-rule="rule family=ipv4 source address=${ADMIN_NET} icmp-type name=echo-request accept"

# add interface associated with the server's fqdn to the new zone
sudo firewall-cmd --permanent --zone="${ZONE}" --add-interface="$(nmcli -g GENERAL.DEVICE,IP4.ADDRESS device show | grep -B 1 "$(host -4 -t A "$(hostname -f)" | awk '{ print $NF }')" | head -n 1)"

# default zone for new interfaces should be `drop`
sudo firewall-cmd --set-default-zone=drop

# apply changes
sudo firewall-cmd --complete-reload

# clean up
unset ADMIN_NET ZONE # if you plan to configure cockpit and/or netdata, you can leave this set
Antivirus
Install and Configure clamav
# install and enable
sudo dnf -yq install clamd clamav clamav-update
sudo systemctl enable clamd@scan

# archive default configs
sudo cp -a /etc/freshclam.conf /etc/.freshclam.conf.default~
sudo cp -a /etc/sysconfig/freshclam /etc/sysconfig/.freshclam.default~
sudo cp -a /etc/clamd.d/scan.conf /etc/clamd.d/.scan.conf.default~

# configure freshclam
sudo sed -i -E 's/#(LogFileMaxSize[[:space:]]).*/\12M/' /etc/freshclam.conf
sudo sed -i -E 's/#(LogTime[[:space:]]).*/\1yes/' /etc/freshclam.conf
sudo chgrp -R virusgroup /var/lib/clamav
sudo chmod g+s /var/lib/clamav

# configure scan
sudo sed -i -E 's/(^Example)/#\1/' /etc/clamd.d/scan.conf
sudo sed -i -E 's/#(LogFile[[:space:]]).*/\1\/var\/log\/clamd.scan/' /etc/clamd.d/scan.conf
sudo sed -i -E 's/#(LogFileMaxSize[[:space:]]).*/\12M/' /etc/clamd.d/scan.conf
sudo sed -i -E 's/#(LogTime[[:space:]]).*/\1yes/' /etc/clamd.d/scan.conf
sudo sed -i -E 's/#(LocalSocket[[:space:]])/\1/' /etc/clamd.d/scan.conf
sudo sed -i -E 's/#(LocalSocketGroup[[:space:]])/\1/' /etc/clamd.d/scan.conf
sudo sed -i -E 's/#(LocalSocketMode[[:space:]])/\1/' /etc/clamd.d/scan.conf
sudo sed -i -E 's/#(ExcludePath[[:space:]])/\1/g' /etc/clamd.d/scan.conf
sudo sed -i "s/^#VirusEvent.*/VirusEvent printf \"Subject: $(hostname -f) VIRUS ALERT\\\nFOUND: %v\" | \/usr\/sbin\/sendmail -F \"clamd\" root/" /etc/clamd.d/scan.conf
sudo sed -i -E 's/#(DetectPUA[[:space:]]).*/\1yes/' /etc/clamd.d/scan.conf
sudo touch /var/log/clamd.scan
sudo chown clamscan:clamscan /var/log/clamd.scan

# selinux
sudo setsebool -P antivirus_can_scan_system 1
sudo setsebool -P clamd_use_jit 1

# download definiton and start clamd
sudo freshclam
sudo systemctl start clamd@scan
User
UID and GID Numbering
Red Hat has recommended that you set UID/GIDs to start at 5000 since at least RHEL 6 . We set our local user to 5000 during installation, but we should also set the UID and GID minimum to 5000 for any future local users that we create.
# change minimum uid/gid from 1000 to 5000
sudo sed -i -E "s/(^[U,G]ID_MIN[[:space:]]*)1000$/\15000/g" /etc/login.defs
User Permissions
# configure umask
sudo cp -a /etc/bashrc /etc/.bashrc.default~
sudo sed -i 's/umask.*/umask 027/' /etc/bashrc #only want to replace the first instance

echo "if [ $UID -gt 199 ] && [ "`id -gn`" = "`id -un`" ]; then
  umask 027
fi" | sudo tee /etc/profile.d/custom.sh >/dev/null
Configure Local Admin
Groups
Local admins should be in the systemd-journal and adm groups.
sudo gpasswd -a "$(whoami)" systemd-journal
sudo gpasswd -a "$(whoami)" adm
SELinux
By default the admin user created during install is not managed by SELinux. We will assume the current user is the administrator and configure that user as a member of staff while allowing escalation to sysadm via sudo. Once we run these commands, we will be locked out of sudo until we log out and back in again.
# we need policycoreutils-python-utils to use the semanage command
sudo dnf -yq install policycoreutils-python-utils

# set our user context to staff
sudo semanage login -a -s staff_u -rs0:c0.c1023 "$(whoami)"

# set appropriate context on our home folder
sudo restorecon -FR /home/$(whoami)

# allow sudo to escalate us to sysadm
echo "$(whoami)  ALL=(ALL) TYPE=sysadm_t ROLE=sysadm_r ALL" | sudo tee /etc/sudoers.d/"$(whoami)" >/dev/null

# clean up
history -c

# log out is required (you will be locked out of sudo until you do)
exit

# log back in to refresh the selinux user context

# match permissions to /etc/sudoers
sudo chmod 440 /etc/sudoers.d/"$(whoami)"
Login Hardening
General System Policies
# login message
echo "
WARNING: Unauthorized access to this information system will be prosecuted to the fullest extent of the law.
" | sudo tee /etc/issue >/dev/null

# timeouts
echo "TMOUT=600" | sudo tee /etc/profile.d/timeout.sh >/dev/null
echo "FAIL_DELAY 4" | sudo tee -a /etc/login.defs >/dev/null
Authentication
# install `sssd`
sudo dnf -yq install sssd
sudo systemctl enable sssd

# configure sssd for local authentication
sudo touch /etc/sssd/sssd.conf
sudo chmod 600 /etc/sssd/sssd.conf
echo "[domain/local]
id_provider = files

[sssd]
domains = local
services = nss, pam, ssh, sudo" | sudo tee /etc/sssd/sssd.conf >/dev/null

# start `sssd`
sudo systemctl start sssd

# set password strength rules
echo "difok = 4
minlen = 10
dcredit = -1
ucredit = -1
lcredit = -1
ocredit = -1
maxrepeat = 3" | sudo tee /etc/security/pwquality.conf >/dev/null

# enable `sssd` `authselect` profile
sudo authselect select sssd \
  --force \
  without-nullok #\
#  with-faillock #faillock was producing some selinux errors, but you can enable it if you want to
Remote Access
# ssh
sudo cp -a /etc/ssh/sshd_config /etc/ssh/.sshd_config.default~
sudo sed -i -E "s/^#(ListenAddress[[:space:]])[[:digit:]].*/\1$(host "$(hostname -f)" | awk '{ print $NF }')/" /etc/ssh/sshd_config
sudo sed -i -E 's/^#(ClientAliveCountMax[[:space:]])[0-9]*/\10/' /etc/ssh/sshd_config
sudo sed -i -E 's/^#(ClientAliveInterval[[:space:]])[0-9]*/\1600/' /etc/ssh/sshd_config
sudo sed -i -E 's/^#(Banner[[:space:]]).*/\1\/etc\/issue/' /etc/ssh/sshd_config
sudo sed -i -E 's/^(GSSAPIAuthentication[[:space:]]).*/\1no/' /etc/ssh/sshd_config
sudo sed -i -E 's/^(PermitRootLogin[[:space:]]).*/\1no/' /etc/ssh/sshd_config

# similarly to `postfix`, when `ListenAddress` is configured for `ssh`, it starts before we have an address and fails
# unlike `postfix`, `sshd` will make additional attempts to start and eventually succeed
# but to keep the logs cleaner, we can make a change to the unit file
sudo mkdir /usr/lib/systemd/system/sshd.service.d
echo "[Unit]
After=network-online.target" | sudo tee /usr/lib/systemd/system/sshd.service.d/online.conf >/dev/null
sudo systemctl daemon-reload

sudo systemctl restart sshd
Misc
### SKIP ON FEDORA ###
# disable ctrl-alt-del
sudo systemctl mask ctrl-alt-del.target

# disable kernel dumps
sudo systemctl disable kdump.service
sudo systemctl stop kdump.service
### SKIP ON FEDORA ###
Auditing
Configure auditd
# backup default config
sudo cp -a /etc/audit/auditd.conf /etc/audit/.auditd.conf.default~

# set max log size to 700MB (based on default 5-log roatation and our 4GB partition for `/var/log/audit`)
sudo sed -i -E 's/(max_log_file = ).*/\1700/' /etc/audit/auditd.conf

# try email alert when free space is critical (by default an earlier alert is sent to syslog)
sudo sed -i -E 's/(admin_space_left_action = ).*/\1EMAIL/' /etc/audit/auditd.conf

# halt system if log partition becomes full (this should never happen)
sudo sed -i -E 's/(disk_full_action = ).*/\1HALT/' /etc/audit/auditd.conf

# half system if log partition has disk errors
sudo sed -i -E 's/(disk_error_action = ).*/\1HALT/' /etc/audit/auditd.conf

# restart `auditd` (`systemctl` command do not work by design)
sudo service auditd restart
### ON FEDORA, YOU MUST REBOOT TO LOAD NEW AUDITD CONFIG
Configure auditd Rules
# base rules
sudo cp "/usr/share/doc/audit/rules/10-base-config.rules" "/etc/audit/rules.d/"

# since we're using number-prefixed rules, we want to comment out all lines in the default rules
# even though they are identical to our base rules
sudo sed -i 's/^-/#-/g' /etc/audit/rules.d/audit.rules

# login uid rules
sudo cp "/usr/share/doc/audit/rules/11-loginuid.rules" "/etc/audit/rules.d/"

# forbid 32-bit
sudo cp "/usr/share/doc/audit/rules/21-no32bit.rules" "/etc/audit/rules.d/"

# ignore ntp
sudo cp "/usr/share/doc/audit/rules/22-ignore-chrony.rules" "/etc/audit/rules.d/"

# this is necessary for some reason
sudo sed -i "s/-Fuid=chrony/-Fuid=$(id -u chrony)/g" /etc/audit/rules.d/22-ignore-chrony.rules

# operating system protection profile (ospp)
sudo cp "/usr/share/doc/audit/rules/30-ospp-v42-remediation.rules" "/etc/audit/rules.d/"

# `rmdir` appears to have been omitted
sudo sed -i -E 's/(unlink,unlinkat,rename,renameat)/rmdir,\1/g' /etc/audit/rules.d/30-ospp-v42-remediation.rules

# our minimum uid is 5000, not 1000
sudo sed -i 's/auid>=1000/auid>=5000/g' /etc/audit/rules.d/30-ospp-v42-remediation.rules

# additional security (stig)
sudo cp "/usr/share/doc/audit/rules/30-stig.rules" "/etc/audit/rules.d/"

# our minimum uid is 5000, not 1000
sudo sed -i 's/auid>=1000/auid>=5000/g' /etc/audit/rules.d/30-stig.rules

# enable optional rules
sudo sed -i 's/^#-w/-w/g' /etc/audit/rules.d/30-stig.rules

# `/etc/sysconfig/network` appears to have been omitted
sudo sed -i -E 's/(^-w \/etc\/hostname.*system-locale$)/\1\
-w \/etc\/sysconfig\/network -p wa -k system-locale/' /etc/audit/rules.d/30-stig.rules

# configure privileged rules
sed 's/^#//g' /usr/share/doc/audit/rules/31-privileged.rules | sed 's/priv\.rules/\/etc\/audit\/rules.d\/31-privileged.rules/g' | sudo bash

# admin home folder
sudo cp "/usr/share/doc/audit/rules/32-power-abuse.rules" "/etc/audit/rules.d/"

# code injection
sudo cp "/usr/share/doc/audit/rules/42-injection.rules" "/etc/audit/rules.d/"

# kernel modules
sudo cp "/usr/share/doc/audit/rules/43-module-load.rules" "/etc/audit/rules.d/"

# lock out
# once enabled, no more changes can be made without rebooting
sudo cp "/usr/share/doc/audit/rules/99-finalize.rules" "/etc/audit/rules.d/"

sudo sed -i 's/^#-e/-e/' /etc/audit/rules.d/99-finalize.rules

# load the rules
sudo augenrules --load

# configure auditing in `GRUB`
echo 'GRUB_CMDLINE_LINUX="${GRUB_CMDLINE_LINUX} audit=1"' | sudo tee -a /etc/grub.d/40_custom >/dev/null
sudo dnf -yq install grubby
sudo grubby --update-kernel=ALL --args="audit=1"
sudo grub2-mkconfig -o "/etc/$(readlink /etc/grub2.cfg)" #for bios booting
sudo grub2-mkconfig -o "/etc/$(readlink /etc/grub2-efi.cfg)" #for efi booting
Cockpit (Optional)
# install and enable
sudo dnf -yq install cockpit cockpit-pcp cockpit-packagekit cockpit-storaged
### sudo dnf -yq install cockpit-selinux #Fedora
### sudo dnf -yq remove cockpit-dashboard #Fedora
sudo systemctl enable cockpit.socket

# configure firewall
ADMIN_NET= #x.x.x.x/x
ZONE="$(nmcli -g connection.zone c show "$(nmcli -g GENERAL.DEVICE,IP4.ADDRESS device show | grep -B 1 "$(host -4 -t A "$(hostname -f)" | awk '{ print $NF }')" | head -n 1)")"

# allow admins to access cockpit
sudo firewall-cmd --permanent --zone="${ZONE}" --add-rich-rule="rule family=ipv4 source address=${ADMIN_NET} service name=cockpit accept"

# apply changes
sudo firewall-cmd --reload

# clean up
unset ADMIN_NET ZONE #leave this set if you are also configuring netdata

sudo systemctl start cockpit.socket
Netdata (Optional)
# install and enable
sudo dnf -yq install netdata
sudo systemctl enable netdata

# configure netdata
sudo sed -i -E "s/(bind to = ).*/\1$(hostname -f)/" /etc/netdata/netdata.conf
sudo sed -i -E "s/#(use_fqdn=).*/\1'YES'/" /etc/netdata/conf.d/health_alarm_notify.conf

# configure firewall
ADMIN_NET= #x.x.x.x/x
ZONE="$(nmcli -g connection.zone c show "$(nmcli -g GENERAL.DEVICE,IP4.ADDRESS device show | grep -B 1 "$(host -4 -t A "$(hostname -f)" | awk '{ print $NF }')" | head -n 1)")"

# allow admins to access netdata
sudo firewall-cmd --permanent --zone="${ZONE}" --add-rich-rule="rule family=ipv4 source address=${ADMIN_NET} port port=19999 protocol=tcp accept"

# apply changes
sudo firewall-cmd --reload

unset ADMIN_NET ZONE

# start netdata
sudo systemctl start netdata
Lock Down
Configure aide
We will receive daily email alerts showing everything that has changed on the filesystem. After each alert, it will re-initialize.
# install and initialize `aide`
sudo dnf -yq install aide
sudo aide --init
sudo mv /var/lib/aide/aide.db.new.gz /var/lib/aide/aide.db.gz

# make cron job
echo '#!/usr/bin/env bash

echo "Subject: $(hostname -f) - AIDE Integrity Check
$(aide --check)"  | sendmail -F "aide" root

aide --init >/dev/null

rm /var/lib/aide/aide.db.gz
mv /var/lib/aide/aide.db.new.gz  /var/lib/aide/aide.db.gz

' | sudo tee /etc/cron.daily/aide_check >/dev/null
sudo chmod +x /etc/cron.daily/aide_check
Taking a Snapshot After Basic Configuration
### SKIP ON FEDORA ###
# tags
TIMESTAMP="$(date +"%Y-%m-%d-%H-%M-%S")"
KERNEL="$(uname -r)"
DESCRIPTION="system_configured"

# take the snapshots
while read -r LV; do sudo lvcreate -s -l 50%ORIGIN --addtag "${TIMESTAMP}" -n "${LV##*/}_${TIMESTAMP}" "${LV}"; done <<< "$(sudo lvs --noheadings -o lv_path @os)"
sudo lvchange --addtag "local" --addtag "os" --addtag "${KERNEL}" --addtag "${DESCRIPTION}" "@${TIMESTAMP}"

# clean up
unset TIMESTAMP KERNEL DESCRIPTION
### SKIP ON FEDORA ###
Reboot
Just cause.
history -c
sudo shutdown -r now
This script will run the above (post installation). It will generate random GRUB credentials for you and print them at the end of the script.