So I managed to set up webserver using FreeBSD and Nginx. Might as well document the process here. This post is more collection of good resources and guides I found online. Most guides linked here won’t just spam you with commands, but also tell you what those commands do, what different variables in config files stand for etc. Hence I won’t start rewriting everything here again, since those guides are already doing better job at explaining things.
This guide will not explain how to set up your own domain, but if you need help with that this guide gives good starting point.
I’m not network guru or battlefield hardened sys admin, so what I did here might not be the most safest, reliable or smartest way to accomplish this. Just keep this in mind while reading further. 
I must use the opportunity for shilling Digital Ocean here tough, they have really good community guides for setting up services so I highly recommend testing them out.  I had no experience at setting up and configuring web servers but it wasn’t difficult with Ubuntu, thanks to the guides provided by Digital Ocean community.
I did set up web server using Ubuntu 18.04 droplet few moths ago, and the process was really similar with FreeBSD. Major differences were:
- Digital Ocean FreeBSD droplets force you to use SSH keys. Not difficult to set up and use.
- Directory paths are little bit different on FreeBSD when comparing to Linux. Strongly recommend you to read this. Gives really good insight about the differences between FreeBSD and Linux.
- Default shell was
sh. It’s not bad or difficult to use, but it is imo more minimalist if compared to something like Bash. I installedbashsince that’s what I’ve used before. - Firewall is different on FreeBSD, but not hard to configure for Web server. Main thing is to remember to leave ports
22,80and443open for SSH, HTTP and HTTPS traffic. Also when messing up with firewall be careful that you won’t lock yourself out from our server. More about this bellow.
Take these steps in this order when you are setting up your web server. Doesn’t matter if it’s Linux or FreeBSD you are using.
- Prep your os of choice ready: install updates and software you need/ want to use. For example after updating system I installed Bash, Neofetch and Nano.
- Configure firewall
- Configure domain by setting up A records etc.
- Install web server and configure it. I used Nginx but Apache works too.
- (Optional) set up SSL cert with Lets encrypt.
- ???
- Profit!
Ok so let’s get our hands dirty now.
1. Digital Ocean droplet.
If you use some other hosting method ignore these steps and follow the instructions from your hosting provider.
Choose the image, in this case FreeBSD 12.0 with ufs. 1GB/1CPU should be more than enough if you are only going to run web server, but pick what fits to your budget. If you wonder why ufs and not zfs, to my understanding zfs is more resource heavy file system than ufs. Since this is going to be basic testing and web server for me I didn’t see any benefit of using zfs.
You also need to set up SSH key. And remember to change the host name if you want to have some more descriptive host name for your droplet.
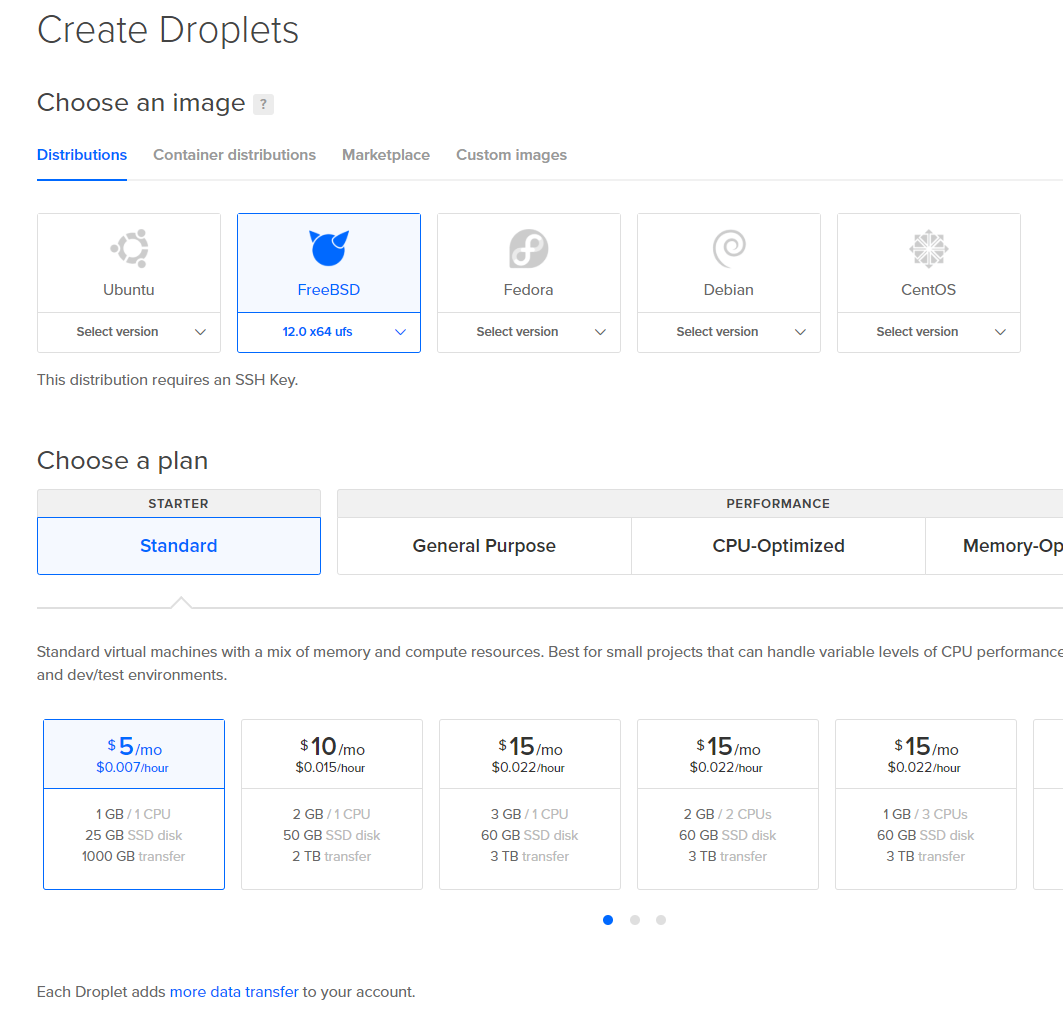
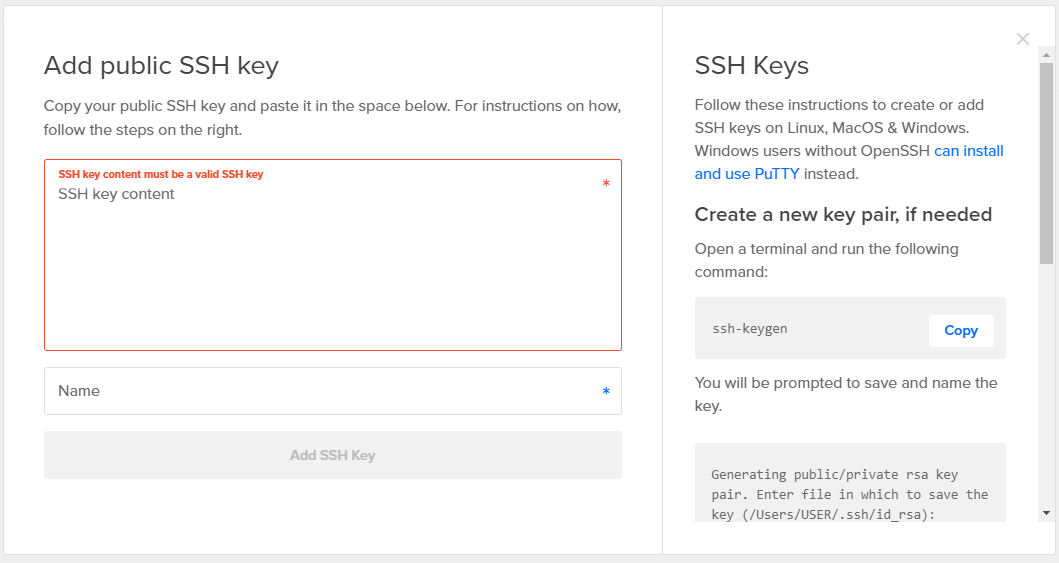
If you are windows user SSH keys can be created using PuttyGen
2. Set up FreeBSD
Follow this guide. Instead of ee editor I installed nano and used that for editing config files. Nano can be installed with the command sudo pkg install nano
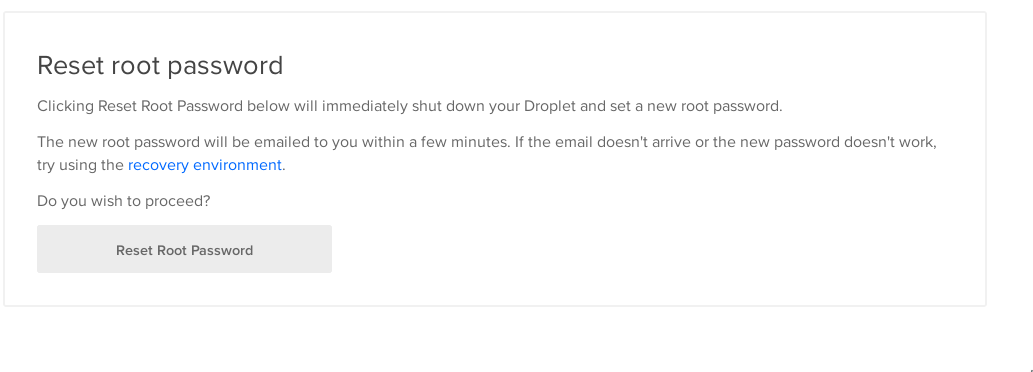
Remember also to set the root password with sudo passwd command. If you accidentally lock yourself out form the droplet while for example setting up the firewall, you should be able to access your droplet through the droplets console in your Digital Ocean dashboard. I personally haven’t tested this though.
You can skip the setting up Bash part, but since that is the shell I’m most comfortable at using I went ahead and used that.
3. Set up firewall
This guide explains how to set up ipfw firewall. FreeBSD offers few different firewalls but based on that guide and my limited research ipfw should be enough here.
I didn’t bother to set up timezones and I also didn’t mess with the Swap file, but feel free to do that if you want to.
Note that ports 22, 80 and 443 should be the ones that you leave open. 22 is used for SSH traffic while 80 and 443 are for http and https. Note that both Nginx and Apache use ports 80 and 443 so it doesn’t matter which web server you will use.
If you are not planing to use https and don’t use SSL certificate then you can leave port 443 closed.
4. Install and configure web server
Like stated above, I used Nginx, but Apache should work fine as well. This guide is for installing Nginx for FreeBSD 11.2, but all the steps in that guide worked for me, except setting up firewall since we already did that.
Remember to edit your rc.conf and add nginx_enable="YES" in that file. That way FreeBSD will start Nginx service at startup if you reboot your server.
Your rc.conf should look something like this:
firewall_enable=“YES”
firewall_quiet=“YES”
firewall_type=“workstation”
firewall_myservices=“22/tcp 80/tcp 443/tcp”
firewall_allowservices=“any”
firewall_logdeny=“YES”
nginx_enable=“YES”
If you run Digital Ocean droplet there’s going to be some other lines too, but since I have no idea what they do let’s not touch them.
If you now try to type the ip address of your web server to your web browser, or your domain if you have already pointed it to your server, you should see the default Nginx welcome page.
While not necessary I did set up separate server block for my site. Process for setting up the server block was almost identical to Ubuntu config I did few months ago. Only thing different is the directory structure the FreeBSD has when compared to Linux.
5. Set up SSL cert using Let’s Encrypt
This was the only guide that I thought was bit sketchy. It wasn’t bad, but if I understood right I compiled the whole Certbot that is used to get the SSL cert from source. I haven’t done any research about this but I think there should be precompiled Certbot package for FreeBSD. If you compile the certbot from source just hit enter and go with the default options while compiling.
If you want to use both www.example.com AND example.com domains remember to create DNS record for both. When certbot asks if you want to redirect all traffic to https I chose yes, but feel free to select what you feel is the best option.
When creating cron job note that it will most likely open vi text editor for you. I tried to figure out why with @AnotherDev but no luck. Just remember vi has slightly more complex keybindings for controlling it when compared to simpler text editors like nano, ee or pico.
6. Done
Now you should have web server up and running.
Lastly much love for @AnotherDev for pointing me in the right direction and helping out with this. If someone sees him give the man a hug.

 Also
Also


 /s
/s