Motivation
I recently mentioned the Raspberry Pi running NetBSD that I use as a serial console server in the Sysadmin Mega Thread and it was requested that I write a tutorial describing the setup. I’ve been meaning to redo that system using an Odroid-C2 for the additional USB ports, so I might as well document the steps as I carry out the process.
The serial console is a ubiquitous and easy way to manage headless server systems without IPMI. I have a few old desktop systems repurposed for software development and testing. In this post, I describe how I use an ARM single board computer such as a Raspberry Pi to access the serial consoles of these machines.
Materials
Rather than investing in an IP KVM for remote video console access, which admittedly would be superior when I need access to BIOS, instead I put some existing commodity hardware to use.
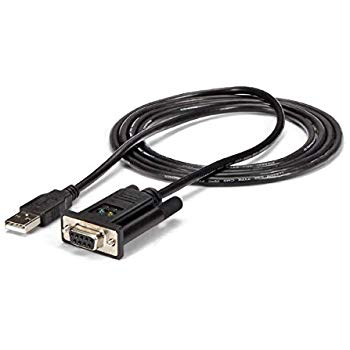
I did purchase some serial port brackets and USB serial cables, but those are quite cheap.
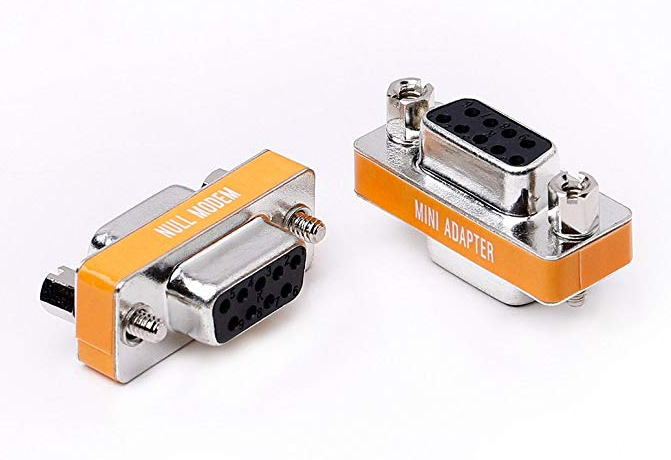
Be sure you get null modem USB serial cables with female DB9 connectors. I accidentally got male-terminated cables so I had to grab some null-modem adapters to make the connections.
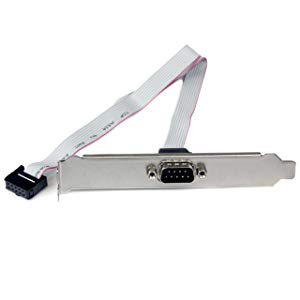
If your motherboard doesn’t have a DB9 connector for the serial port, you’ll need a bracket. Note that there are two different pinouts for COM headers on motherboards, so it’s a good idea to buy both just in case, or plan on potentially having to rewire the ribbon cable. I needed one of each flavor so I got a two-pack of brackets and rewired one using a 0.1" 2x5 IDC connector I had on hand.
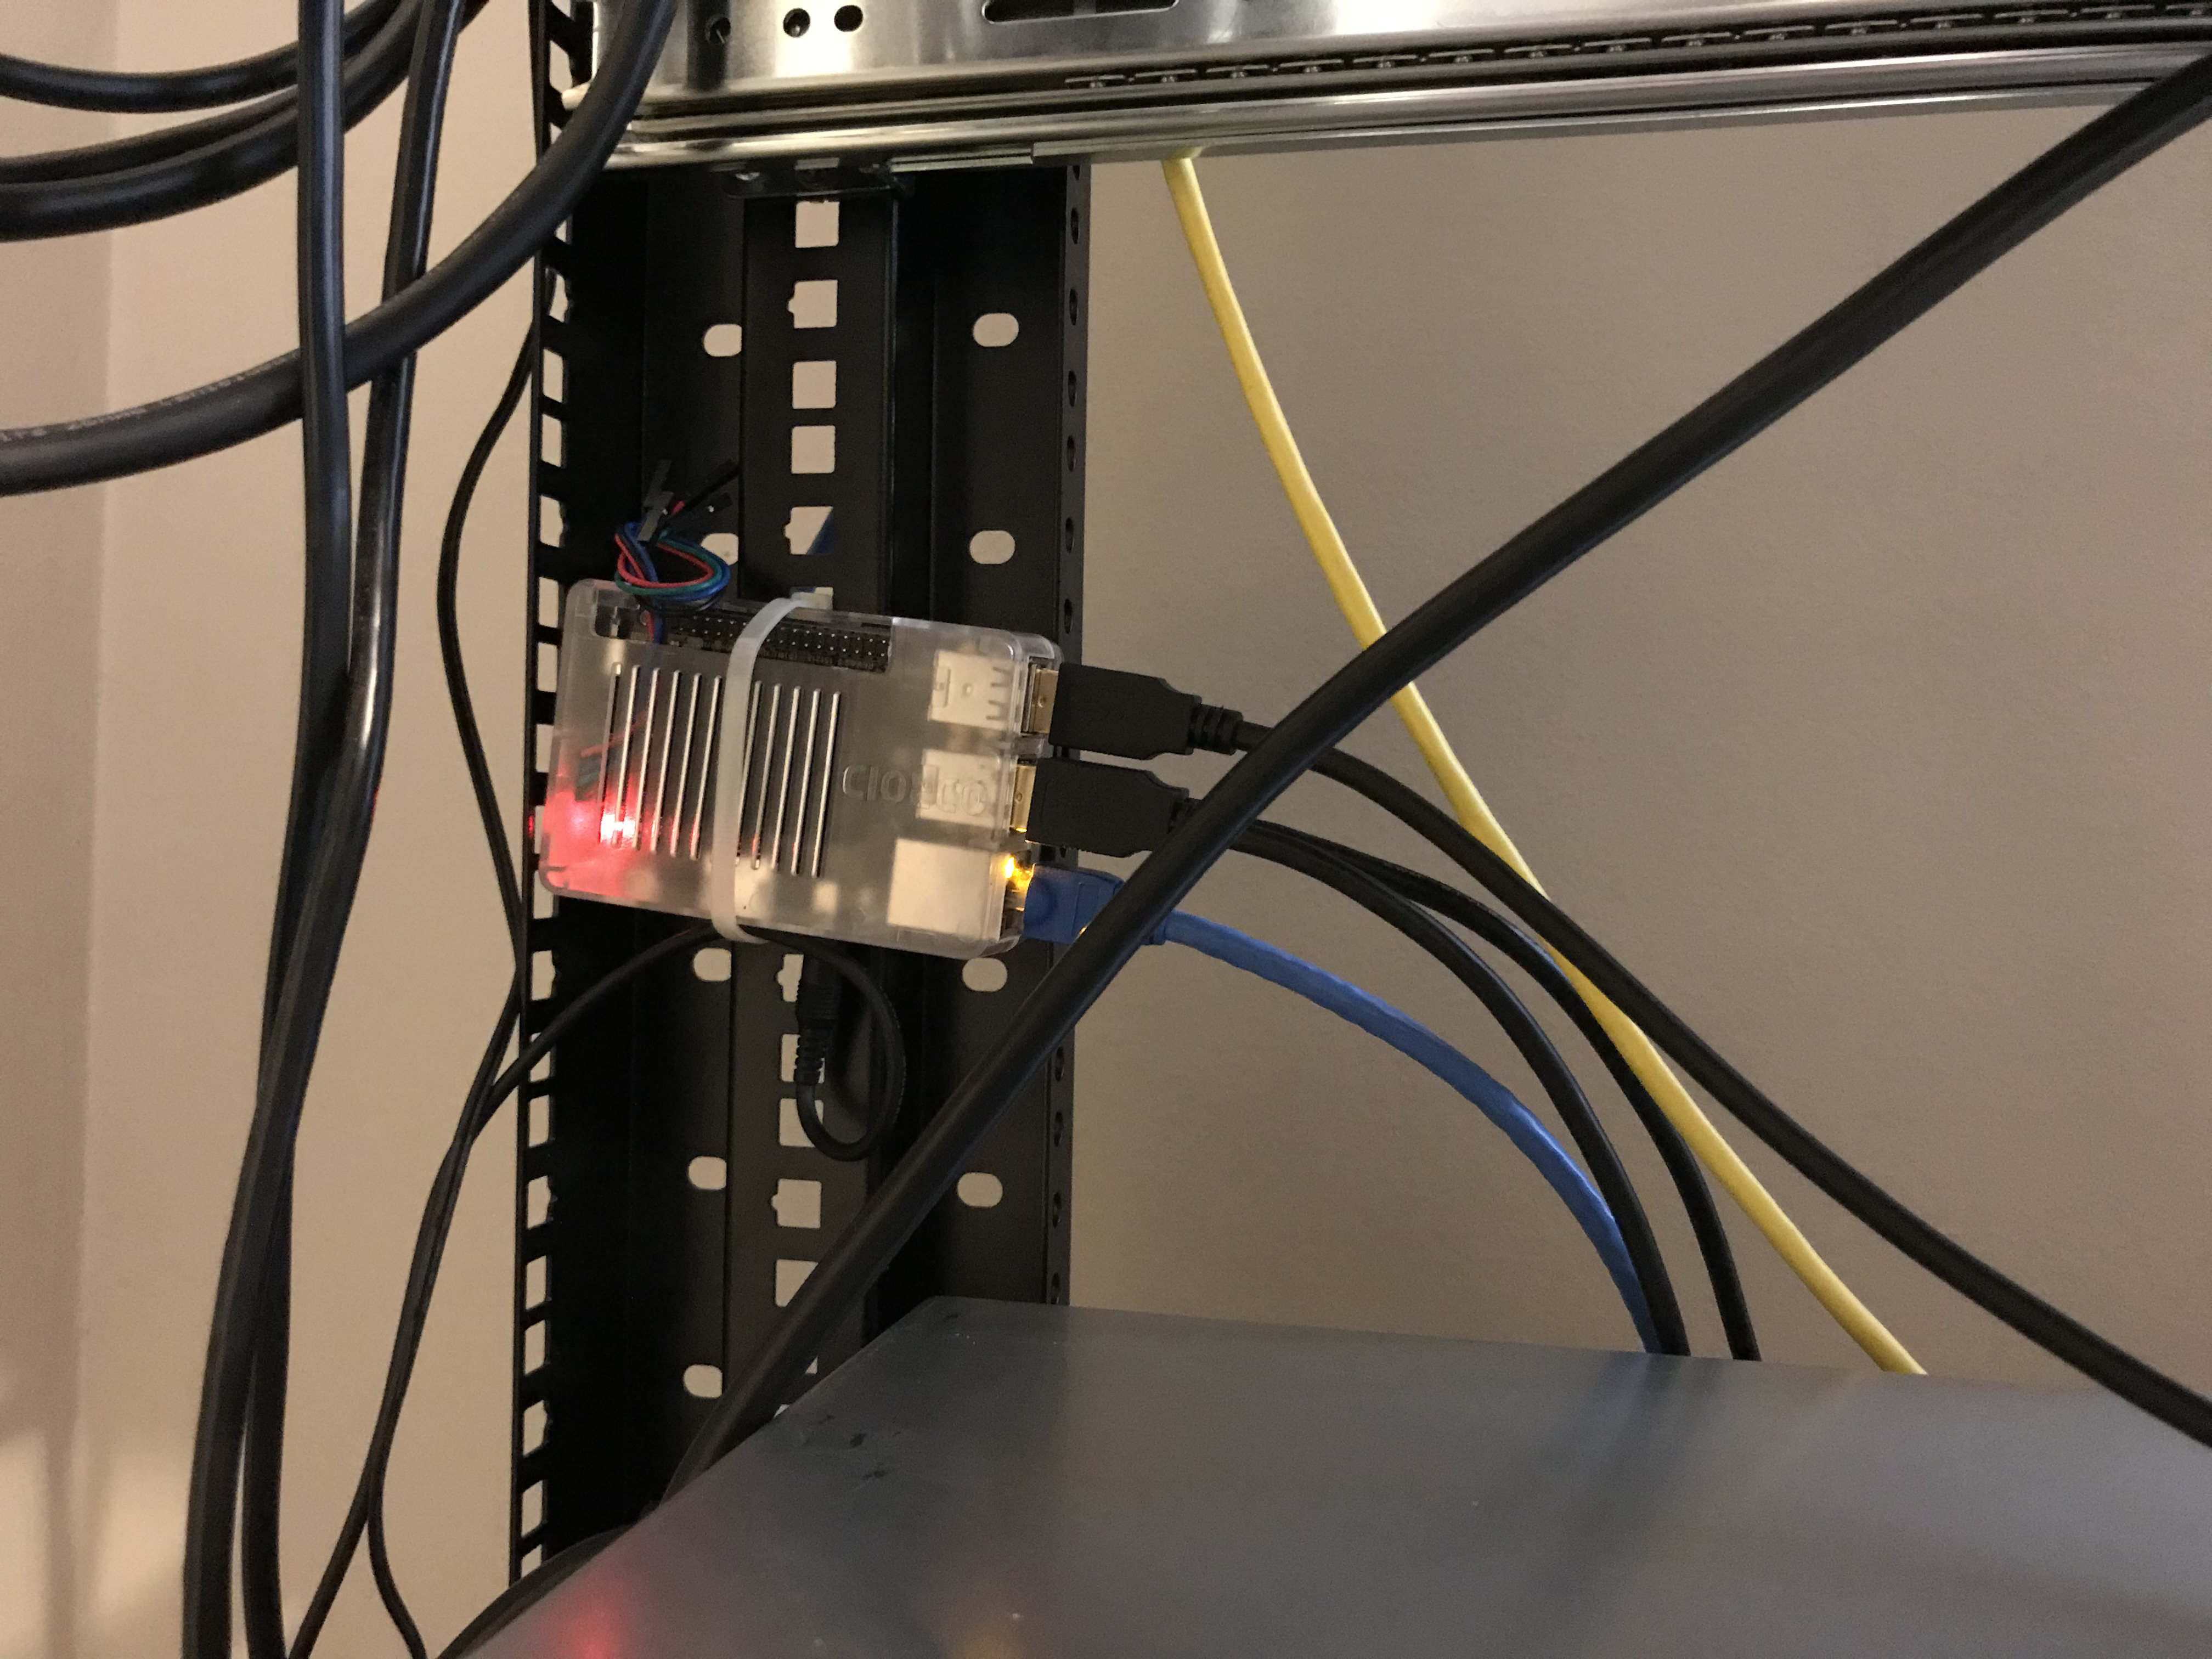
The other key component is whatever neglected ARM SBC you have stashed in the toy box. I started with a Raspberry Pi model B, and this time I’m using an Odroid-C2. I also used a low voltage serial cable to perform the installation.

NetBSD Installation
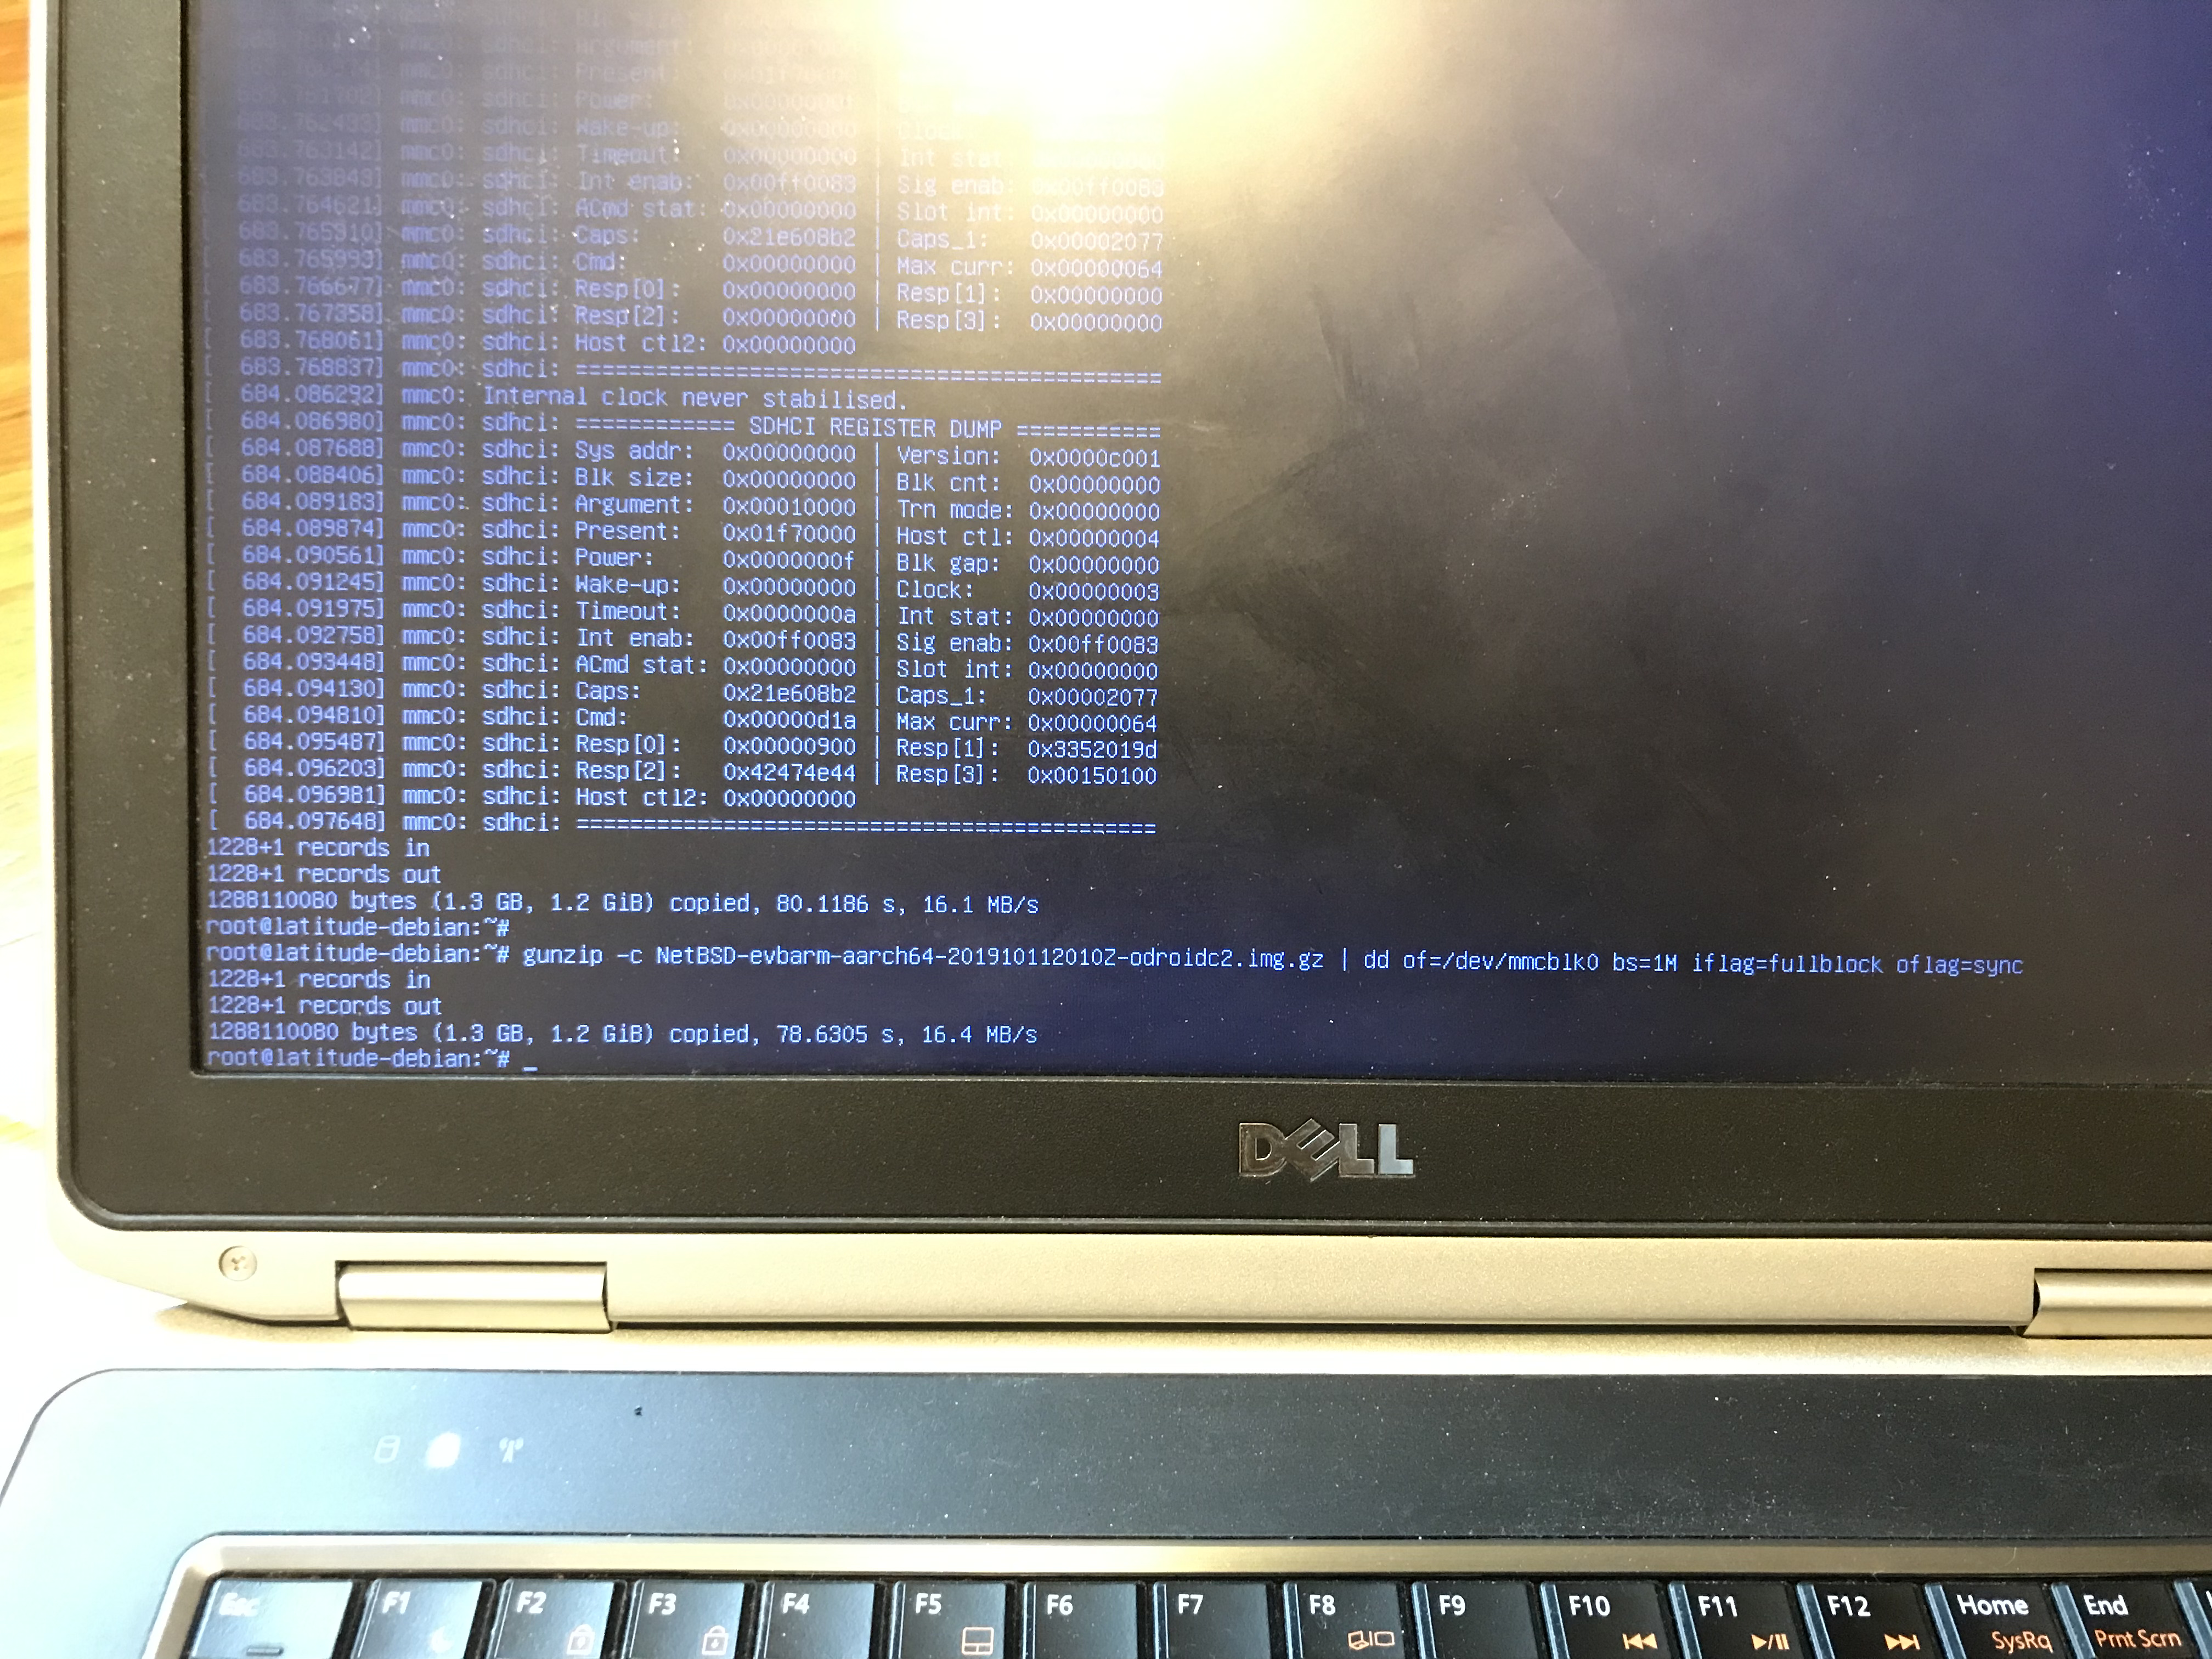
ARM images for NetBSD can be downloaded from here: http://www.invisible.ca/arm/
Just dd the image for your device to an SD card. I’m not trying to teach anyone how to use dd here, so make sure you know what you’re doing or ask for help if you don’t.
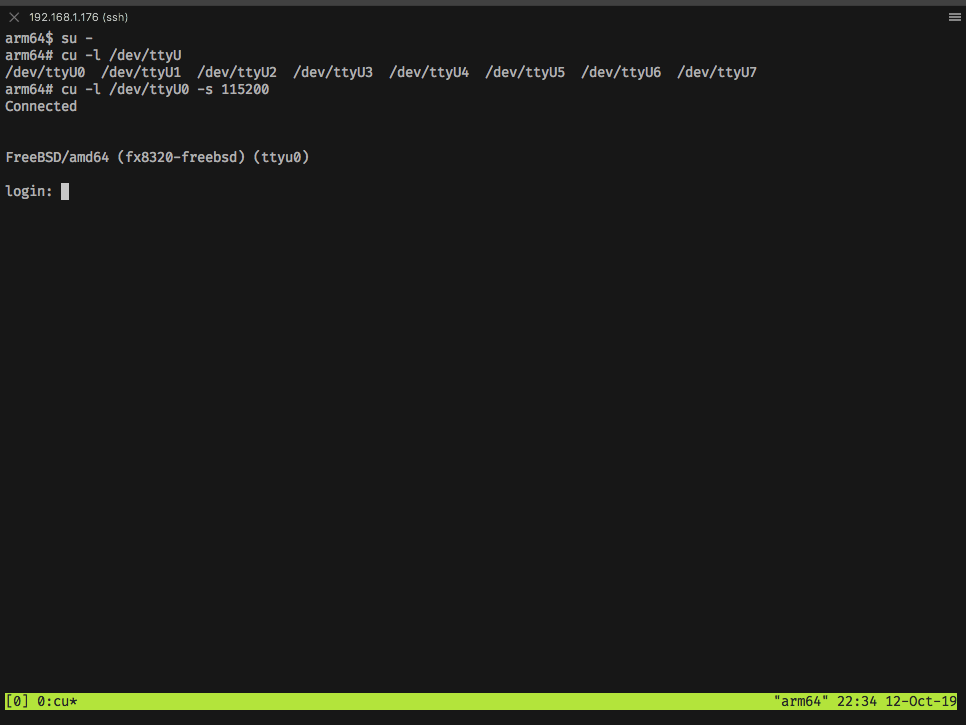
I use cu to connect to serial port of my Odroid-C2. The minimal Debian install I was using required apt install cu to install it, but it is generally included in BSD systems, and there are plenty of alternatives such as screen, picocom, or minicom. Use whatever you are comfortable with here.
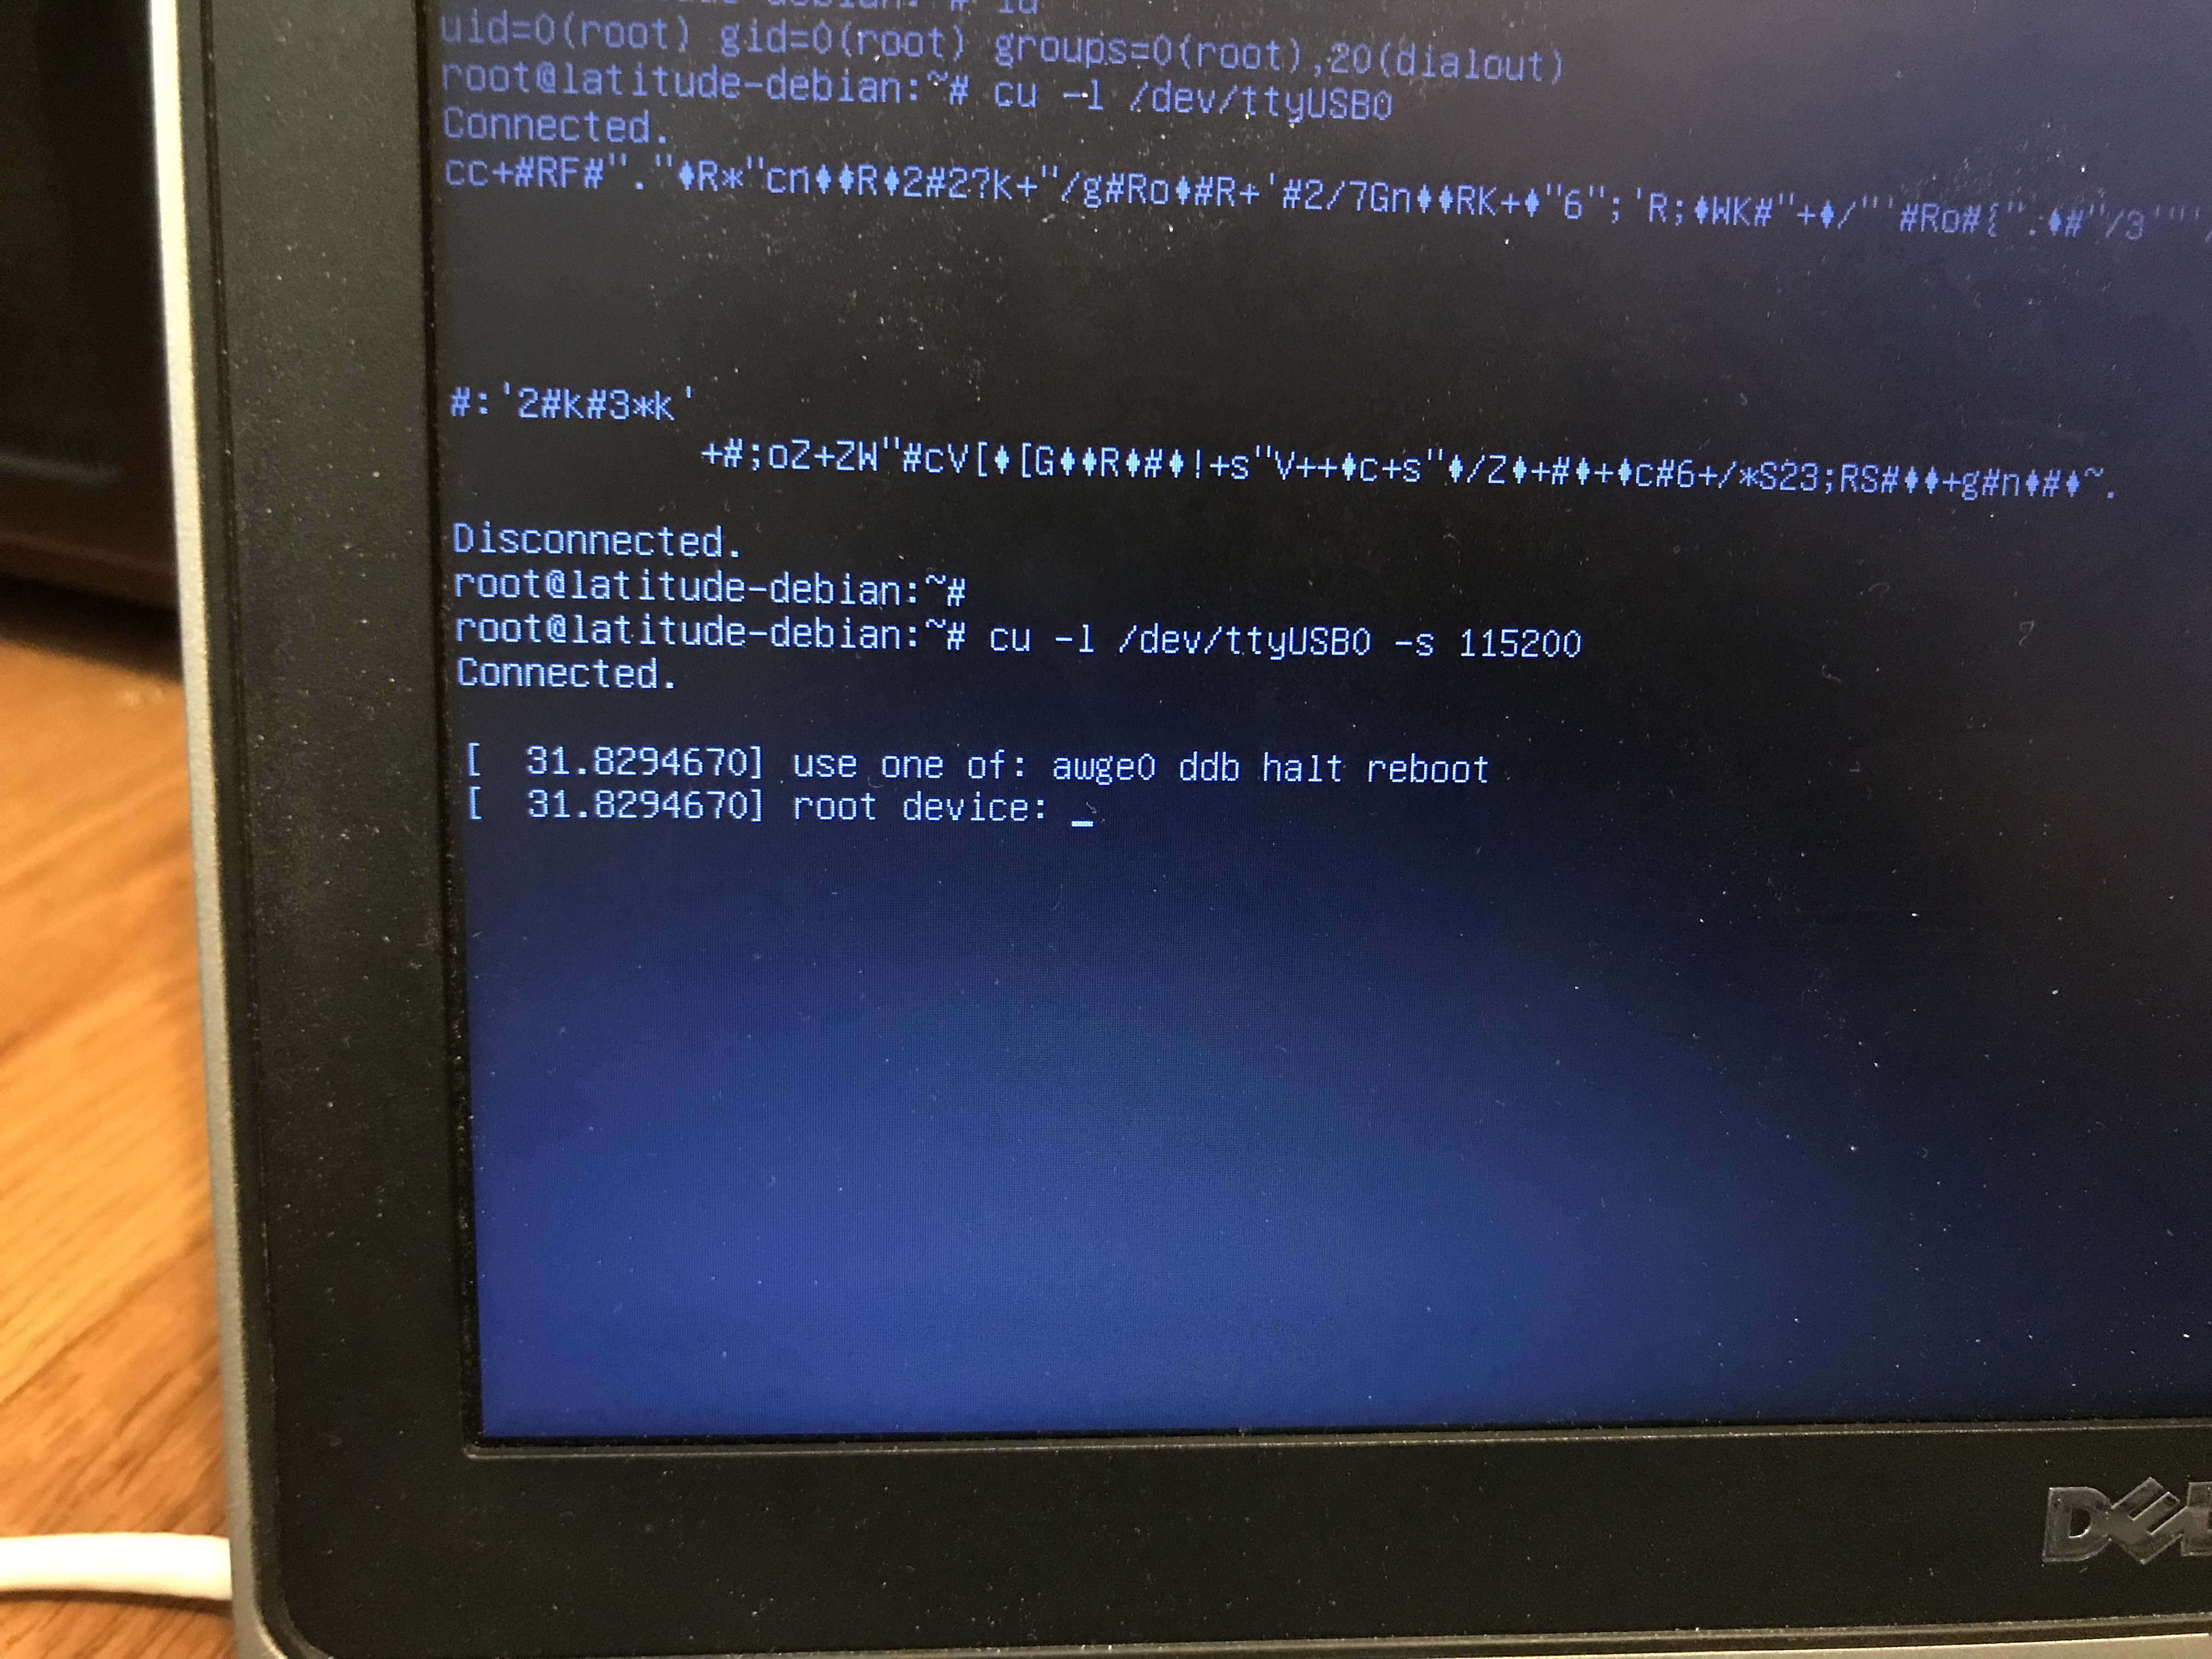
The serial console for my device was running at 115200 baud. If you see funny junk try different speeds. If you see nothing, try swapping RX and TX. I made both mistakes, for illustrative purposes of course.
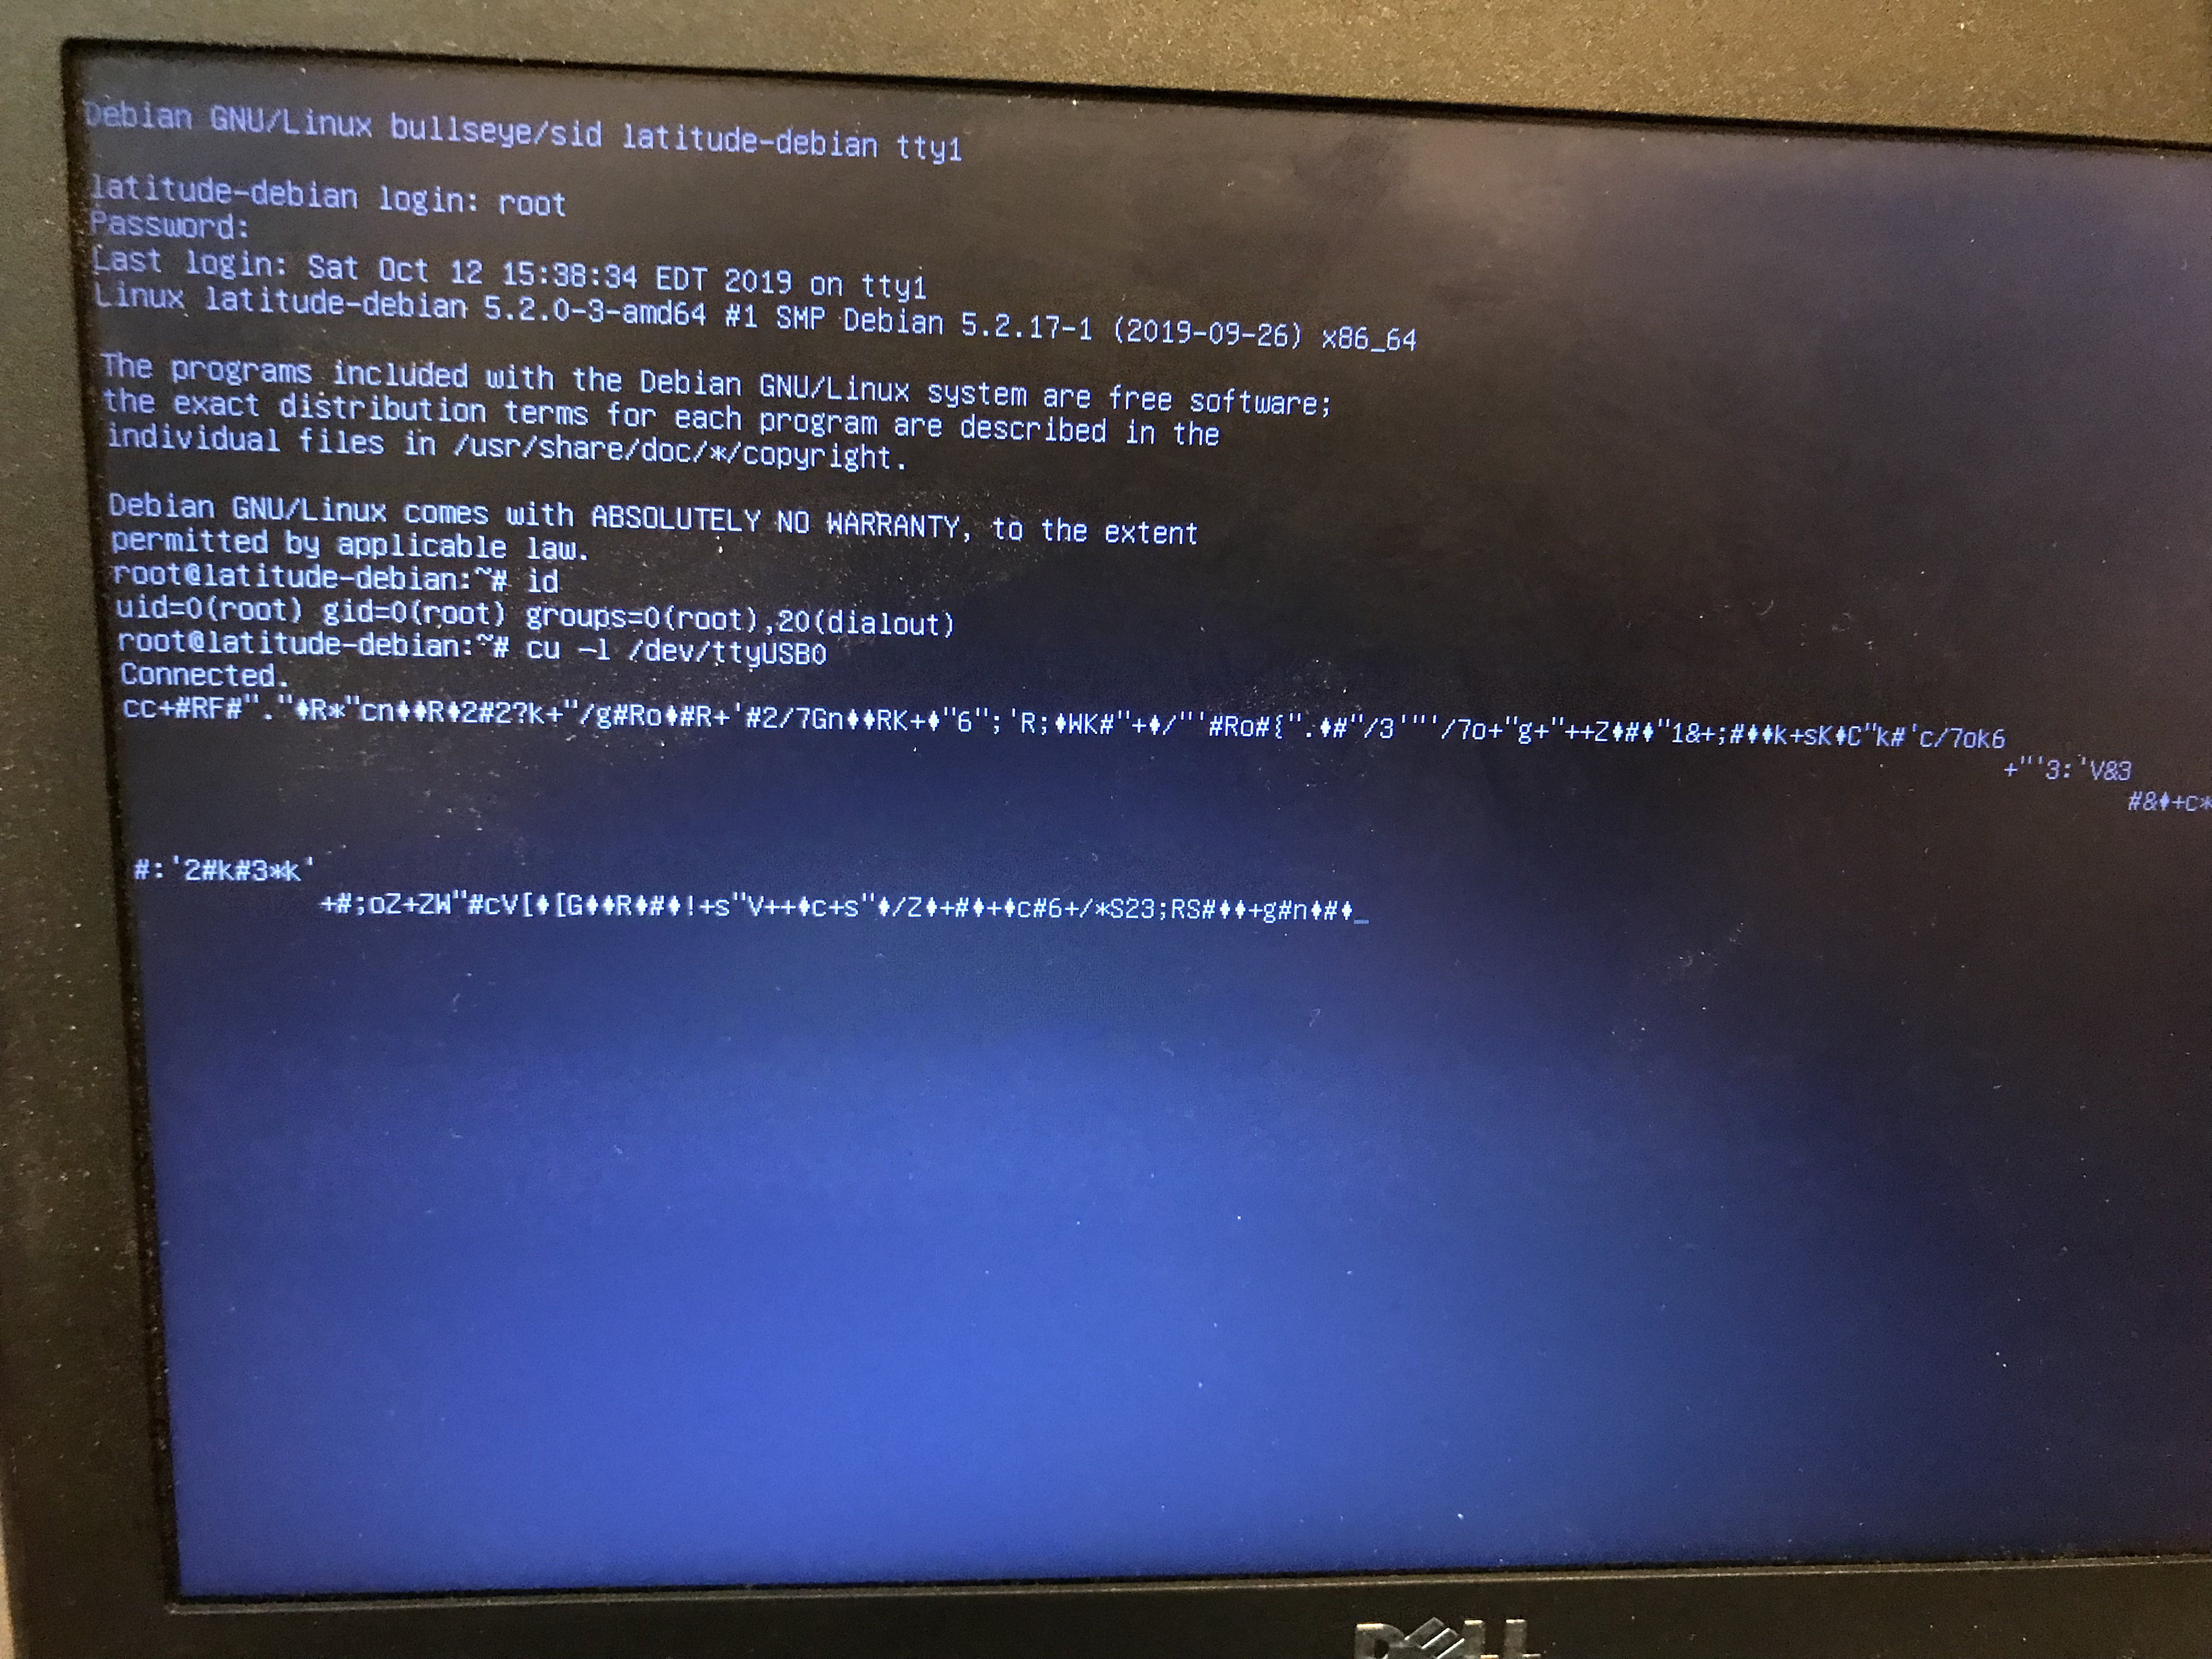
The way to exit cu is the same as for ssh: press enter then ~.. Note that when doing this over ssh you’ll need to escape the sequence first, so it’s ~~. or else the ssh session gets closed instead of cu.
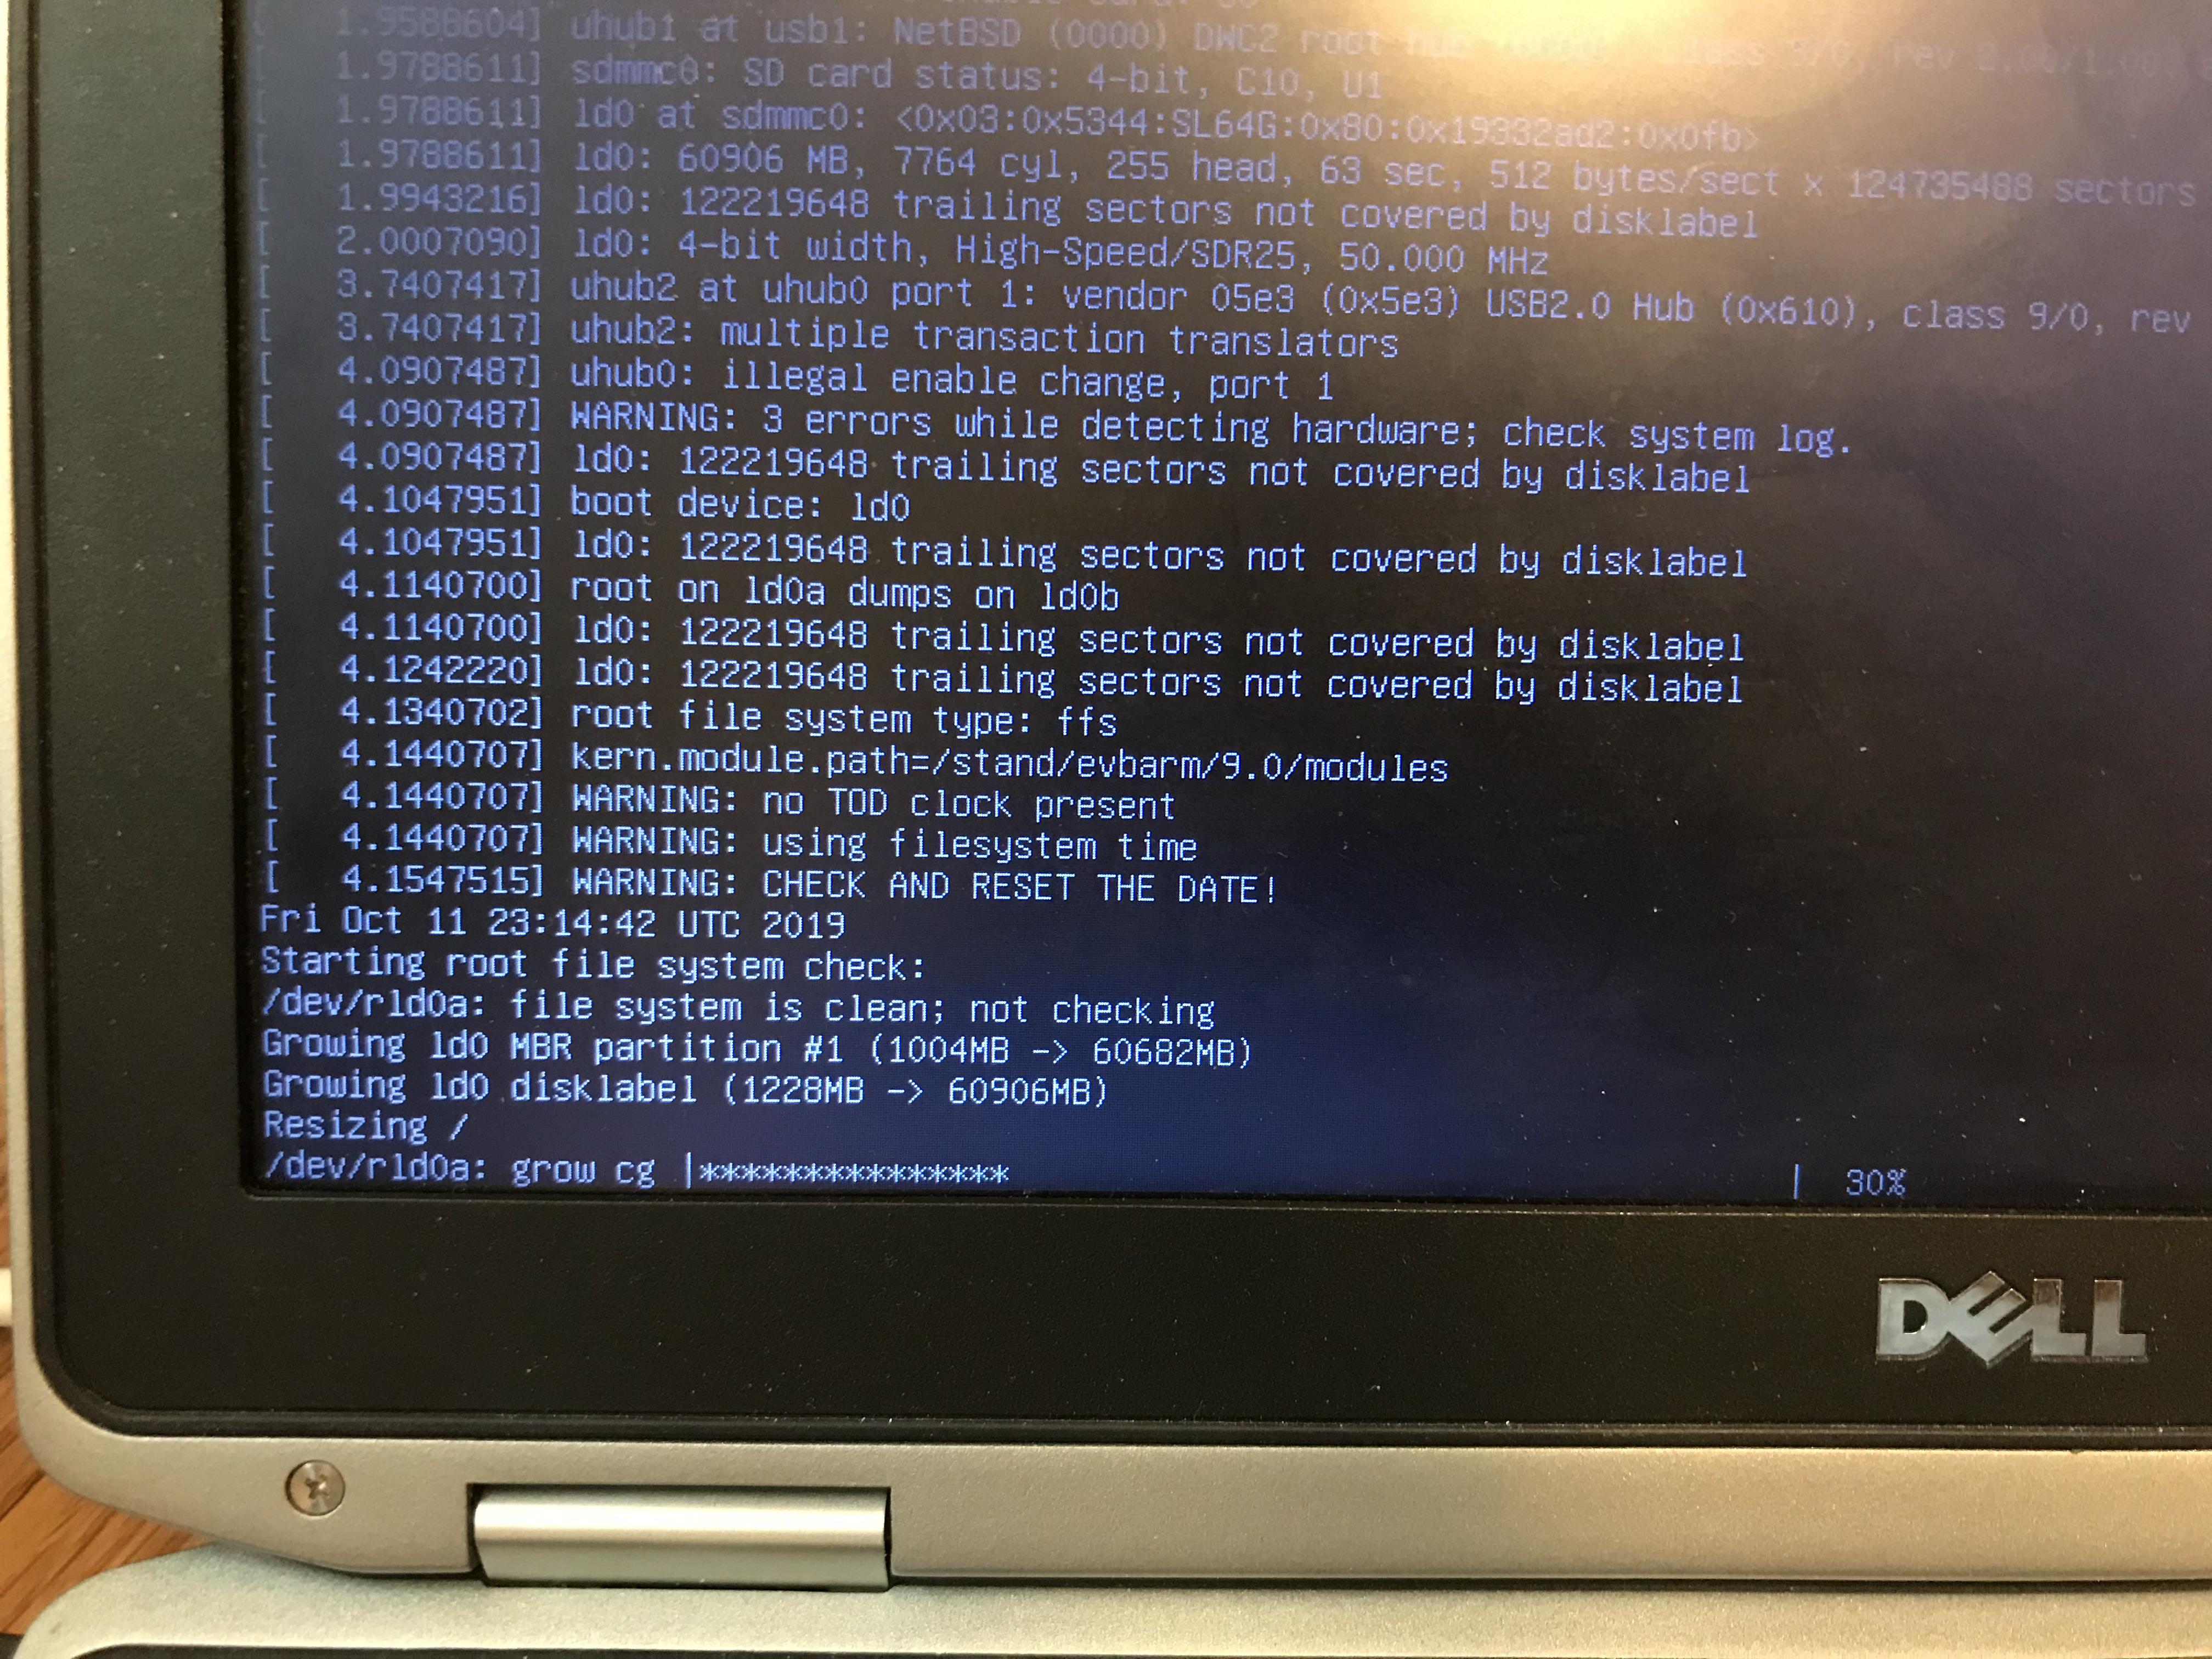
The first time the NetBSD image boots it will automatically resize the filesystem to use the available space. Using a 64GB SD card is pointless and takes forever. It’s probably fine to use a 2GB or 4GB card.
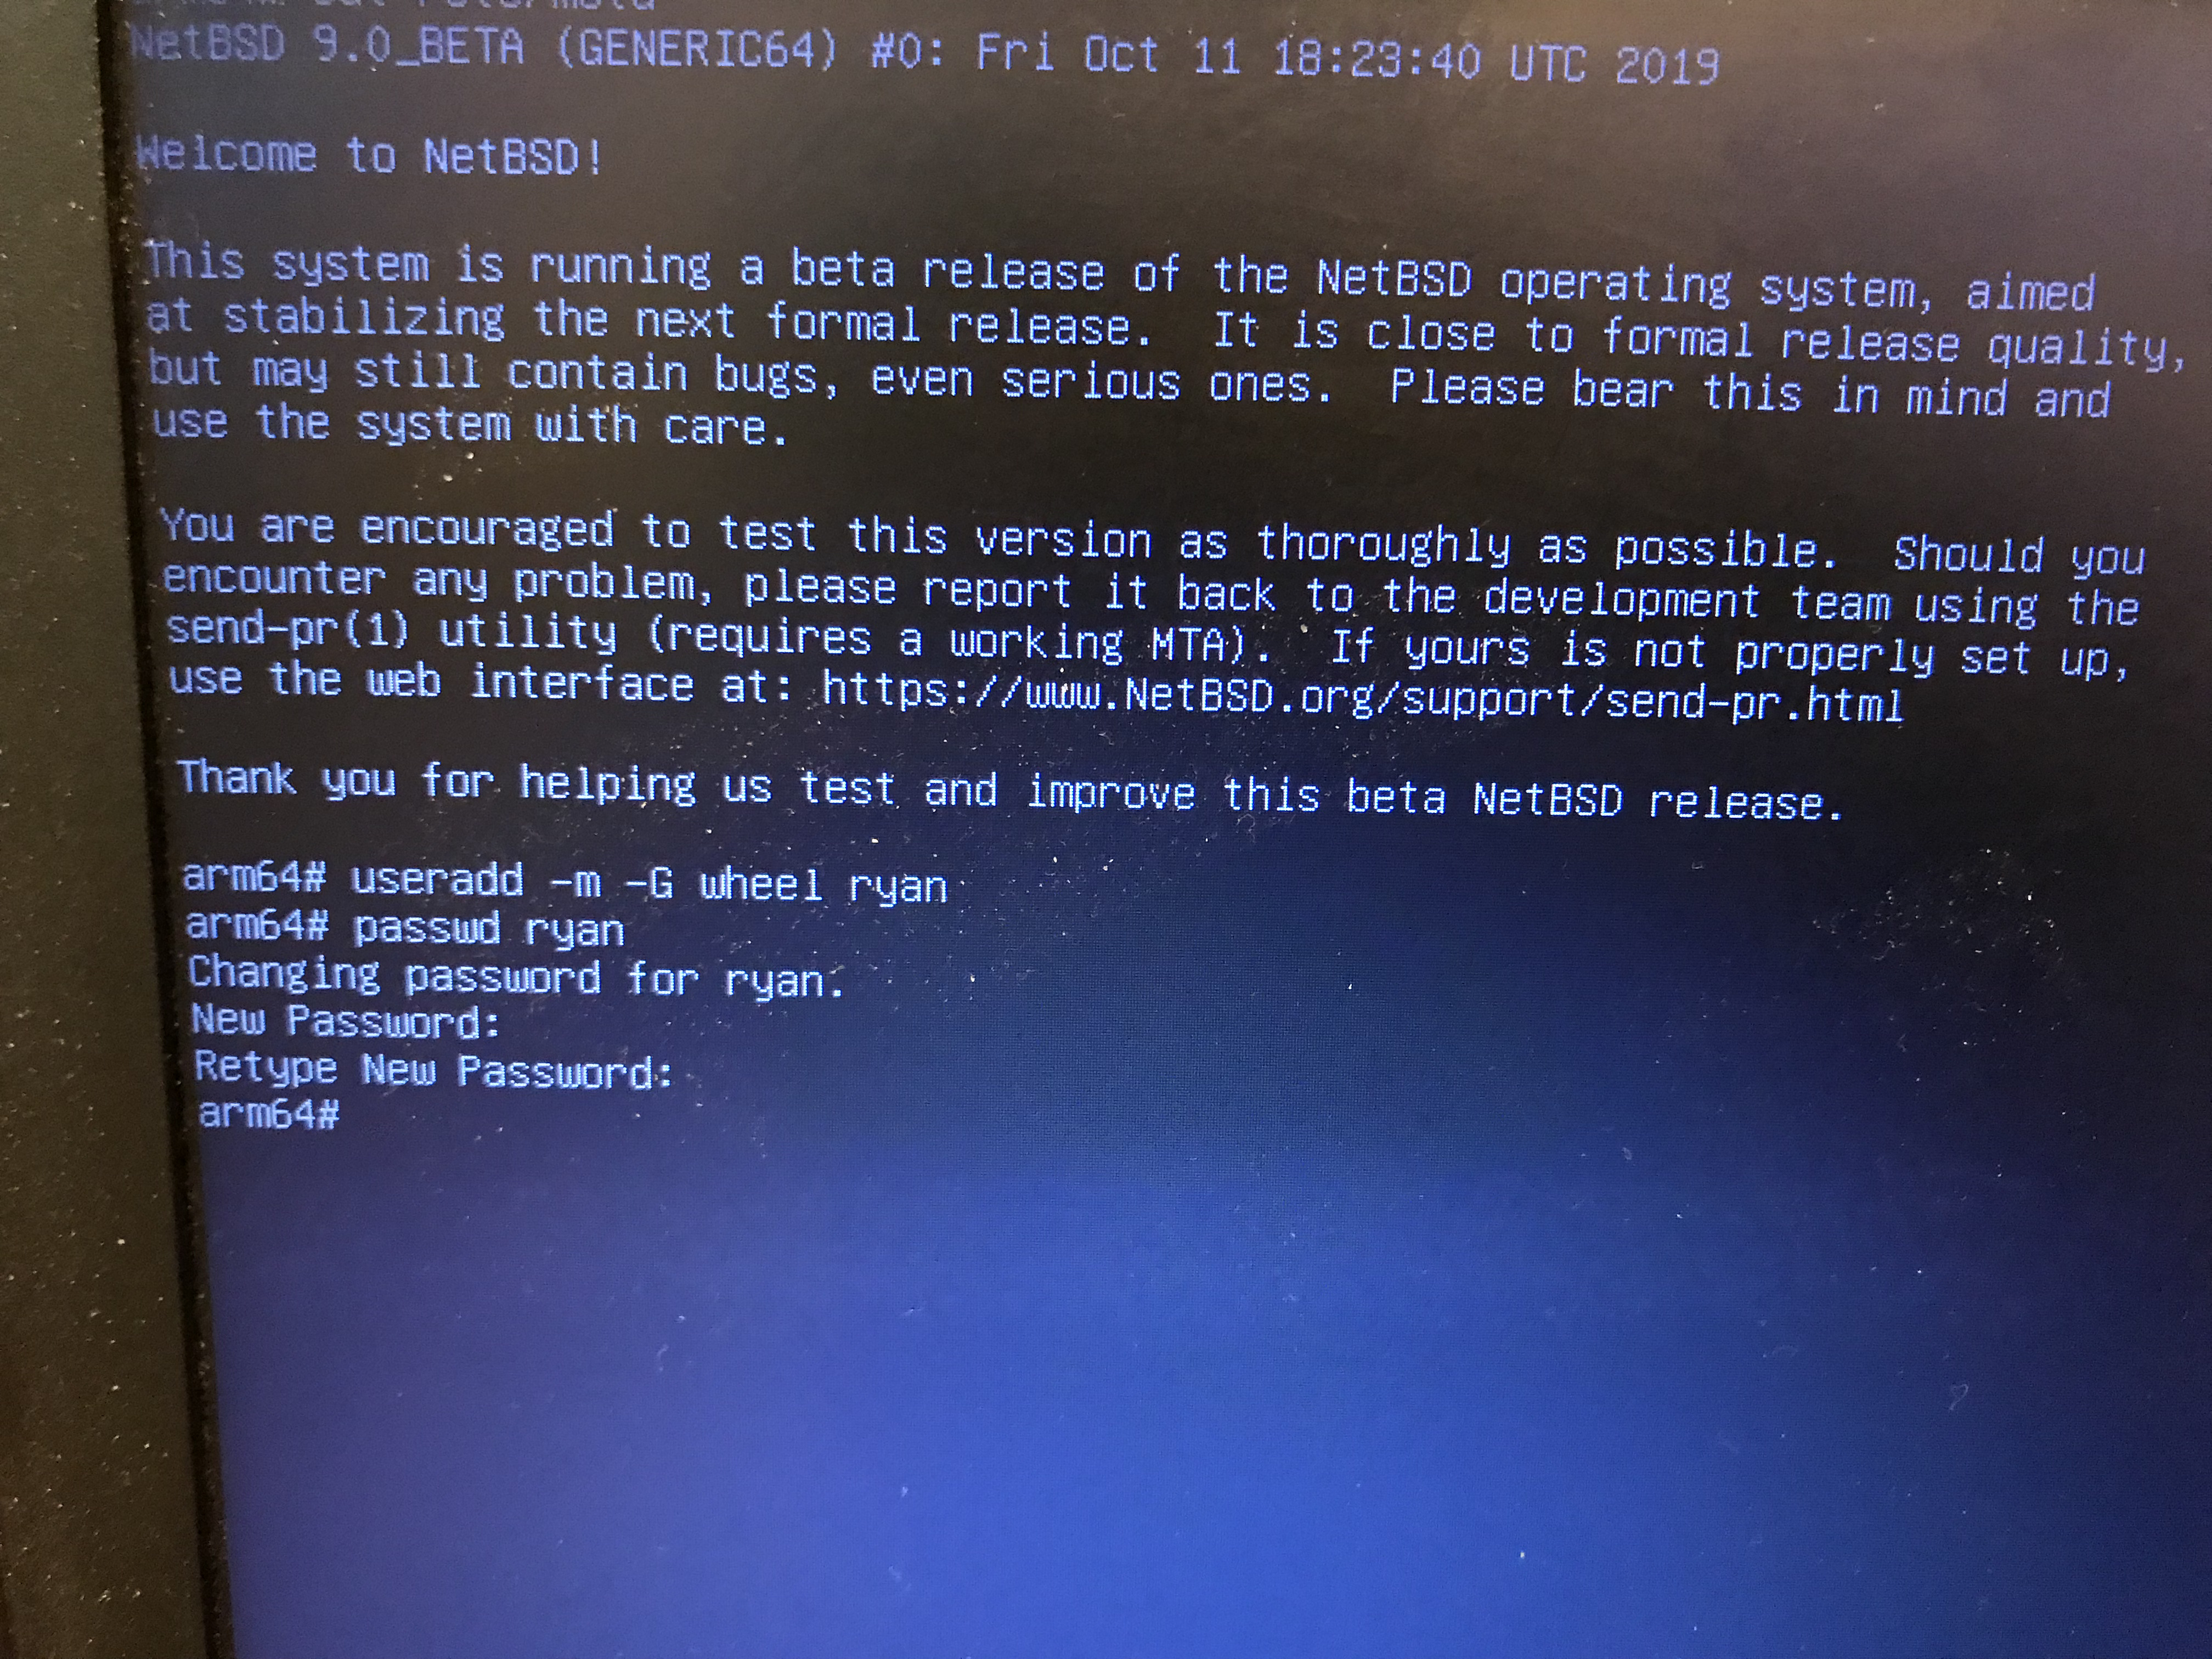
After NetBSD is done marking its territory you can log in as root, no password. This is a good time to set a root password. You should also add a user for non-root activities, and set the password for this account as well.
That’s all the software installation required. Run ifconfig and make a note of your IP address then run poweroff before unplugging, and then relocate the device to its new home.
Hardware Installation
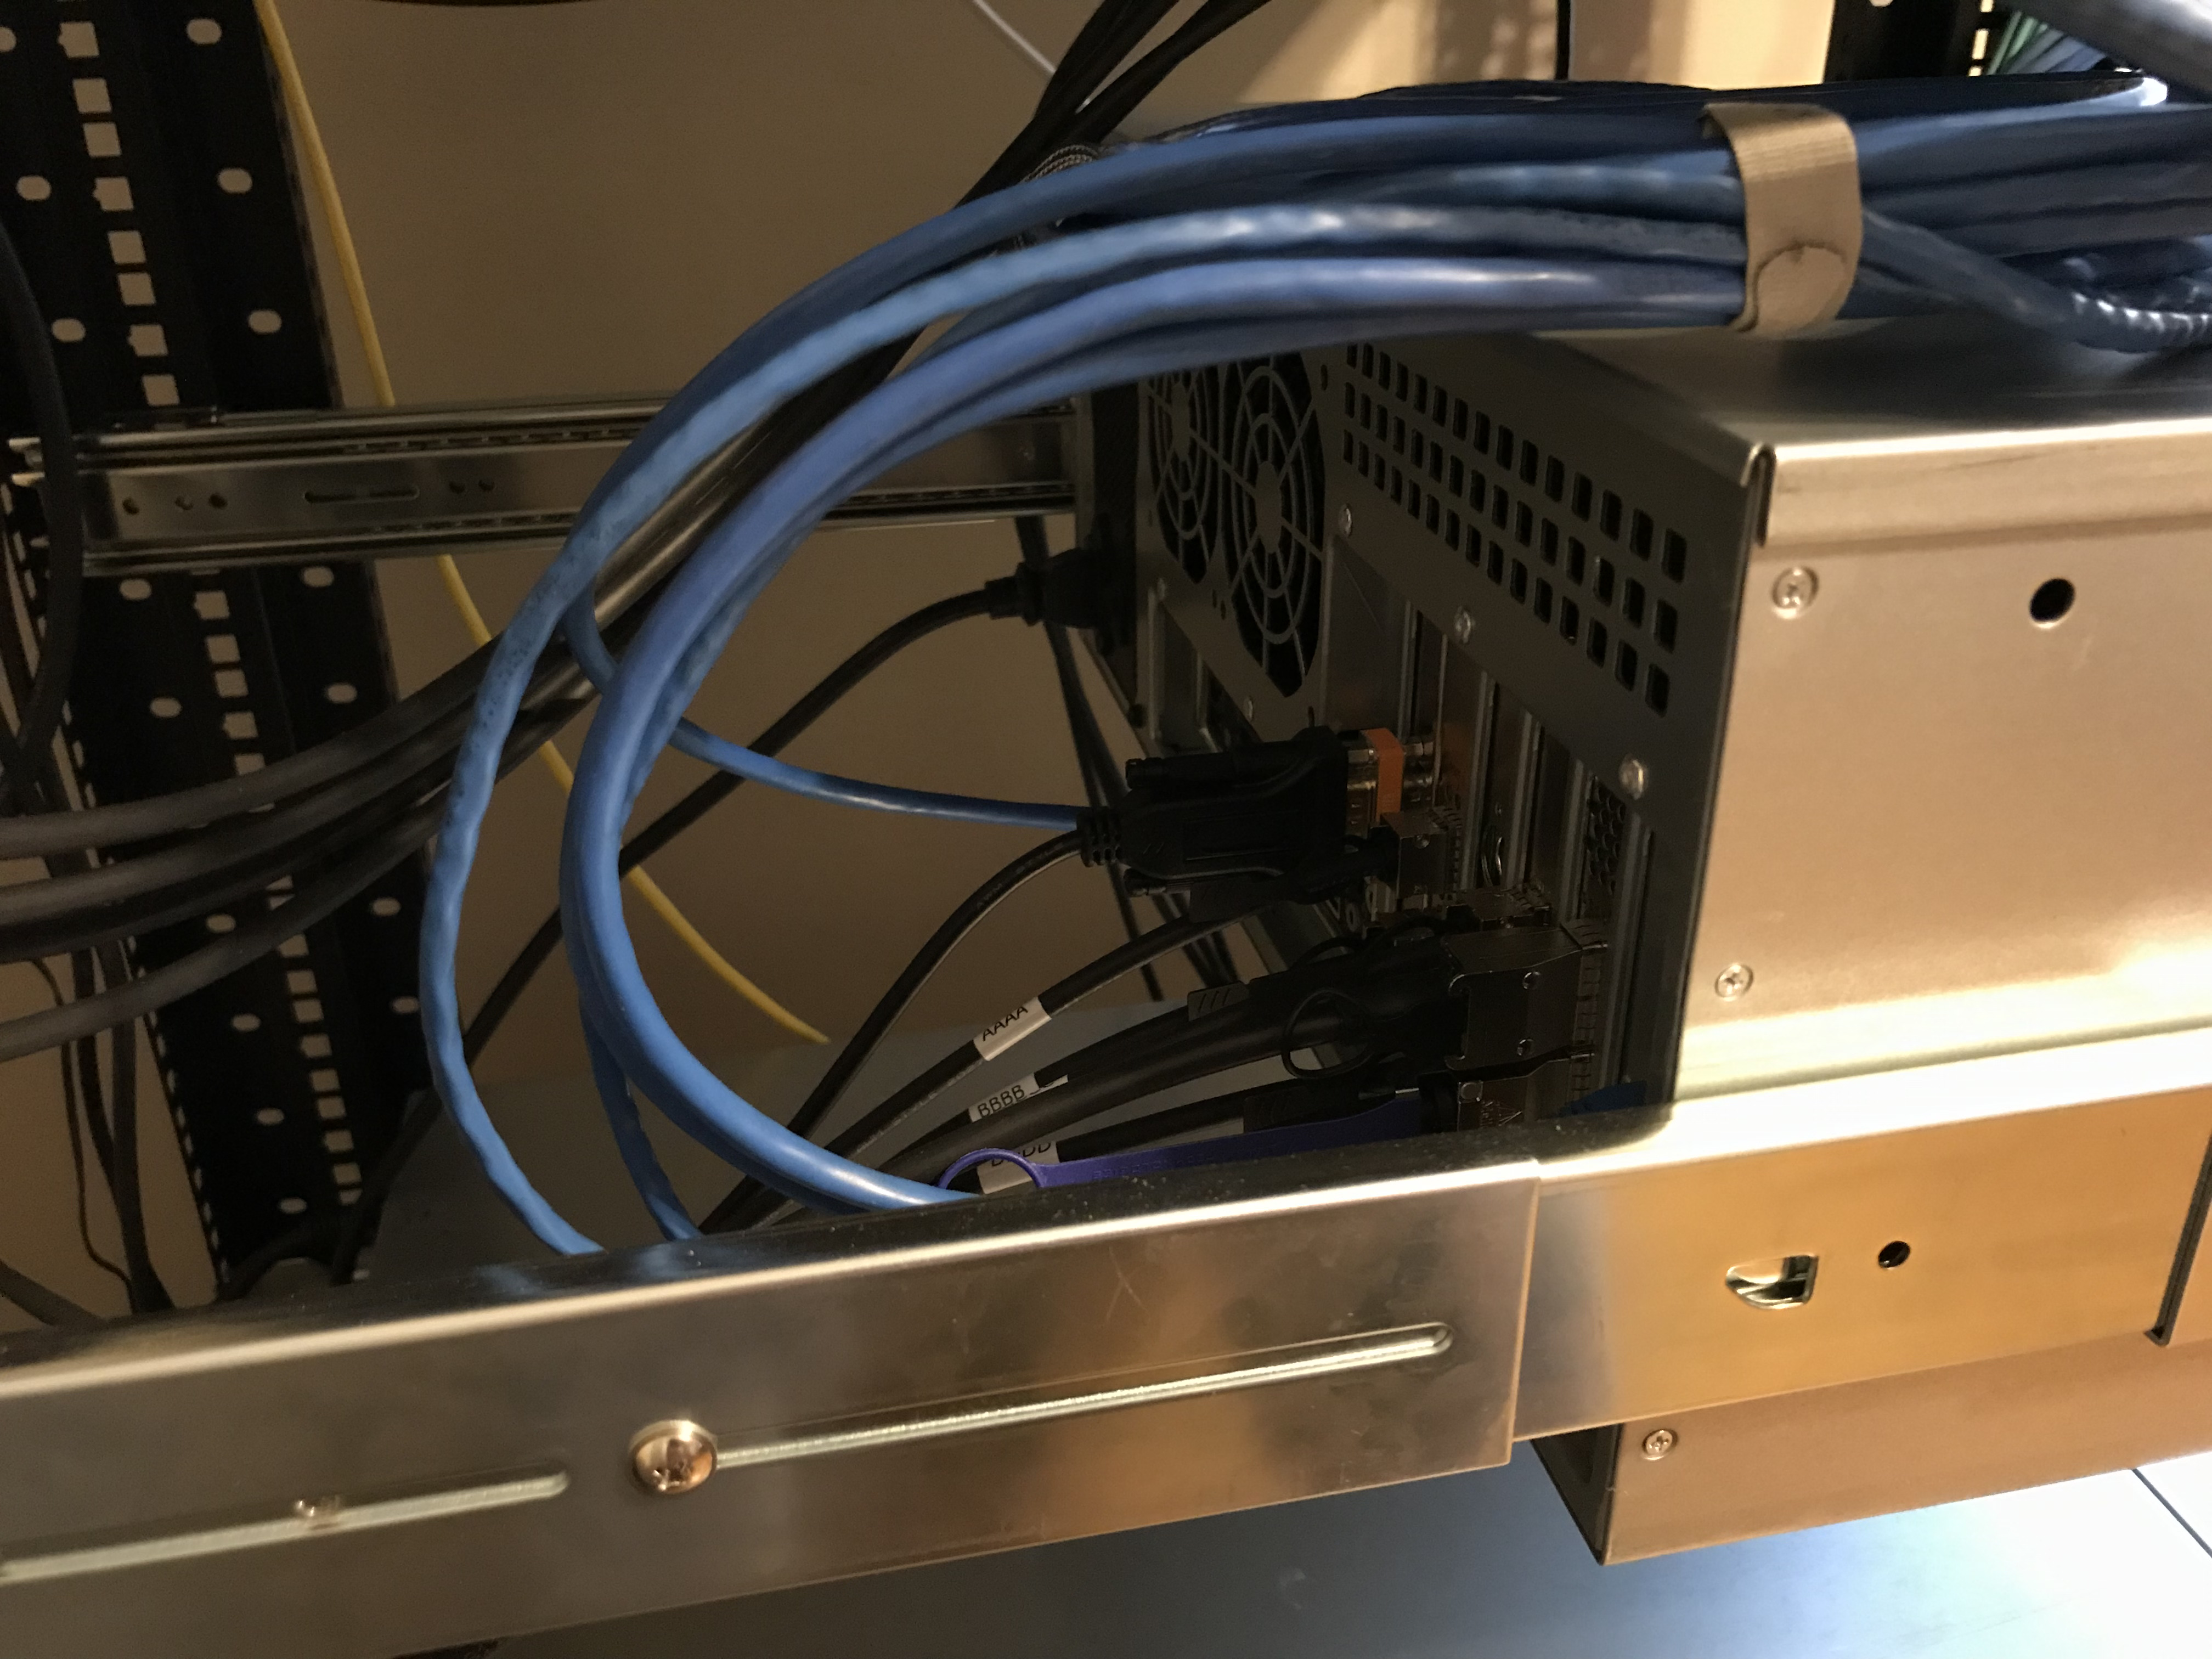
This will depend on your setup. I have 3 (to be 4 when I find another cable) serial cables attached to my device. I used a zip tie to attach the device to a rack rail so it stays out of the way.

Remote Access
Now ssh in and fire up tmux (it’s conveniently included in the NetBSD base system) and become root.
To connect to a server’s serial console, use cu -l /dev/ttyU# where # is a number corresponding to the serial port you want to use. The server will have to be configured to use the serial console.
NetBSD i386/amd64 Console Configuration
Thanks to kimmo in #netbsd for helping me figure out the following to get my serial console configured in NetBSD 9.
Simply add the line consdev=com0,115200 to /boot.cfg:
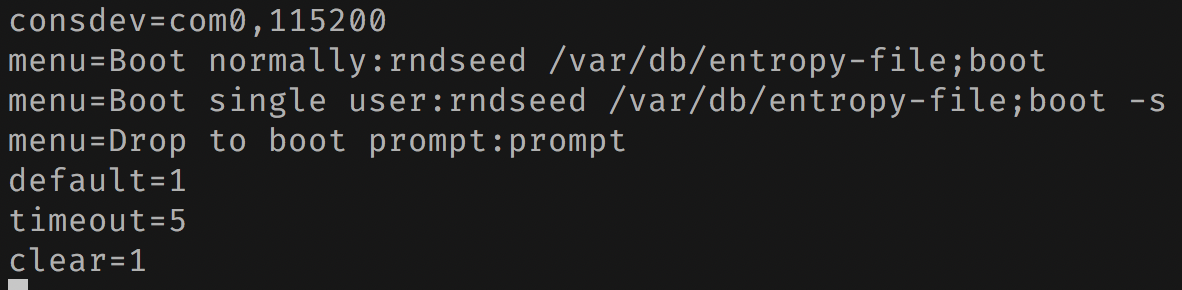
Note that the com ports are numbered from 0 rather than 1. In my system, com1 is the IPMI serial port (which is the one I actually use for that system, since it has it).
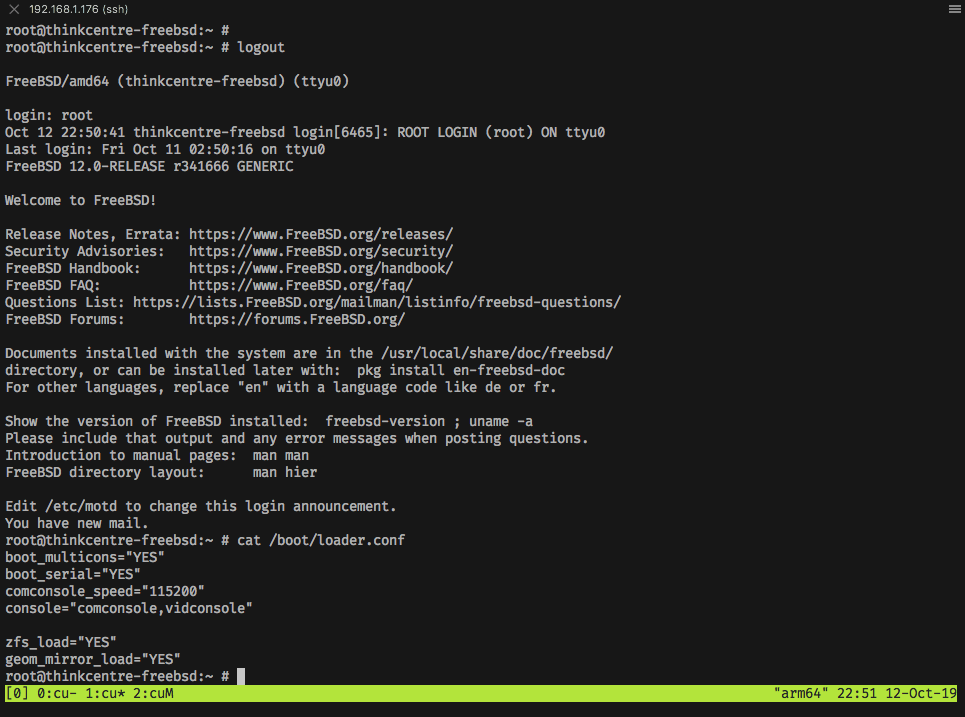
FreeBSD Console Configuration
Configuring FreeBSD to use a serial console is done by editing /boot/loader.conf, shown here for an EFI system and for a legacy boot system:

I have manually set the consoles in these examples, but strictly speaking, all you should really need to enable the serial console is:
boot_serial=YES
comconsole_speed=115200
It’s a good idea to add boot_multicons=YES in case you want to use the video console too at some point, so:
boot_multicons=YES
boot_serial=YES
comconsole_speed=115200
Putting boot_serial and boot_multicons makes the serial port the primary console device while still allowing login on the video console. I find this configuration useful because you can copy kernel messages from a serial console much more easily than from a video console. Alternatively, the following settings will leave the primary console as the video console (if present):
boot_multicons=YES
comconsole_speed=115200
Debian Console Configuration
Configuring Linux to use a serial console can vary, but for Debian and GRUB2 it means editing /etc/defaults/grub and updating the boot image as shown here:
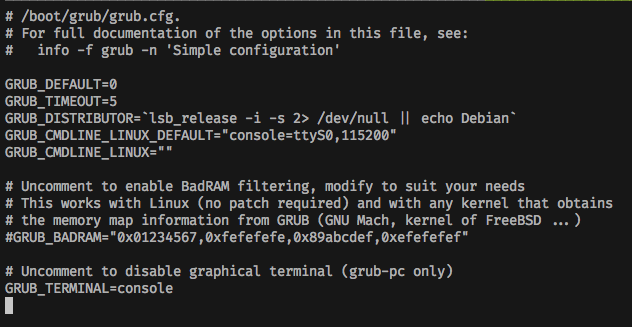
EDIT: kimmo in #netbsd suggests the following may be required to configure the serial port speed correctly for GRUB:
16:49 < kimmo> you should add this for grub:
16:49 < kimmo> GRUB_TERMINAL=“console serial”
16:49 < kimmo> GRUB_SERIAL_COMMAND=“serial --speed=115200”
16:49 < kimmo> otherwise only the kernel will be on the serial port
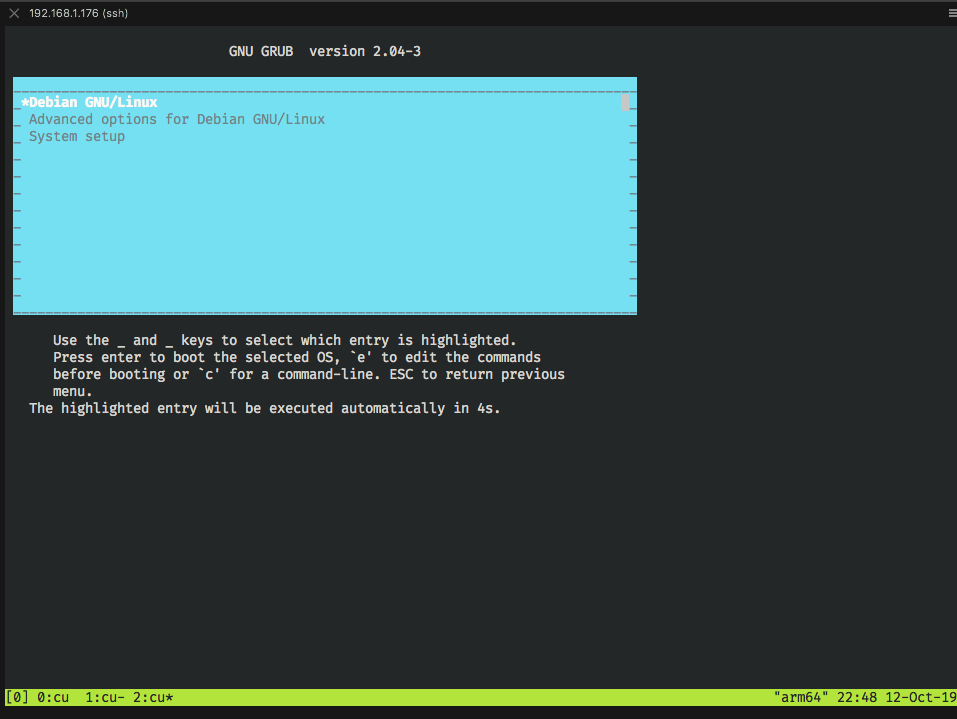
I uncommented the GRUB_TERMINAL line and modified the GRUB_CMDLINE_LINUX_DEFAULT line. This example only enables the serial console. To keep the video console active as well, use this:
console=tty0 console=ttyS0,115200
The last console listed becomes /dev/console, so in this case the serial port is the primary console. Change the order if you want the video console as /dev/console.
Run update-grub to generate the updated grub configuration file and boot image.
You can also edit the grub command line at boot for a one-off job if needed.

OpenBSD Console Configuration
As a bonus, I performed an OpenBSD install using the serial console. When booting the install media, you have to use the video console and keyboard to escape to the boot> prompt and enter the following:
stty com0 115200
set tty com0
Then continue installation from the couch on your laptop. 

The installer notices you are using the serial console and offers to configure the installed system to use the same settings.

Conclusion
No packages had to be installed; everything necessary was included in the base system image. I had problems with the eMMC and gigabit ethernet on the Odroid-C2 so I cheated by using an SD card and USB ethernet adapter. You’ll have better luck with a Raspberry Pi. Other than that, this was a piece of cake to set up.