Even's DIY ‘n stuff blog

My old Logitech MX518 was still mechanically working, but it also had the same problem as my SteelSeries Sensei mouse I re-coated a while ago: The rubberized surface was really worn out and felt sticky and disgusting. I tried several methods to clean the surface with no luck, so I decided to just simply sand the rubber coating off like I did with Sensei mouse.

Steps were the same as with my Sensei mouse:

  1. Remove mouse skates
  2. disassemble the mouse
  3. sand the parts
  4. try to assemble the mouse, wonder why there’s so many leftover screws
  5. figure it out, assemble the mouse
  6. ???
  7. Profit! and done

Pictures:

If you are careful when removing mouse skates you might be able to reuse them like I did, but also be prepared to order new set if old ones won’t work anymore, or you manage to destroy them.

Scroll wheel was covered in dust and all sorts of gunk, so I washed all the plastic parts from the scroll wheel assembly with some dish washing liquid. Good stuff for this purpose since it removes grease and other dirt really well.

The carnage

Sanding paper get gunked up quite quickly because of the rubber type of surface the mouse has. I used regular 80-100 grit paper to remove the surface (don’t remember exactly what the grit was, sorry), and then 180 grit paper to make the surface little bit smoother.

Finished product. The “+” button in front of the scroll wheel doesn’t have the clear tactile feeling any more but it still works. Other buttons work like they did before disassembly.

I first thought I could paint the sanded surface, but eventually decided to leave the surface as it is. It looks better IRL, but to be honest the main goal was to make mouse pleasant to use, not to make it pretty or anything. :smile:

5 Likes

Made few coasters out of wood. I did see these type of coasters in somewhere, maybe in a YouTube video, but can’t remember where. Anyway, these were really simple to make if you have access to miter saw.

Got bit carried away and made few stacks of coasters. :sweat_smile:

I realized the wood I used wasn’t dry enough, so there’s a chance the wood might still crack when it’s drying up. As you can see on one of the stacks there’s clearly some moisture. It’s not that big of a deal, I can throw these in the fireplace and cut new ones if needed.

At the moment coasters work as intended. :+1:

I left these pieces as they are, but I could try spray on lacquer or something for the next batch.

5 Likes

One of my forever ongoing projects is my desk/battle station, which I’m constantly thinking on how to improve.

I already have one USB port mounted under my desk, the one that I currently have is this.

Sometimes I would like to have more than one USB port easily available, so I’m going to solve this problem next.

I found left over piece of L-alu profile that was perfect for the project. I started out by marking down the USB ports, drilled some holes and used my needle file set.

If someone is wondering, I’m using two of these:

I also decided to add one headphone connector here. Thought this might be handy as well.

Measuring how big the hole for the headphone jack should be

Sanded and ready to be painted. Holes for the USB ports are not perfect, but they will be hidden under the desk so I wouldn’t worry about it.

Dad had black spray paint in the shed. Sanded the first layer and sprayed second layer to get bit more even surface.

Painted and assembled. I didn’t have black screws, so I just took regular stainless steel screws and used permanent marker pen to color the screw heads black. I mean hey, it worked. :man_shrugging: :smile:

And mounted under the desk. I know the USB ports are upside down, and yes, can’t be arsed at the moment to rotate them. Maybe when it starts to irritate me enough I might do something about it. :sweat_smile:

And yes, that is a toilet paper holder from Ikea, bolted under the desk as well. Working really well as headphone hanger. :ok_hand:

EDIT:

And the reason why I have usb ports under my desk is simple, I don’t have front I/O in my case, so I instead have em placed here. All the ports under my desk are connected to the back of my computer, just like regular usb extension cables.

15 Likes

Nice man what distro? :crazy_face::crazy_face::crazy_face:

I see you running i3wm :wink:

2 Likes

i3 is love, i3 is life. :smirk:

Running atm the Majaro i3 edition. Thinking of installing Arch at some point. @BookrV said ladies love Arch users and will gather around me, competing for my attention if I start using it. :thinking:

5 Likes

I was just about to say Manjaro. Lol

3 Likes

Nice color scheme.

@BookrV is a fucking liar btw :wink: Only thing that gathers around you when you use Arch is sweaty Arch users telling you you’re doing it wrong.

1 Like

I’ll man up and install FreeBSD. Then I can feel the power of the universe channeling inside me.

/s

Ironically I can’t get KDE to work on FreeBSD, have to get back to that project soon. :smile:

Thanks, .Xresources bellow if you want em

.Xresources

!Font, scrollbar and default window size declarations

URxvt.font:xft:Monospace:pixelsize=15:antialias=true
URxvt.boldfont:xft:Monospace-Bold:pixelsize=15:antialias=true

URxvt.scrollBar: false
URxvt.geometry: 90x30

!Background opacity. This also defines background color.
urxvt*depth: 32
urxvt*background: rgba:1000/1000/1000/E600


!Disables the insanely annoying Ctrl+Shift shortcut that enters ISO14755 mode
URxvt.iso14755:         False

!EXTENSIONS:
URxvt.perl-ext-common: selection-to-clipboard,pasta
URxvt.keysym.Control-Shift-V:     perl:pasta:paste


! special
*.foreground:   #d0d0d0
*.background:  #0d0c0c
*.cursorColor:  #d0d0d0

! black
*.color0:       #0f0e0e
*.color8:       #808080

! red
*.color1:       #ff0099
*.color9:       #ff0099

! green
*.color2:       #b61566
*.color10:      #b61566

! yellow
*.color3:       #fb66bf
*.color11:      #fb66bf

! blue
*.color4:       #0683a1
*.color12:      #0683a1

! magenta
*.color5:       #7e079c
*.color13:      #7e079c

! cyan
*.color6:       #e207f2
*.color14:      #e207f2

! white
*.color7:       #ffffff
*.color15:      #ffffff
1 Like

OpenBSD

1 Like

Hmm, I totally forgot to update some stuff here. Let’s fix that now.

My old desk used to have drawers where I could keep some small stuff I liked to have in arms reach. My new desk doesn’t have drawers (might make drawers later), so I used to hold some basic things like pens, usb drives, fabulously colored flash light and whatnot in small plastic…container? I guess that’s the right word.

That container was some old worn out lunchbox that I repurposed, but I never really liked it. So why not make new one out of wood? Goal was to make the box using only clue in assembly, no nails or screws. So being true to myself I went on and totally over engineered the hole thing. Sensible option would have been to just miter cut the sides and glue the bottom sheet of plywood to the frame, but instead I tried to attach the bottom piece slightly differently, hence the “over engineered” statement. :smile:

I can’t remember where I saw this technique to cut small slot to each side piece and sandwich all together in one glue up, but it felt interesting enough to try.

Oh and the slot was cut using the table saw. I didn’t have router when making this. I split the costs with dad747 and now we have a router in the workshop. :slight_smile:

Slot for the bottom piece is bit too big, the piece it self is about 4mm thick, while the slot is about 5mm. That wasn’t a problem since I put glue also in to the slot, so the bottom isn’t moving in its slot at all.

Then it was just matter of using enough clamps to hold the whole thing together while the glue was drying up.

And the final product, next to the old plastic container.

Idk, wood just looks always nicer than smooth plastic surface. :slight_smile:

I didn’t use any finishing method with the box so it’s just natural wood surface now. Might do something later.

I might make a new box later, the wood that I used for the sides is 15mm thick and, well, bit too thick for this purpose.

8 Likes

blows of some dust away from abandoned blog

Aight, cleaned my first self made case today with some dishwashing soap. Case has been in storage for about 6 years now and the amount of dust it had collected was legendary. And it smelled like storage :nauseated_face:

I planing to reuse this and give it new life as htpc, for now. I need to check if I have to get new psu and ssd for this

7 Likes

Cable monster vs no cable monster.

Wish I knew what was my reasoning on buying non modular psu for a case project where I tried to build small case without too much of wasted space.

Anyway, original 850w psu is making this really high pitched coil whine sound, and I’m not interested at hearing it while trying to watch movies. Luckily I found my old 520w psu I originally bought for my old core 2 duo rig. Fan in it is audible but I’ll see if I can tolerate it. If not I’ll throw some money at my local pc hardware store.

Ordered new ssd for this, but for now I’m just testing things with old laptop hdd.

And ignore that power switch dangling like that. You didn’t see anything.

9 Likes

So the old Corsair psu was warm even after the htpc was offline for few days. It might be that computer is just sipping enough power when switched off that it is enough to warm the PSU (that has not the fan running). Or it might be some of the internal components are just one step away of dying. What ever the case was, I thought it might be good idea to get new power supply for this.

Before anybody points out, yes, Gold rated 650w Seasonic power supply is absolutely overkill for this, but the reason why I picked this one was simple. I wanted to get a PSU with semi passive cooling, and this unit was one of the only ones that I was able to find in stock. All others had availability dates few weeks in the future. And me being inpatient guy waiting was not a option. :smile:

I might recycle this PSU to my future NAS build later on. Or get new one, who knows. :upside_down_face:

Oh yeah, I got 250gig SSD too. Now I can barely even see the Elementary OS logo when this thing boots. :ok_hand:

PSU and SSD in place. SSD isn’t attached in any way, I might put some double sided tape under it later but meh, it’s fine like that for now.

One thing to mention about this new PSU: It comes with PSU tester! Or rather, this is more clean way to start the PSU without computer. I wouldn’t mind if other brands would send these with the PSU’s too.

And htpc setup ready. For now.

6 Likes

Anyone following my blog: I finally started working with the Apple G5 case. Project log here: Sæglópur - Power Mac G5 case mod project

7 Likes

Well since this blog is about stuff that I find interesting I might as well share some linux related things here too.

While I was testing Alacritty terminal today I noticed some odd behavior with ranger, which is a terminal file manger.

While I prefer to use GUI file managers like Thunar, imo the image preview in ranger is something you can’t get in GUI managers. Well while I was playing with ranger in both urxvt and alacritty I noticed that the image preview breaks if I manipulate window sizes in awesomewm, or move focus out of the said window, etc.
I’ve had these small problems with image preview before but never got around fixing them, I always thought this is caused by the terminal emulator.

Well today while searching solution for the problem I noticed some user had changed the default w3mimage renderer to Überzug. After installing it I only needed to add these lines to rangers rc.conf file:

set preview_images true
set preview_images_method ueberzug

first line was already in my rc.conf, just needed to add the second one.

Now the image preview is working well both in ranger and alacritty.

tl:dr try to use Überzug if you have problems rendering images in terminal.

Link to Überzug repository:

1 Like

I got myself two old IBM Model M keyboards. They are bit different generation, other has detachable cable while other one (the one with blue IBM badge) has fixed cable. They were in overall good condition, though they needed some proper cleaning. Here’s what I did.

Biggest problems were dust, stains, and general dirt that had accumulated over the years. PS/2 cables were also really dirty, and both keyboards had this strong smell, like the one that you notice in old warehouses and attics.

Both boards were in ok condition, but since these are used and I don’t know when was the last time these were cleaned I thought a proper and thorough cleanup was needed.

First I washed the key caps using normal dish wash soap.

I used regular dish wash soap to clean the outer plastic shell of the keyboard as well, and it was really effective against the smell I tried to get rid off.

However the smell didn’t completely come off when I tried to scrub the black key switch assembly on both boards, so I tried vinegar. I’ve used vinegar before to remove murky smell from my current apartment (previous tenant was a smoker) and it worked really well. I simply poured some vinegar to small bowl and let it sit close to keyboard parts a few days. And yea, I did this in my bathroom. :smile:

The annoying smell is still present on the cables, otherwise the vinegar trick worked really well here. I might try to use the vinegar to scrub the cables, but eh, that can wait for a better day, the smell isn’t nearly as bad now. And despite my best efforts cables still look quite dirty, probably something that’s only fixable with new cables.

Here’s cleaned keyboards without key caps.

And here one of the boards on my desk. Today I learned that some motherboard manufactures apparently aren’t complying to old PS/2 connector standard that closely anymore, causing problems with older keyboards. At least that’s the only explanation I found, since neither of the Model M’s are working on my current Ryzen desktop that has MSI motherboard. When I tested these using my old workstation (Intel 2500k + Asus mobo), both keyboards worked fine when connected to PS/2 connector. And yes PS/2 does not support hot swap, I did shut down the computer first before connecting the keyboard to PS/2 connector.

Well PS/2 to USB adapter is on it’s way so hopefully that will solve the problem. :crossed_fingers:

7 Likes

I’ve wanted to revamp my home network a little, so to get things started I got myself new x86 based firewall/router. Here’s my initial thoughts about the platform after using it for few days.

I haven’t done any major stress testing so take my opinion as “filthy casuals point-of-view” :grinning_face_with_smiling_eyes:

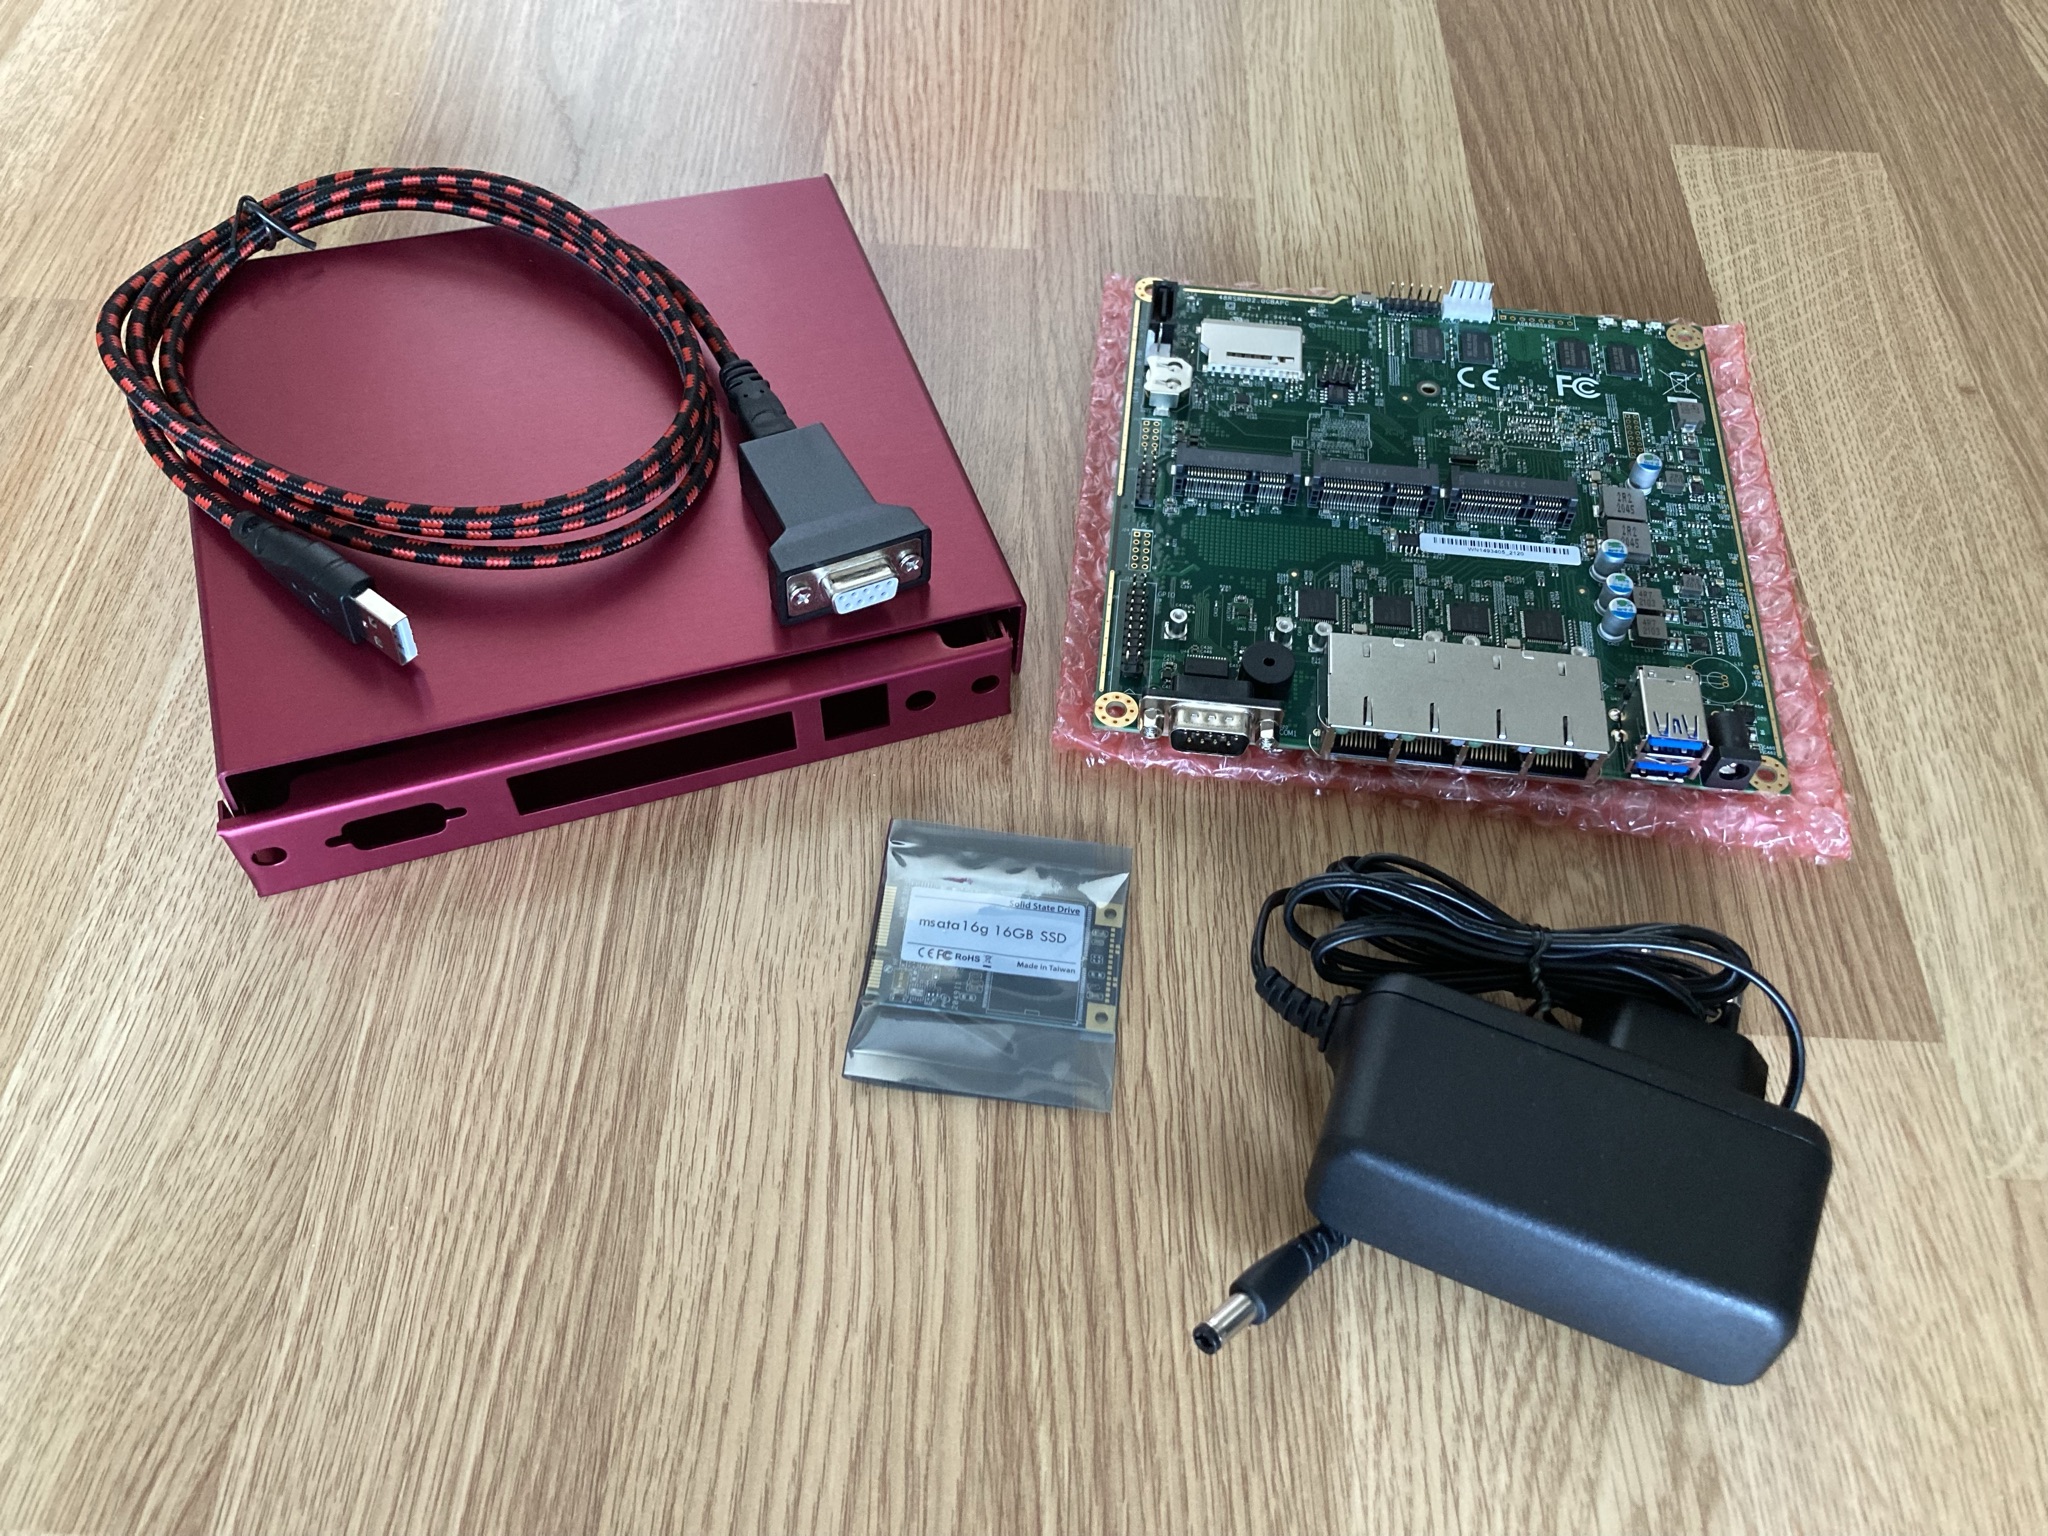
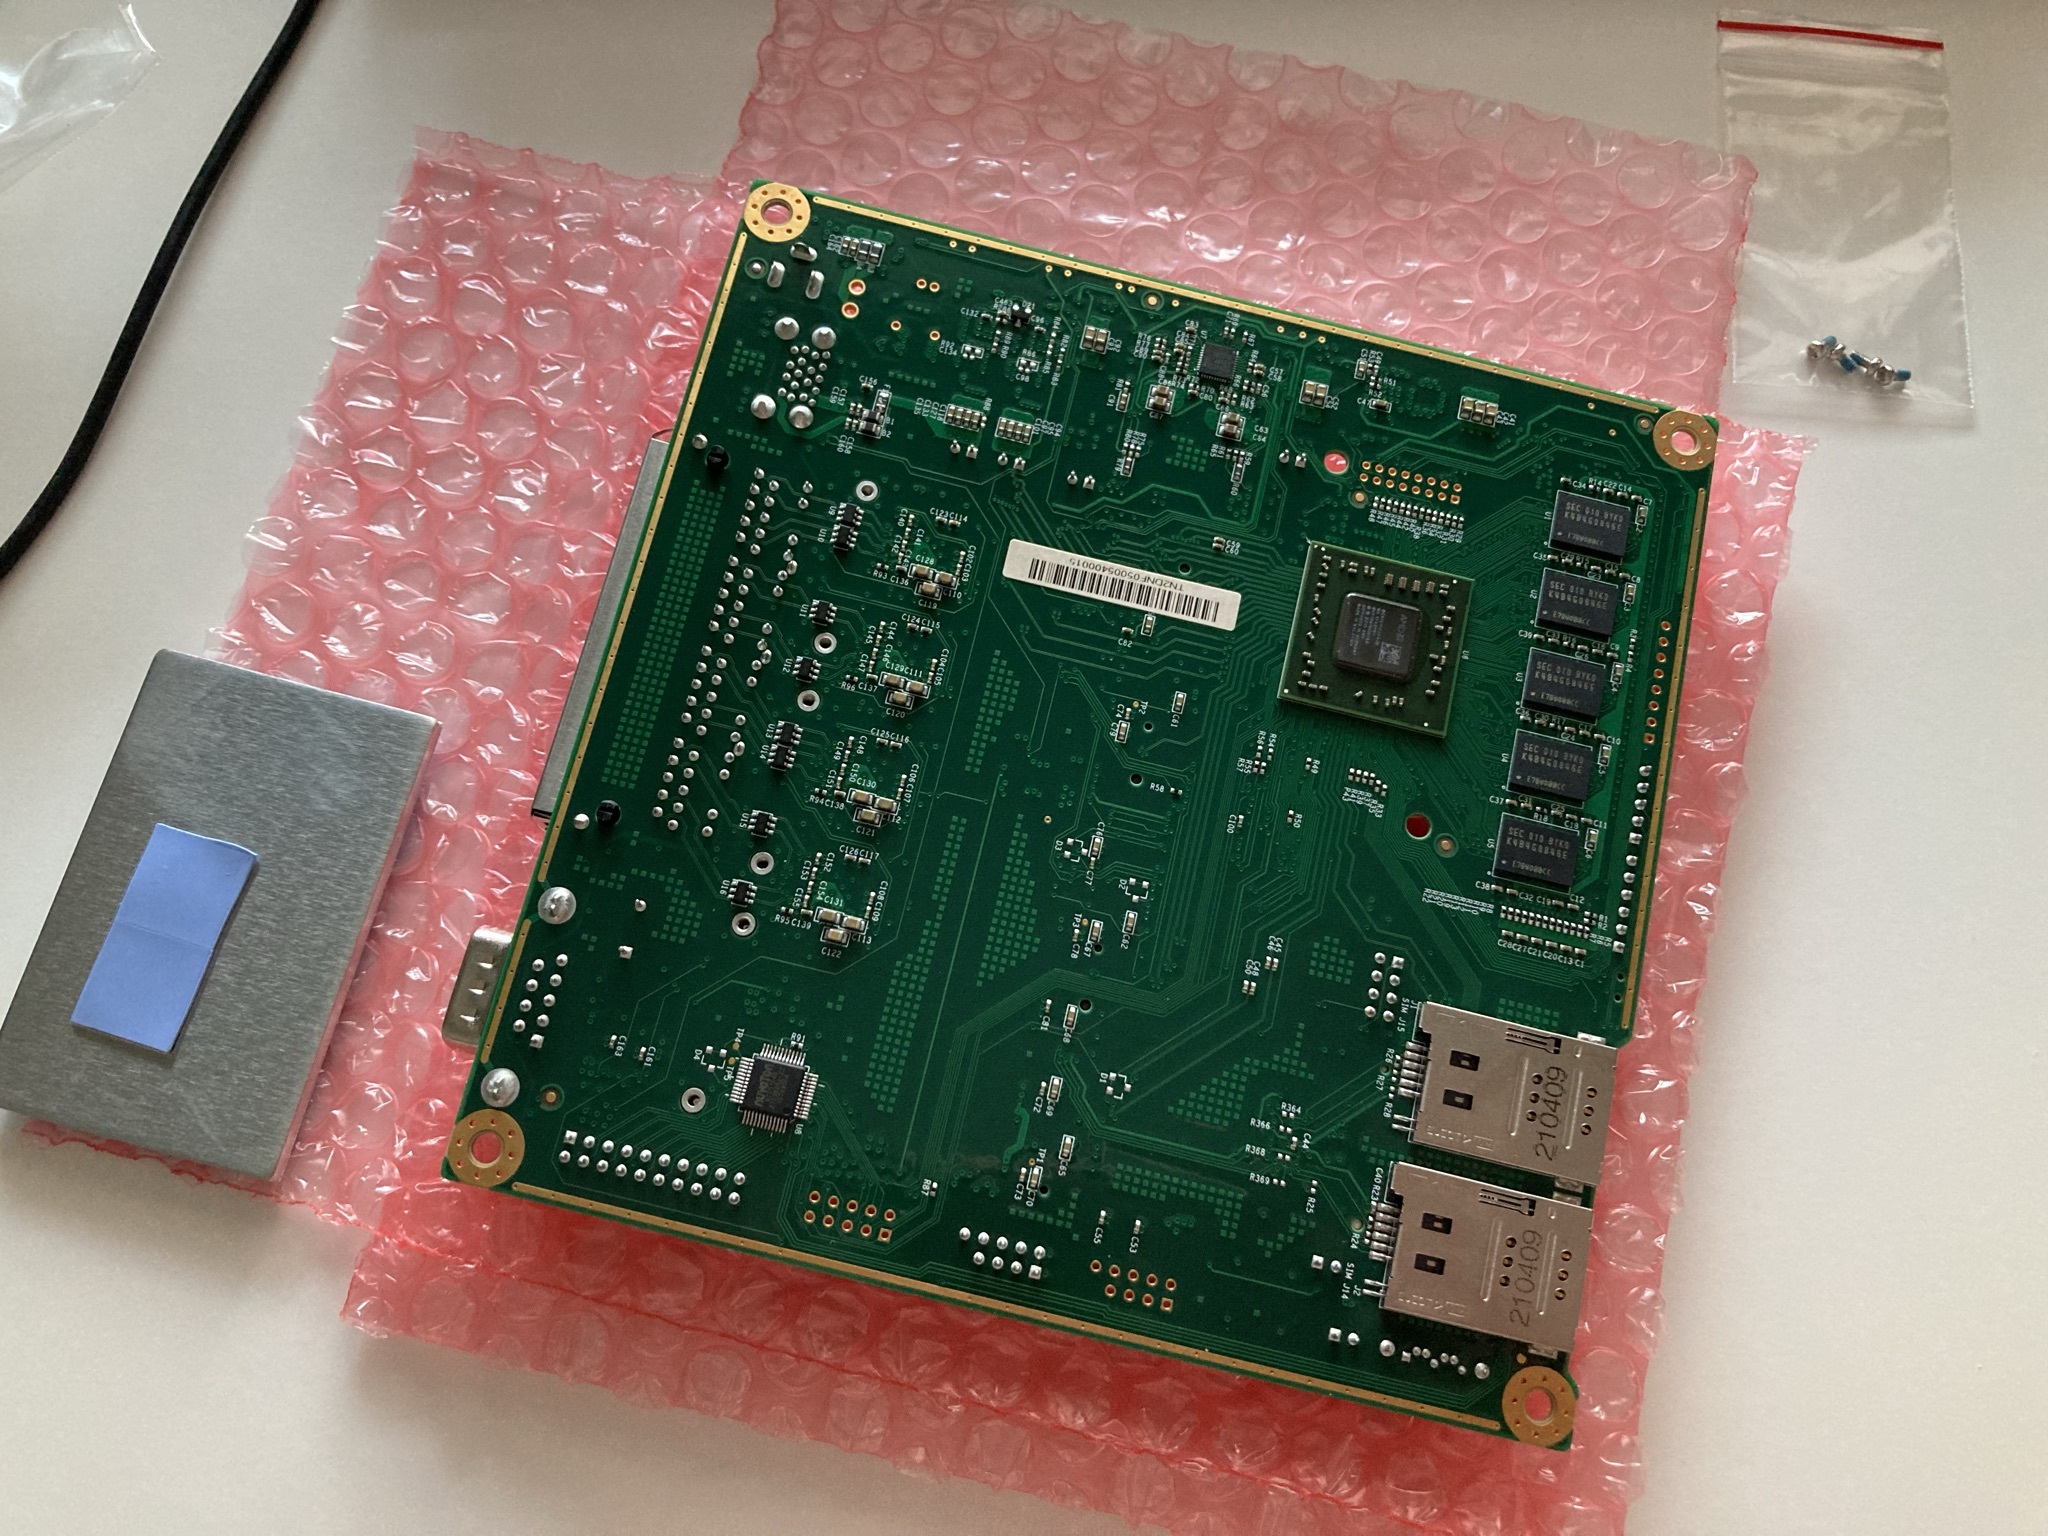
Router is based on PCEngines APU2 platform, more specifically I have APU4D4 board. If someone is interested this is the exact package I got, plus I also got the bios flash module and SATA cable if I ever want to put regular 2.5 Sata SSD into this thing.

CPU is AMD Embedded G series GX-412TC quad core 1GHz cpu with AES-NI support. When I was looking for possible router hardware one criteria was to have AES-NI support available, not that I need it, but afaik pfSense is planing to drop support for non AES-NI CPUs in the future, if they haven’t done it already. So aes-ni was more of a future proofing the system, rather than me wanting to play with cryptography etc.

System also has 4 gigs of ram with ECC support (ram soldered, not possible to upgrade later), and 4 Intel i211AT nics. Intel network interfaces was another requirement for the hardware. While something from Realtek might work, BSD based systems like pfSense and Opnsense are bit picky about nics, and the safest route is to go with Intel.

Other notable things about this platform is it has coreboot right out from the factory, the system is purpose built for this purpose, and this thing can boot from various different storage options (SATA, SD card, mSATA and USB). Bad stuff is the only output you can get from the board is via serial port, there’s no video outputs.
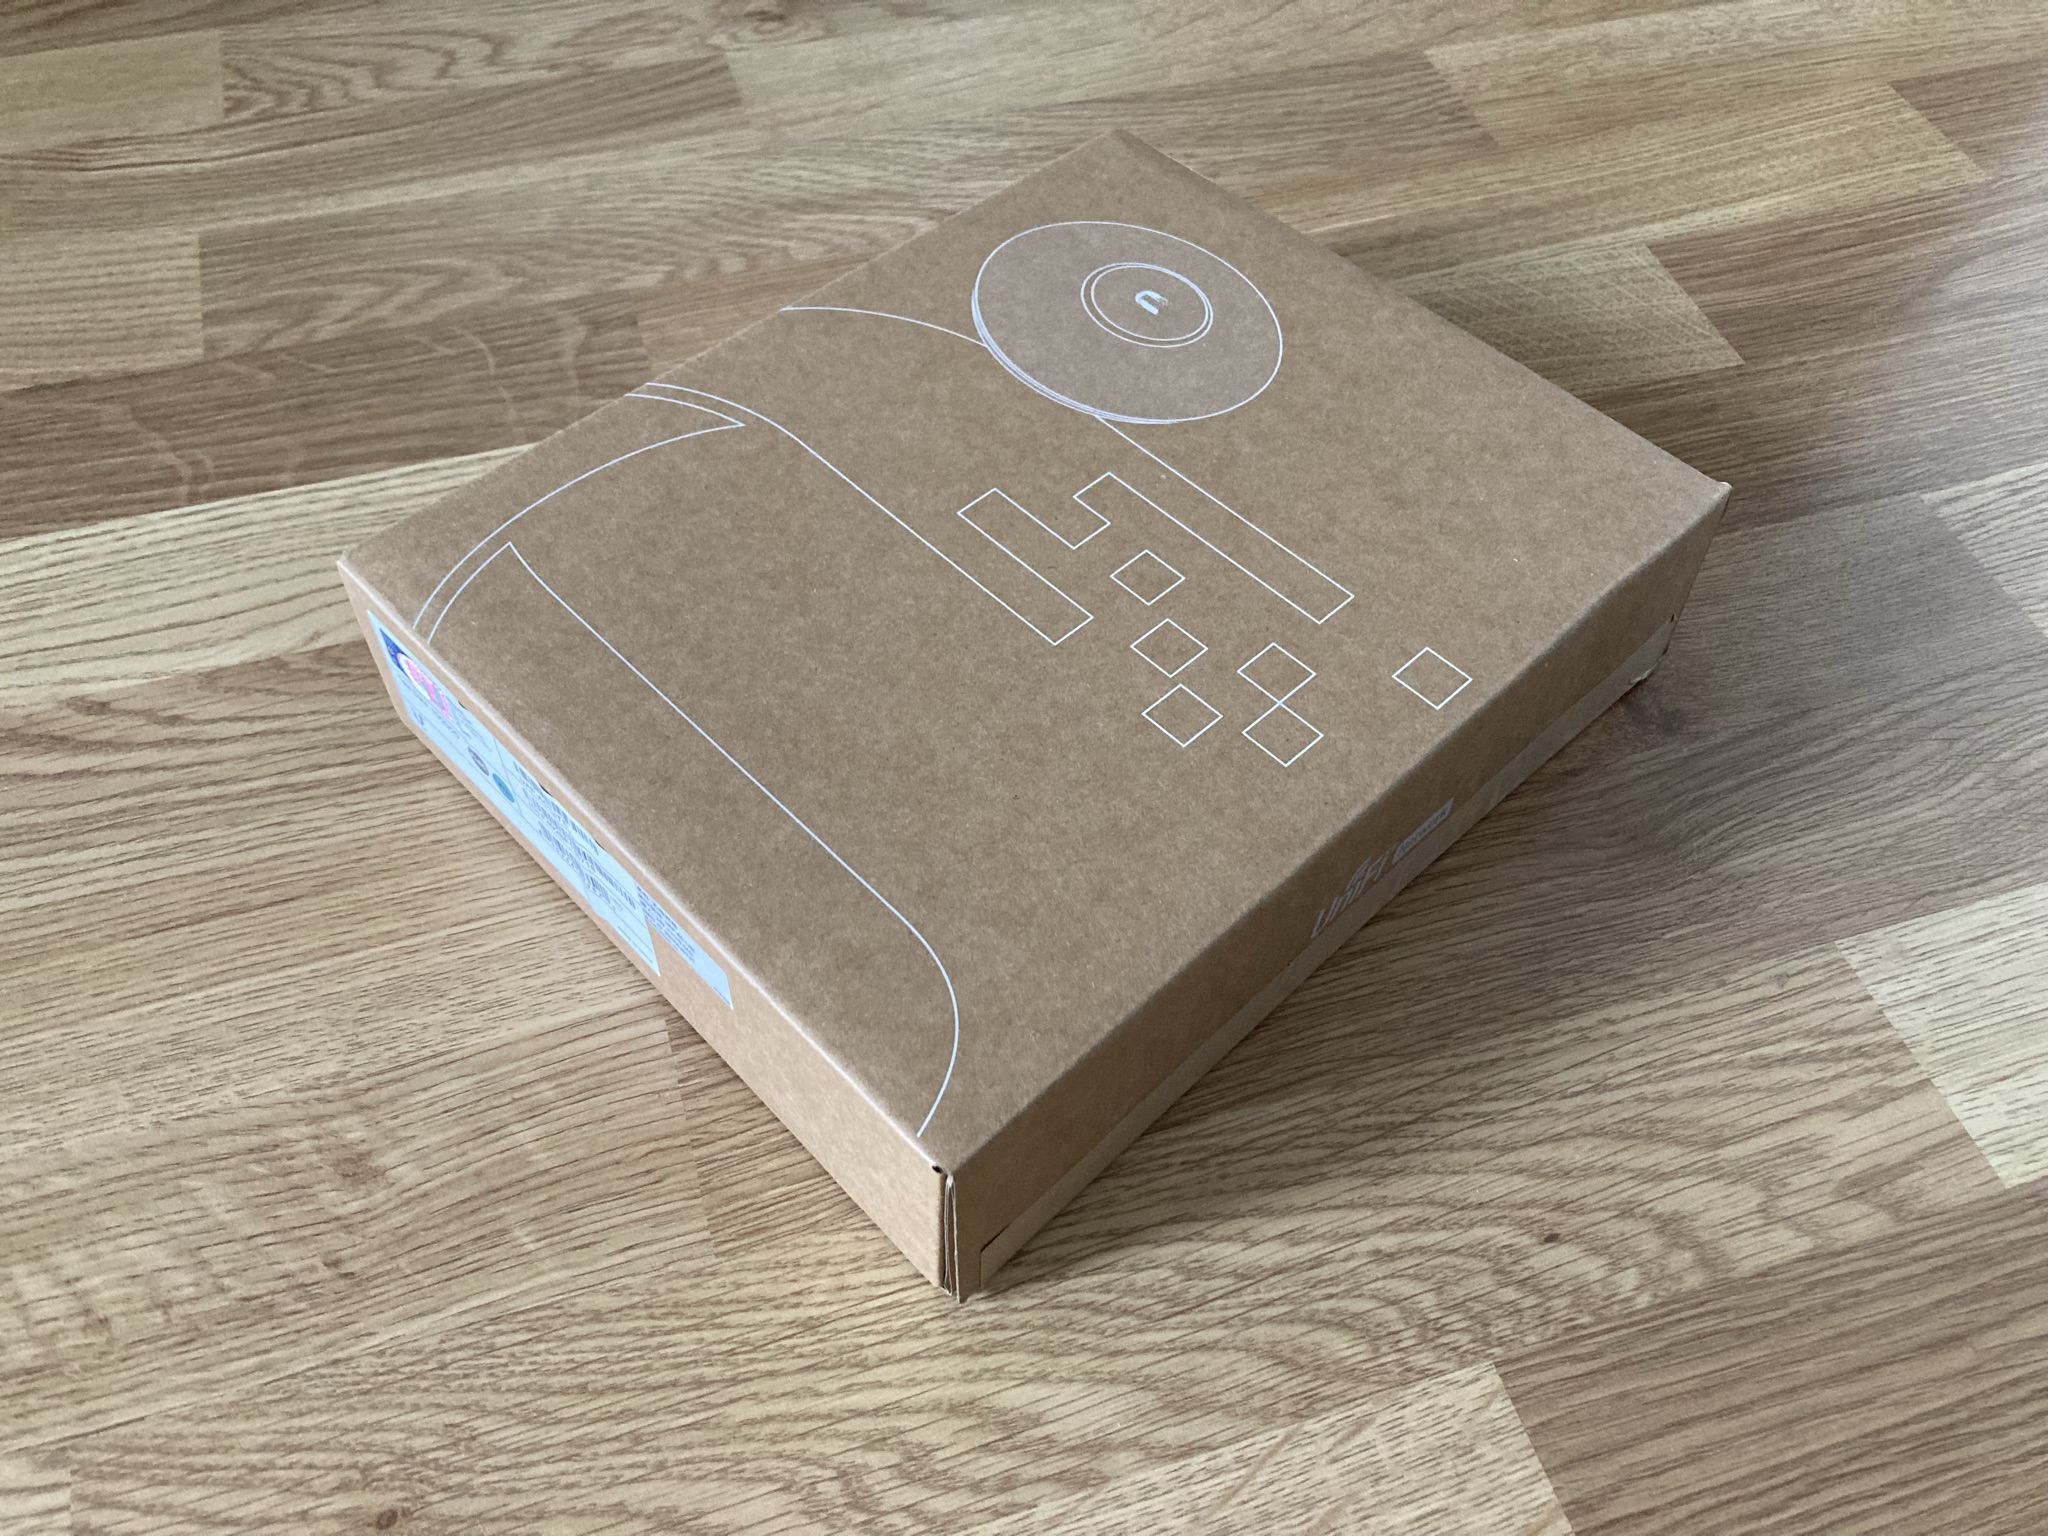
Anyway, PICTURES!

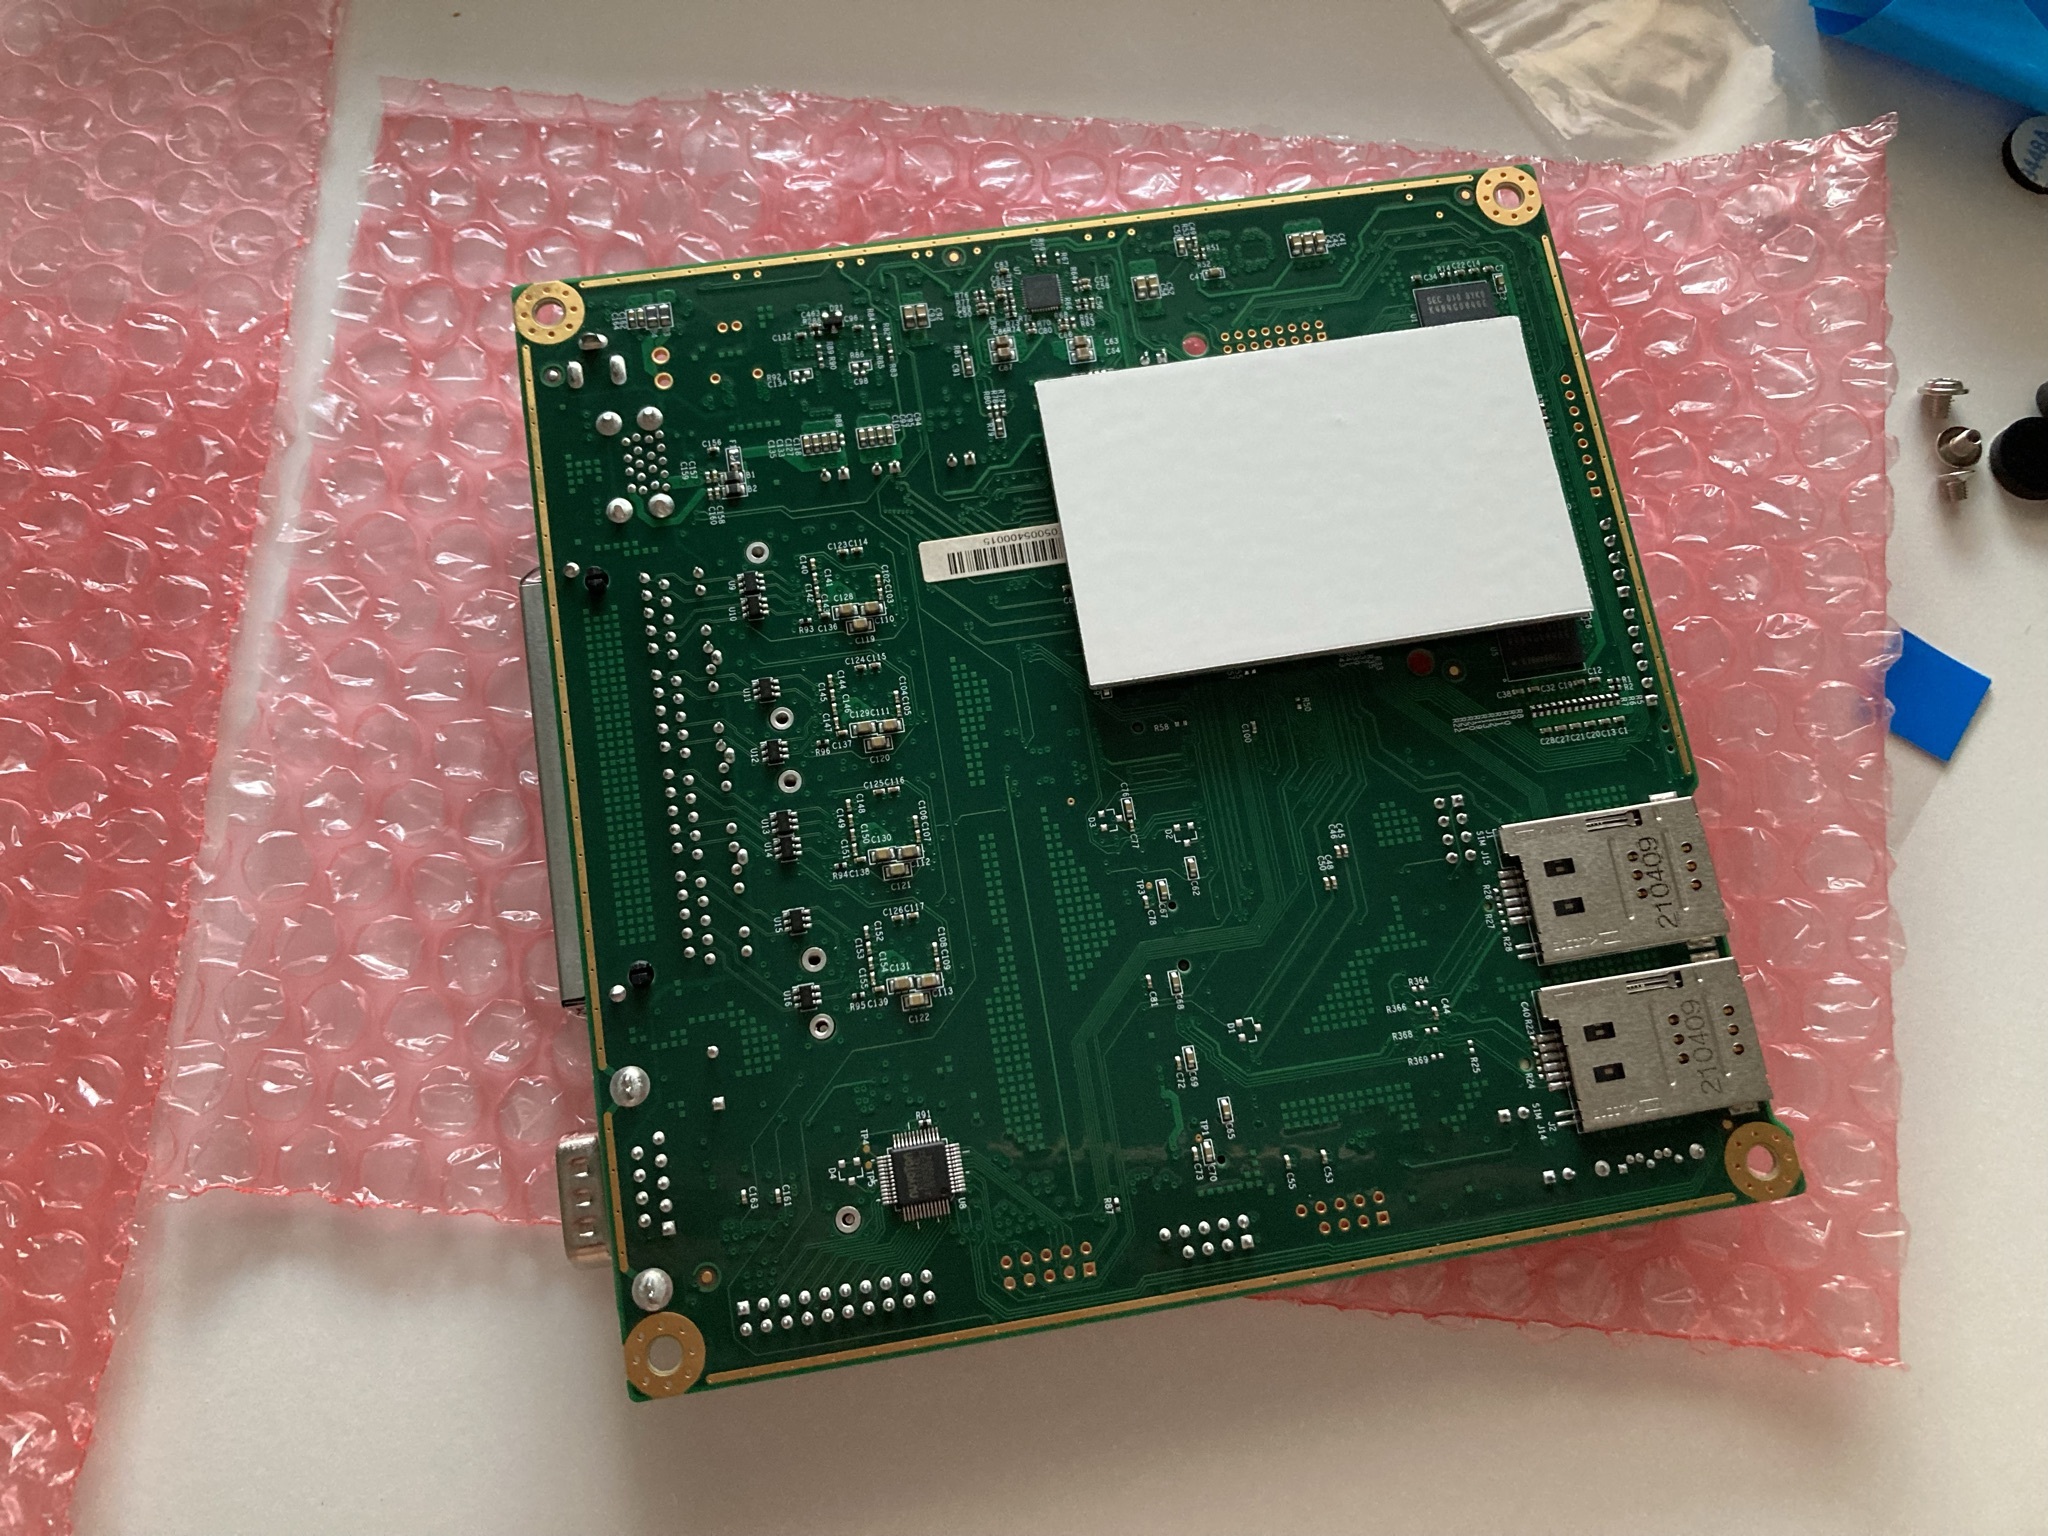
I decided to get more reliable mSATA SSD instead of using SD card as boot media. SSD is only 16GB but since this is going to be quite basic firewall I don’t think I will need much more.

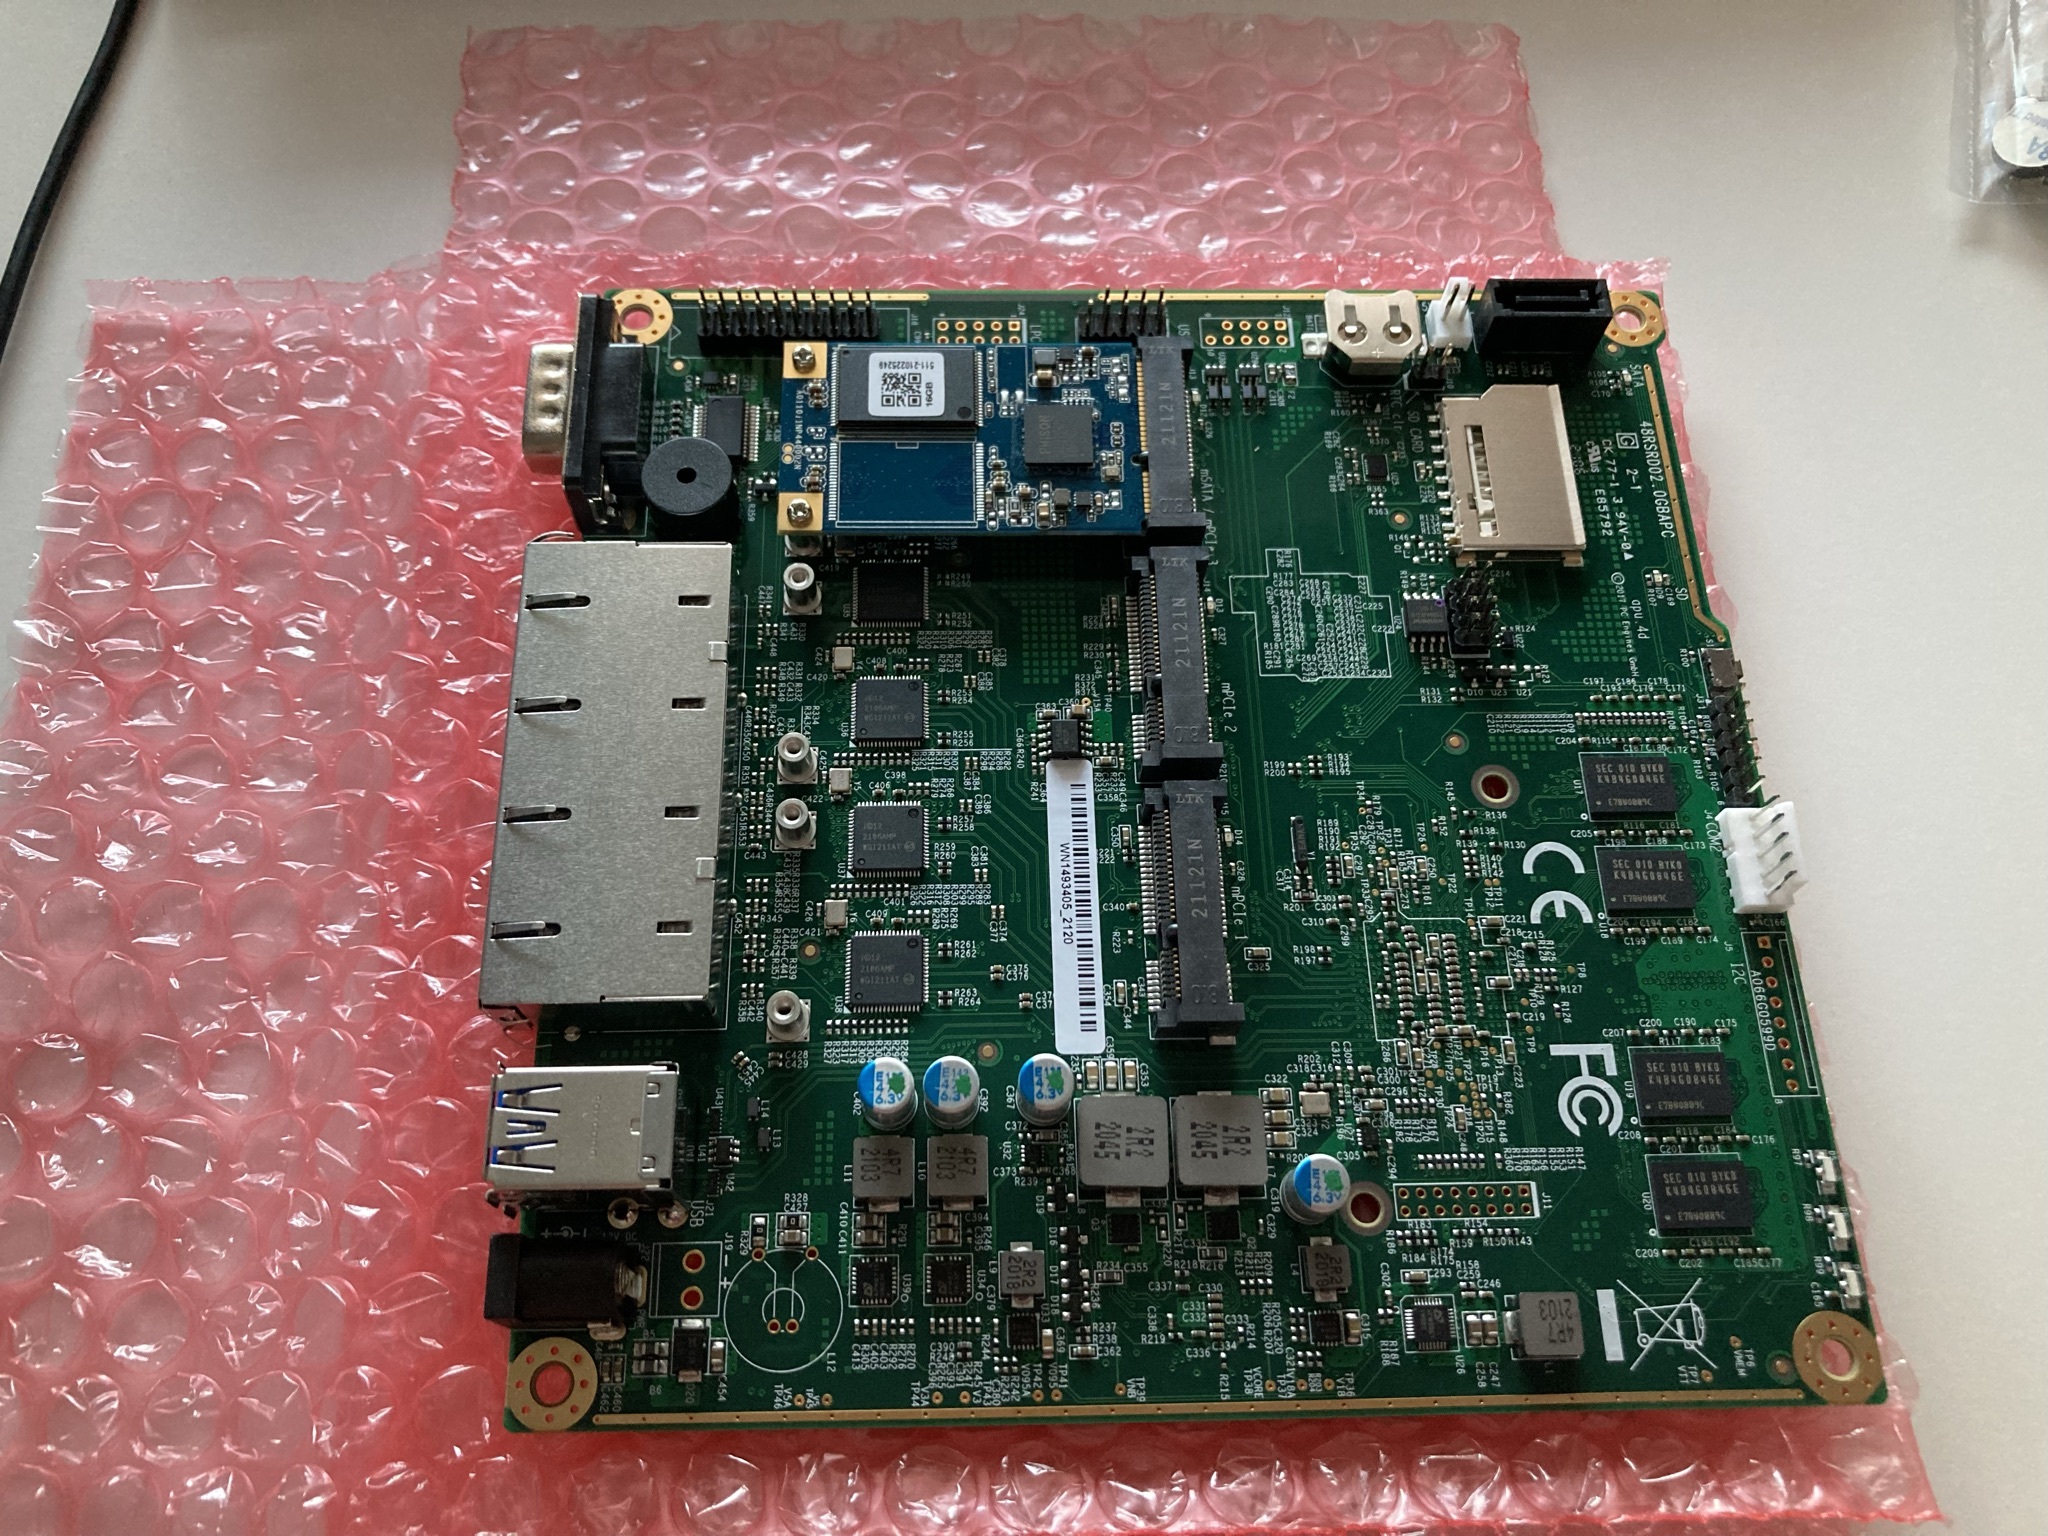
Empty miniPCI slots next to SSD are for wireless cards. I don’t plan to add WIFI for this because I want to be able to throw this thing under the boiler if I feel like it and not having to worry about poor WIFI performance. I will get separate WIFI access point, more about that later.

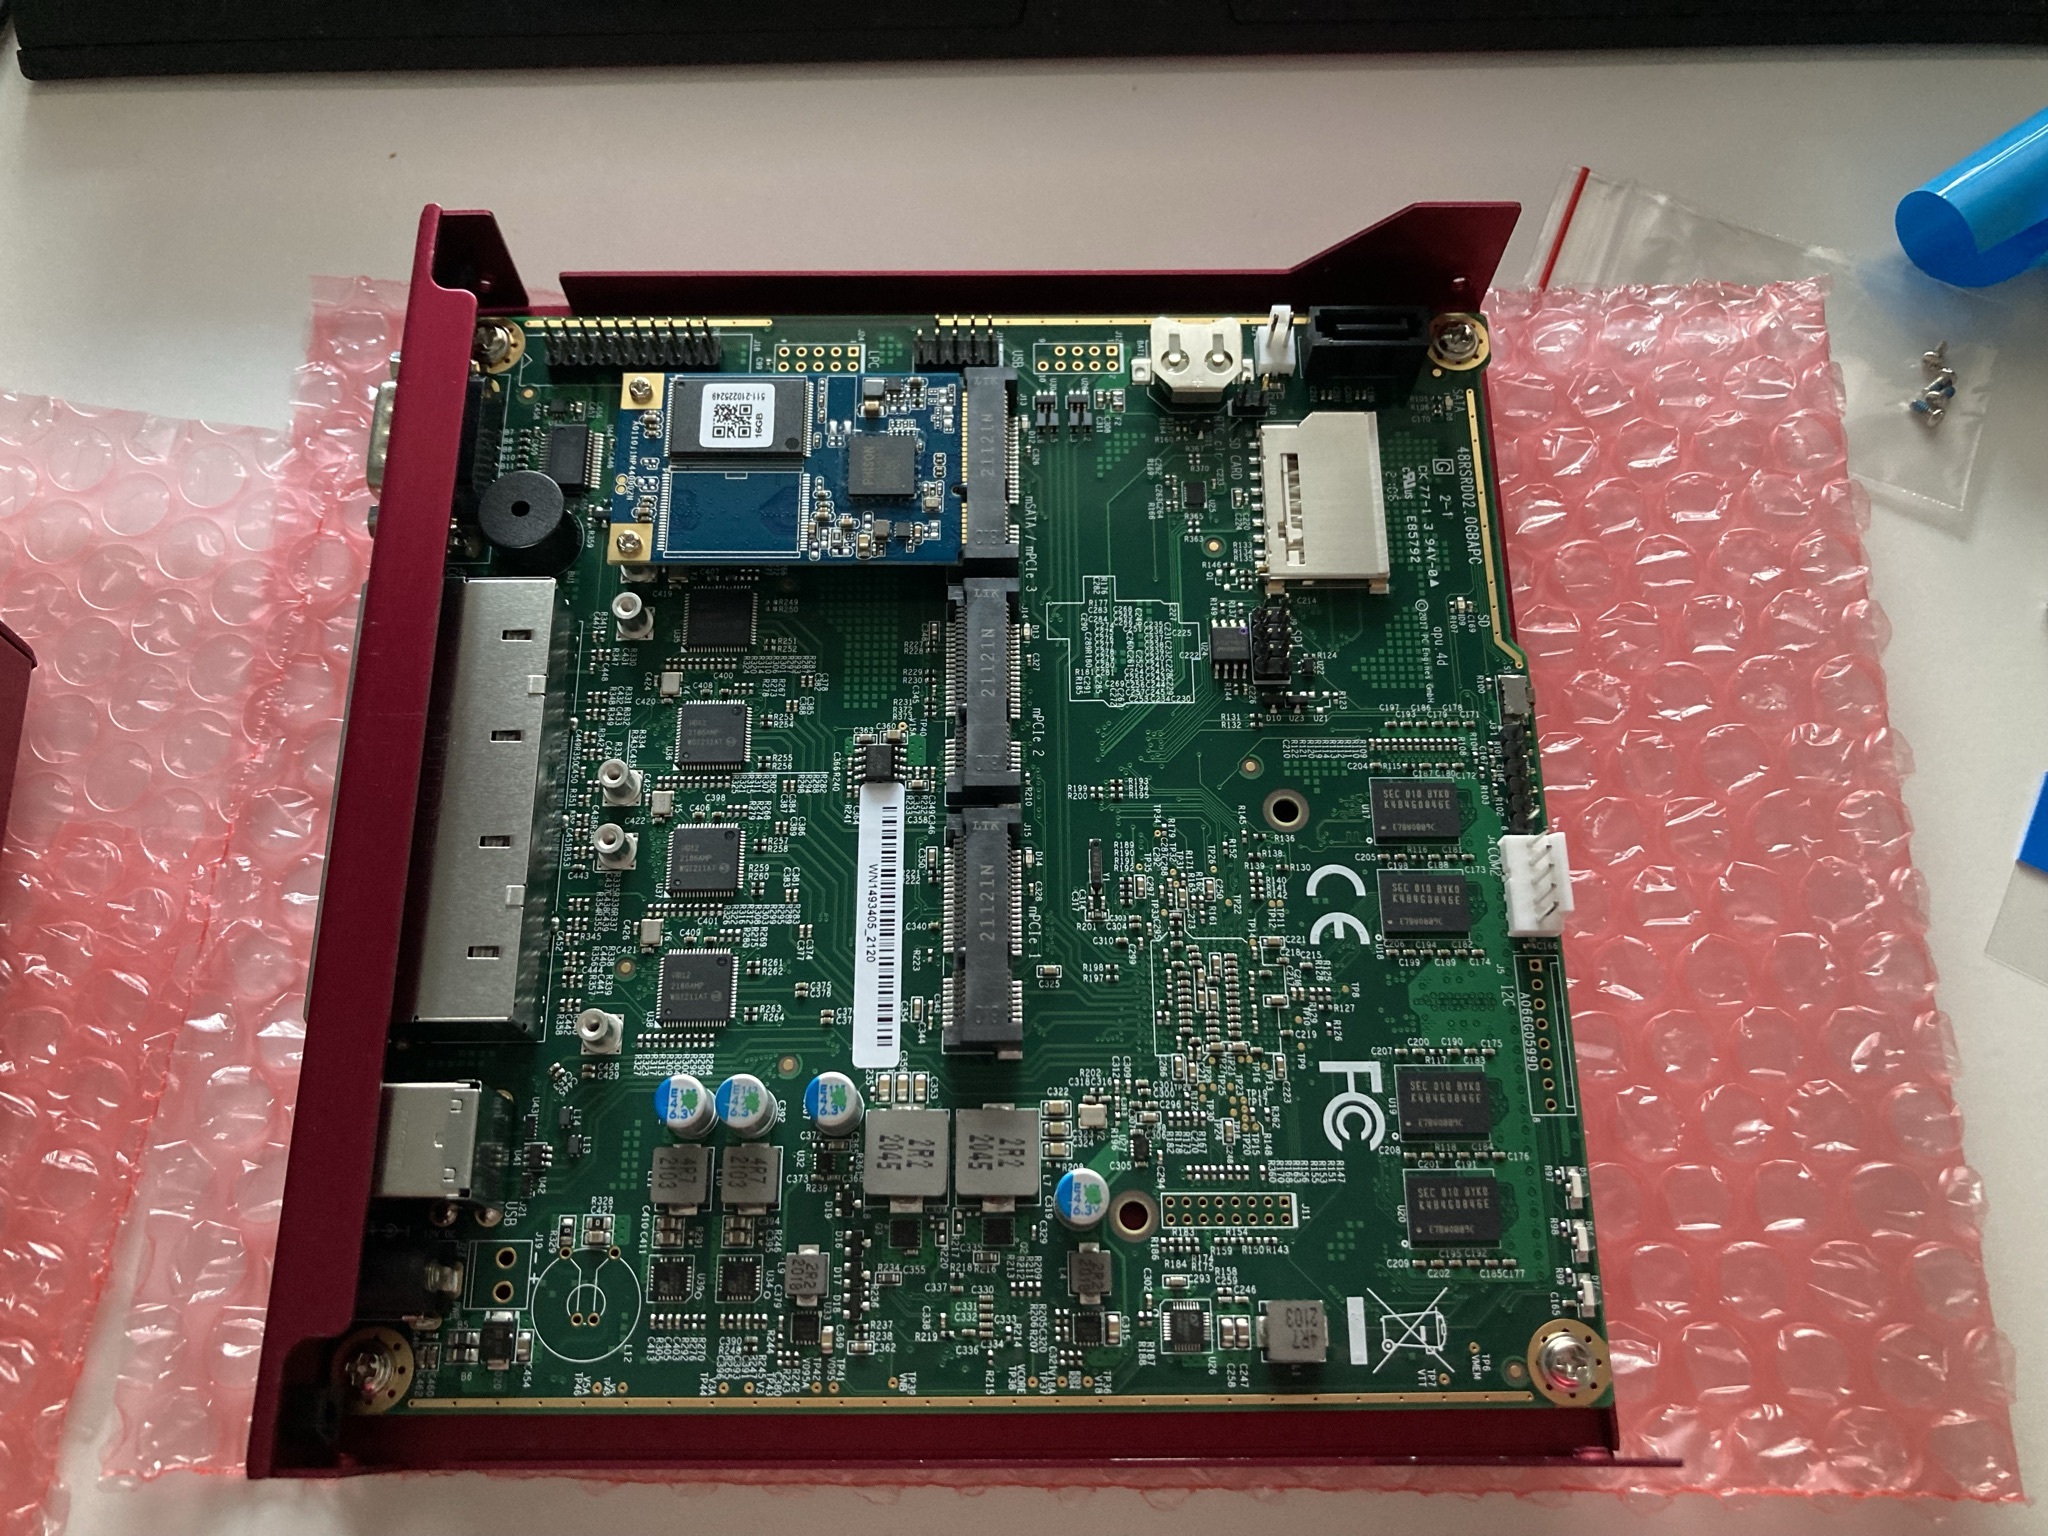
Here’s the board upside down. You can see the CPU in top right corner. The piece of aluminium next to the motherboard is the heat spreader that comes on top of the CPU.

Here’s the heat spreader on top of the CPU. There’s thermal pad on both sides of the heat spreader. The CPU is cooled passively by using the aluminum case itself as heat sink. The heat spreader is sandwiched between the motherboard and the case.

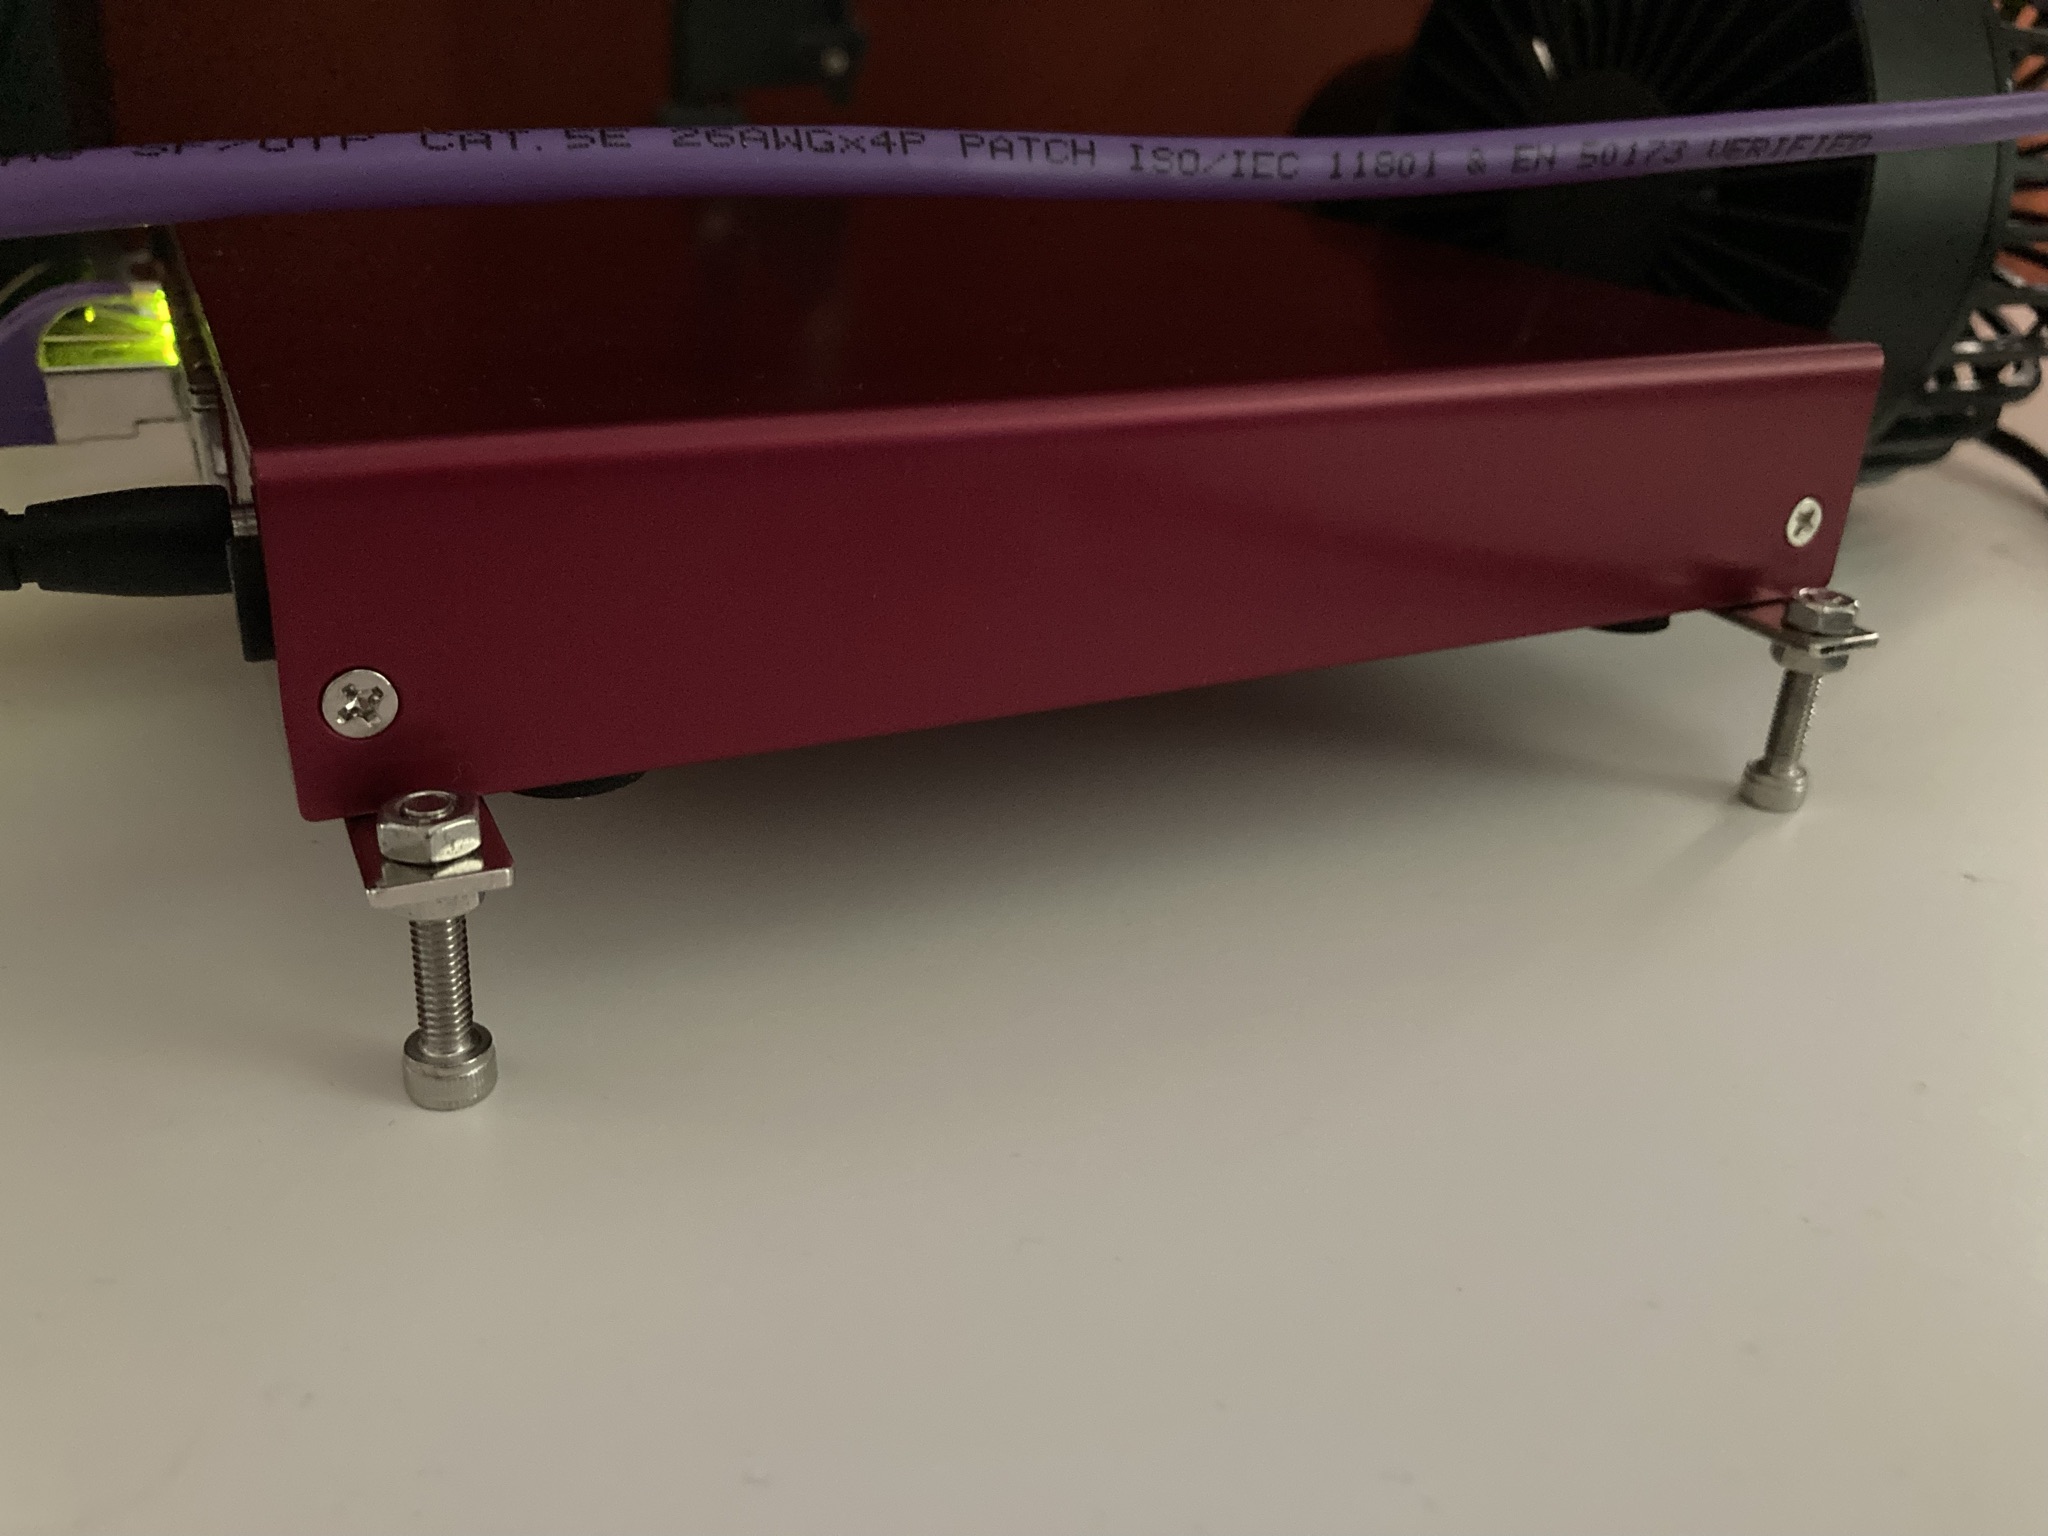
Wall mount is optional but I put the bracket on already since my plan is to mount this thing under my table at some point.

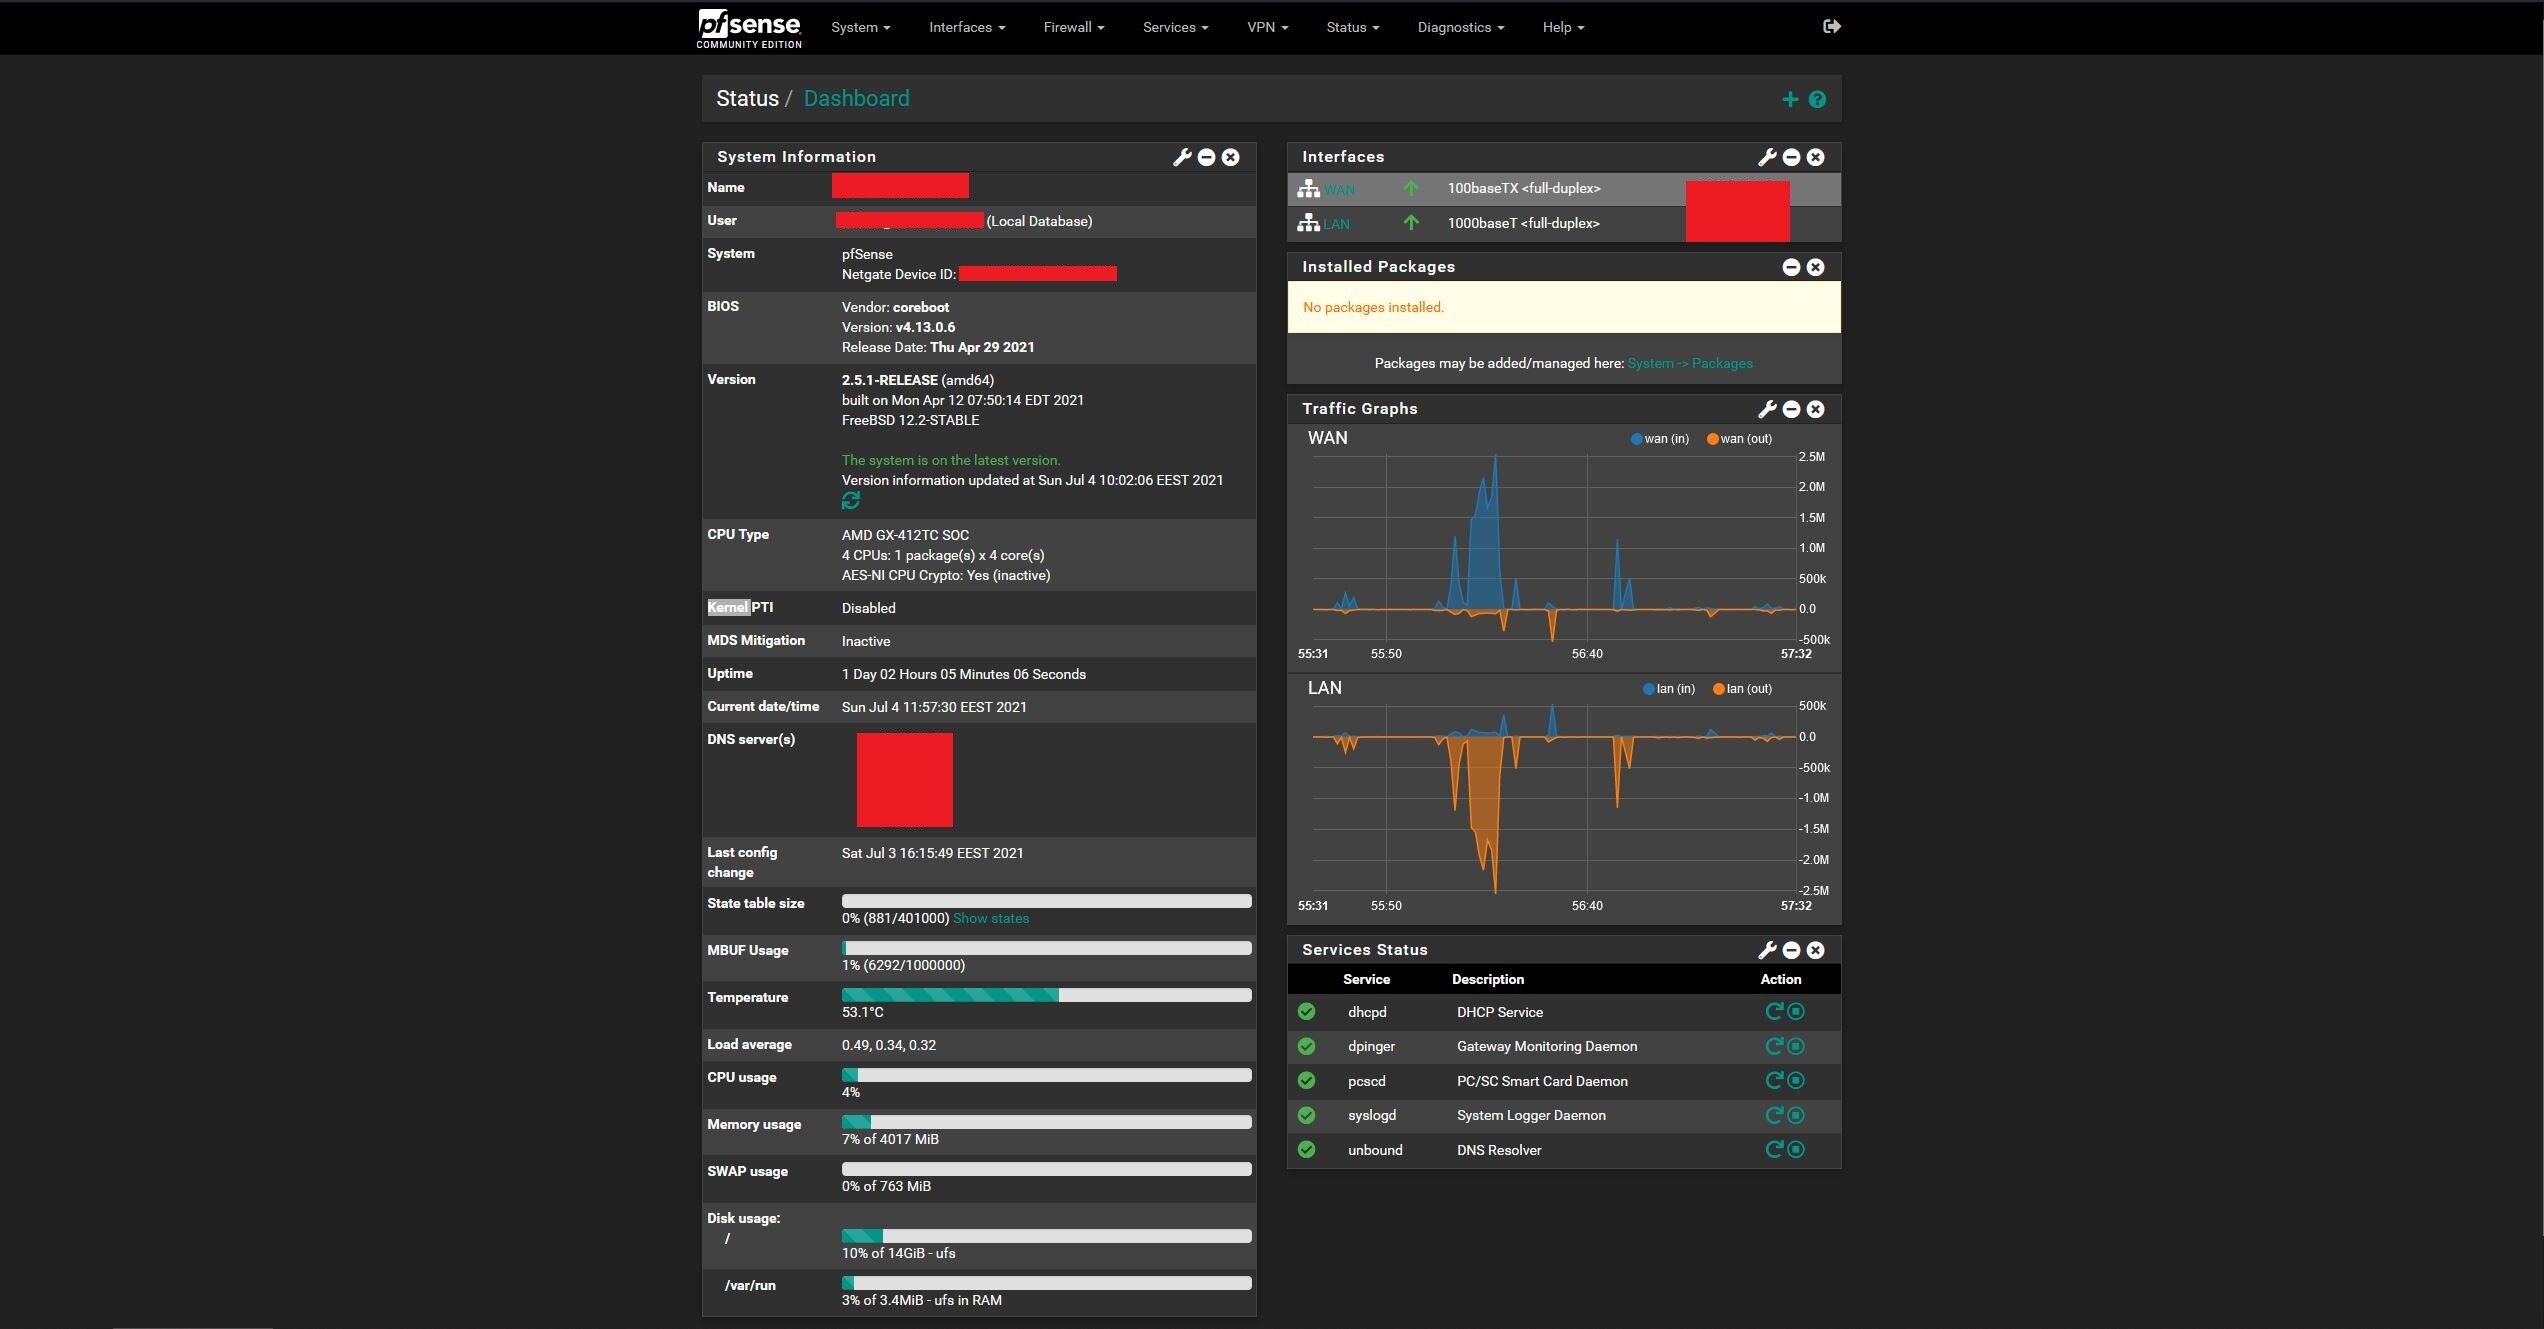
Aaand pfSense up and running! :slight_smile:


So, what’s my first impressions?

I must say this is really neat and well made solution if someone wants to have small x86 based router and don’t want to go the Aliexpress route.

Currently I have only one grievance I’m not entirely happy, and that’s the CPU cooling. In normal use the CPU temps are around 60 °C, but when I put Steam to download a game without any bandwidth limitations CPU peaked around 73 °C. CPU usage was about 20%. Granted it’s really warm in my apartment right now, so I’ll have to do some extra testing later, but I don’t imagine the temps are going down much more from this with current cooling system. I don’t really care if CPU peaks at 70-75 °C, but what troubles me is when that happens the case is almost too hot to touch. Right under the CPU the case gets really hot.

Right now I have few bolts attached to wall mount brackets to lift the router off the table, to allow more air flow under it, since the CPU is located underside the router. I also have small table fan blowing air at the router, just testing out how much difference it would make. Currently I managed to drop the CPU temp down to 52 °C, but since there’s no cooling fins or anything I don’t think that active cooling is going to do much more here. We need to have more cooling surface.

BUT, who says we have to be satisfied with default cooling? :grinning_face_with_smiling_eyes:

What’s good is PCengines provides useful information about their products on their website, for example in here they are giving quite good description of what requirements there is for third party cases and what kind of thermal pads should be used. So I might try to jerryrig some alternative cooling solution for this. I will share my results here if I ever get around trying my luck.


And now my WIFI plans an problems.

My initial idea was to repurpose my old TP-Link Archer C7 as wireless access point. Instead of using the factory firmware I’ve flashed the unit with OpenWRT 19.07.7.

However, all OpenWRT AP tutorials and guides I’ve followed have either resulted me having no WIFI, no Internet over WIFI, or simply locking me out from the entire router. Thankfully the reset button let’s me to roll back to default config.

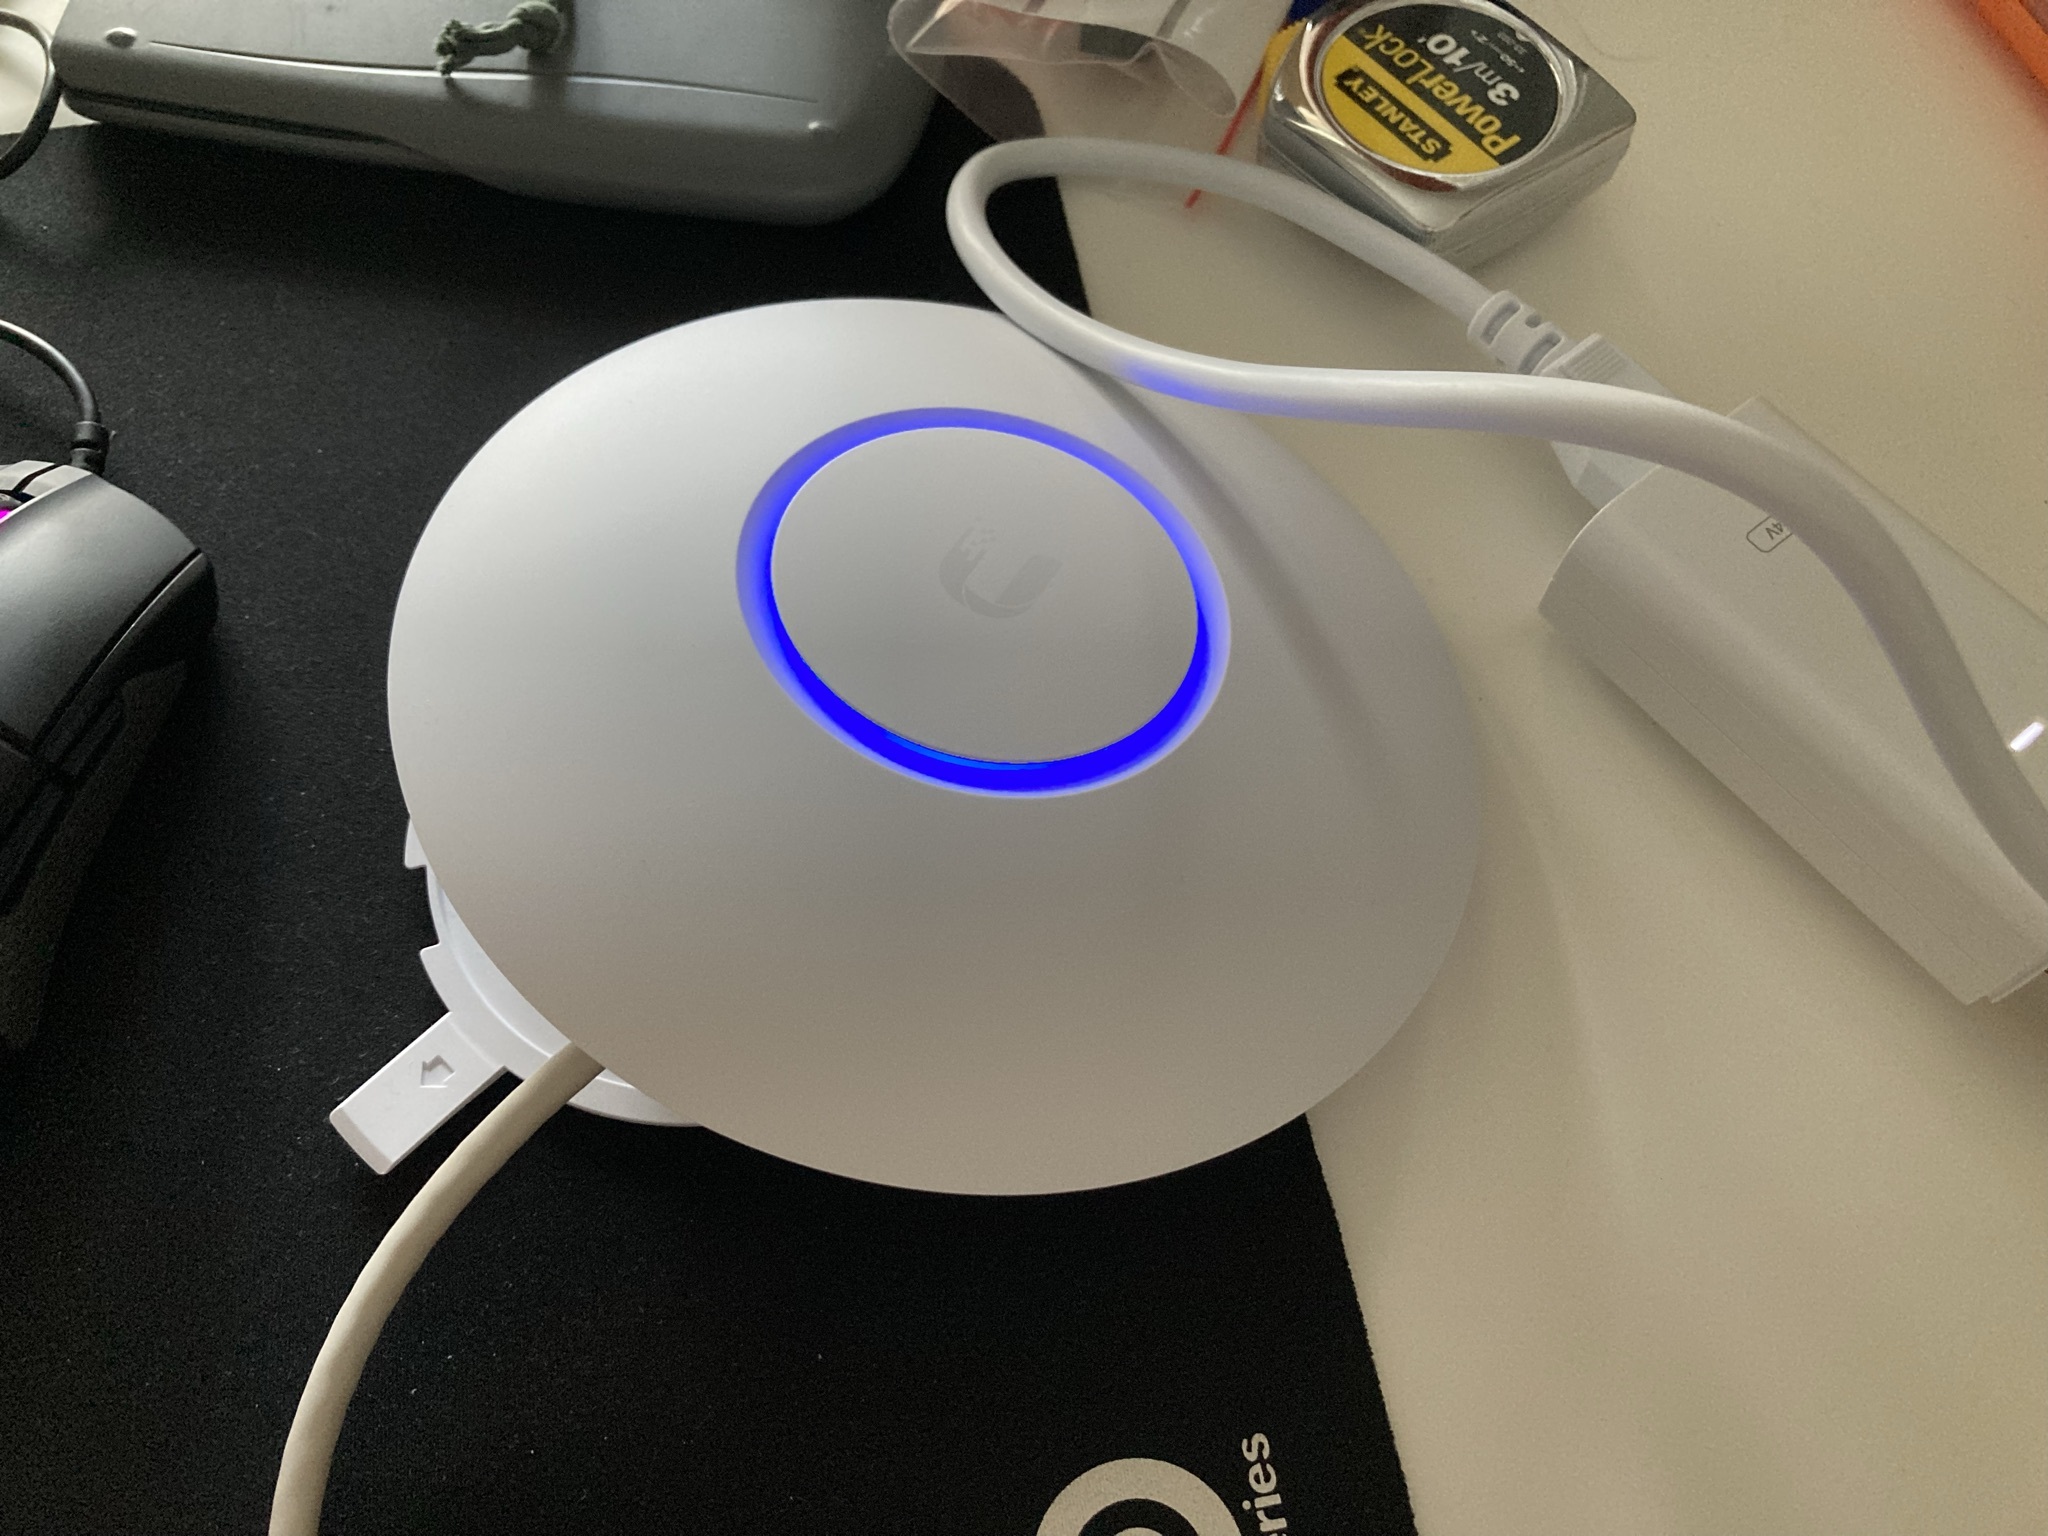
My plan right now is to ditch the idea of using old router as WIFI access point, and instead get some entry level Ubiquiti access point like Ubiquiti UniFi UAP-AC-LITE or LR. If someone has any good tutorial “for dummies” on how to configure OpenWRT to work as basic WIFI access point I’m all ears for learning purposes, but for simplicity I’m going to stick with Ubiquiti for now.

5 Likes

I am your expert for OpenWRT. I was born in it. Melded by it. You have merely adopted it and I am here to help.

Set your gateway to your router IP, and set the OpenWRT AP’s interface IP to a static one within your router’s IP range (like 192.168.1.2 if your router is at 192.168.1.1) also Make sure that dnsmasq, firewall, and odhcpd are all set to disabled in system → startup. Then go to Network → DHCP and DNS → make sure ‘Authoritative’ is checked, hit save and apply. Then reboot the AP.

You can even tag and untag each Ethernet port with different vlans for multiple WiFi networks.

If you need more help I can link you to the wiki pages

Thanks, I followed this tutorial that had about the same steps as your guide.

That resulted me not being able to log into the openwrt router anymore (yes I double checked I used right IP).

I’m still curious to see if I can turn that thing into AP, but for now I’m going to leave it as a back up solution if my pfsense firewall gives up.


Got Ubiquiti access point in the mail yesterday, let’s see if this thing gives me the desired result.

1 Like

Ubiquiti basically gave me exactly what I wanted with one button installer. I currently need to have just one wifi network for the few wireless devices that I own.

2 Likes