So I finally decided to delid my i7-6700k. Ever since I got it I have tried to overclock it. It would do 4.4GHz all day perfectly fine. 4.6GHz was iffy, stable but warm. But once I got to 4.7GHz it needed more voltage and it ran very hot. Like well into the 80s hot. Because of this I’ve just been running it at 4.4GHz the last year or two now.
The past few months I have been going back and forth trying to decide whether I should do it. I wanted to get the delidding tool, but decided it would be a waste of money probably only using it once. On Friday I ordered Conductonaut and some black RTV. Somehow it arrived today (Sunday) instead of the scheduled delivery date of Monday.
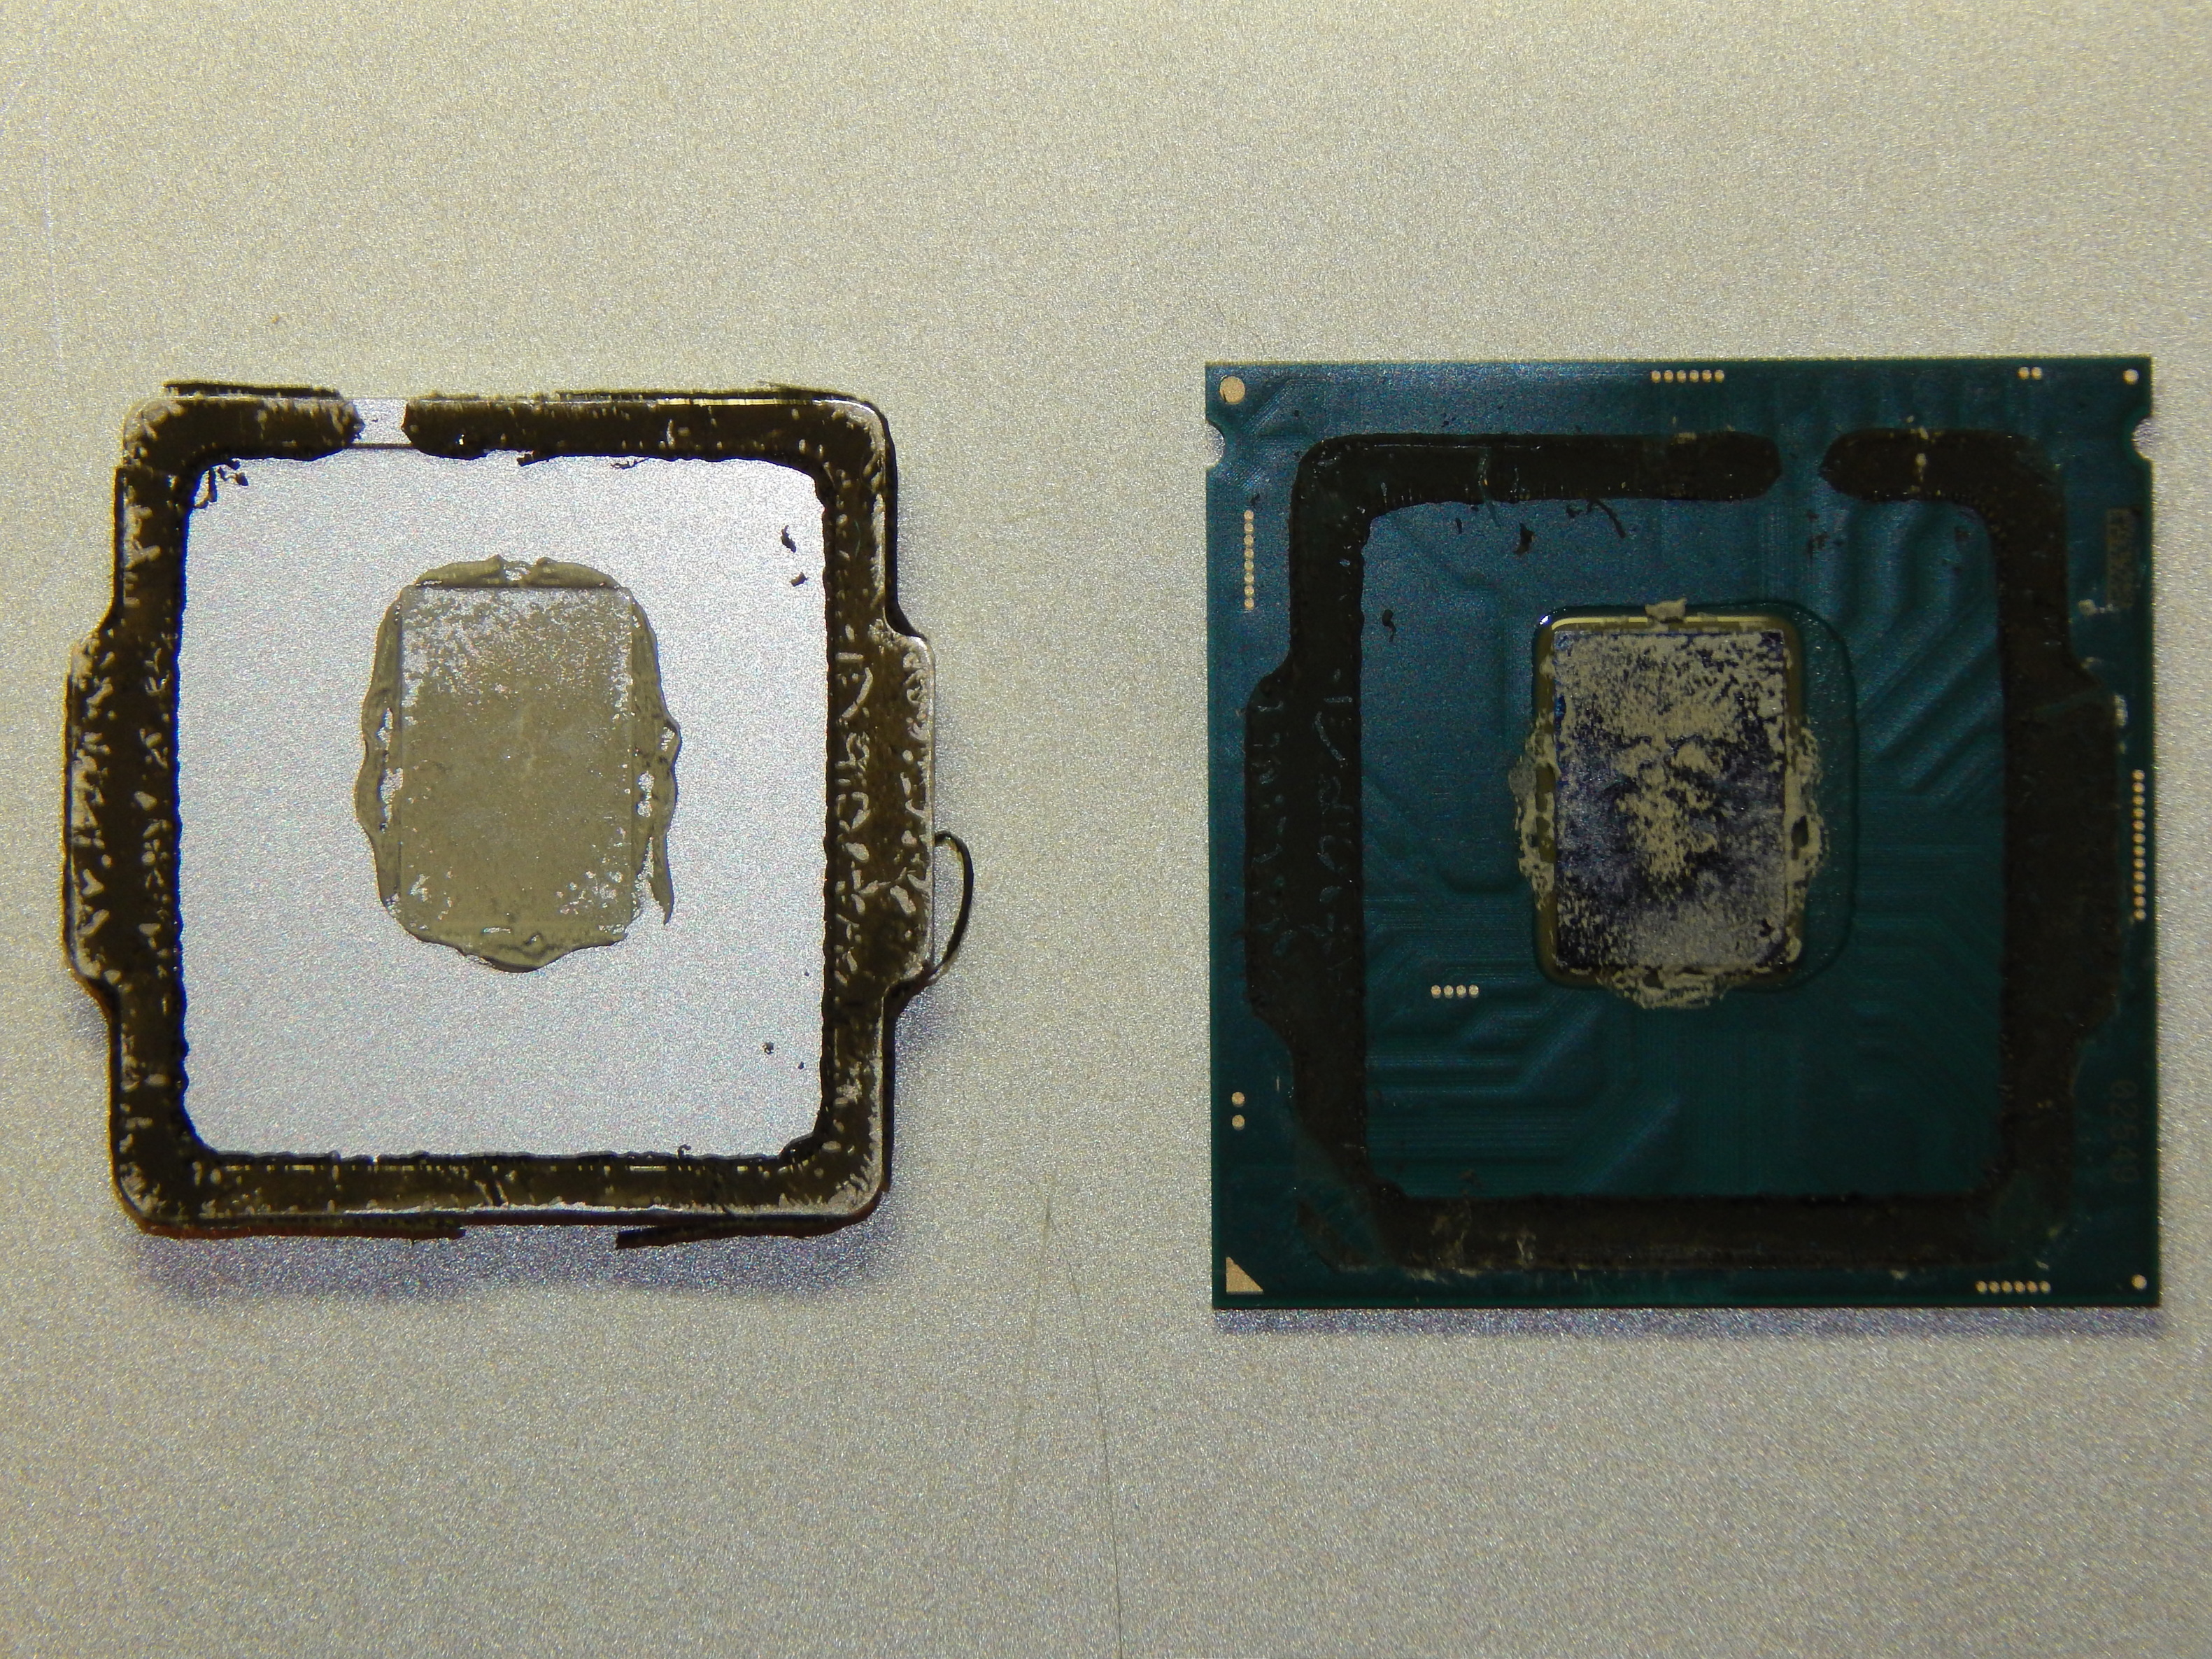
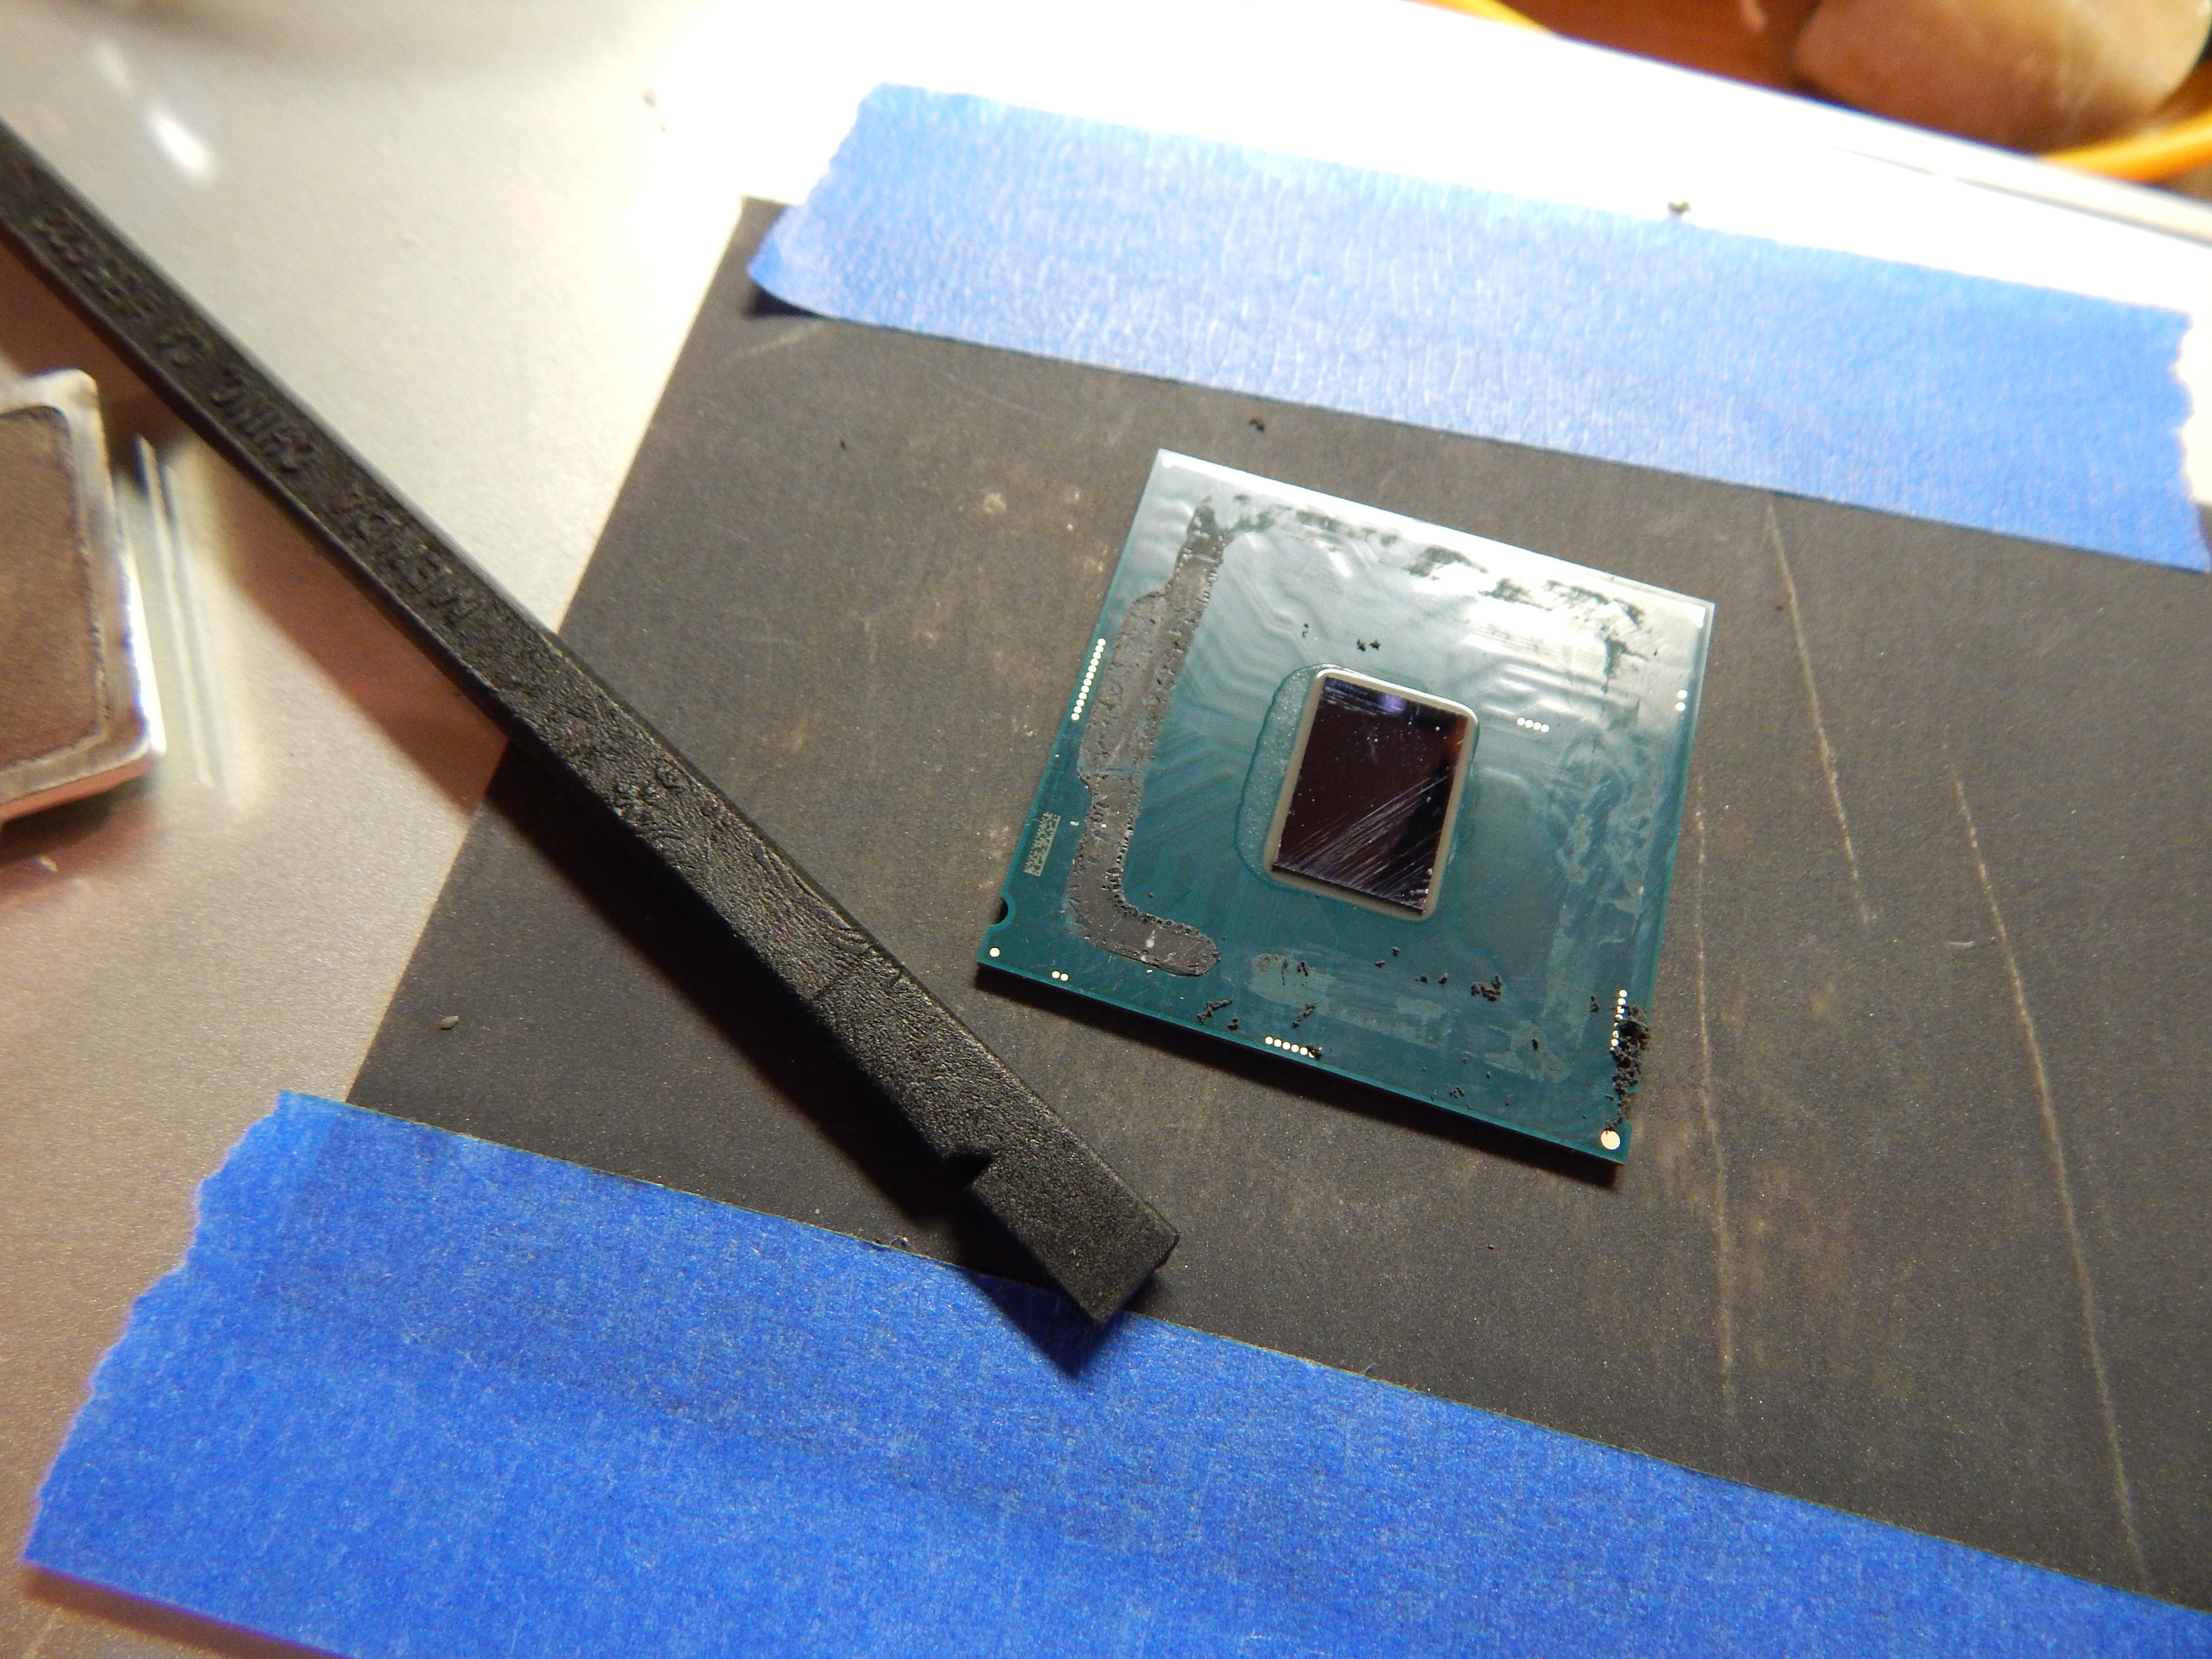
It was actually incredibly easy to delid the CPU with just a thin razor blade. I was afraid to cut into the die or lop something off the board, but it went very smoothly. There’s nothing under or around the heat spreader to lop off, and the die is pretty far in.

As you can see, the OEM TIM was pretty bad.
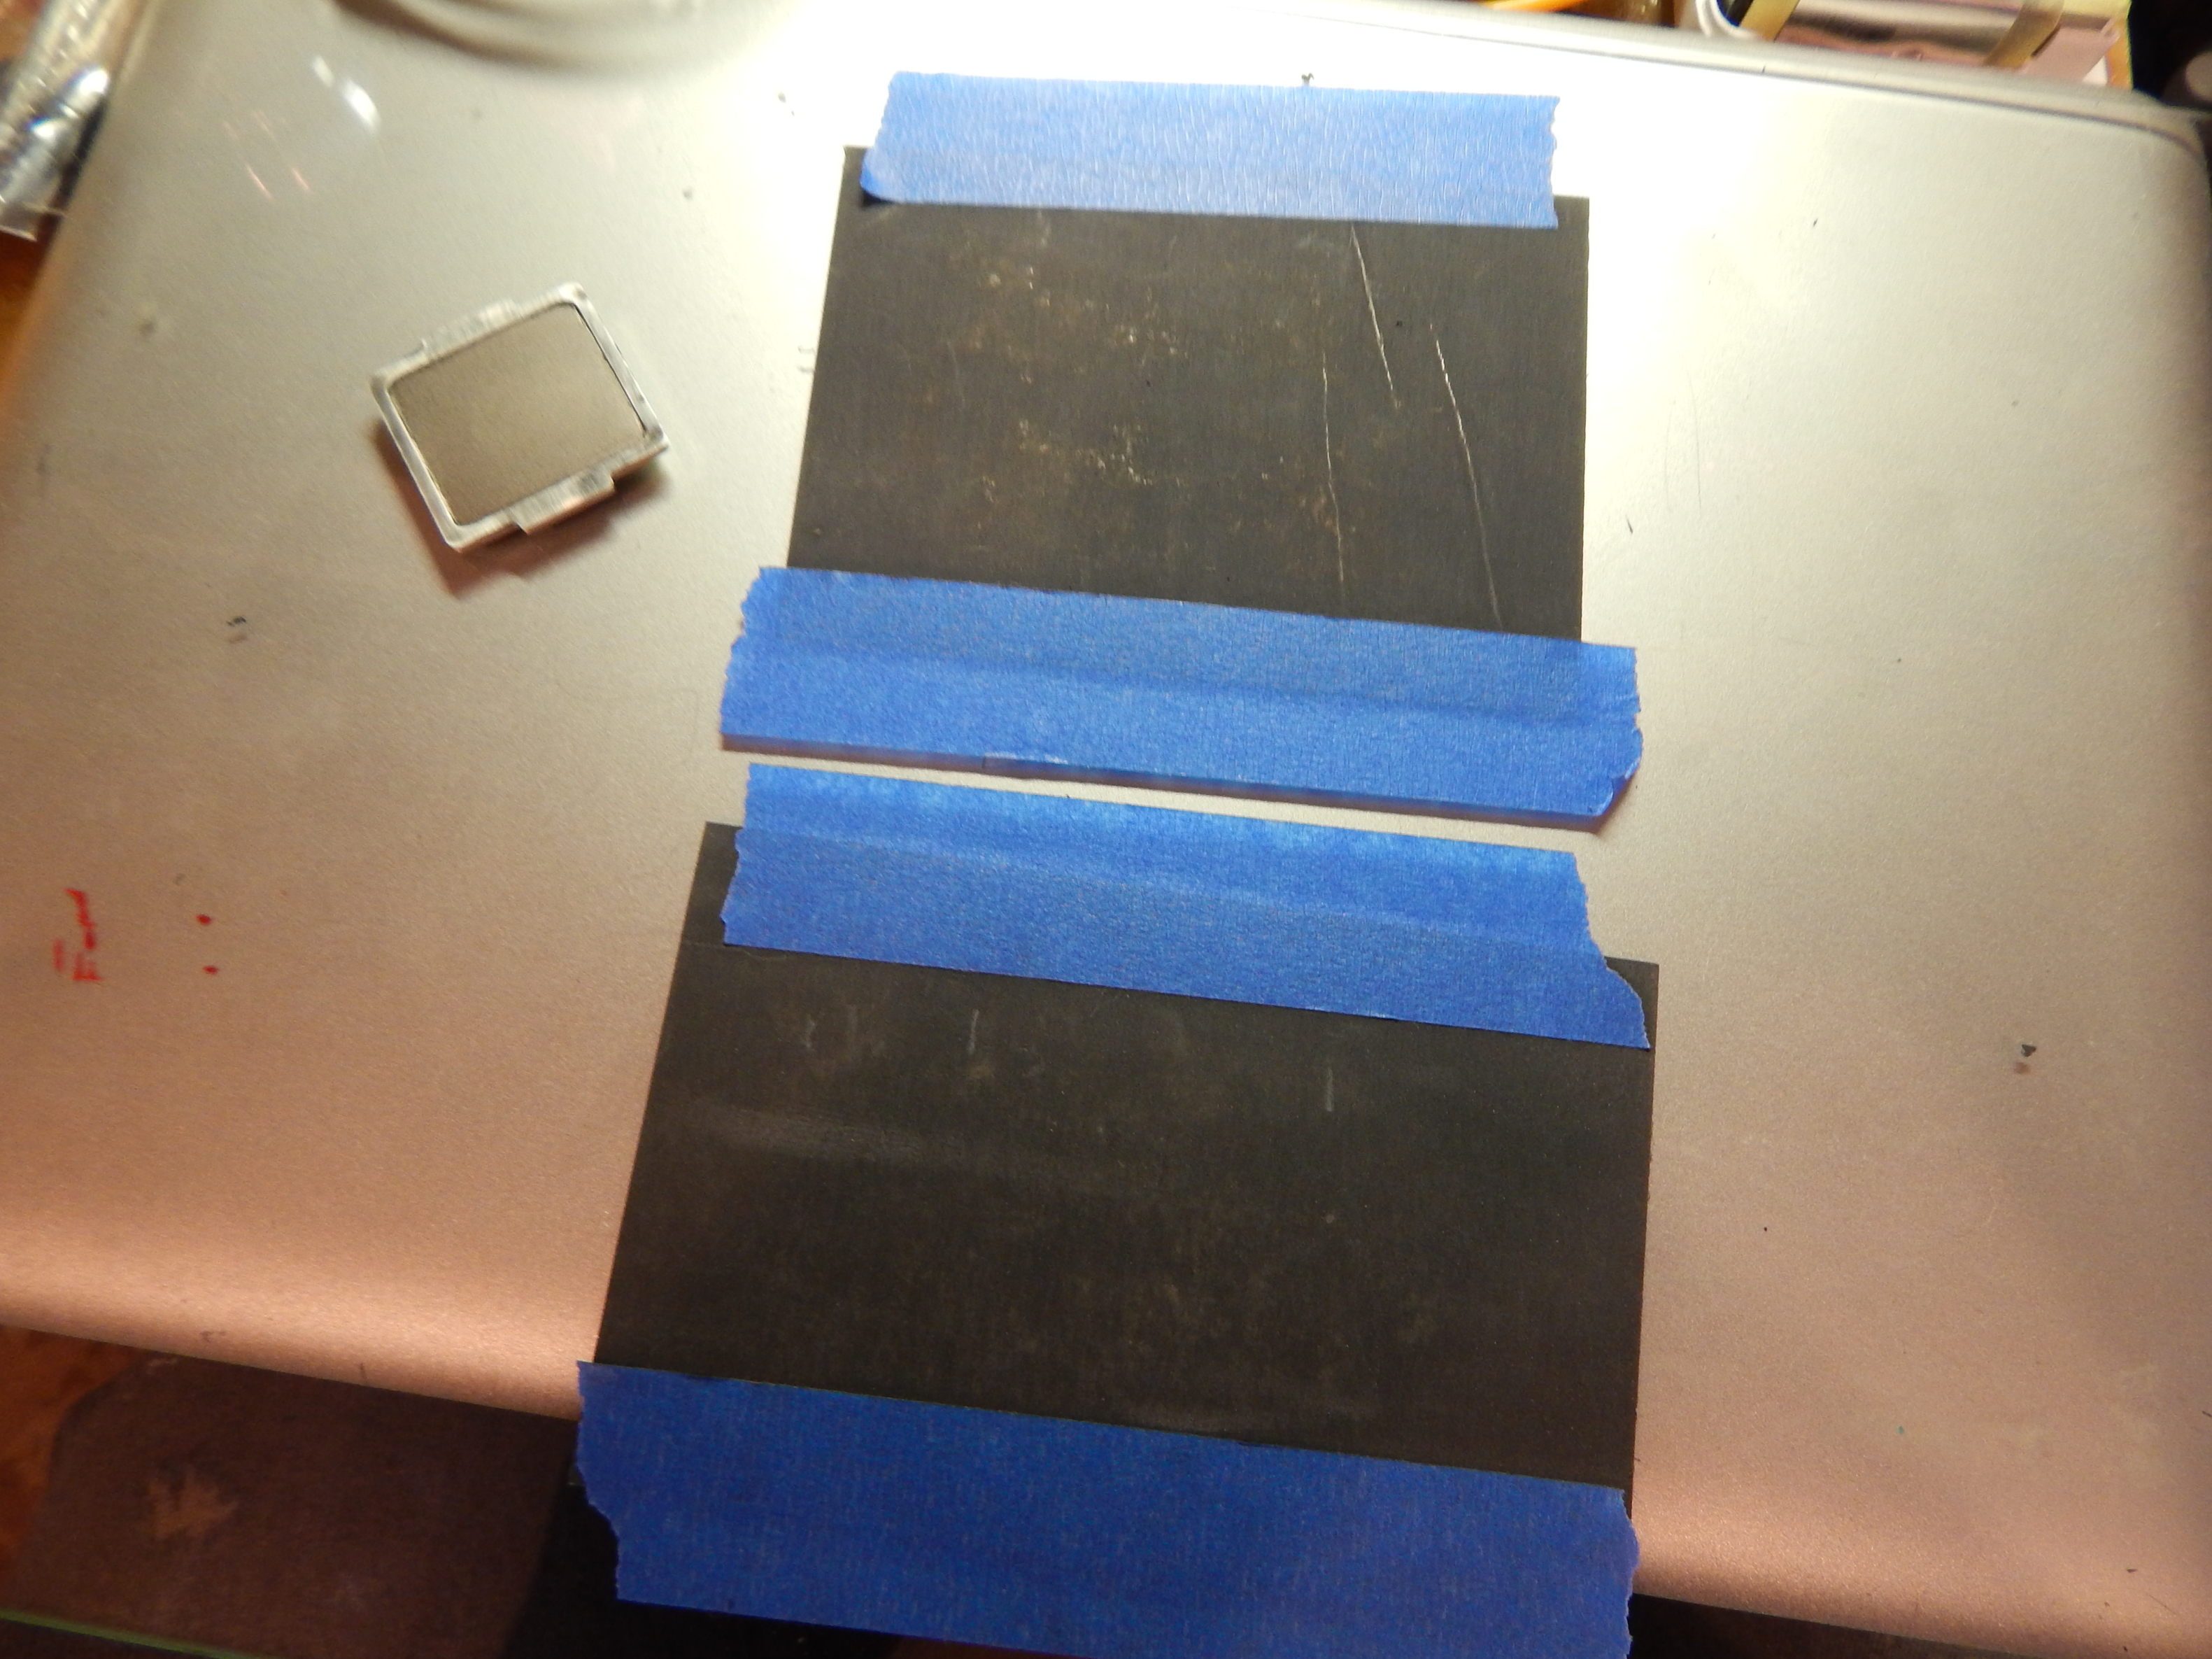
I also got some 1500 grit sandpaper and taped two small pieces to a piece of glass. After scraping (most of) the adhesive off the edges of the heat spreader I gently ran the contact side over the fine sandpaper. I had read somewhere that the liquid metal TIM can sometimes be slightly thinner than the OEM TIM, so doing this shaved off a tiny amount of material to guarantee good contact.
After this I used a nylon/plastic spudger to scrape the adhesive off the CPU board. The one thing that always sticks in my head when doing this type of work is to always use a tool that is softer than what you are working on. This makes it significantly less likely damage will occur to what you are trying to clean. In this case, the PCB is harder than the nylon/plastic spudger, so the adhesive came off with no problem.
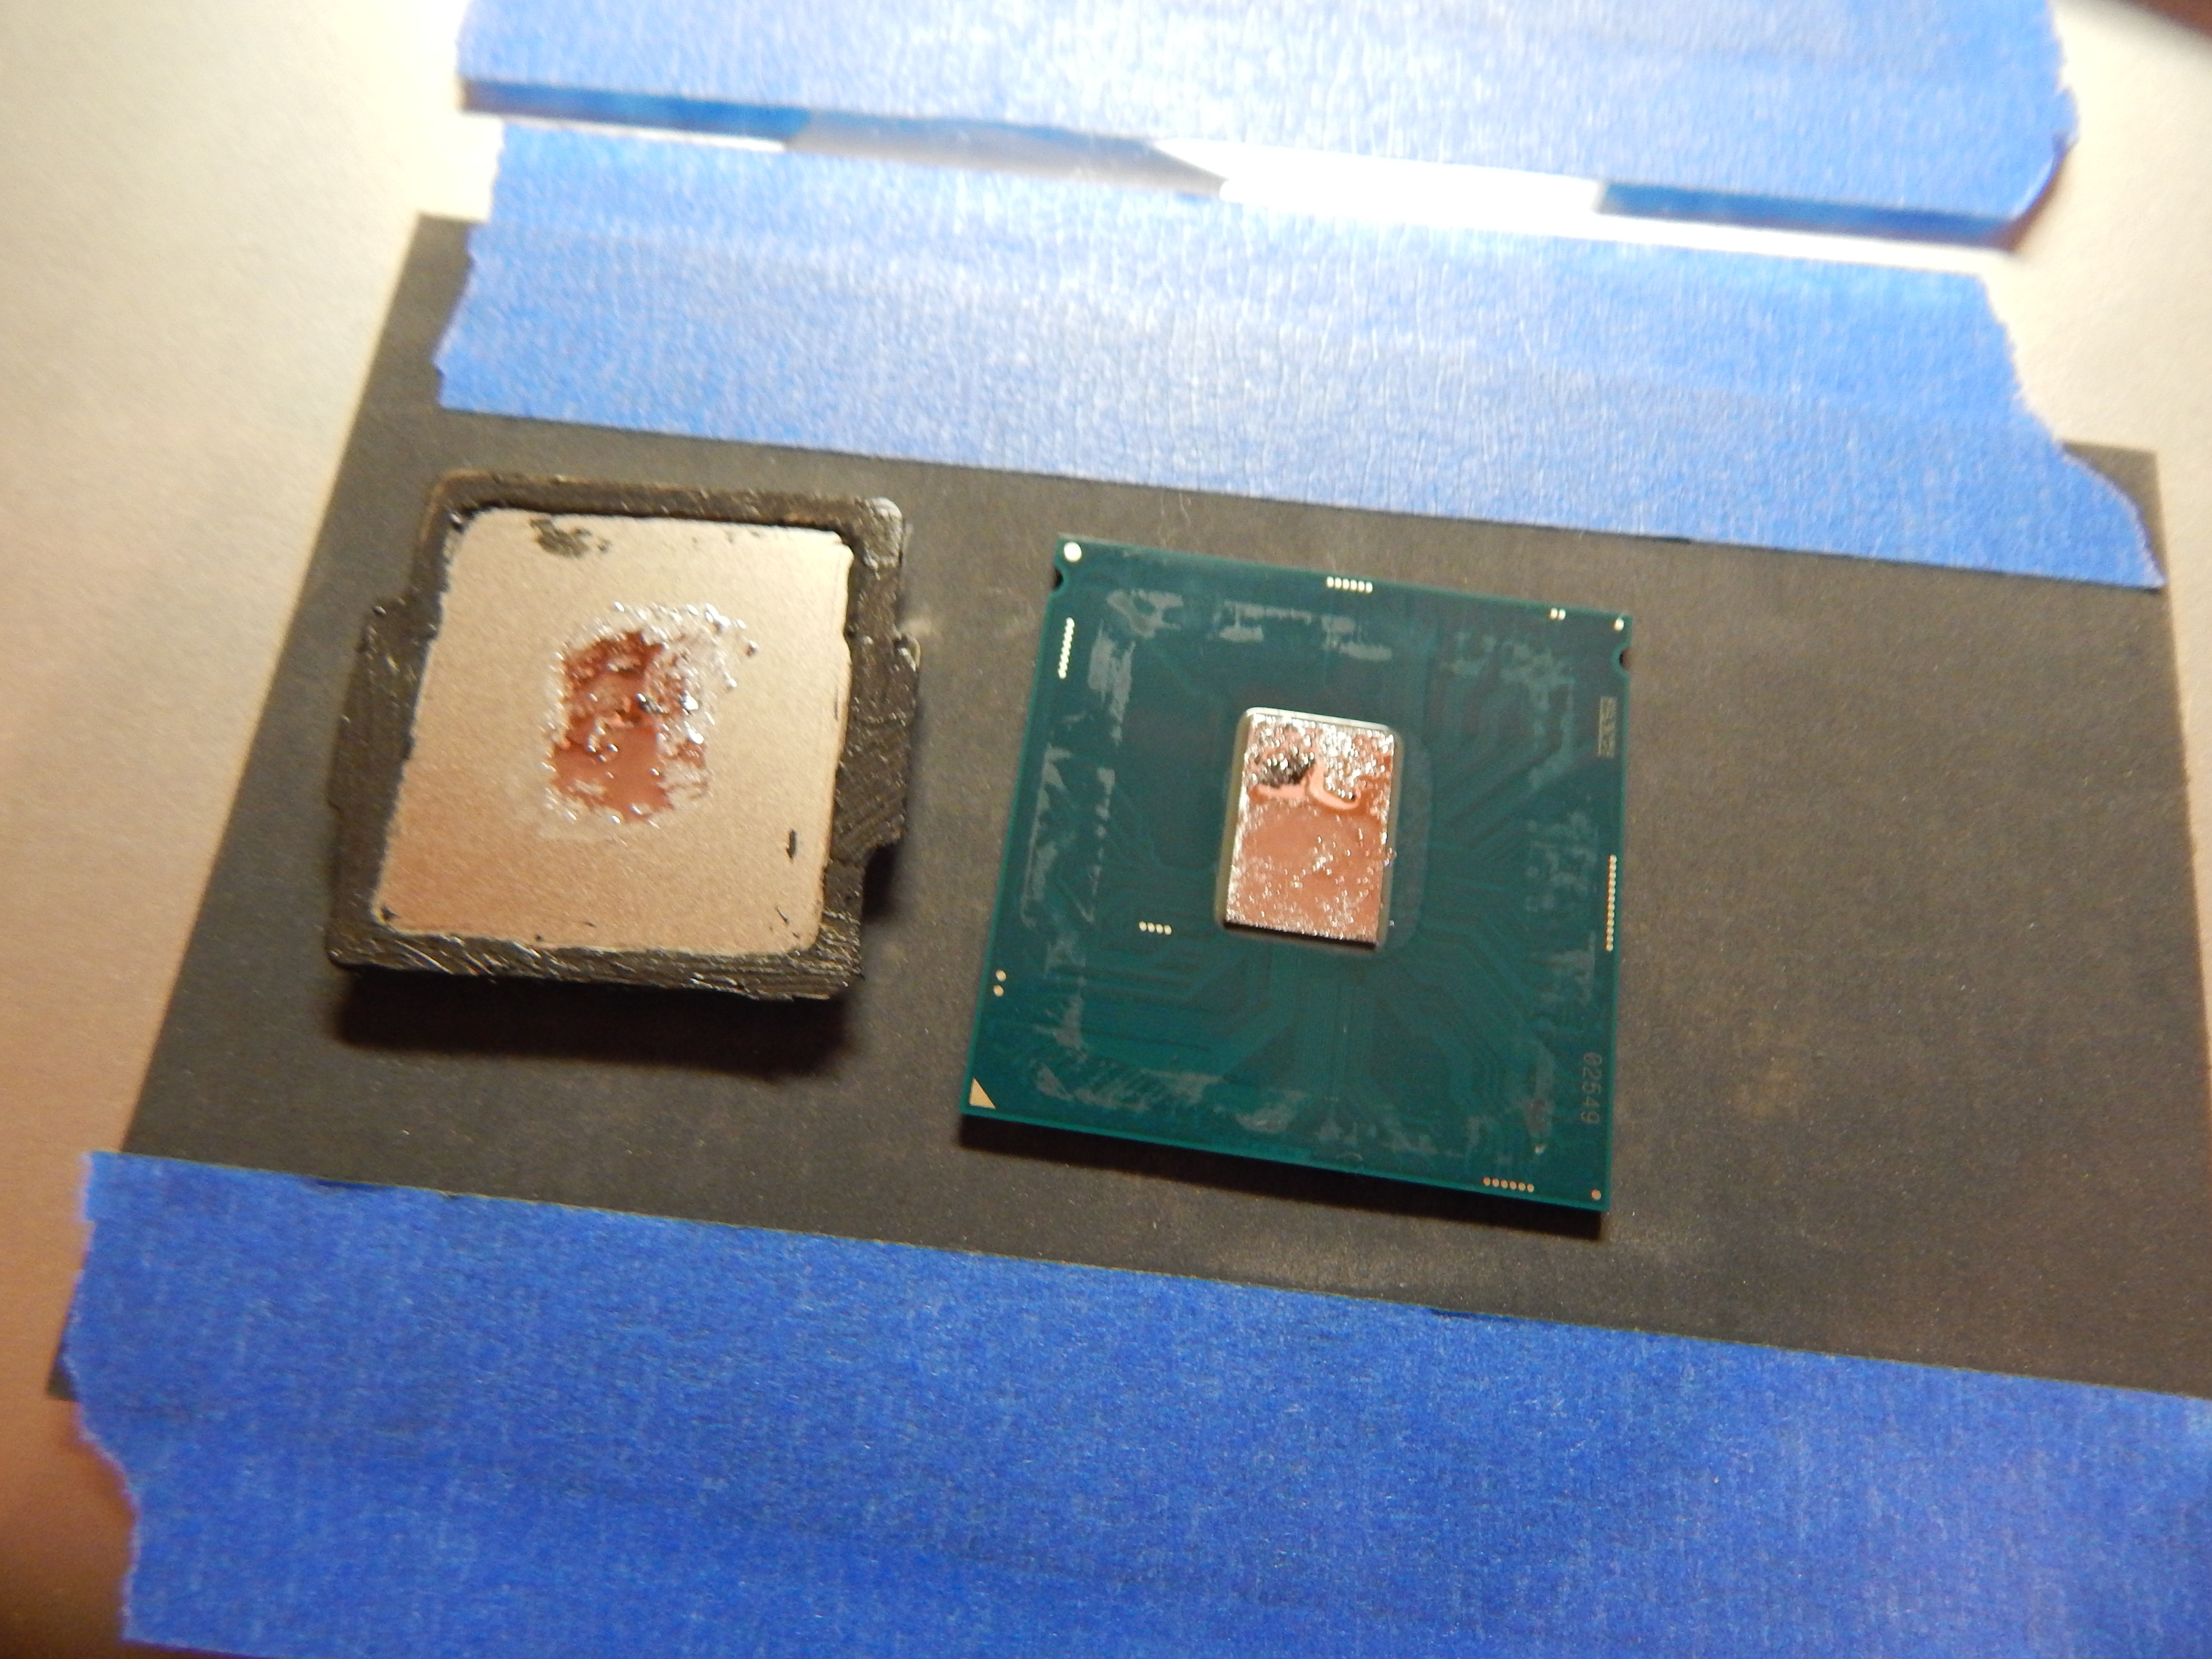
And here are the two parts cleaned and ready. I probably could have spent a little more time getting more adhesive off the PCB, but it looked clean enough.

And the final steps. The conductonaut is applied to the die and half-heartedly applied to the heat spreader. The black RTV is also applied to the edges of the heat spreader. I applied a thin, uneven layer of the RTV to the edges, then spread it around with my finger to make it even and thin.
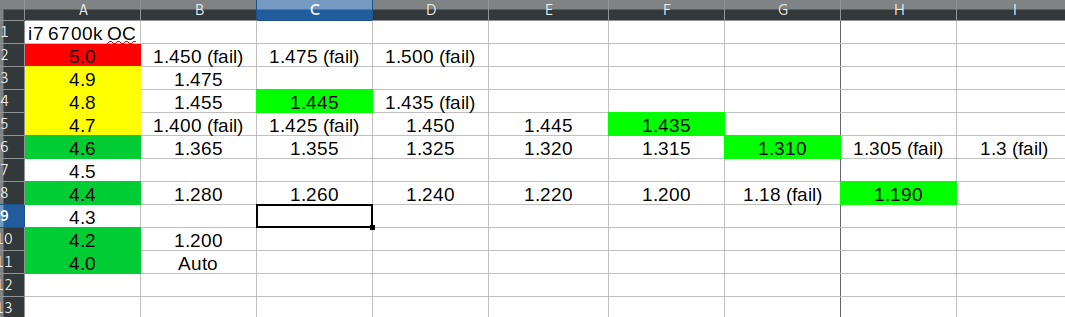
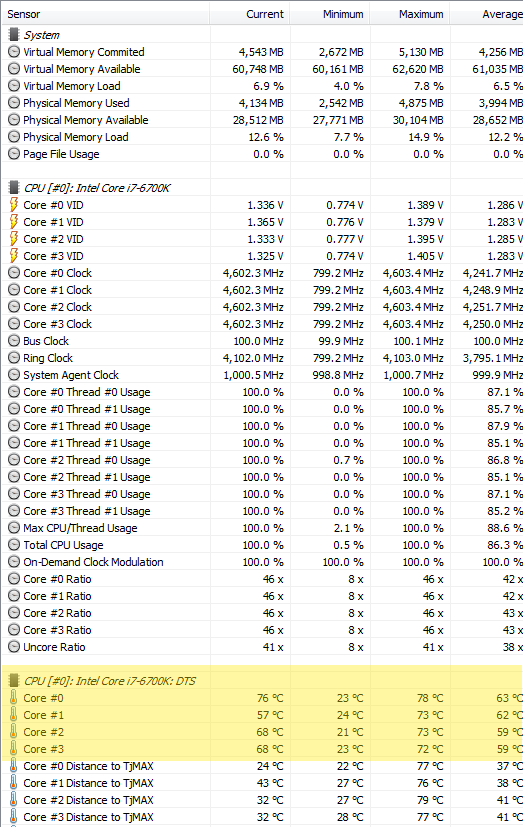
And now for the before and after temps. This was done with the processor running at 4.6GHz and 1.310v, and the cooler is a Corsair H100i GTX. This was only 15 minutes of AIDA64 stress test, but it gives a good impression of the max temps.
Before:
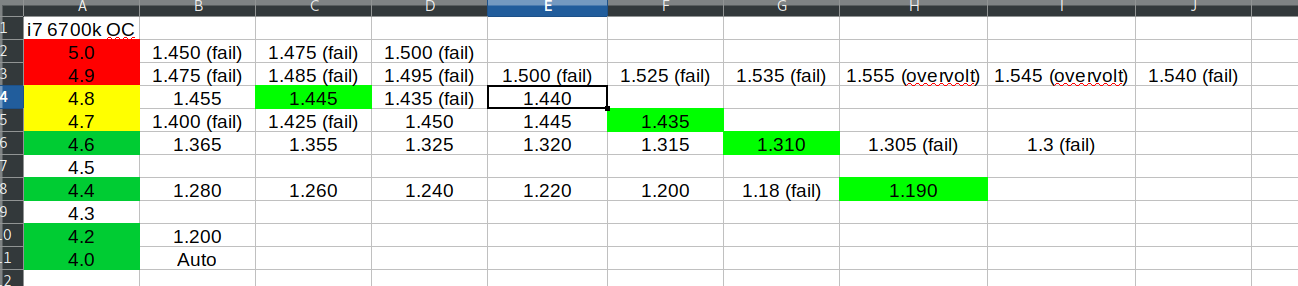
After:

So, there we go. Temps dropped by about 20 degrees Celsius. Pretty amazing. Now I’m going to shoot for 4.8GHz.