Cardboard 2.0 - Full ATX system the size of an ITX computer

Hey Peeps, it's the Fox Loli.

This is a project that started just under a year ago. Cardboard 1.0 was the start of a fun concept I wanted to try out - fitting a fully-capable, full-ATX gaming machine in as tight a space as possible whilst still giving good thermals for the components.

What I ended up with was a $210 computer with a Core 2 Quad Q6600, a P5B motherboard and a Radeon 7770 in a thick-sided case made entirely of cardboard, measuring 8x10x13 inches. You can see the partially-finished-and-then-silently-dead thread here:

I axed CB1.0 for multiple reasons.
The design was so ghetto and on-the-fly that it was a constant eyesore to look at, especially with the wood-glued corners laid bare for all to see.
The power supply was non-modular and therefore totally unsuitable for the build,
The cables had to be routed and mounted with zipties punched through the sides of the case,
There were no mounting points for drives nor was there any room to do so,
There was nowhere to mount a fan,
There was little to no exhaust for the 100W Q6600 or the 75W 7770,
The motherboard was an ancient model that used electrolytic capacitors, and was limited to PCIe 1.1 x16 on the graphics card. There were no more expansion options beyond PCI and PCIe Gen1 x1, the VRM would give everyone here brain cancer, and the memory controller was partially shot, ignoring roughly 1GB of the memory added to the machine. Not to mention that the motherboard was mounted onto the side with 3M velcro pads which all rotted off, and there was no I/O shield or PCI bracket to speak of.

Here are a couple of pictures of what it looked like, in-progress.

Basically, it was cancer, and the components eventually ended up in a computer that I donated to the town library to replace a dying single-core Sempron machine. But it did a good job of doing what I expected the hardware to be capable of.

I still wanted a tiny cardboard computer, though, especially after experiencing what a pain in the ass hauling my desktop to LAN Syndicate and back was. So, Cardboard 2.0, abbreviated CB2.0, was born. Or... well, she's still being born at the moment. That's what this is gonna be about.

CB2.0 is going to be built along similar lines to CB1.0, but with much better planning, far superior parts and a far better implementation, both technically and aesthetically.

The parts:
CPU - Intel Xeon e5450 3.00GHz processor with a 775 sticker
Motherboard - Gigabyte EP45-U3DP
RAM - 7GB (total) of DDR2-800/5-5-5
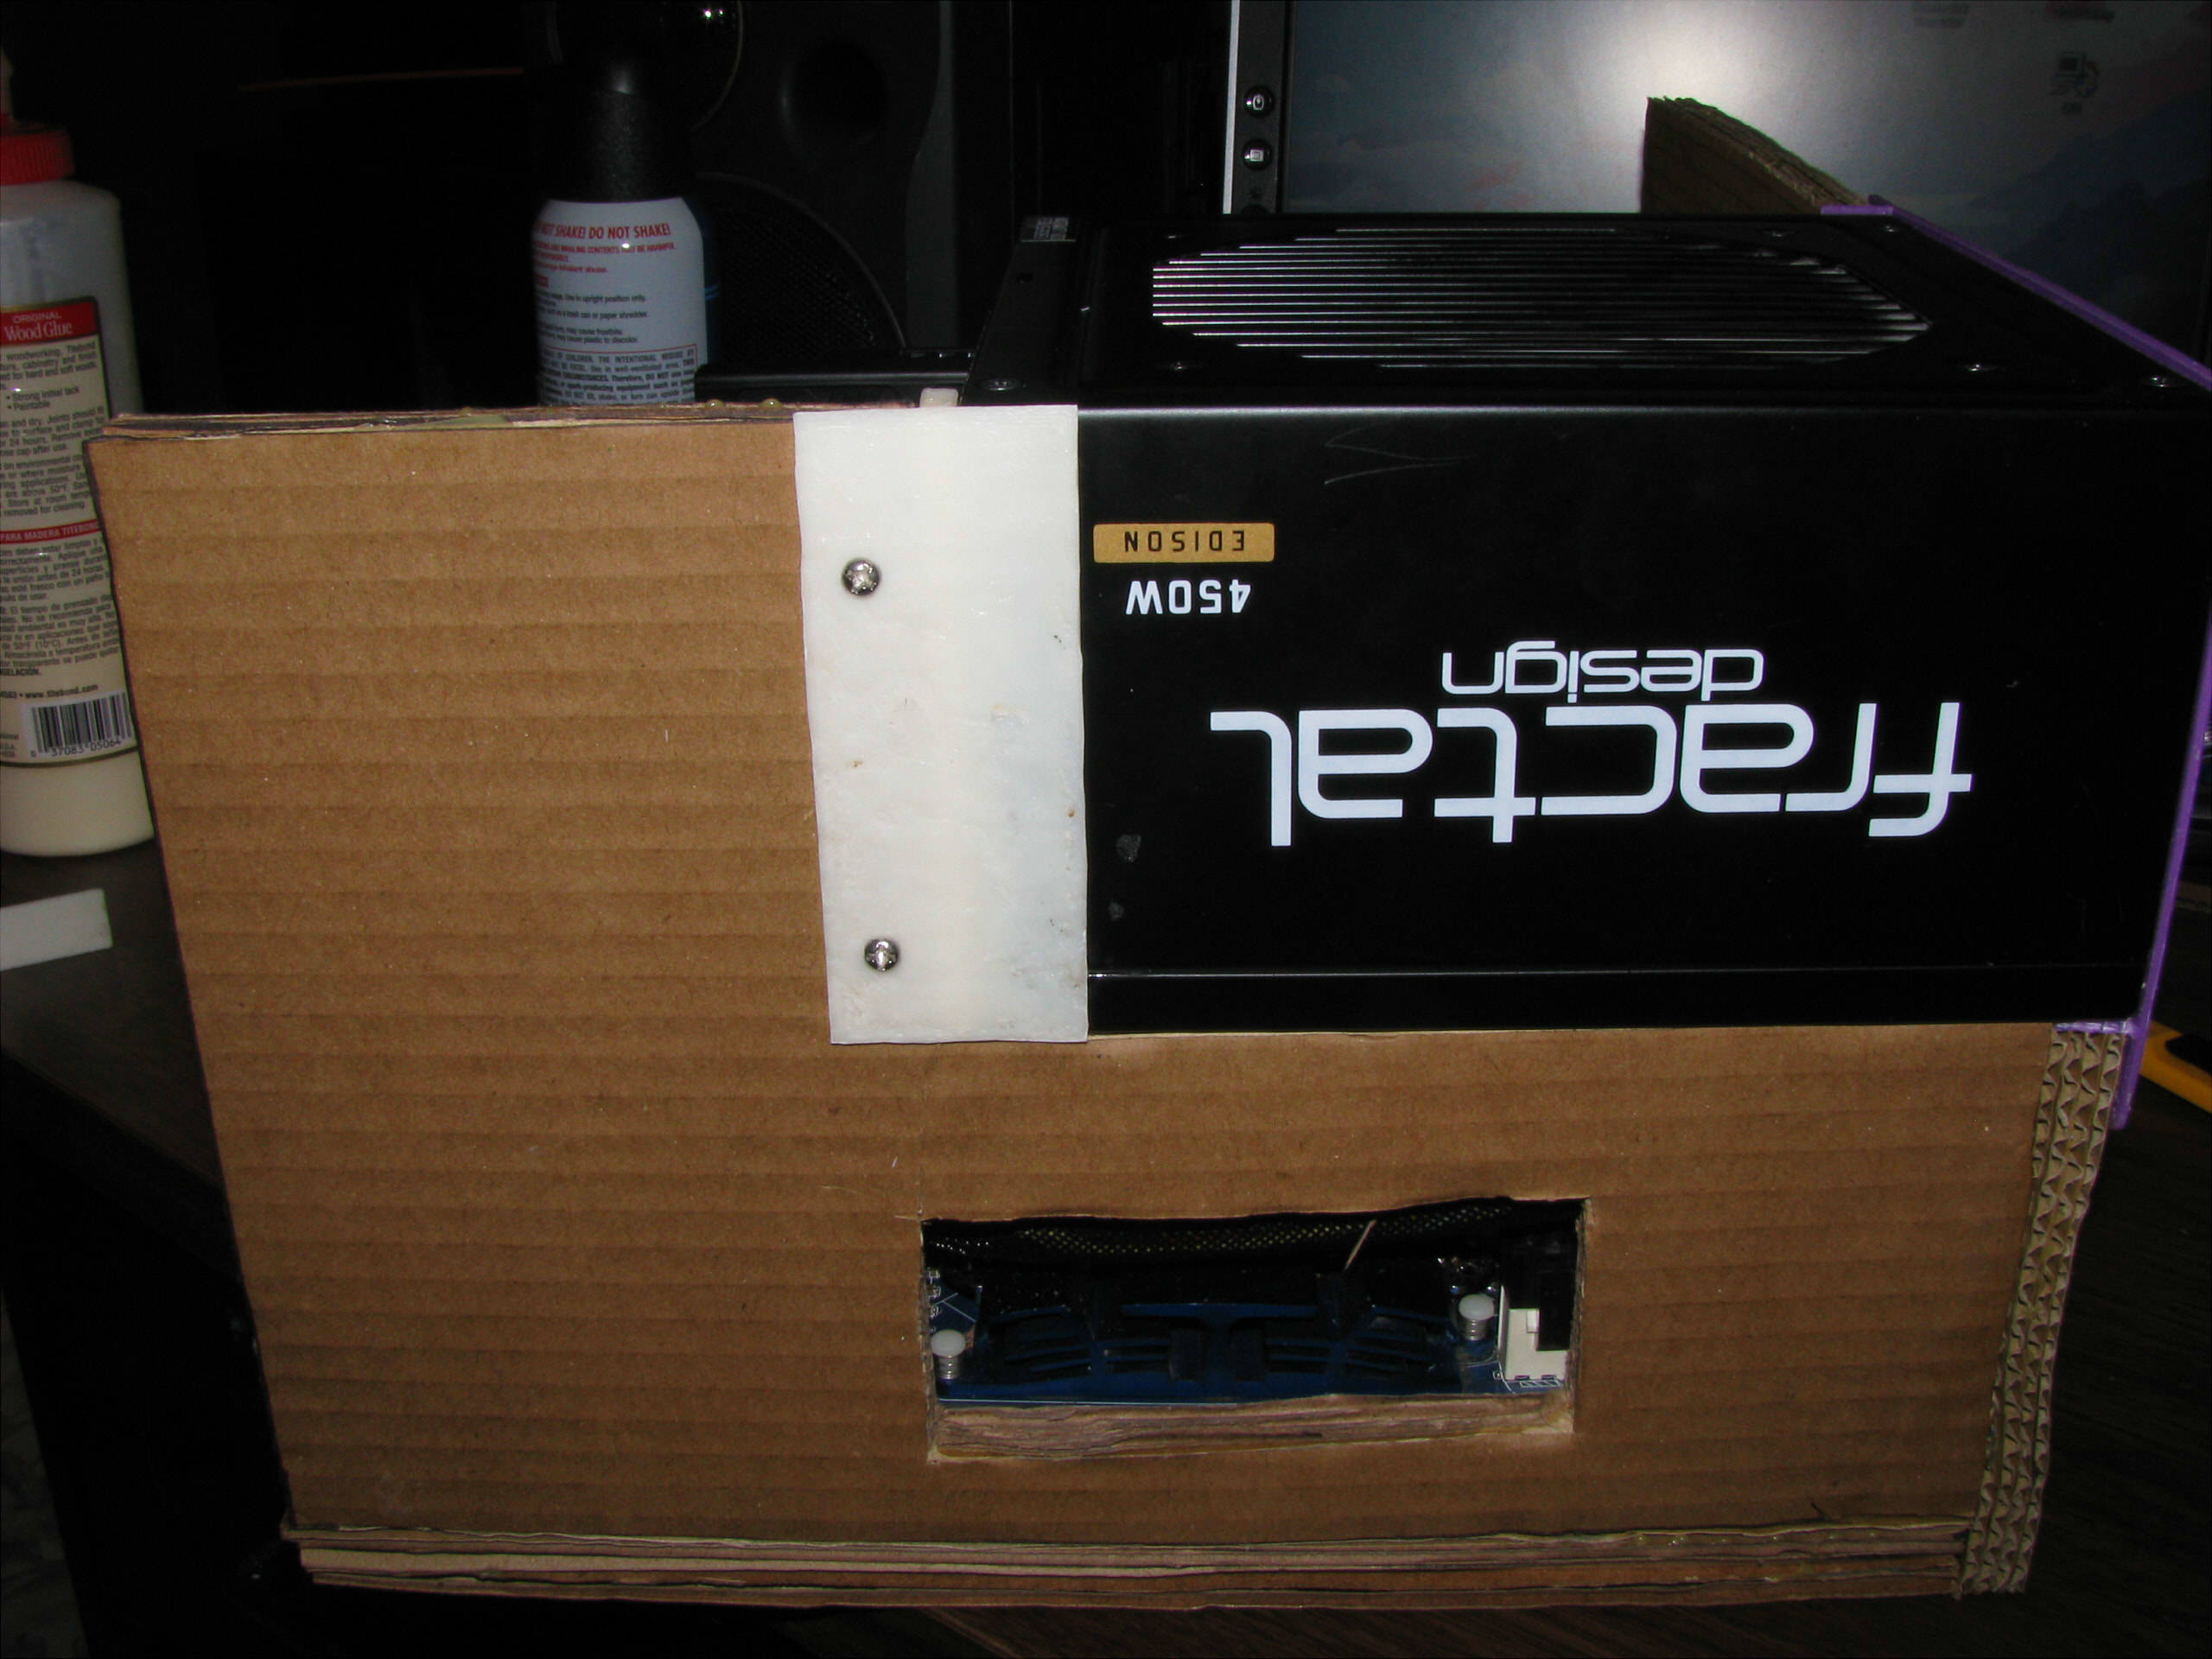
PSU - Fractal Design Edison-M 450W 80+ Gold.
Cooler - Xigmatek Praeton low-profile cooler.
Graphics Card - Asus Radeon 7770 @ 1020MHz
Storage - Crucial BX200 256GB + HGST 1TB 2.5" HDD
Storage Brackets - 2x Enermax PCI-SATA hot-swap drive bays.
SATA III PCIe Card - Marvell 88SE9230 controller - PCIe Gen2 2x electrical

The improvements will be like night and day compared to CB2.0's predecessor. It will have a motherboard I/O shield as well as a properly-applied (held in with bolts) PCI and I/O shield bracket pulled from an old case. It will also have a handle, like its predecessor. The same handle, in fact. But my 3D printer will now be employed to print custom parts for the aesthetics of the corners, for fan mount brackets and for the power supply bracket. It will have proper intakes and exhausts as well as a crazy-ass Delta Electronics blower fan for "emergency exhaust". The motherboard is now mounted on a much more elegant plastic bracket, which is glue-cemented into the back panel rather than just sticking the motherboard on some velcro. The side panel will have a hinge, making access to the parts as easy as any other case.
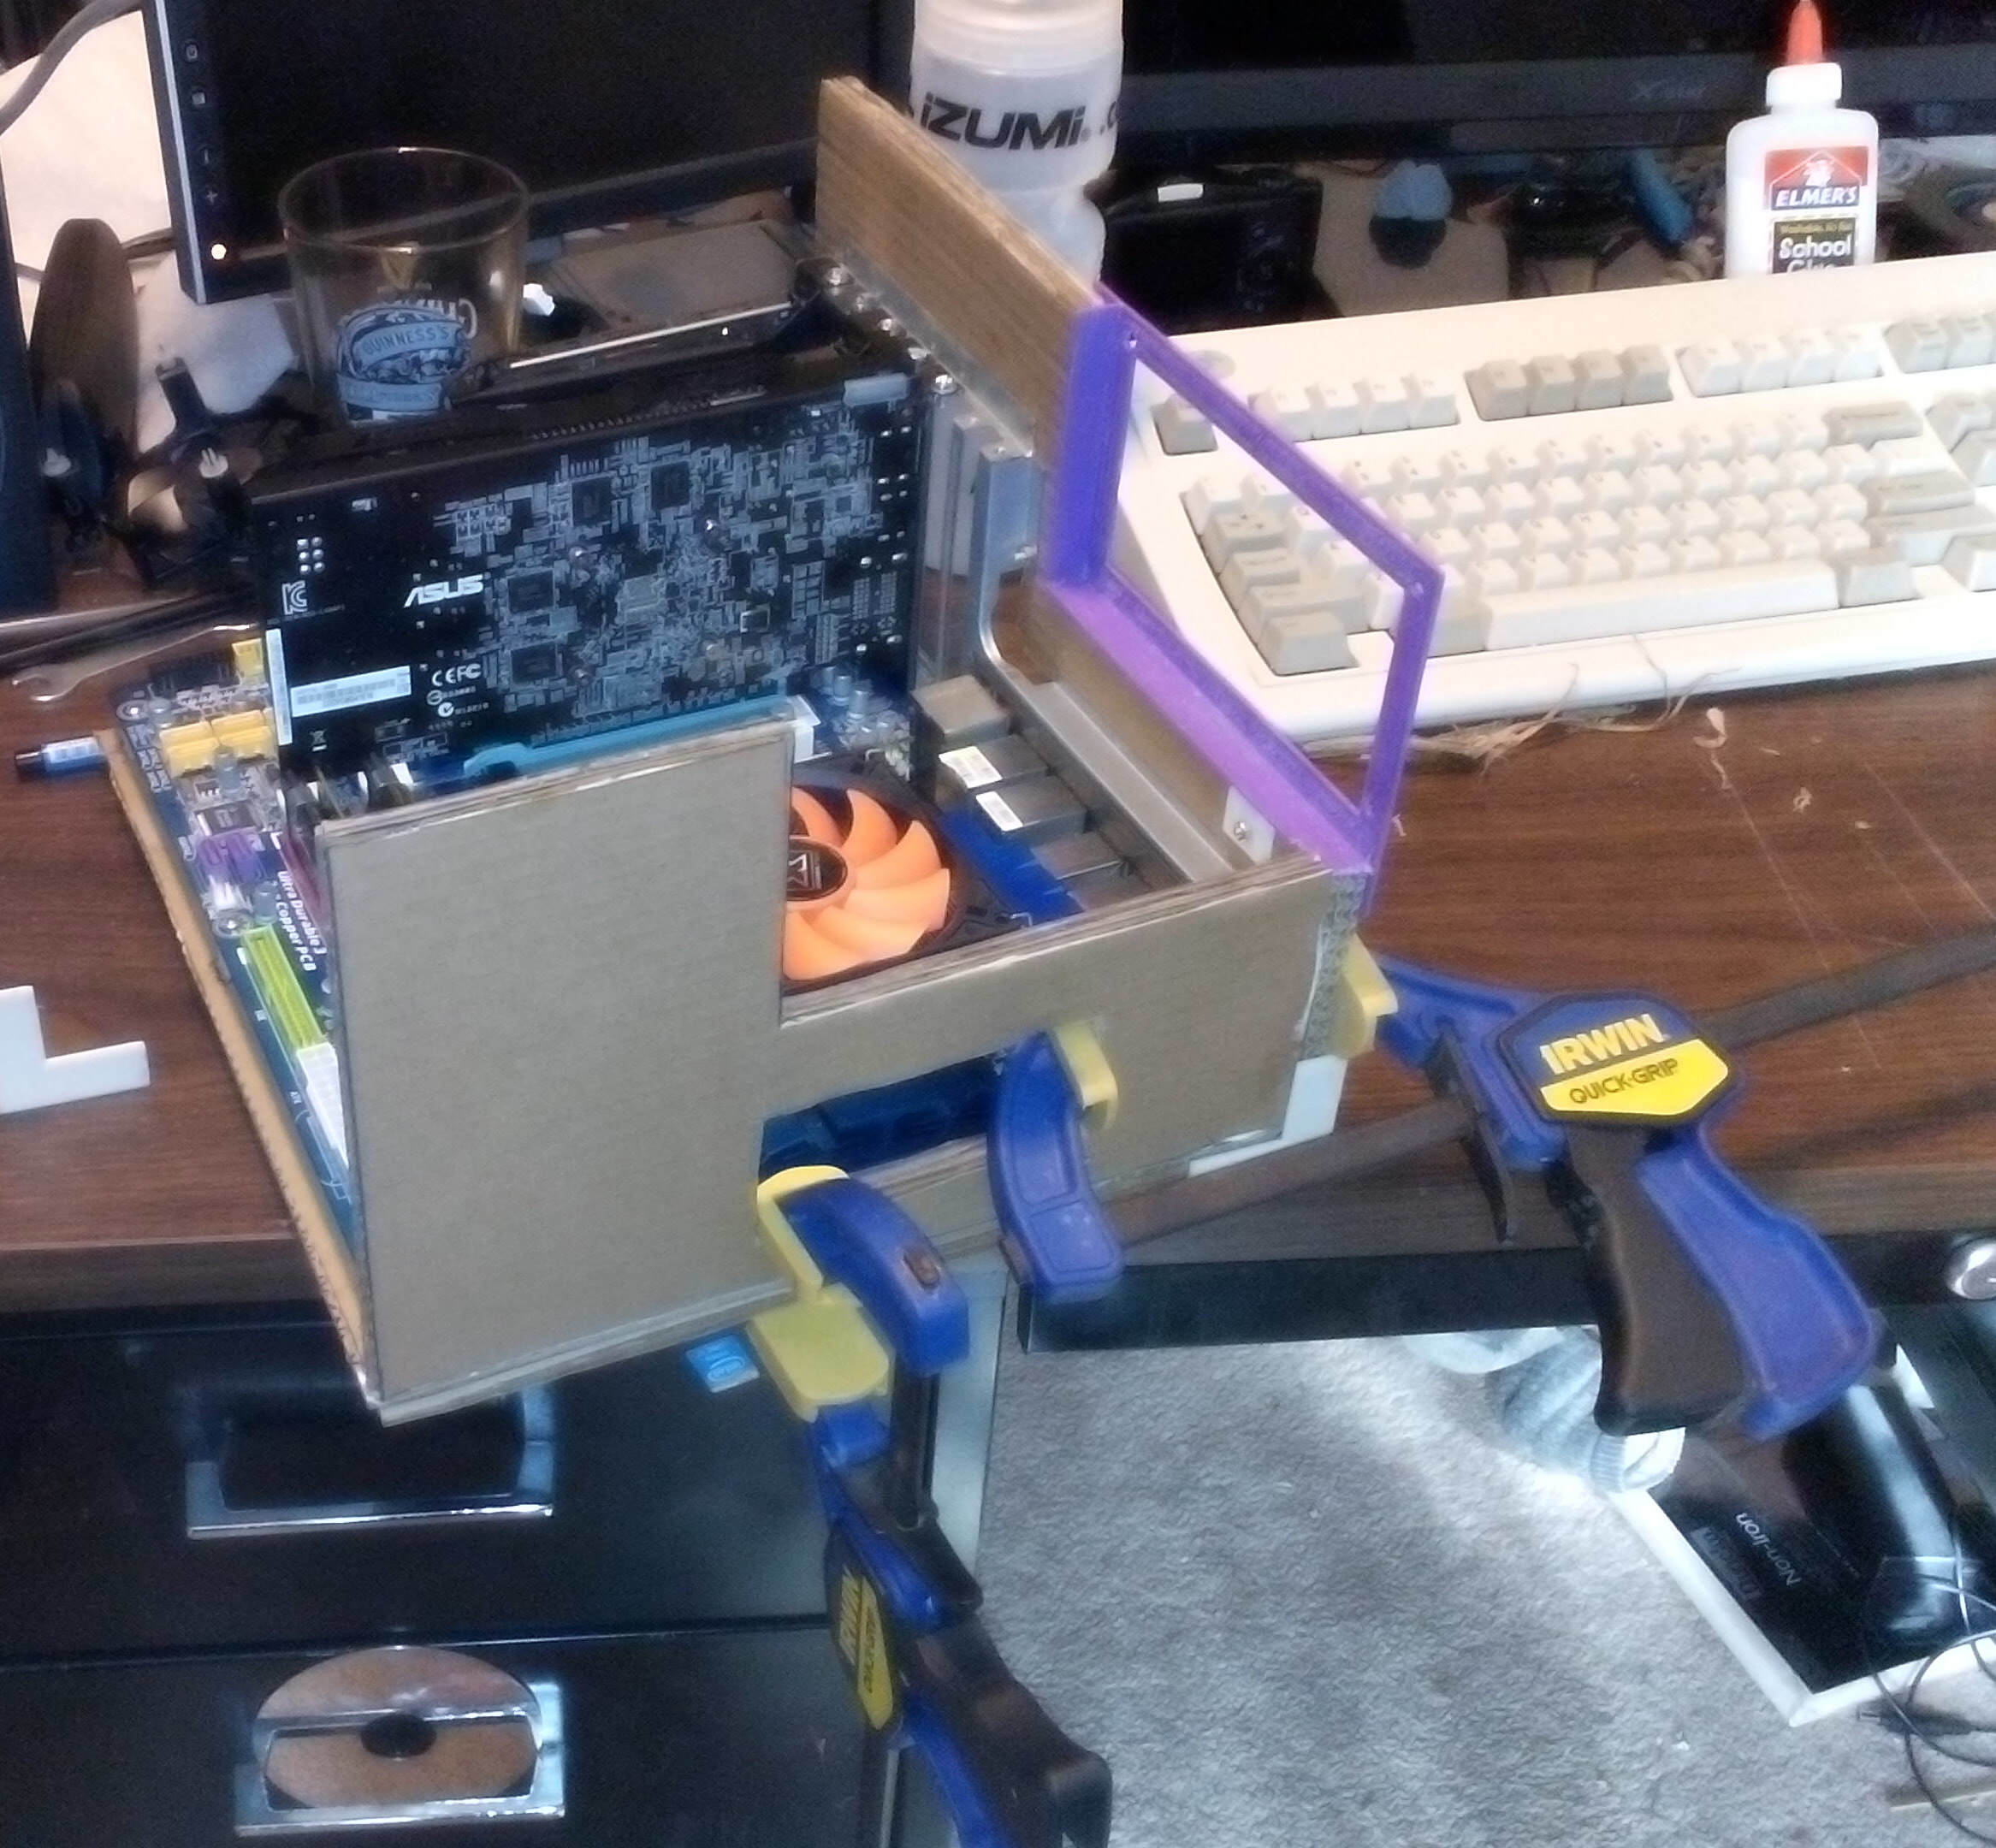
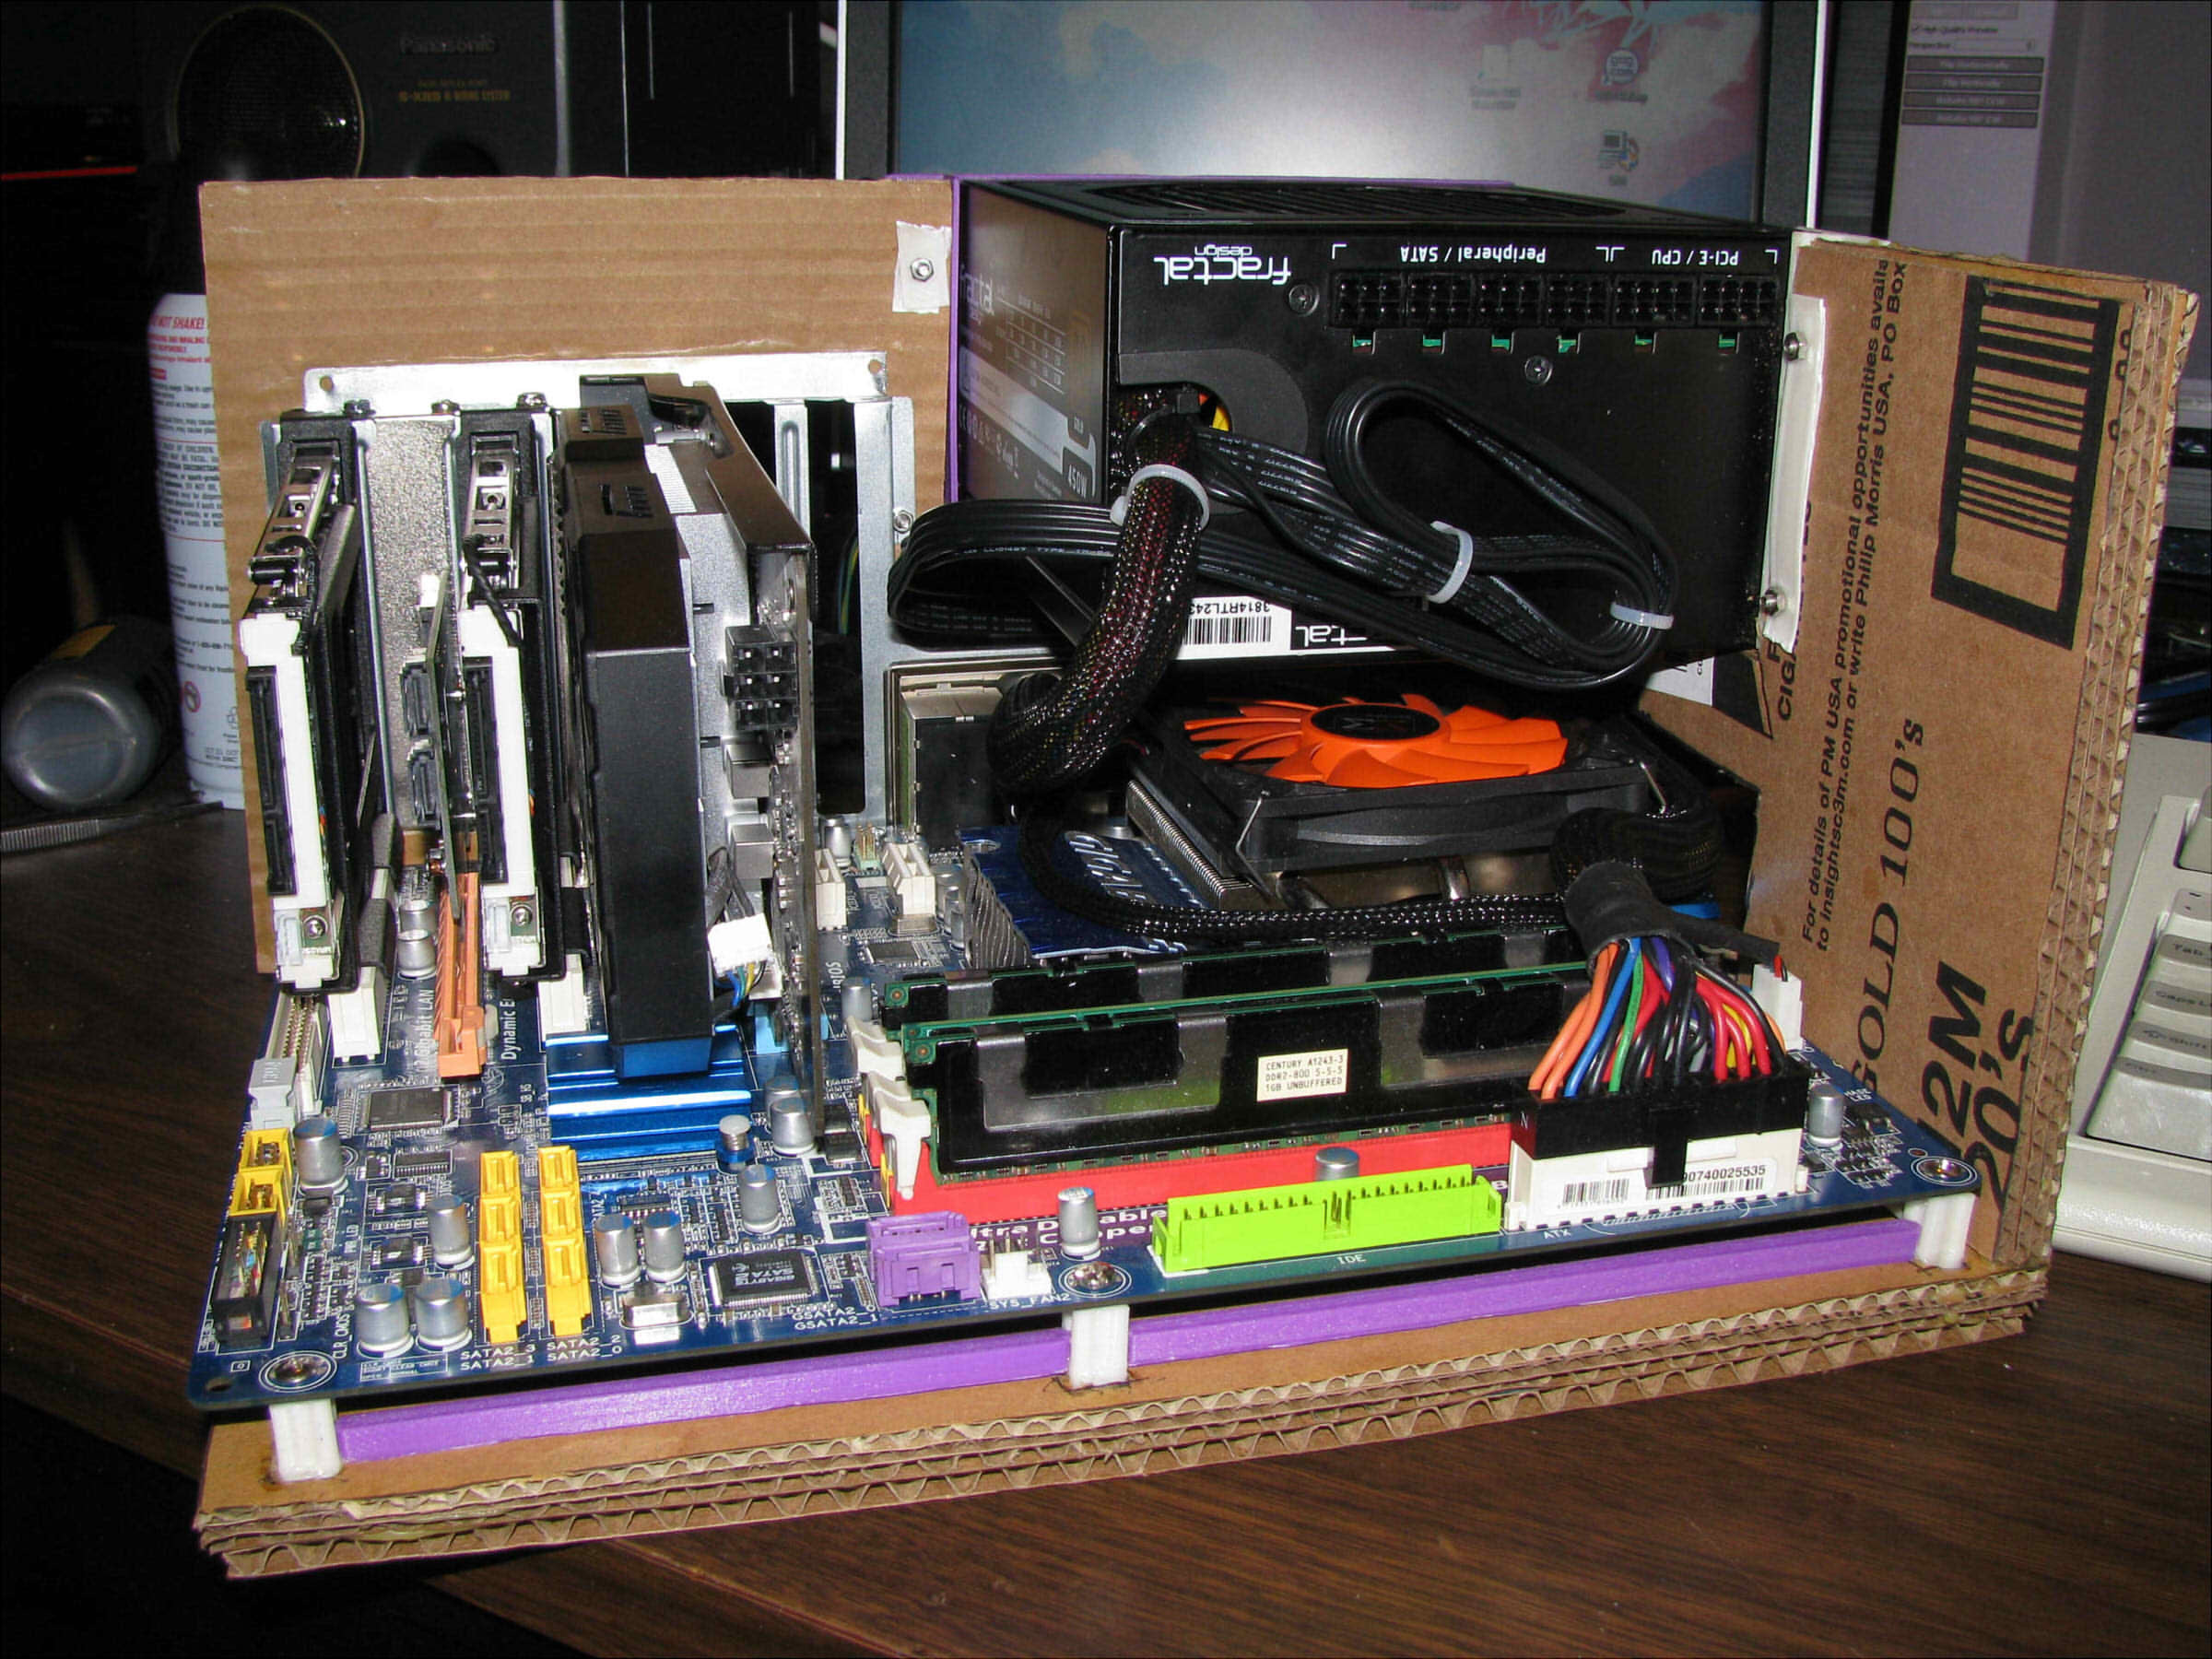
Progress so far:

The components are all visible apart from the power supply, which will be mounted on that cutout you see on the top right hand corner. Don't worry about support for the power supply - this will be built to stand on its end. It will have more than enough support by the end of the build.

Don't worry about the CPU being suffocated by the power supply - the PSU shall have the fan facing outwards, and the airflow of the case will be supplemented during high-load times by a very beefy blower fan. I have exhaust vents all planned out for this build. This computer is NOT going to catch fire.

Here is the I/O shield and PCI bracket in all its glory. the corners and the inside will be covered with something to be more aesthetically pleasing - I had to cut each piece of cardboard by hand and by eye with a box cutter.
You can see that in this build, nearly no space will be spared. The two PCIe slots currently empty will be populated by an inexpensive HDMI capture card in one slot, and either a wifi card or a USB 3.0 card. I am leaning towards the 3.0 card even though the link is 1.1 x1. This will be a very well-decked-out machine.

That's what I have for now, I'll keep y'all posted as the build progresses :D 'til then, DISCUSS! :3

8 Likes

Very cool! Cant wait for updates and the finished product!

You know, it would make for a good theme for your build, that is if you don't have the design finalized yet.

2 Likes

Sounds like my type of PC.

3 Likes

Aw ): That sucks. I wanted to see some fireworks...

Jokes aside that looks sweet!

This is like something I saw at a lan about 2 years ago, except it was bigger and included a lot more hot glue and duct tape, in comparison this is a magical franken build, I'm actually surprised to how nicely it was made for a cardboard pc!

UPDATE: PSU bracket has been bolted in place on the back, and the bottom panel is being glued in place as we speak! Will attach the PSU tonight when I get home!

1 Like

This is looking really sweet. Definitely following for updates o.o

I've thought of this before, and seen people do wooden cabinets for CPU case. Make it look like a living room coffee table or china cabinet. The problem I have with carboard, although it's kinda cool and I would like to do it before a wooden desk/case is that overclocking the the motherboard area does get fairly warm on overclocked or non-spacious cases. Say anywhere from 40-50c on hotspots, that's a bit no-no and screams house fire, especially if you have a no name brand Power supply.

Thankfully, I'm using a good Fractal Design (Seasonic) 80+ Gold PSU. With both the CPU and GPU being 80W parts, I would be very surprised if the total power consumption of this entire system broke 200W at max load. So, thankfully, I don't see this catching fire any time soon. And the Xeon I'm using is already at 3.00GHz, I don't think I'll be pushing it beyond that, especially on the cooler that I'm using. The case will be well-ventilated in general. I feel much safer using this than I did Cardboard 1.0, because that used an 80+ power supply and a 100W Q6600 with little to no exhaust. It didn't explode or anything, but this one uses far better parts.

1 Like

UPDATE: Bottom panel has been cut and glued, and the second PSU bracket is bolted in place!

The left part of the brace is held into the cardboard by two machine screws and nuts, with a leftover piece of ABS from a failed print to distribute the clamp on the other side. The right side of the brace is superglued straight onto the side of the power supply. Sorry, xD but it's the cleanest and most reliable way of getting the PSU and the cardboard to be flush with each other.

Here's what it looks like on the inside so far. The main cables have been routed around the CPU fan. Don't worry - they won't obstruct the heatsink or case airflow.

And an outside photo of the progress as a whole. Cardboard 2.0 is really starting to take shape!

Stay tuned! I have my 3D printer mostly repaired so it should be able to print way faster. So that means I'll be cranking out the front panel and its fan mount tonight! The capture card and USB 3.0 card are on the way, too.

I also have a pretty mad idea for getting a wifi card in the x1 slot covered by that there graphics card :33333333

5 Likes

Greetings again, y'all! Cardboard 2.0 is now ready to start doing actual things that actual computers actually do!
Installing Windows was a bit of a pain - because this machine uses a Xeon rather than a Core 2 Quad, I had to manually force a microcode update to the BIOS to make the motherboard recognize the Xeon's instruction sets, without which Windows 8.1 and later WILL NOT INSTALL. This will be a warning that I'll probably give whenever I make a build guide for 771 to 775 mods.

But now that everything is up and running, here's the progress on the actual physical build itself!

Application of the front panel, complete with a fan bolted onto the inside, with a tasteful grill on the grill.

And from the side

Then the top panel, with the case handle bolted on.

And from lower down, this time note that the excess edges on top have been cut down.

Now for the entire build, which is seen here next to my gloooooorious CRT running MSI afterburner. I had just been playing some games for a little bit to test how what kind of temps I could expect.

The CPU temperature never went above 63°C and the GPU temperature barely reached 50. I know, these are only 80W parts, but still, given the size of the CPU cooler and how cramped the case is, I was expecting the temperatures to reach much higher than they actually did. I'll have to put it through much longer and harder paces later. Perhaps its down to it not having a side panel yet, but given that the GPU and CPU are going to be right up next to an exhaust fan on the next side panel, just above the power supply, I don't think it will change much.

The handle I attached to the top of the PC is rock-solid and the wood glue holding the PC together is just as solid. The entire machine weighs just over 11 pounds and it survived my ogre shake test with flying colors. This is turning out to be just as much as I had hoped it would be! CB2.0 is going to be amazing once it's actually completed.

Next: cutting out holes and printing brackets for the front I/O and power button, and embossing the project logo on the front and side of the machine. Then applying the corners. Then comes the task of making the final side panel.

Until then, enjoy!!!!!

4 Likes

Great project! I stay tuned!