[Build Log] making the FT-03 mini and a GPU loop fight for real estate

This build is a work in progress as of 28/06/2020, post will be edited further.

So the goal here is pretty straight forward:
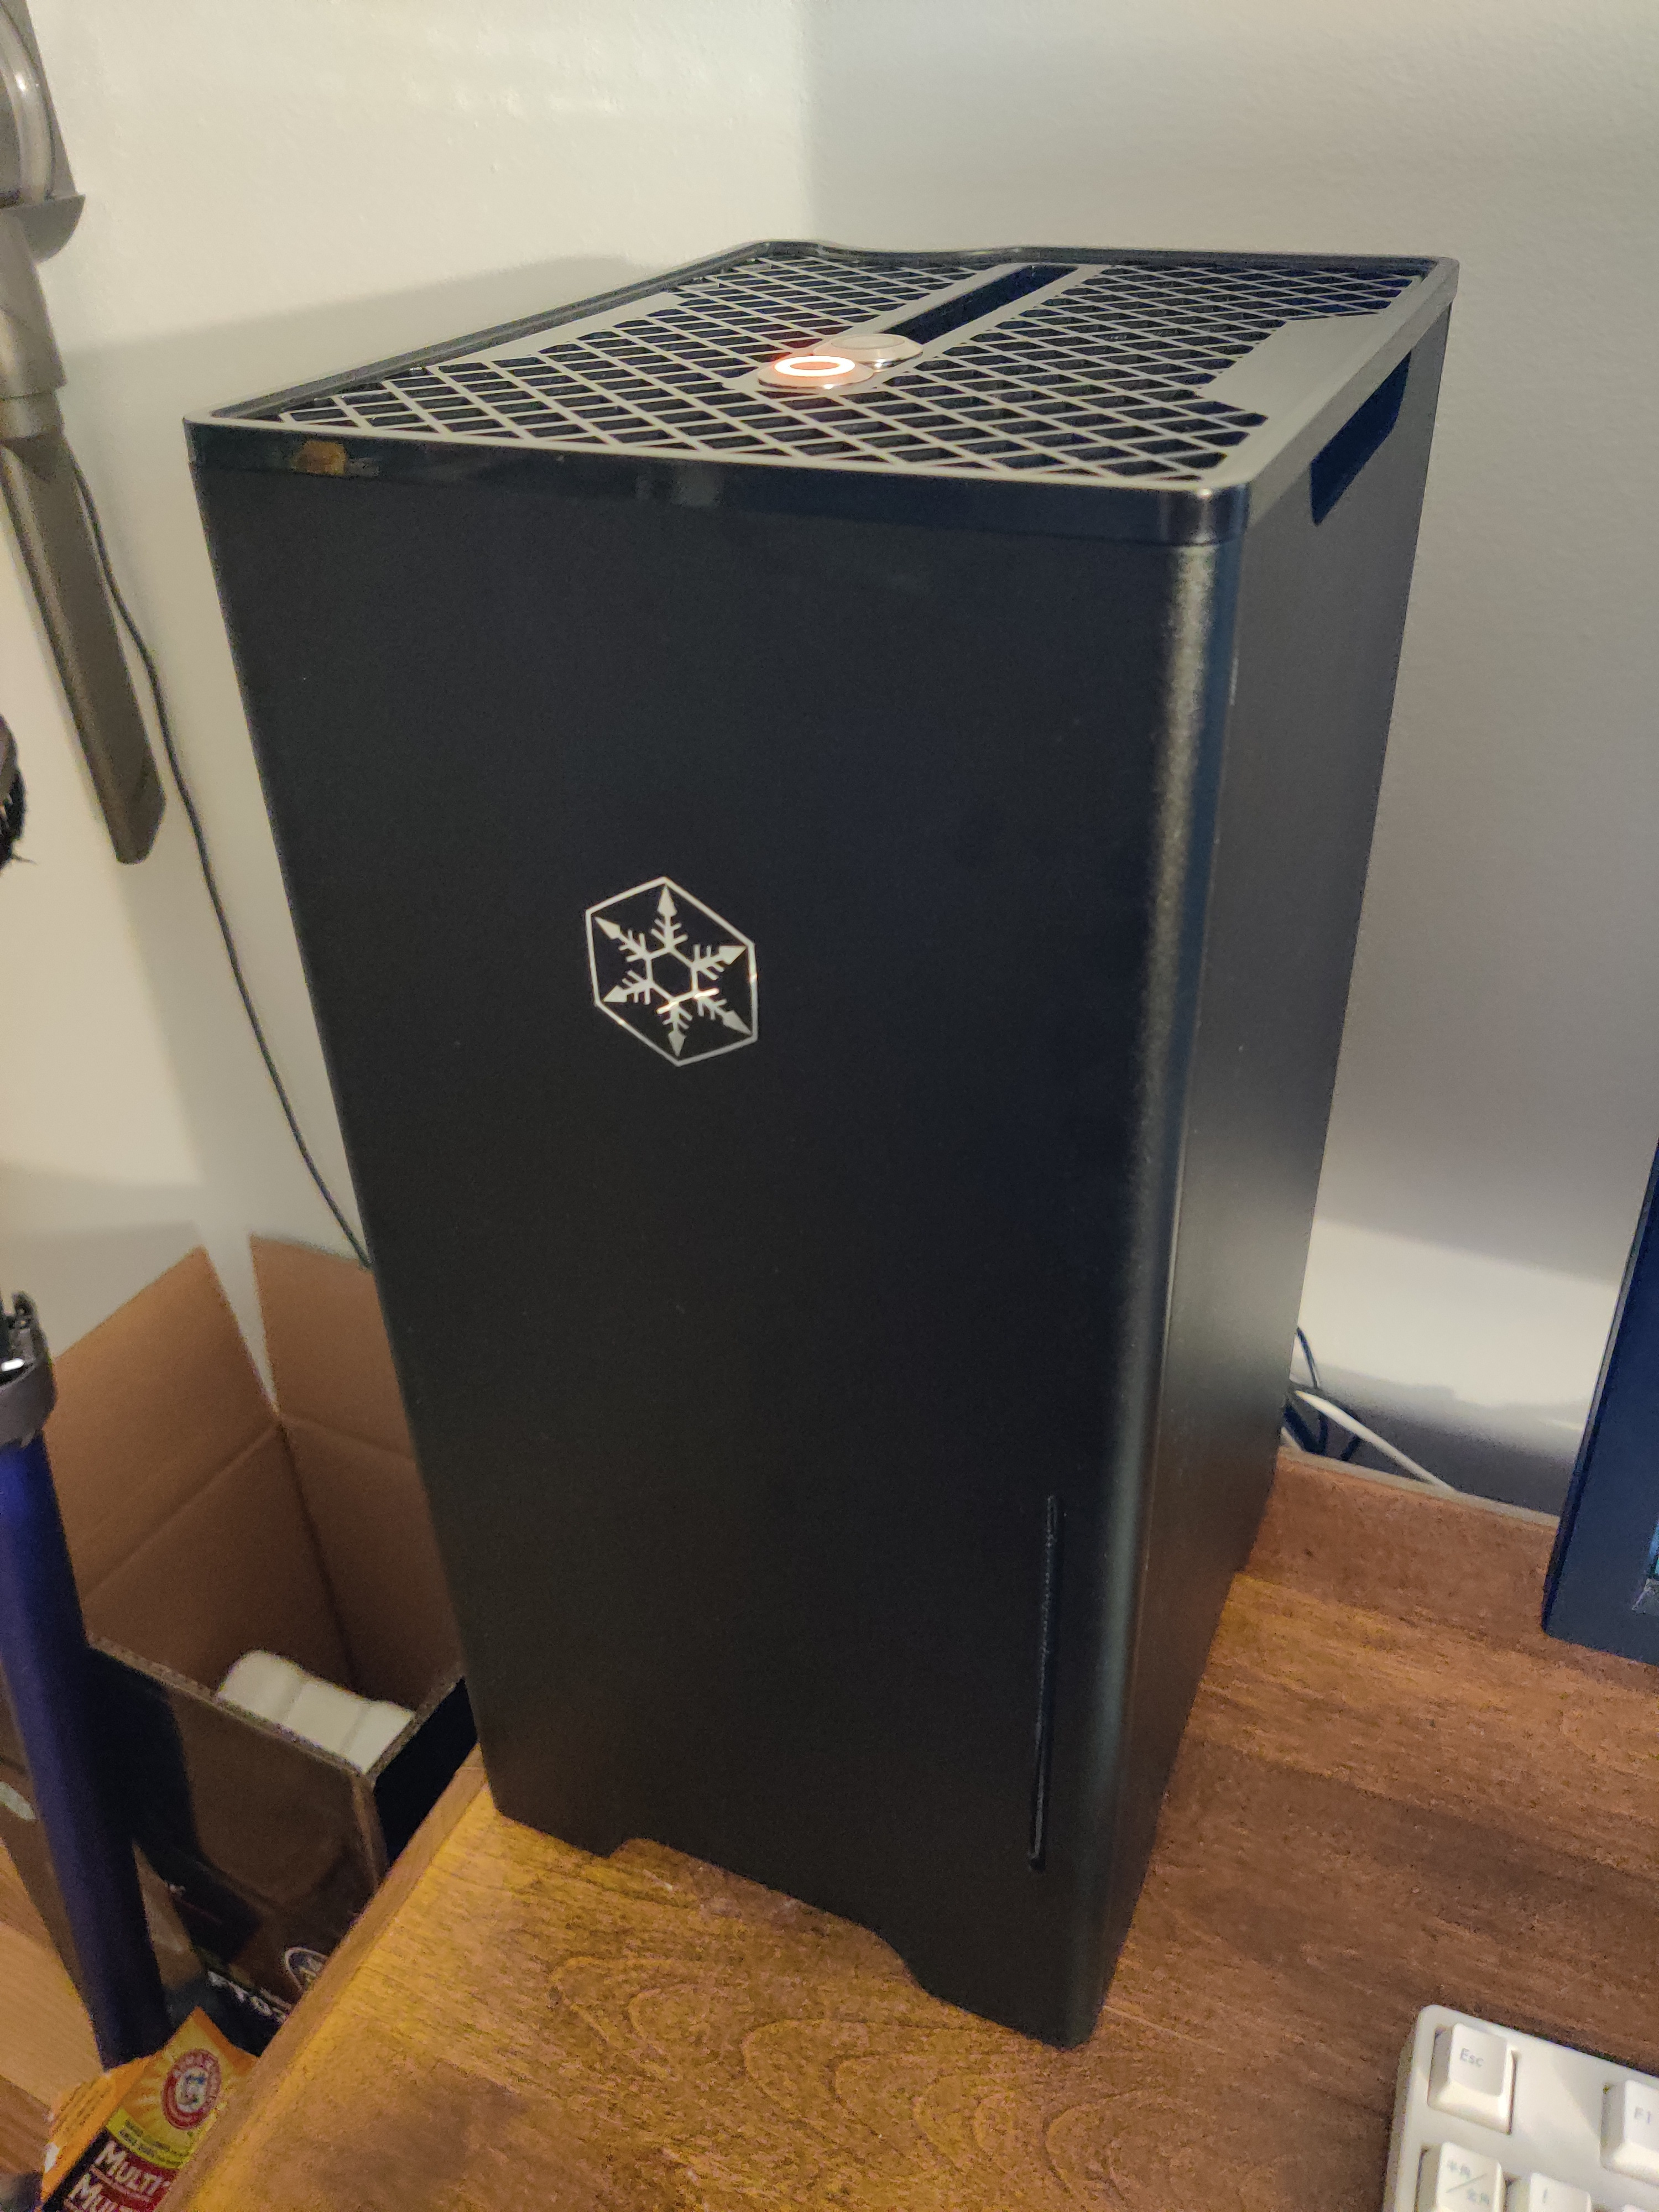
I’m building a GPU loop in a Silverstone FT03-mini. No radiators outside the case, all 4 panels on, no vent holes or dremeling allowed on the sides. Bulkhead dremeling to pass tubing is OK. Basically it needs to look like this:

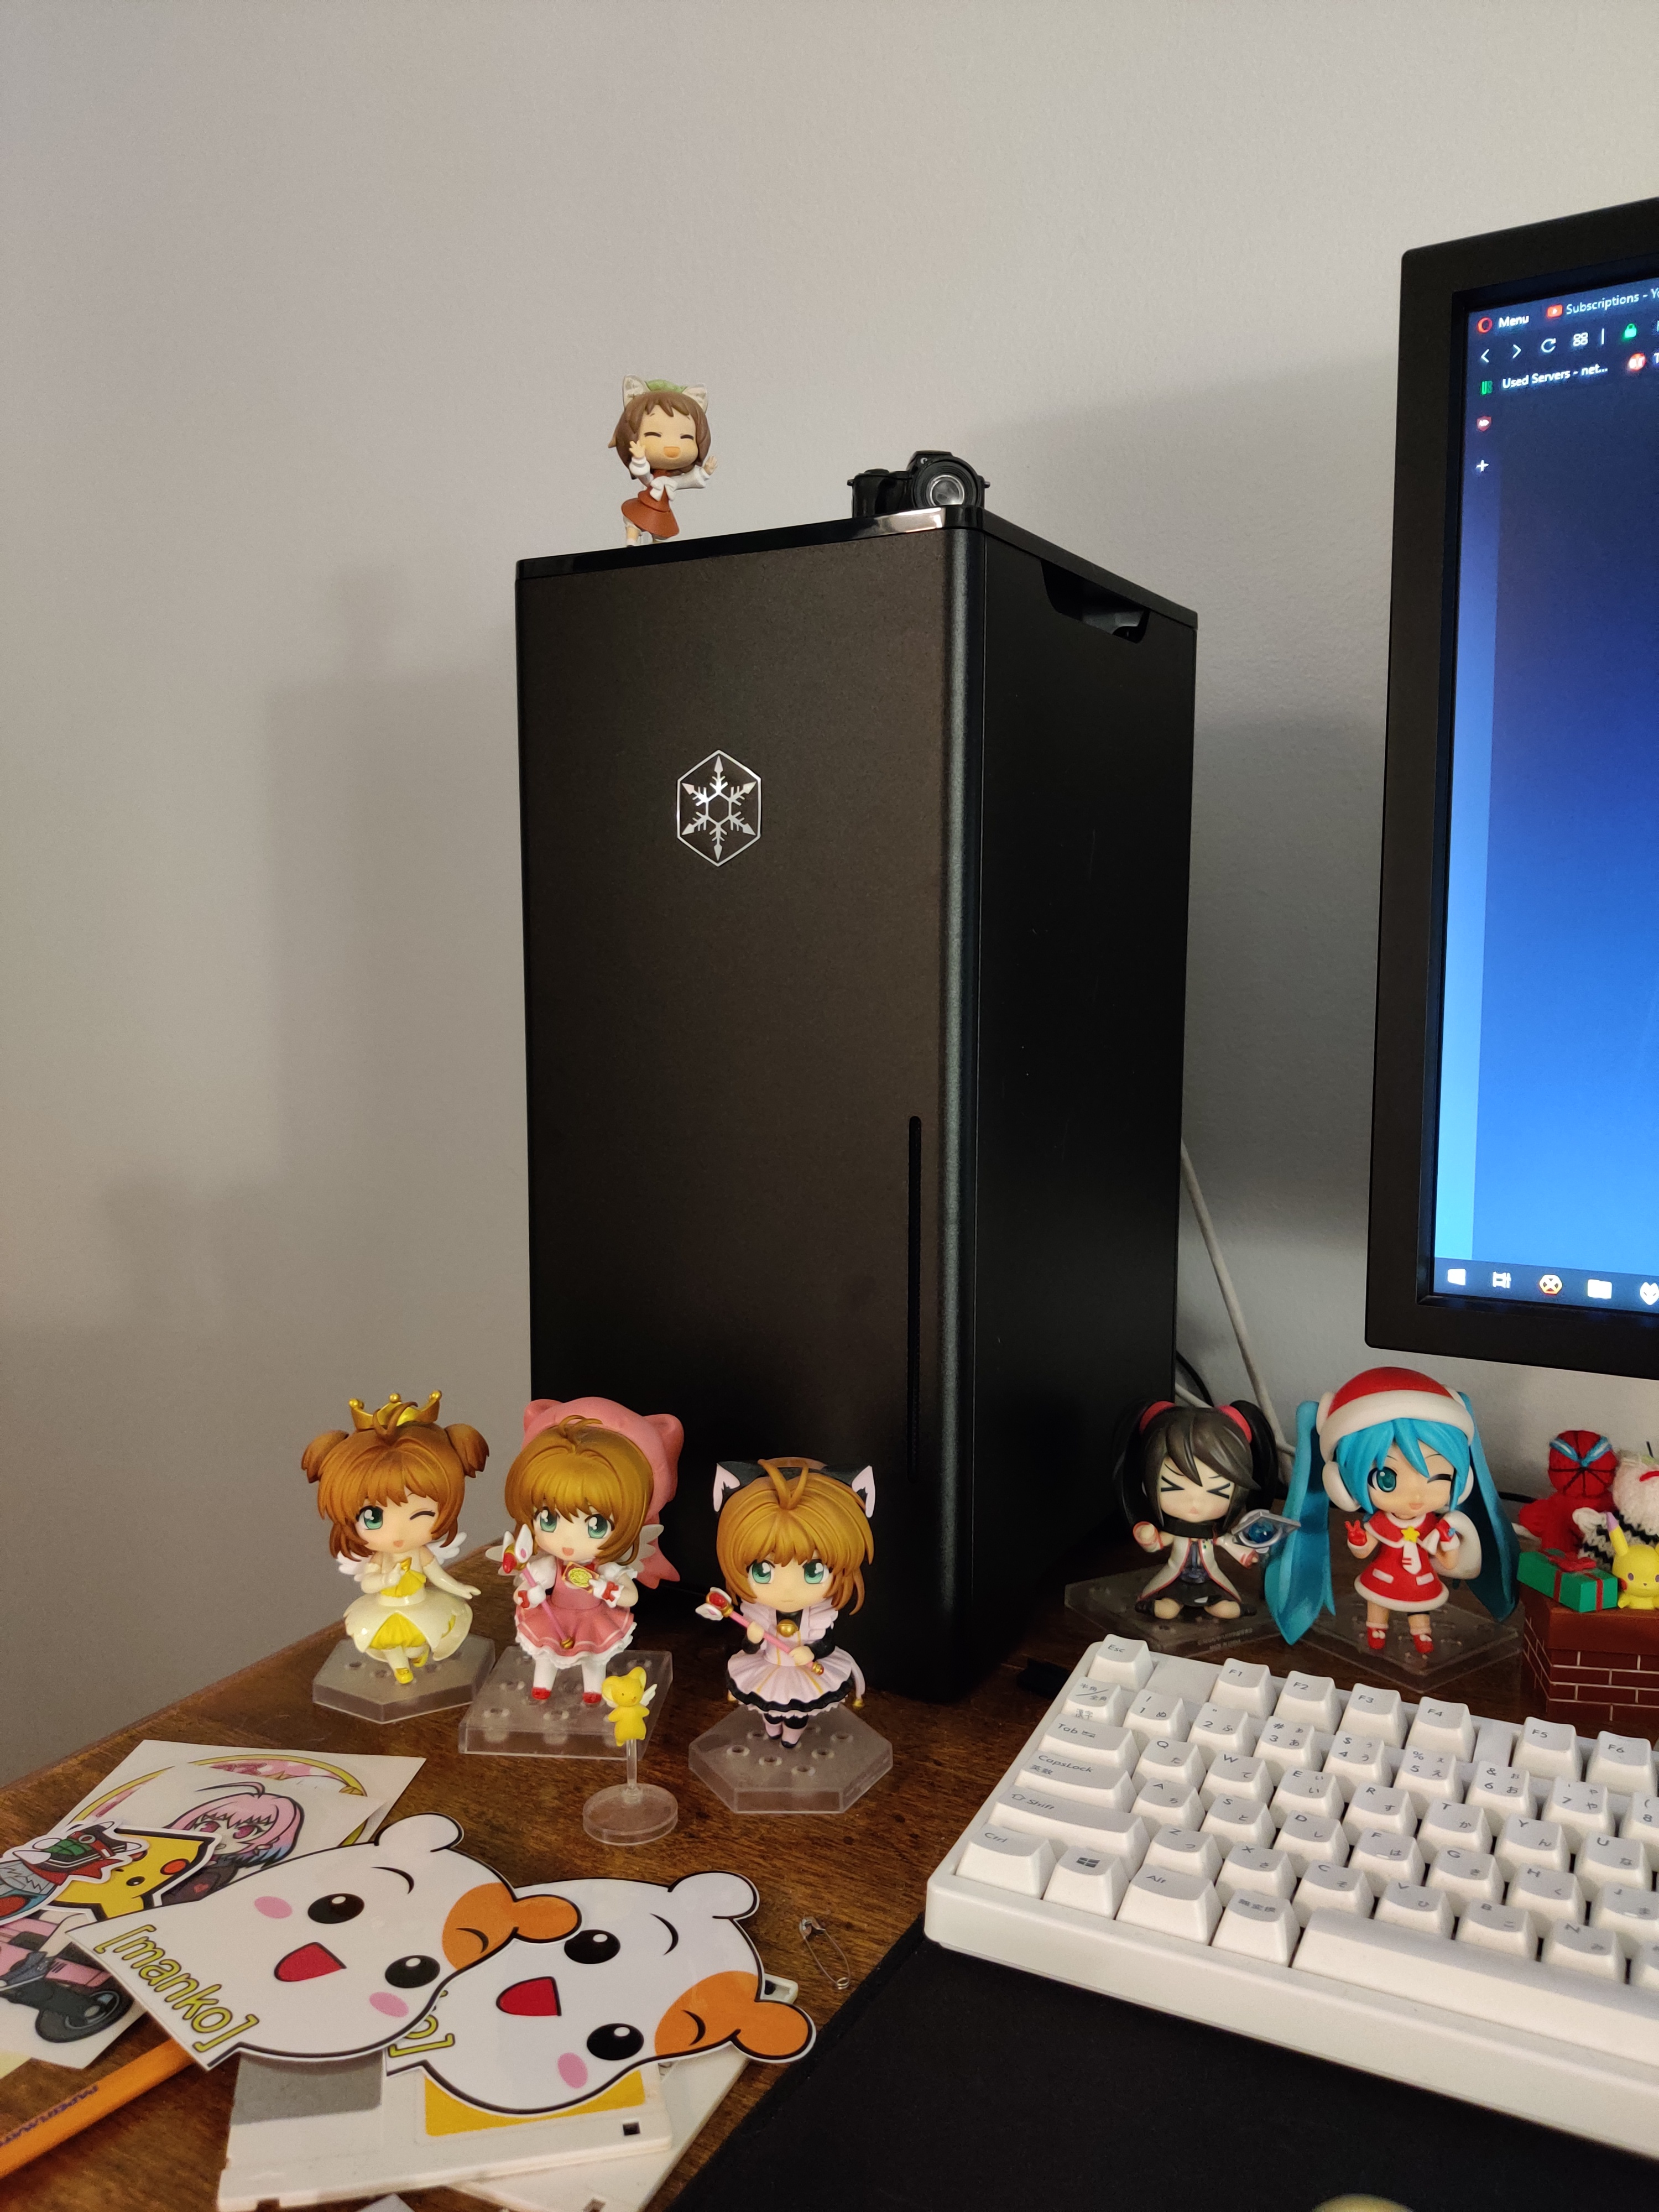
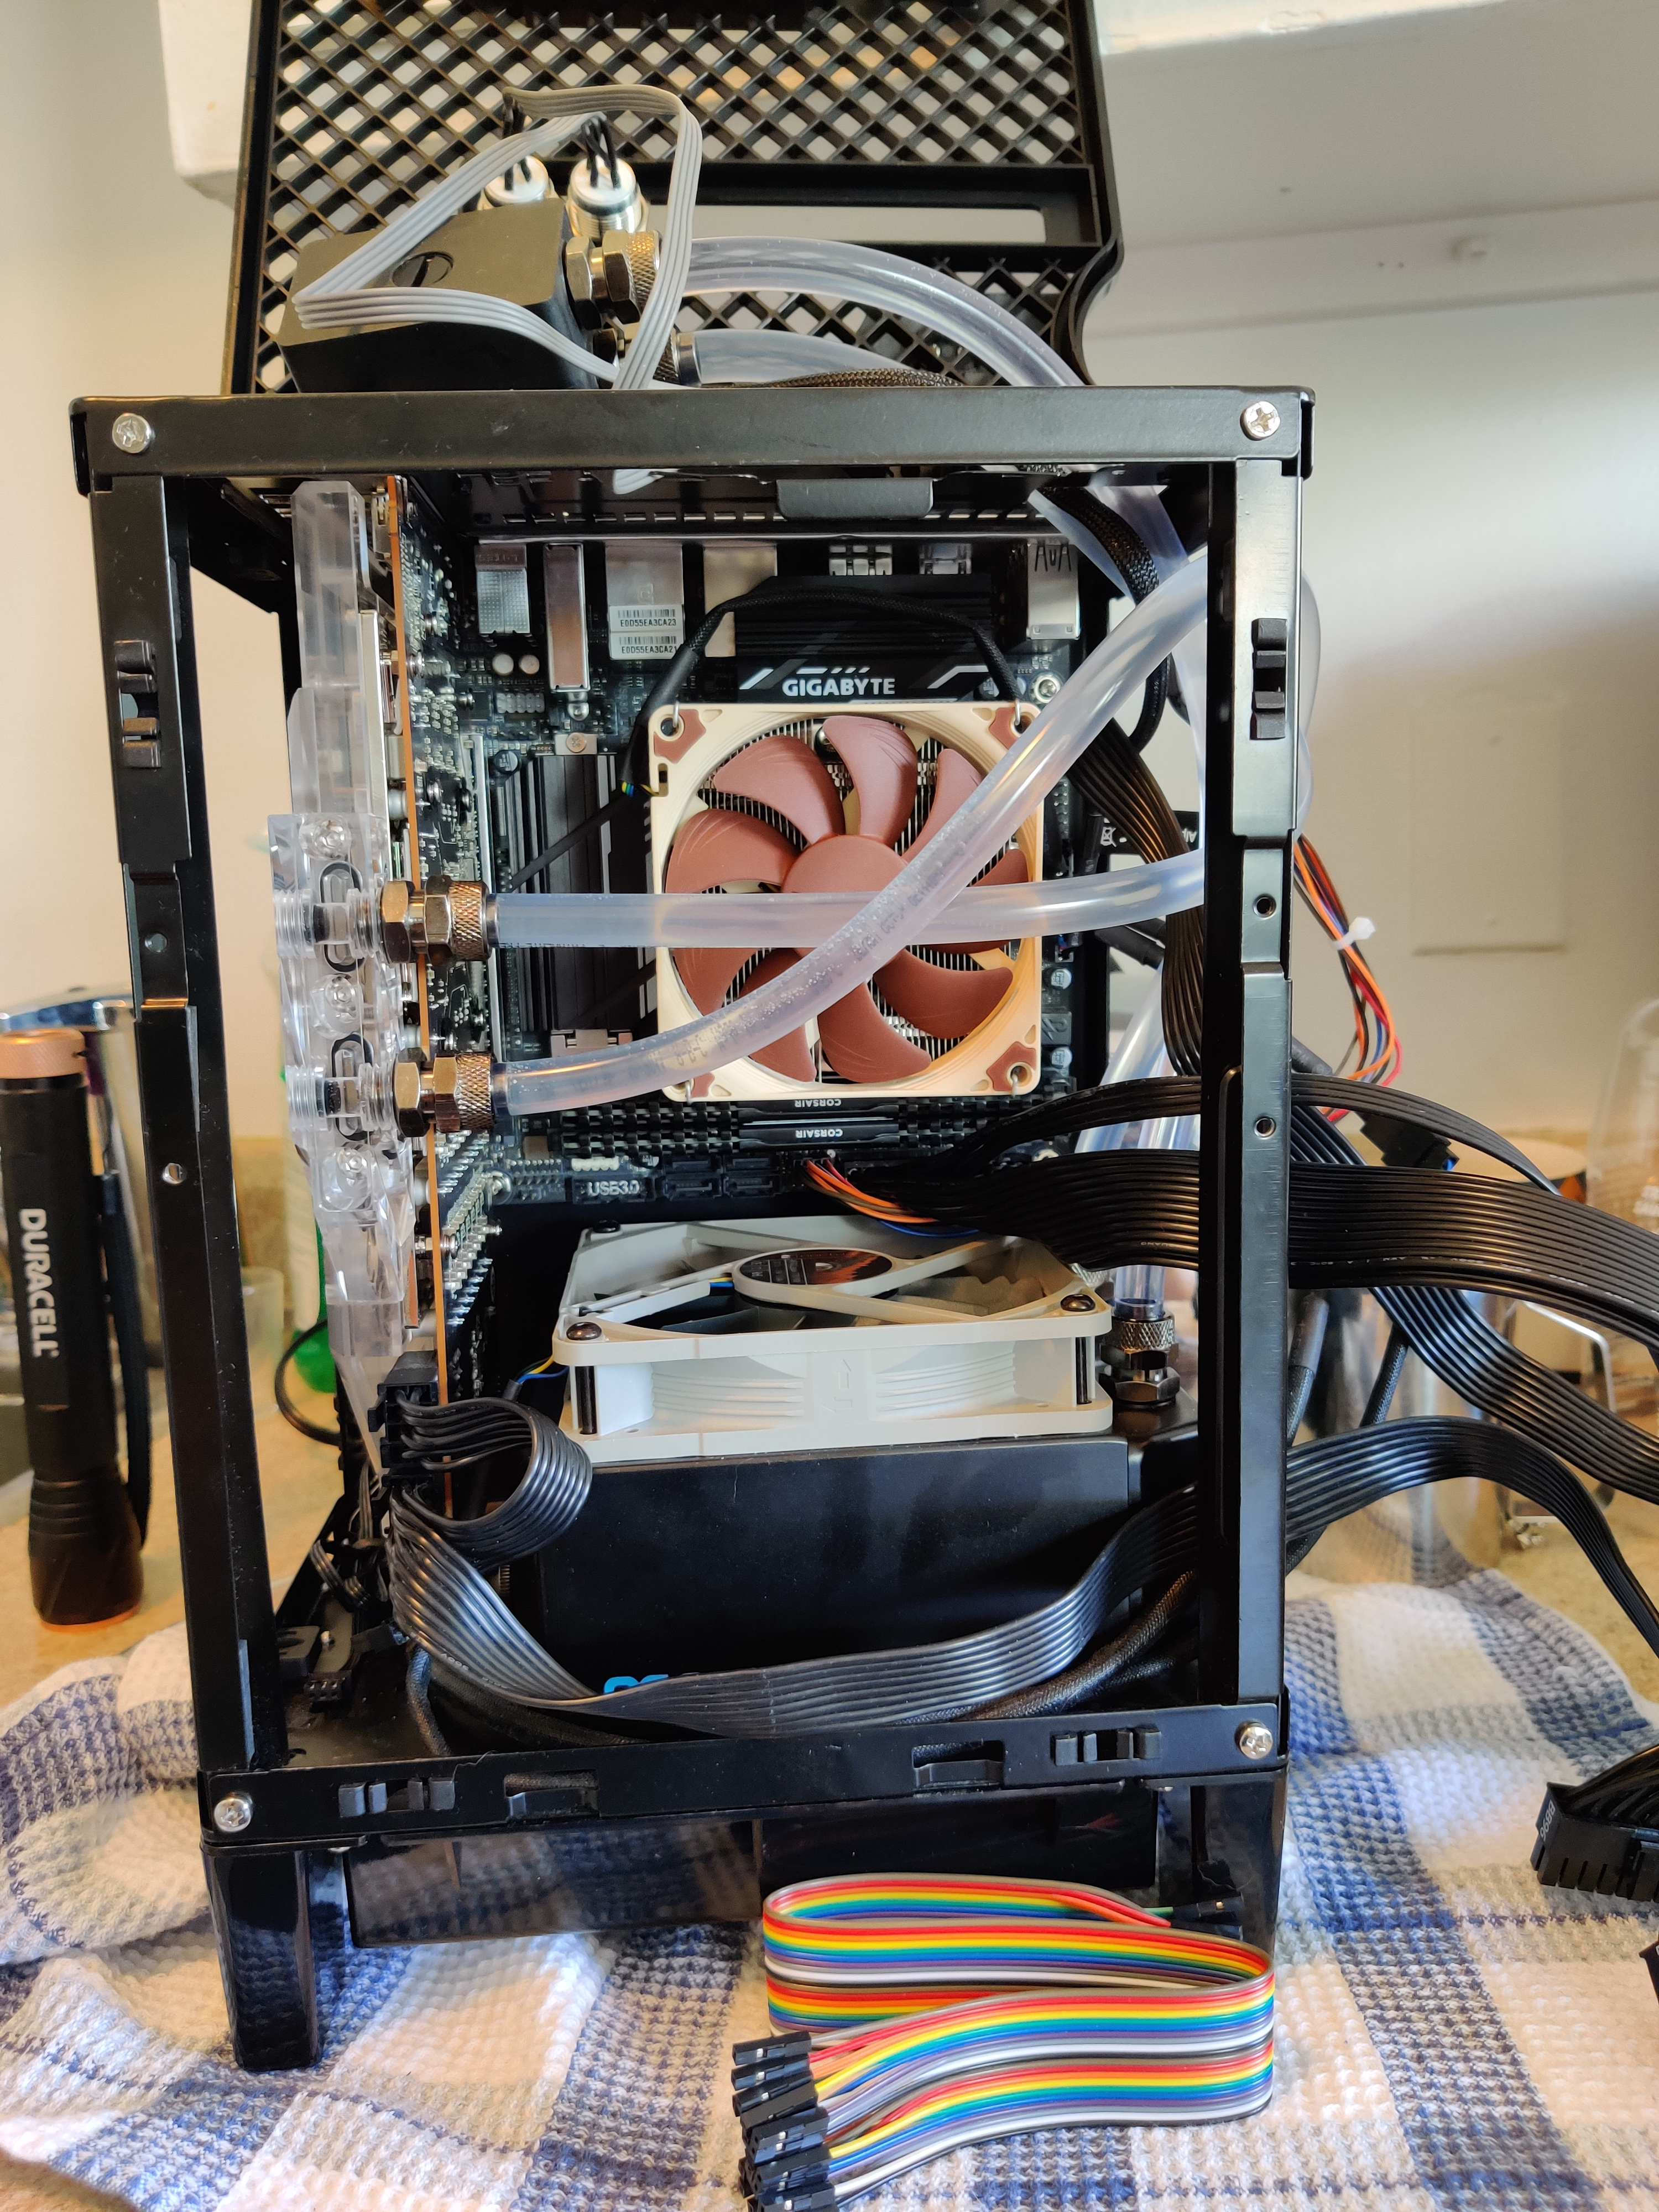
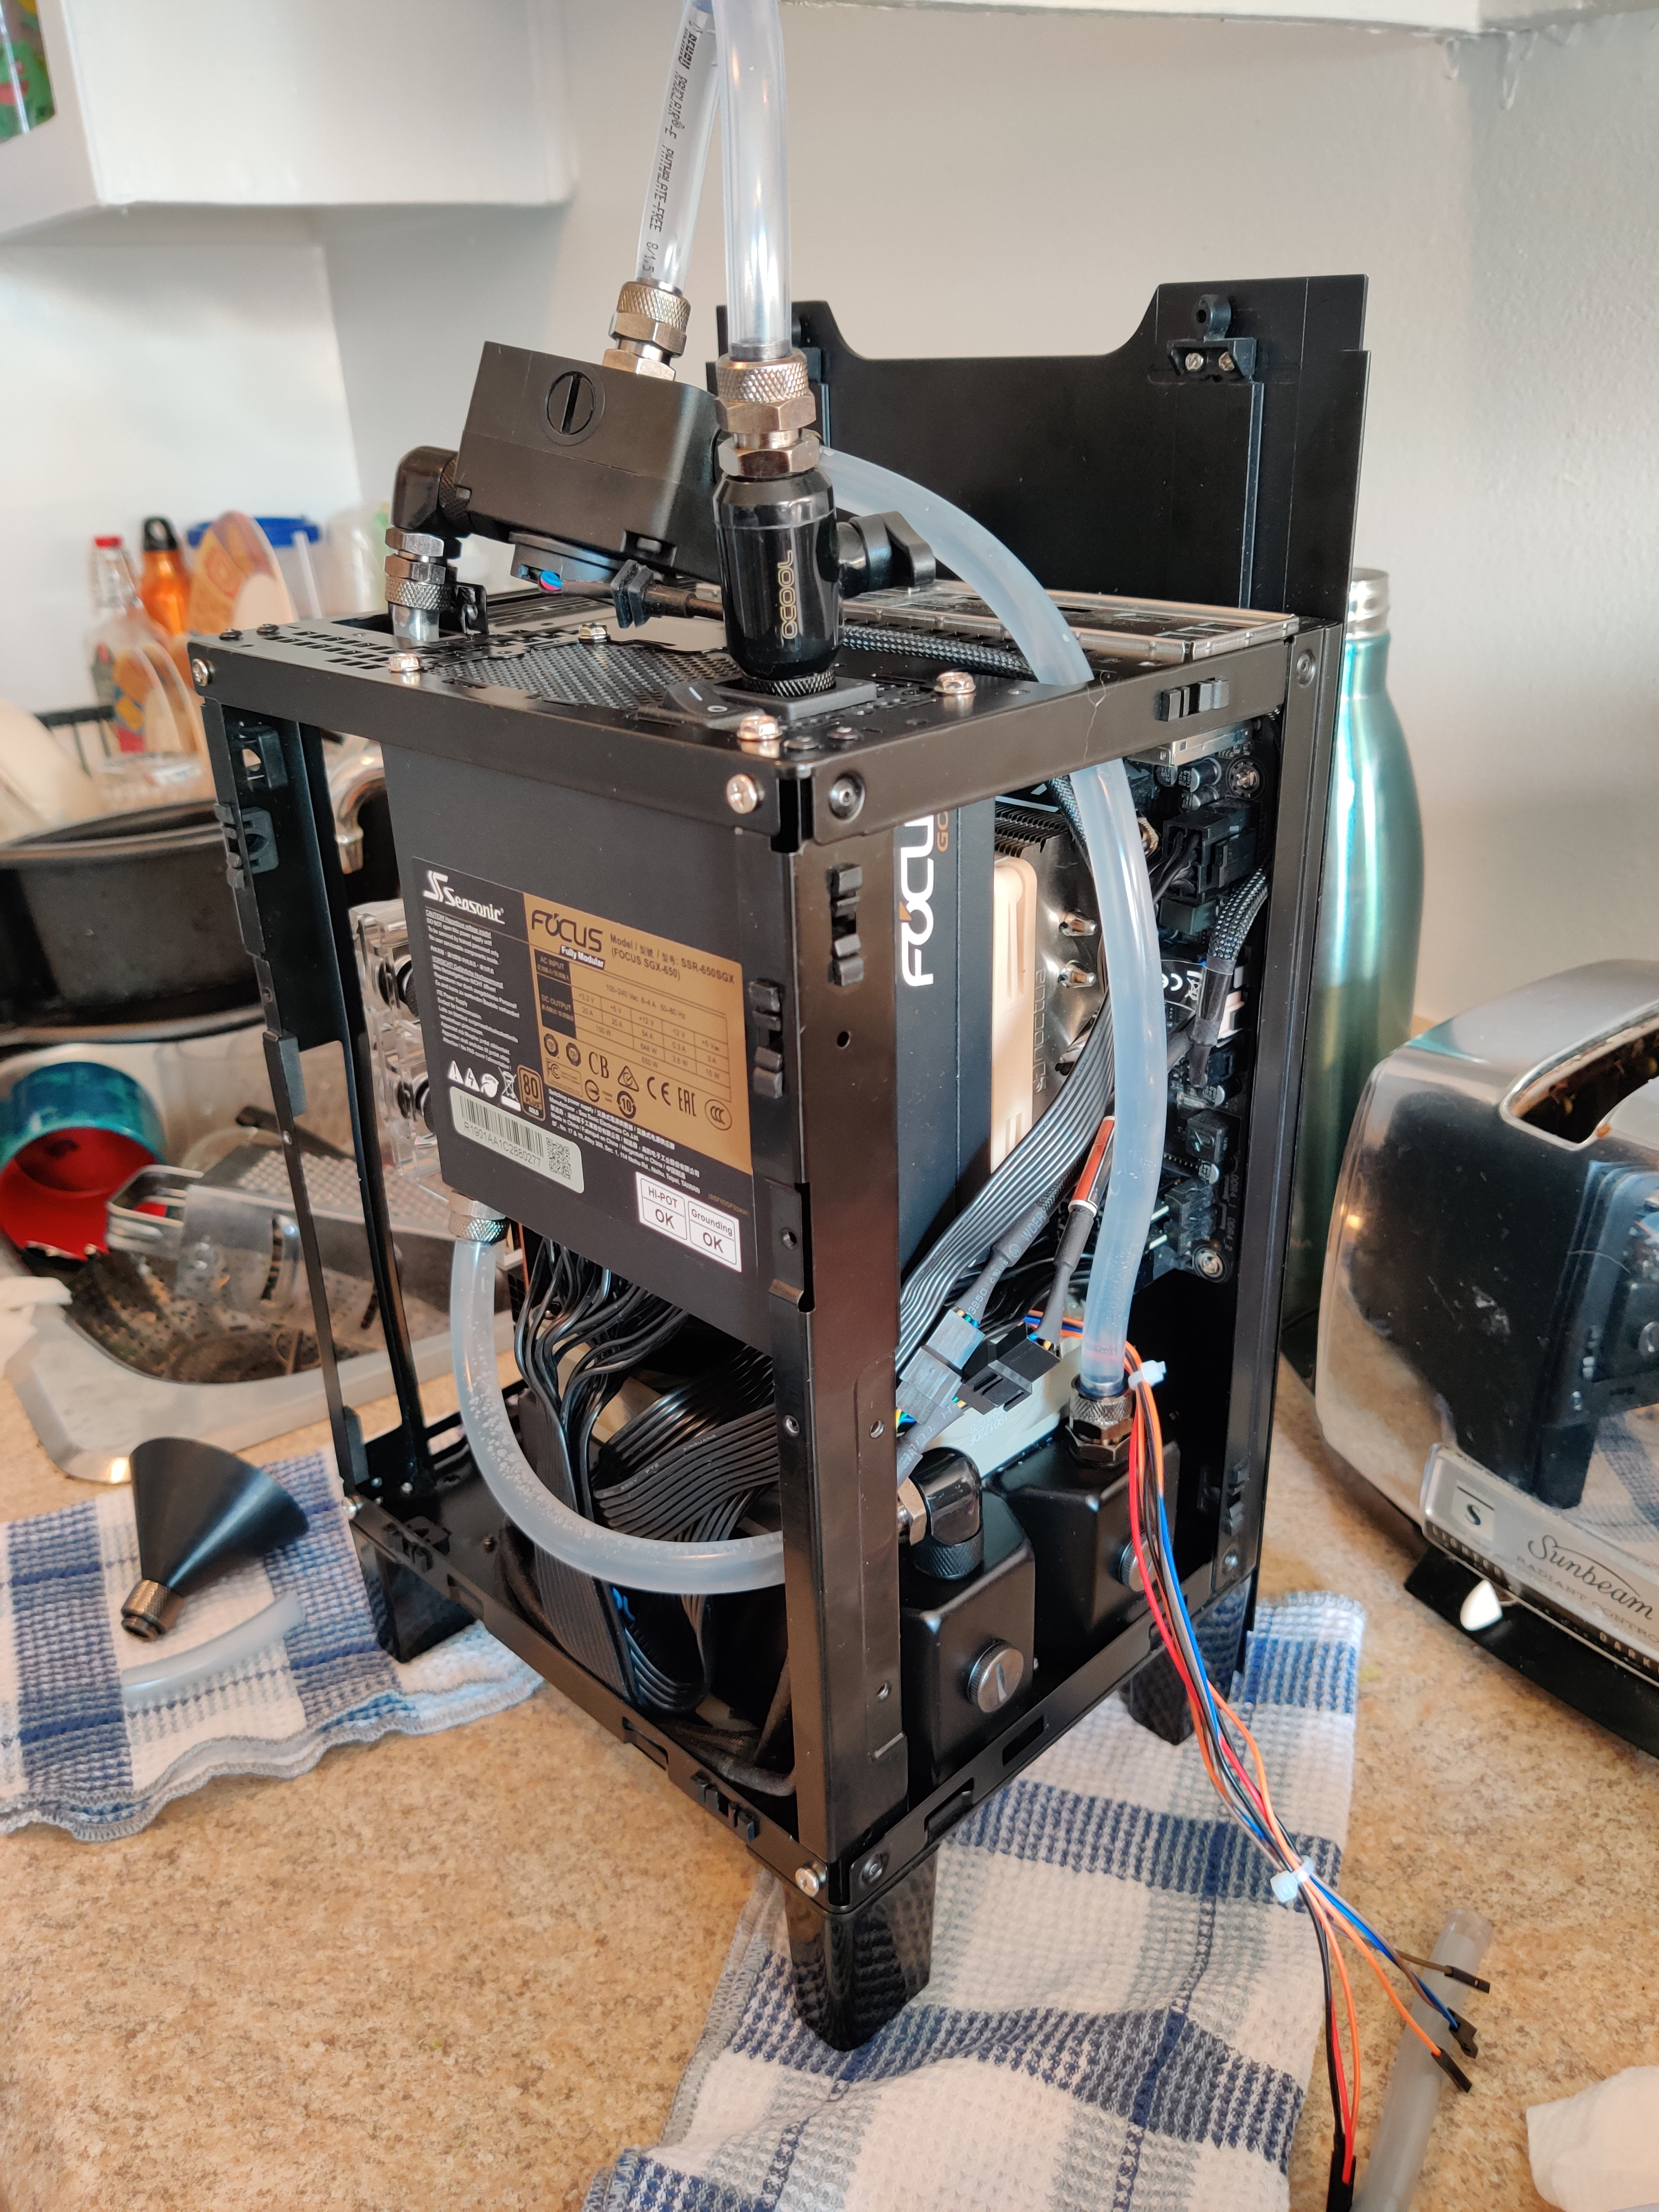
In this tiny thing is an i7 8700k at 4.9 on a Noctua L9x65, Gigabyte’s Z370N Wifi, a 16gb kit of DDR4 2600, a 1TB Samsung 970 Evo, an MSI 5700XT MECH OC, and a Seasonic SGX-650 SFX power supply.

My prime reason for water cooling is that MSI shipped most models of the 5700XT with defective coolers, undersized thermal pads for the memory, thermal pads that don’t contact the heatsink and some that are utterly useless. Since every RMA department is overwhelmed right now and I’m certainly not waiting 2 months for a replacement card, it looked like a fantastic opportunity to spend 75% of the price I paid for the card in water cooling parts.
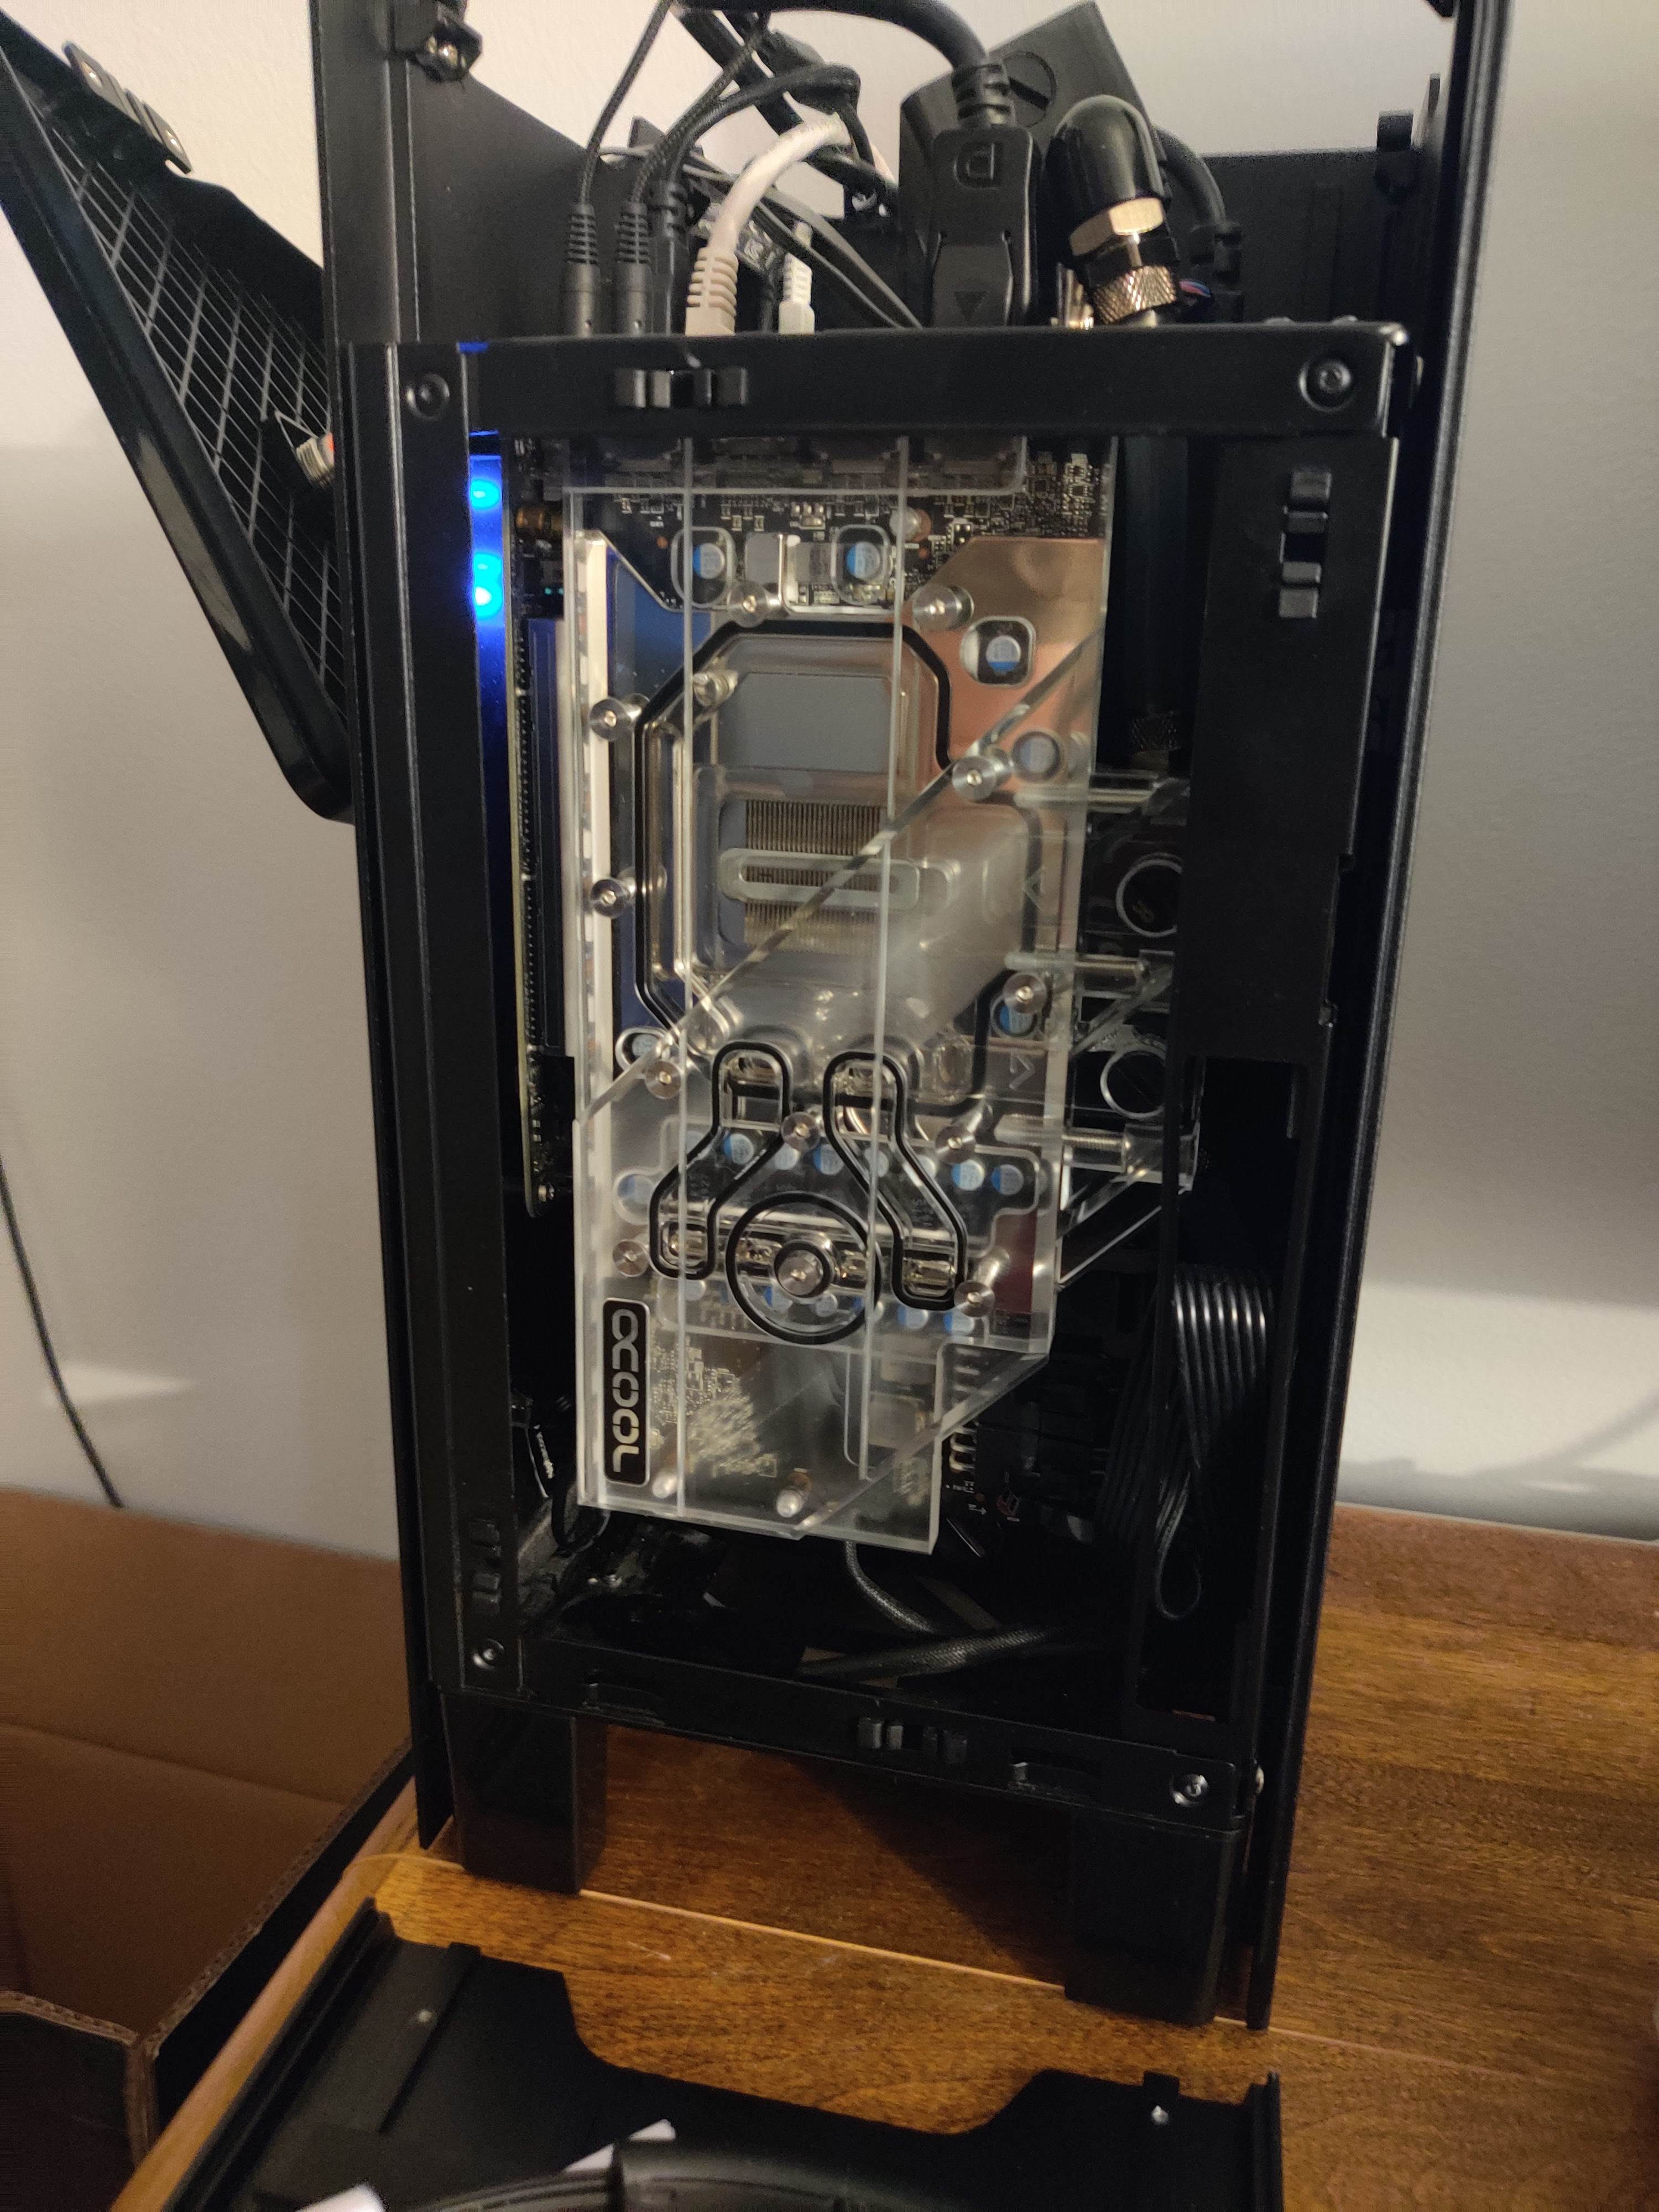
I also have 90 degree fittings, a 140mm 3000rpm industrial fan from Noctua, some sleeved cables and a ball valve on the way, and I’m debating whether or not I should get quick disconnect valves.

Proof of concept photo

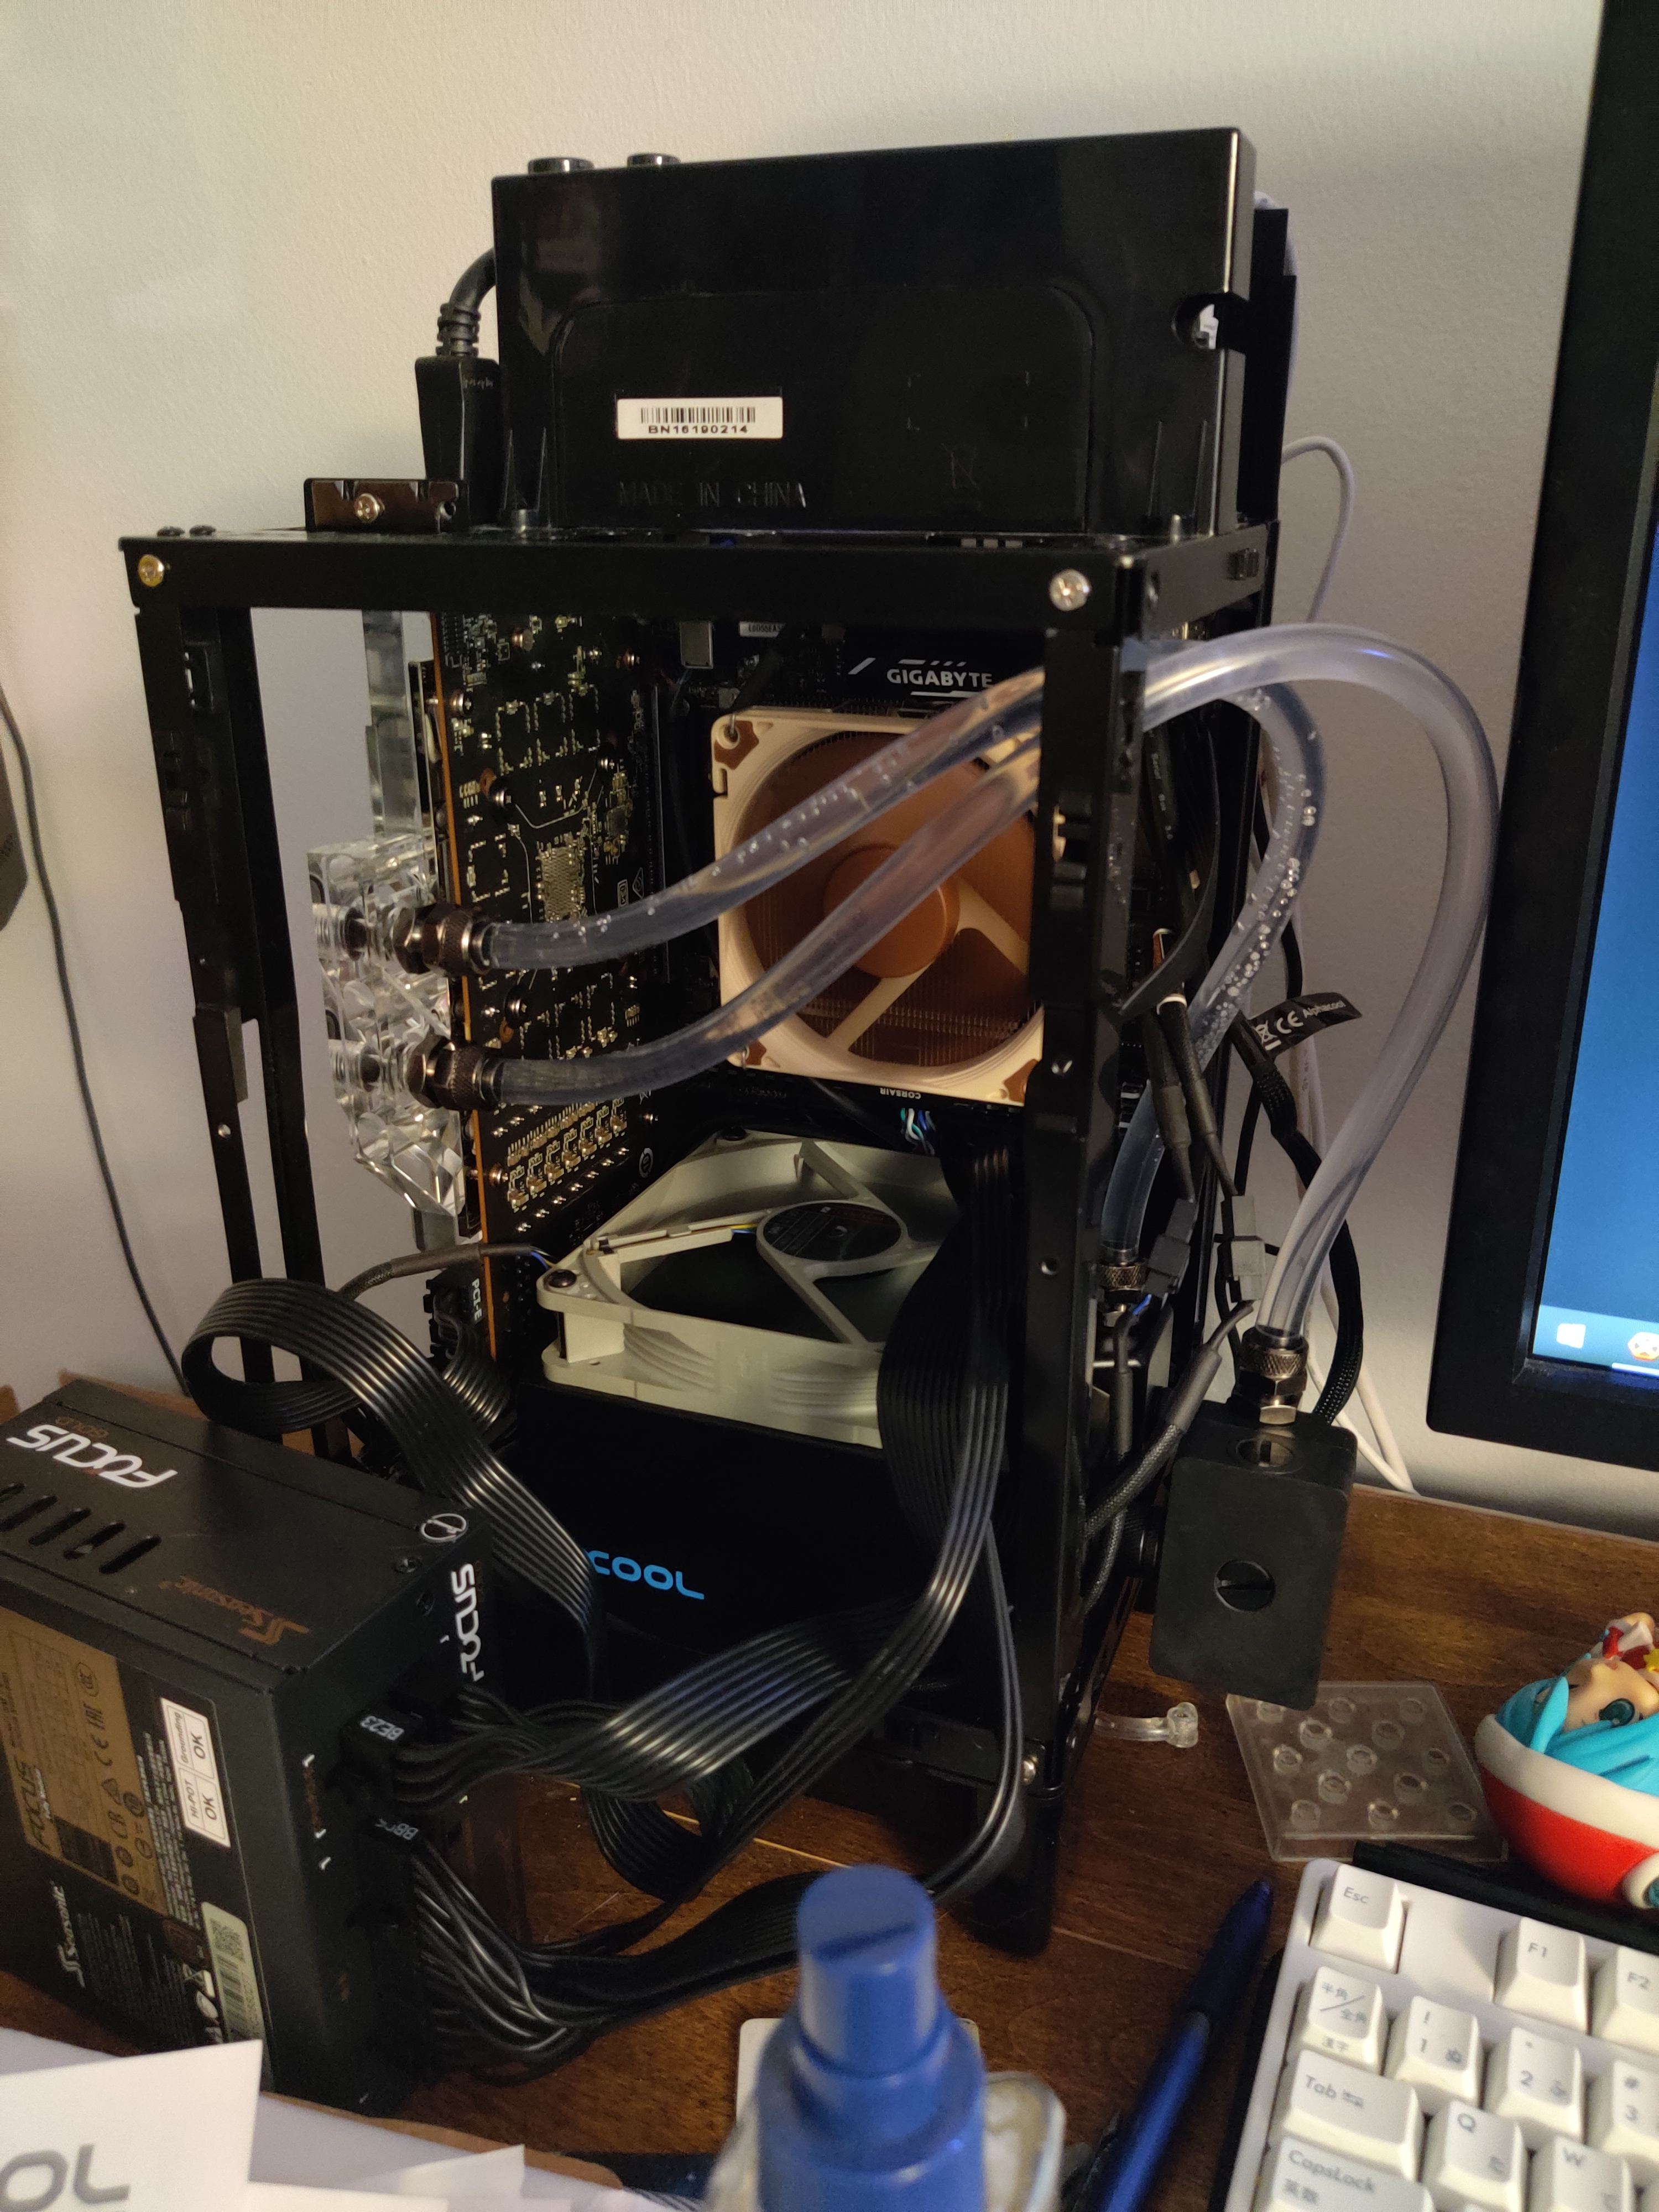
For now I have fitted the components I have together as a proof of concept before starting to think about what to do next. Good news though, the temperatures I had with the 5700XT MECH OC’s defective cooler have gone down by a whopping 40C. GPU hotspot is at 71C under full load at 28C ambiant.

Next steps:
Since the motherboard is mounted 90 degrees offset, and the “back I/O” is in fact on top, the top panel I/O is useless. I decided I was getting rid of that. 4 screws, and it’ll be out. I decided to repurpose 2 industrial switches with orange LEDs as my power and reset buttons.

photos


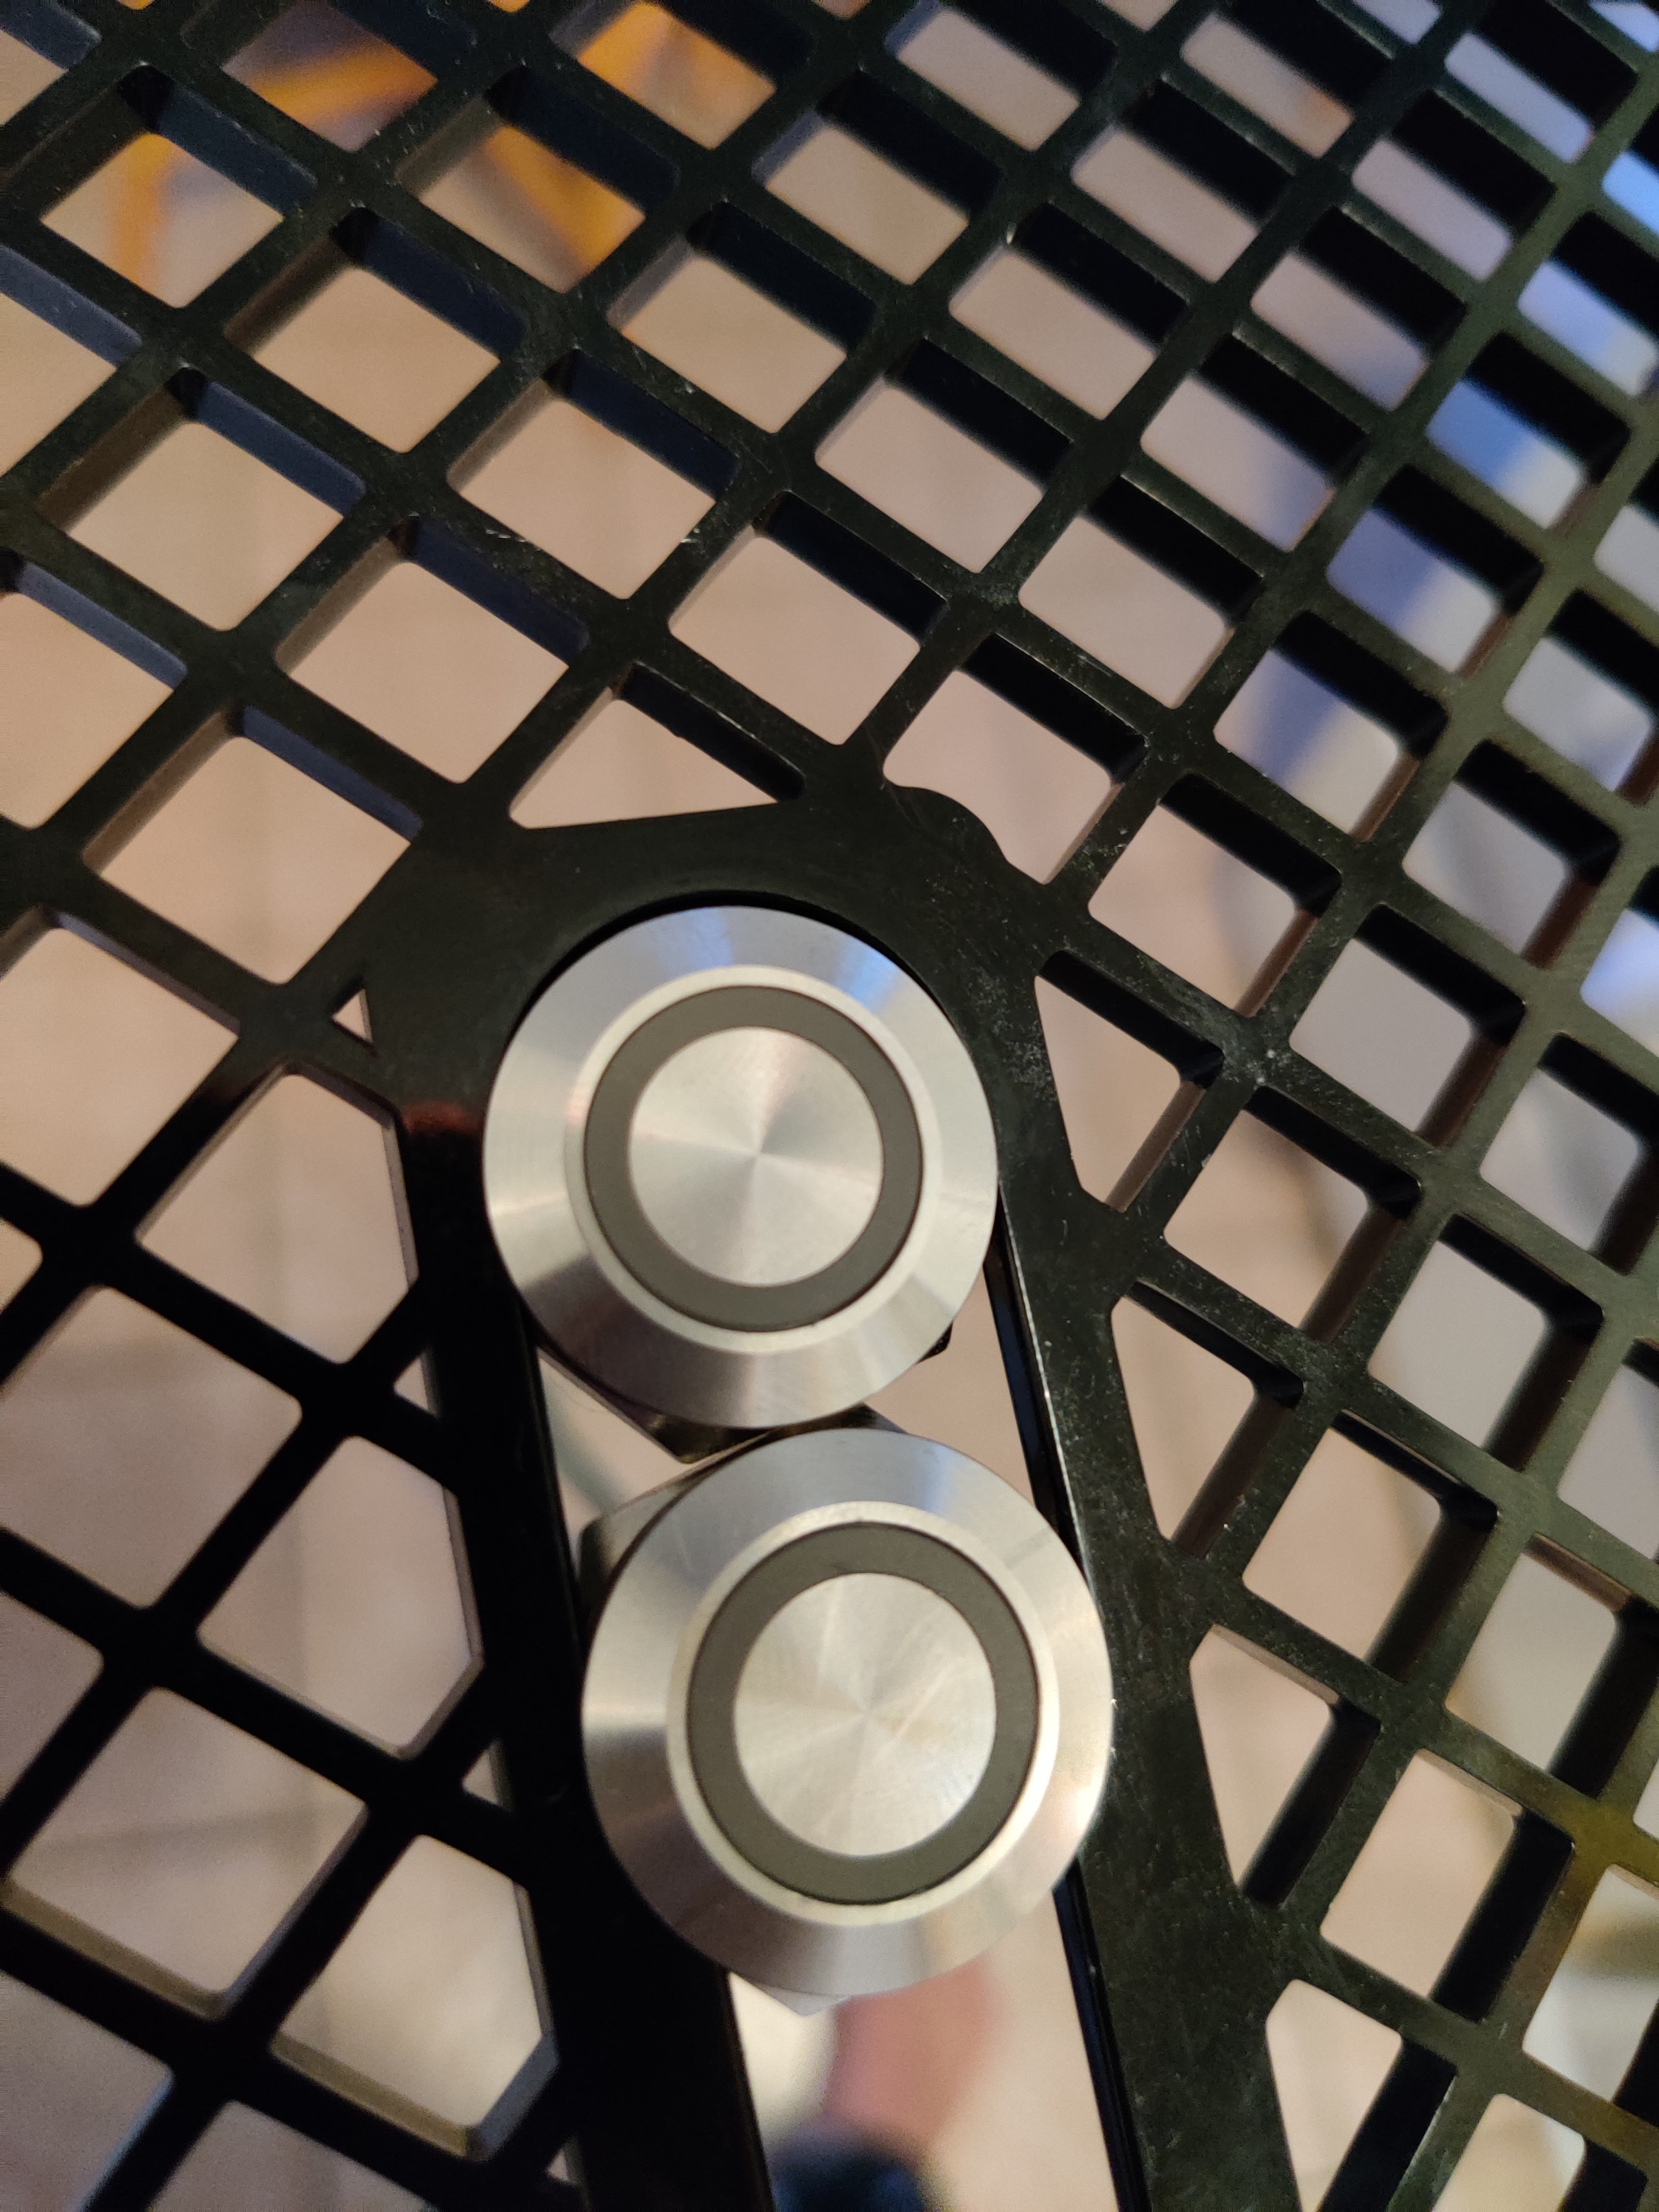
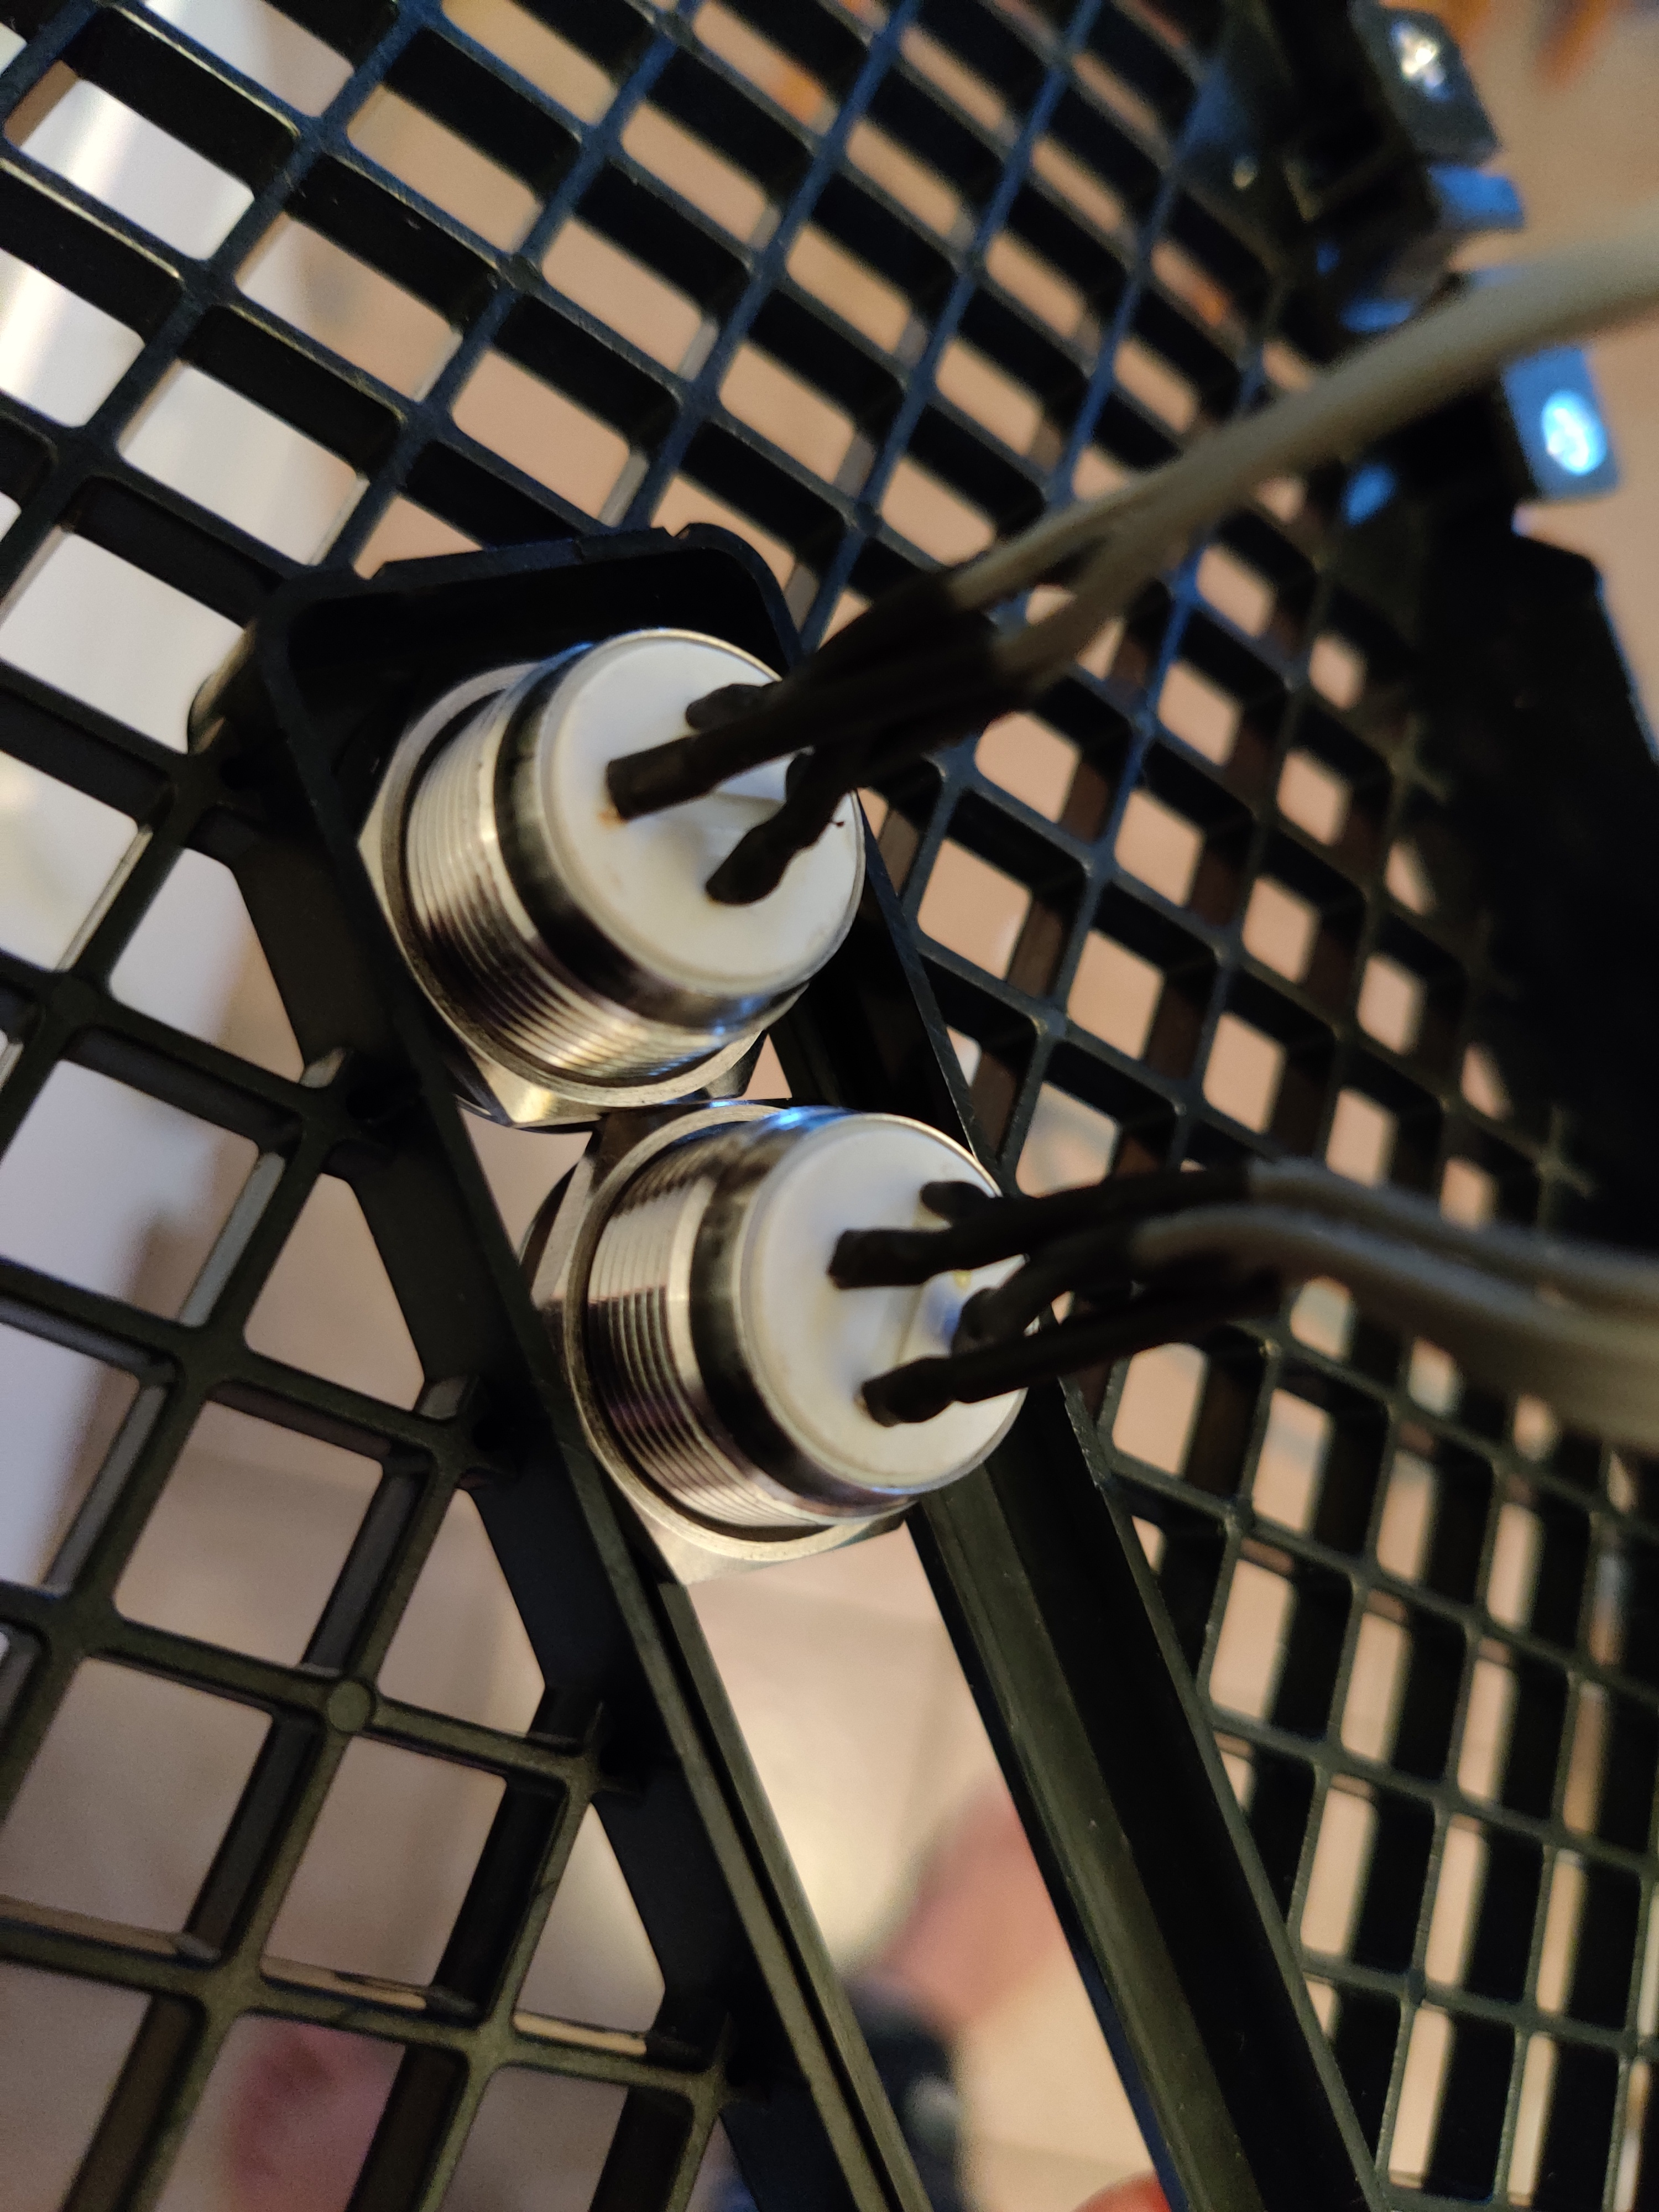
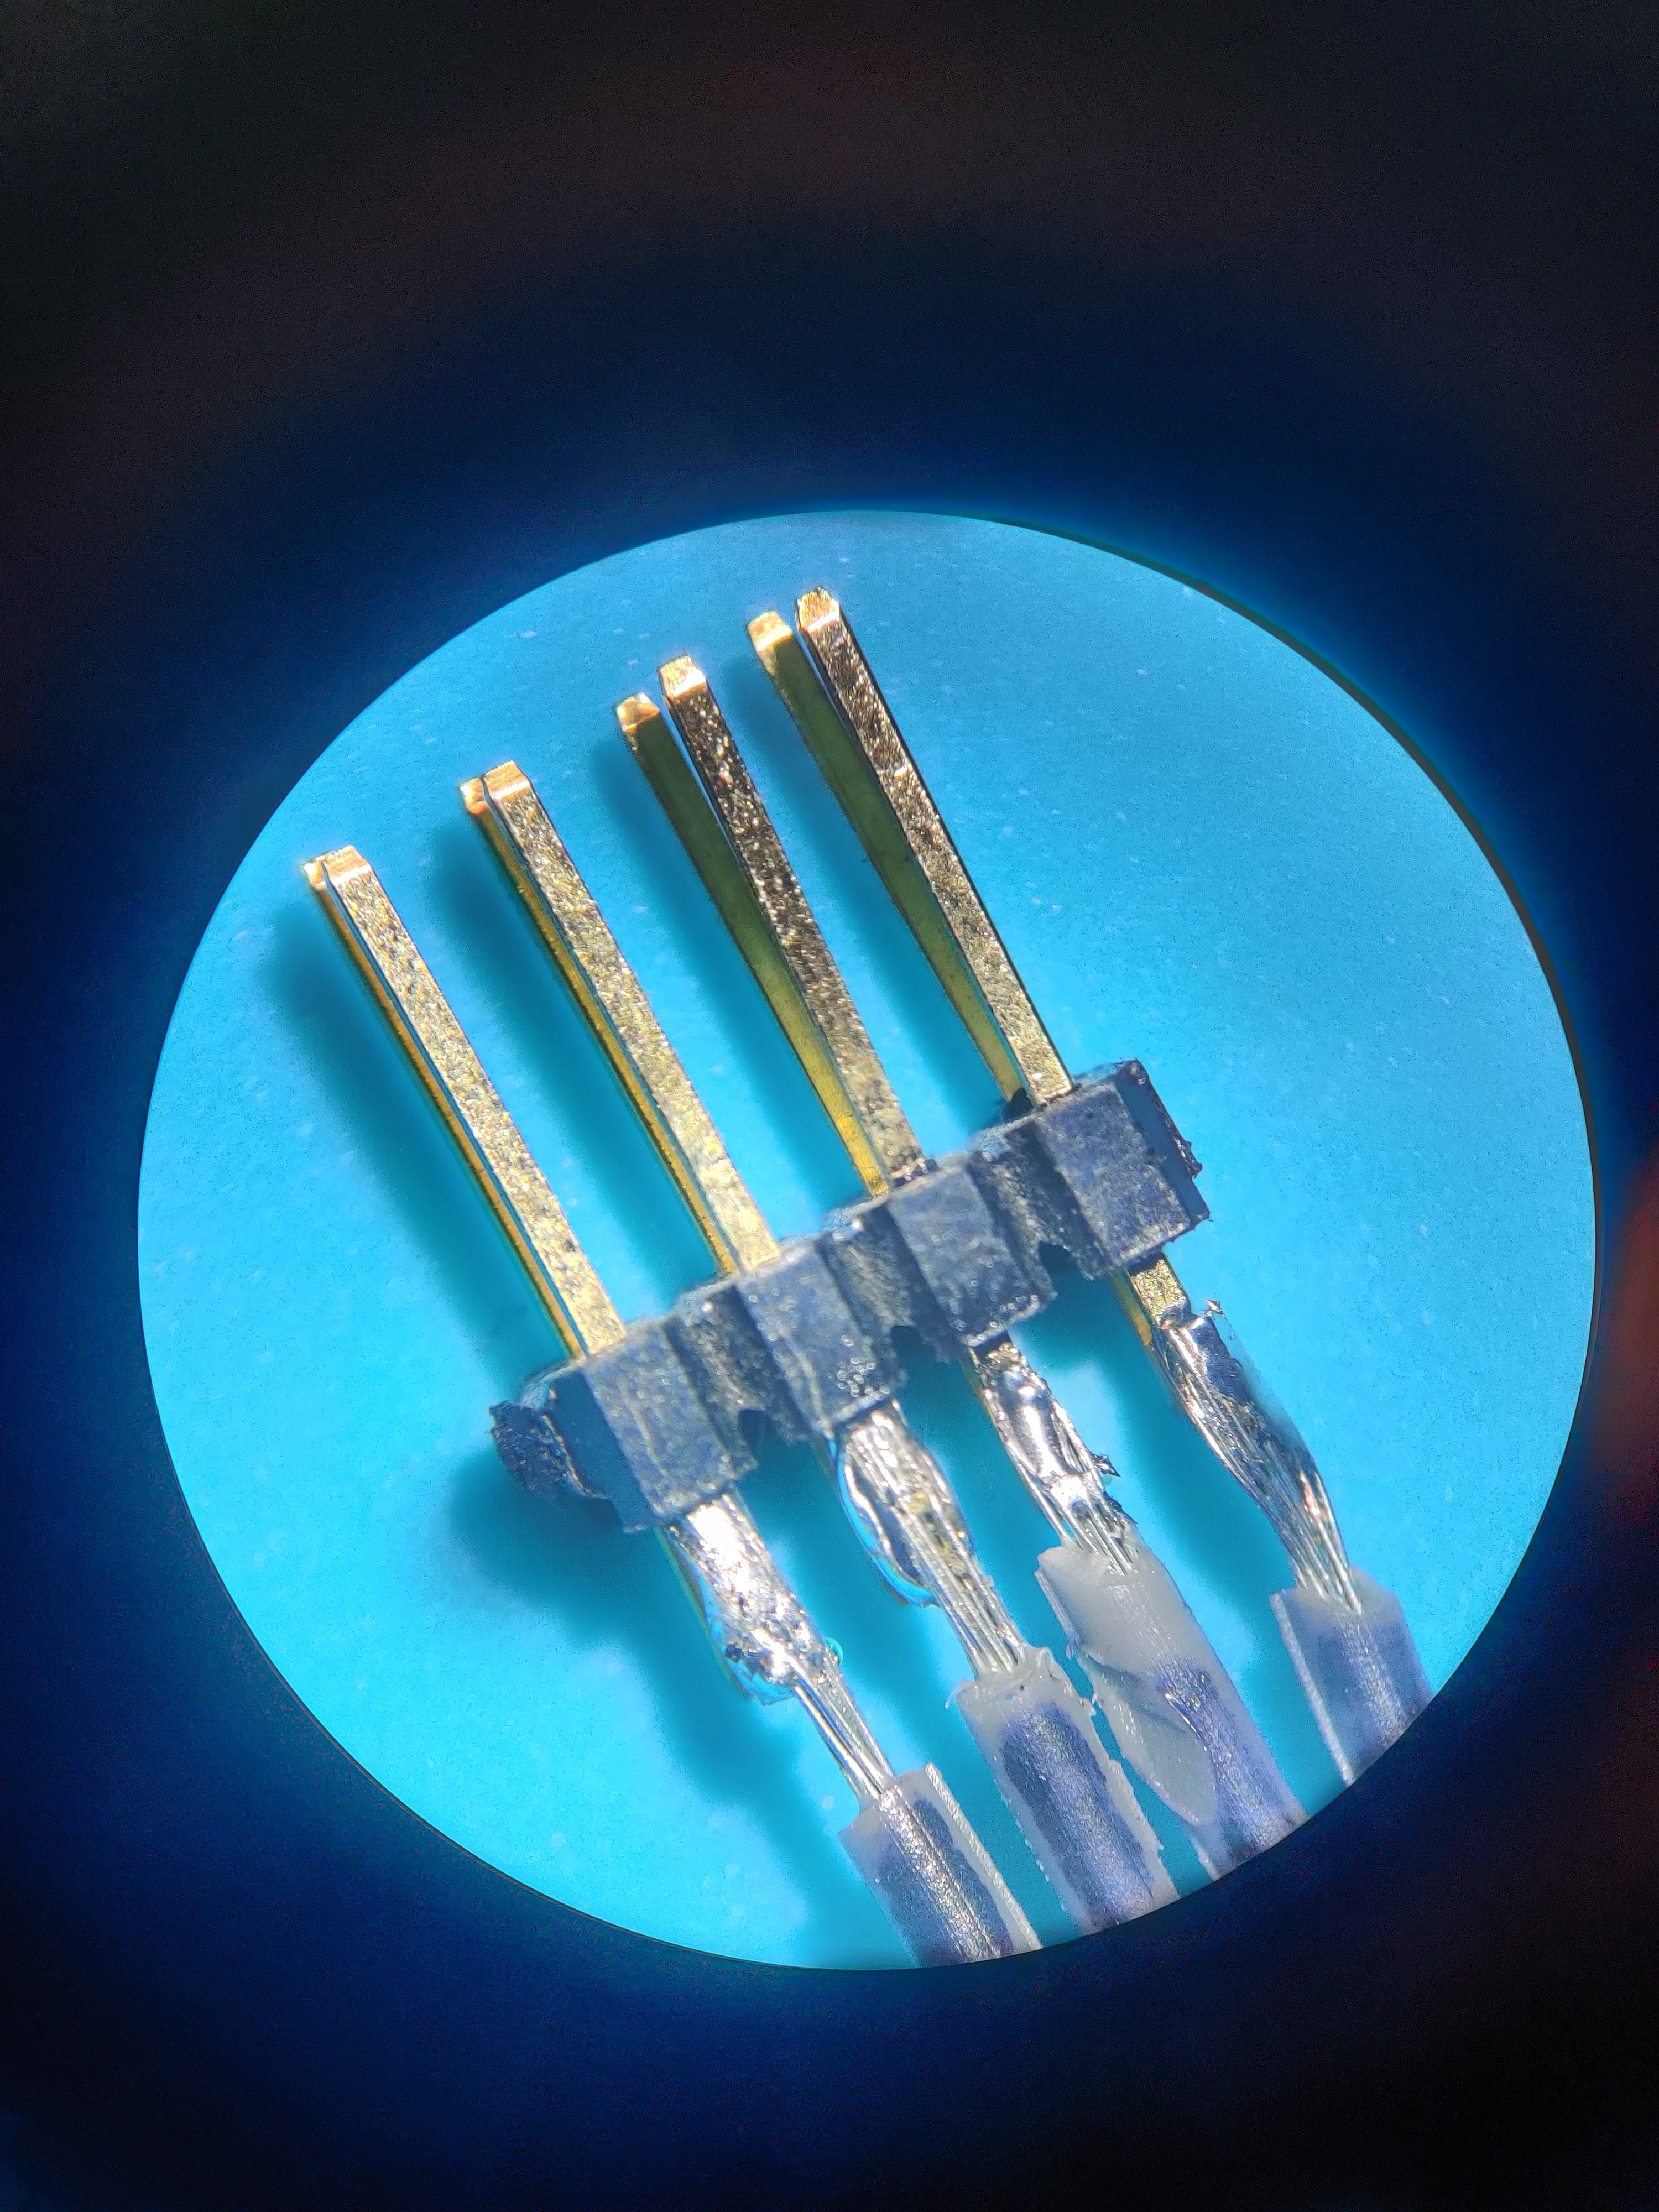
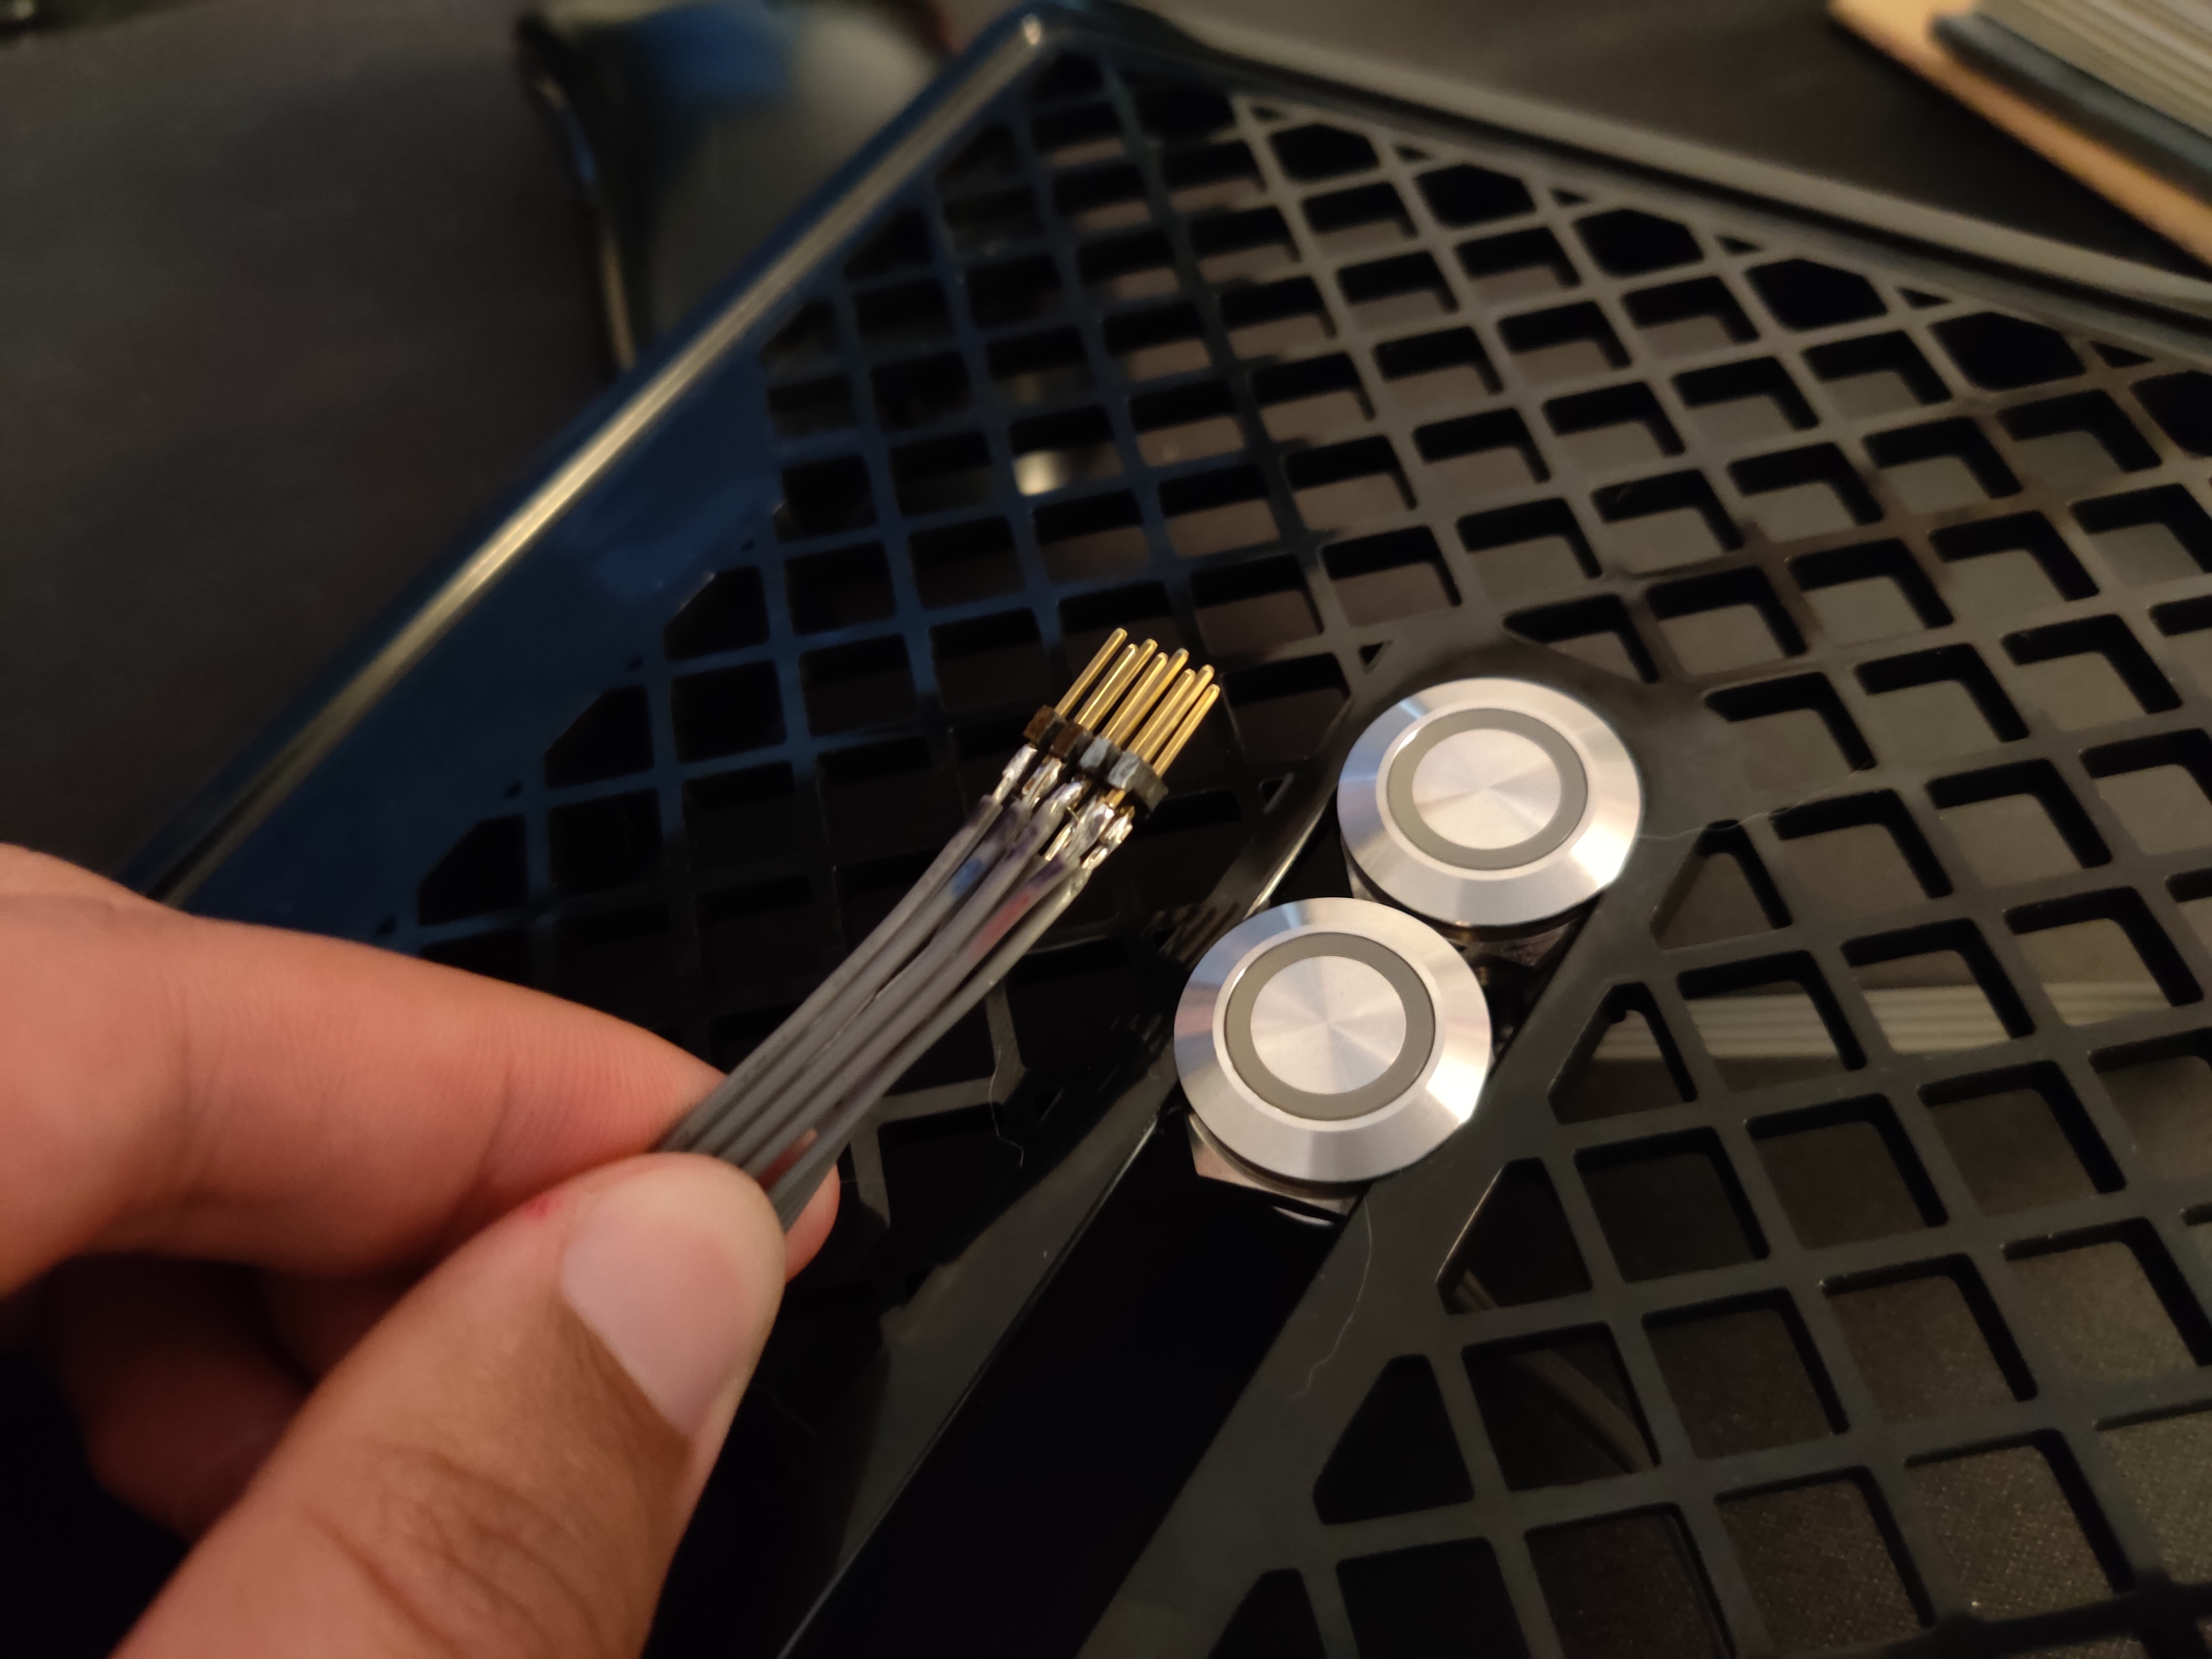
As you can see I adapted the JST connectors on the buttons to the 1mm pogo pins we all know and hate. Not my best soldering job, but I couldn’t dump heat without melting the plastic and it made a mess, so yea you piss with the cock you got.

So next up, meaning as soon as the fittings get here, the top panel I/O is coming out and the pump and reservoir are getting relocated up top. Might need some bulkhead fittings and dremeling through the top to make it look clean, but we’ll see.

I’ll keep y’all posted.

4 Likes

So I didn’t get my missing parts yet, but I just couldn’t help myself. These buttons look too damn slick and I couldn’t wait to see what it’ll look like.

Photo

Looks messy now, but wait.

I redid some tubing runs and removed the top I/O riser thing, then relocated the pump and reservoir to the attic. I got a cheapo “rainbow” set of JST female to female cables from the hobby shop to plug the motherboard’s FPIO header to the new buttons. (I have some individually sleeved ones on the way)

With the pump, reservoir, cabling and tubing all relocated, I can now put 3 of the panels on and the now glorious top cover. PSU is still hanging out on my desk behind the tower, but the orange LED buttons make this all worth it.

Next up:
When the fittings and cables arrive, I’m redoing the loop yet again so the PSU fits inside the case where it belongs.

I am also trying to find affordable short run PSU cables for a Seasonic SGX series PSU. This is difficult. Cablemods comes to around 100USD for 3 cables, which feels like a stupid way to spend money and bad value. Suggestions or references are much appreciated.

1 Like

Today on another episode of dbx10 wrestles with a tiny case and parts clearly not meant to fit in it:

Finally, after weeks of waiting for parts, and despite the fact that I am still waiting for MORE parts, the proof of concept phase is over.

The temps are acceptable considering the very limited airflow, but I surmise the 8700K’s occasional thermal throttle will push me to upgrade sooner than I would otherwise have to. On the other hand, the GPU temp is hovering around 60C under load. :ok_hand:

PACKING CHIPS!

Photos


I redid the tube runs to let gravity help the air out the loop more efficiently, and shortened some tube runs. I also moved the pump to the attic, as it won’t fit anywhere without some intense dremeling. This is not optimal, but I have not noticed any problems with this configurations so far. No bubbling, no crackling, pump stays silent.

What’s missing still:

  • Noctua 140mm iPPC 3000RPM fan
  • Custom short run PSU cables (still on the lookout for reasonably priced options)
  • Alphacool quick connect kit (was out of stock)
  • Sleeved FPIO cables

The reasoning behind the 3000rpm IPPC fans is that I know I’ll run them at half speed 99% of the time, and I’ll still have plenty of leeway for when it gets toasty at LAN parties. When the pandemic ends, of course.


It should be “done” by the next time I decide to post an update. However, I suspect I’ll see something at some point that’ll give me an idea and then my wallet will suffer some more. The Emperor’s work is never done.

See y’all soon.

1 Like

I had one of these and mounted a 140mm on the very bottom and 3d printed some better feet so it could fit. It sort of worked, but I live in Australia so sort of doesn’t cut it during summer time here.

I have a 1080TI MINI GPU with waterblock.

1 Like

I thought about that, but I don’t know anyone who owns a 3D printer. Also yea Straya is the hot running PC’s doom. Hope you have good AC in the room or your FPS is gonna tank. It gets pretty toasty here too in the summer, but nothing a small window unit can’t manage.

I’ve moved to a new ITX case that is capable of taking two 240mm rads, and have my 1080TI running off one 240mm rad which seems to do a good job.
The case is the Phanteks Enthoo Evolv Mini ITX which I felt was a ok compromise.

I’ll still use my FT-03 for a AMD APU Server since now I have a B550 turning up and my older B350 ITX mobo will need a new home (and CPU).

The issue with FT-03 is you exclusively need a GPU HSF with a blow outside case design, there is no way to make it work otherwise, unless you completely change/cut a side panel, but even then the air still dumps inside the case which is BAD. A 1060/2060 GPU would probably be ok however!

The only other was is like I said, FAN/140MMRAD blowing downwards and out the bottom. I actually had to modify the case to have the rad on the very bottom but you don’t see the rad connectors.

This topic was automatically closed 273 days after the last reply. New replies are no longer allowed.