No mowing lawns or following dogs and bagging their poo here - Just a hot muggy August in Florida pre-hurricane transmission replacement. Time to complete is before SHTF.
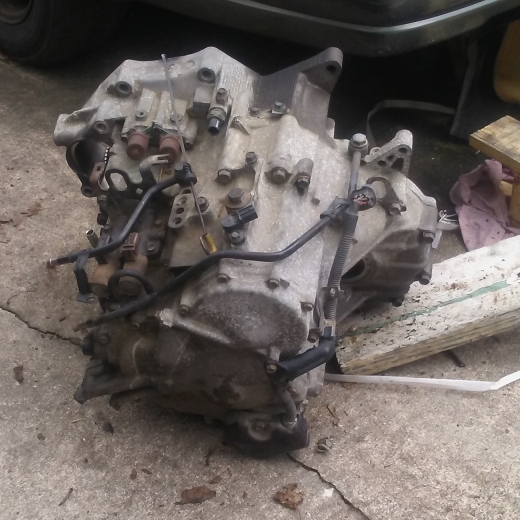
A quick background story: Buddy needed a cheap car fast and found one for under 1K. 2001 Honda accord with ~260K on it and a bit of a jump from a stop. Good tires, cold A/C, just barely tap the key for a smooth and quiet engine start. Belts squealing slightly and trans mounts torn from said jumping issue. Fixed everything but the trans. We knew this day was coming like a hurricane, and now both are upon us.
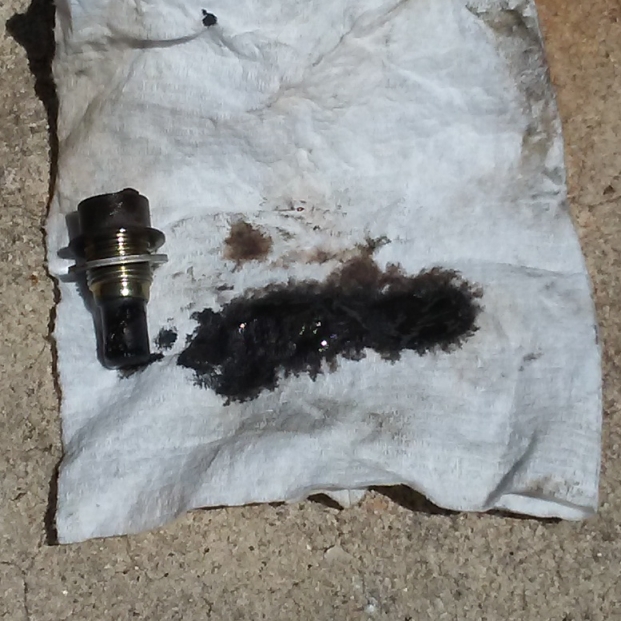
The drain plug magnet was downright terrifying! Previous owner acquired the car from a customer in lieu of cash. Changed a few things including trans fluid which was worrying. The pic isn’t good, but there are some larger specs in the goop that came off the magnet. Less easy to see are the slightly larger bits stuck to the magnet. At first glance the fluid appeared well used, but a close look while it drained showed it was still red but full of fine debris - far too much to just be friction material in only a few months of driving.

As per the title, the car I’m working on is under a black mulberry tree. The August Florida sun is particularly brutal, yet even with some leaf loss it is growing new leaves and starting to fruit again this year. Given the location I wouldn’t trust eating all of the fruit it bears, but it is really good and I usually eat a cup or two of it. The umbrella effect from pruning, minimal care, and maximum shade/fruit for little effort makes it one of my favorite trees, Then again I say that about a lot of trees. I have too many to count and always learn new things observing them.
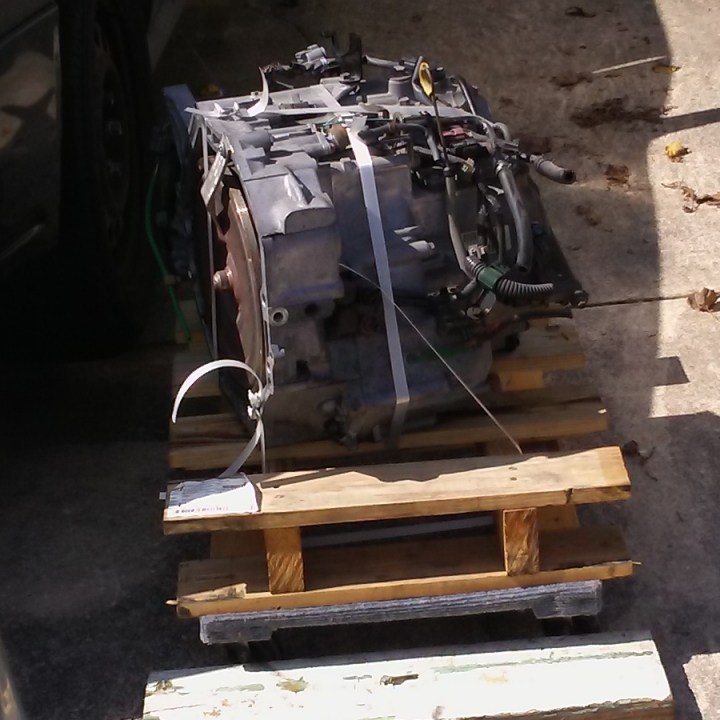
The new trans came in and looks pretty good on the outside, lets hope it holds up. I got started with the basic stuff - disconnect and remove battery + tray, remove airbox, start labeling wires and hoses as I disconnect them. Since I’m not using the engine hoist and not winging it (first import trans job), I decided to label things as per the repair manual in the same order so I can do the reverse for installation. I normally assign letters to each one and tape a key on to the engine hoist. That’s a great way to teach someone, just call out the letter and which wire or hose it is and then get questions such as ‘what is that for’ and ‘how does that interact with that system’. The best is the BAC. ‘What’s that?’ It’s the Big Ass Connector!
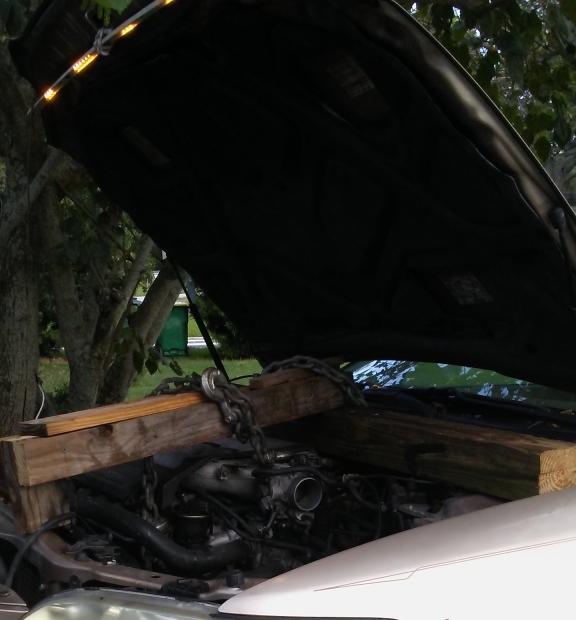
I don’t have ~$500 for a proper engine cradle so I improvised. Old 4x4, pieces of a 2x6 ripped in half longways, and some blocks to hold things in a stable manner. All taken off my sawhorses and cut to length. I jumped ahead a few steps and loosened the trans mounts and front mount so I could jack up the engine a bit and get my chains as tight as I could by hand, then lowered it down. It held tight and hovering a fraction of an inch above where it normally rests.
The pics I took didn’t come out great, and my light didn’t do much to make it better. I do like using those cheap LED light strips. My first light I made with them was just a PVC pipe with LED’s glued to the outside. That was a bad idea for a drop light, as it was easy to smack into something and bust a section. Luckily they can be cut out in sets of 3 LED’s and new sections soldered in place, so that one I hang in my garage. I made another one with the LED’s spaced out and I cut the pipe in half this time so they are recessed on the inside of the half pipe. I have had a strange fascination with making my own light fixtures since I was a teenager.
Nothing to really see, so no pics, but I took apart the ball joint, wishbone that goes to the strut, radius arm, and loosened the inner CV axle on each side. I had more trouble with the ball joints than I can ever remember having before. I had to partially reassemble things and use a jack on the loosened castle nut to use the force of the suspension to push down on the control arm, and wail on it with a framing hammer until it finally gave way. No space for the really big hammers and no pad to beat on either.
I wasn’t going to destroy good ball joints with a pickle fork and those lever style tools are either cheap (garbage) or expensive (I’m cheap AF, never needed one). A good hour or more of fiddling and beating things into submission. I have no remorse for non-compliant inanimate objects.
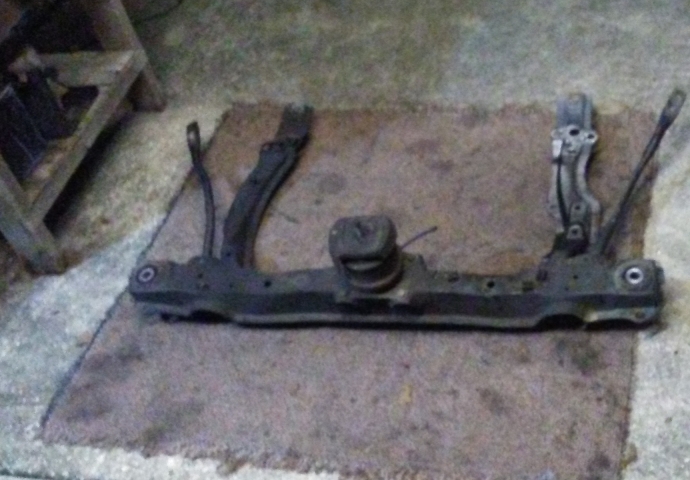
After that it was just a matter of unclipping a few things from the front of the subframe, putting a paint mark on the rear bolts where it meets up with the rear subframe section and then unbolting things. I used a piece of cardboard with a hole in it and a dollar spray can to make a clear mark without overspray. I got the rear part of the front subframe unbolted and resting on the control arms via the radius arms attached to it, then unbolted the front which allowed me to lower it down without slamming down. Carefully laid on my trusty piece of carpet and dragged out from under the car.
That’s it for today, I’ll take my time in the morning getting the shift cable removed and unbolting the trans. Around noon I’ll have the owner come over and lend a hand so I can use a pair of jacks to lower the old trans and pop in the newer one. I may employ the engine hoist and a steel cable so it can’t accidentally drop too far. I wont be in harm’s way but I don’t want anything to get wrecked by a 200lb paperweight.